
You’ll start by separating must-haves from nice-to-haves and framing a lean budget that targets space efficiency and durable, affordable finishes. Get a structural check early, map out stairs and room placement, and plan phased work to curb costs. Outsource critical trades, handle DIY finishes, and lock in permits sooner rather than later. With smart material choices and clear priorities, you’ll avoid surprises—yet you’ll still have decisions that demand your attention as you move forward.
Feasibility and Budget: Establish Your Loft Conversion Budget
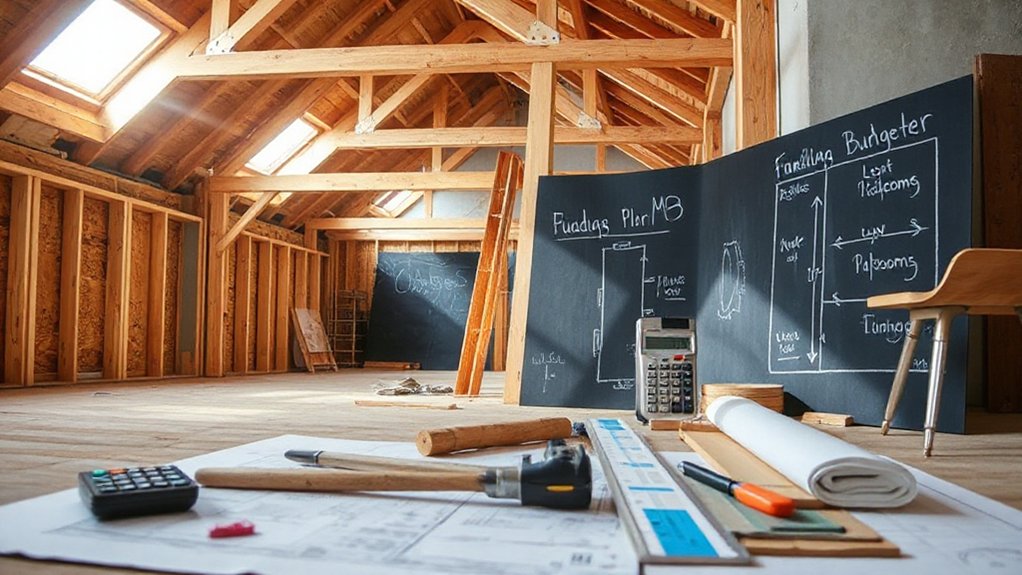
Estimating your loft conversion budget starts with a clear scope and realistic cost targets. You map dimensions, ceiling heights, and habitable areas to establish a baseline, then identify must-haves versus nice-to-haves.
Assess existing structure, services, and access points to gauge disruption and costs. Budget pits include unforeseen structural needs, access compromises, and permit delays; plan a contingency of 10–15%.
Break down costs into design, demolition, insulation, ceilings, stairs, and utilities, then align them with your target finish quality. Consider design aesthetics early, since finishes drive a large portion of the budget, but avoid over-specification that inflates price without proportional benefit.
Document assumptions, frequency of reviews, and decision milestones to prevent scope creep and preserve cost control throughout the project.
Assess Structural Feasibility Before You Commence
Assess structural integrity early on to identify any hidden risks or limitations. Check load-bearing elements and existing joists before you proceed, so you can plan support or reinforcements if needed.
Hire a professional surveyor to verify findings and advise on safe, compliant options.
Assess Structural Integrity
How structurally sound is your loft space? You must verify integrity before you spend a penny. Begin with a visual survey for cracks, sagging joists, and roof leaks, then flag any signs of water damage or corrosion.
Roof stability hinges on unobstructed support and proper purlins, not just attic aesthetics. Conduct a baseline assessment of framing, ceiling height, and potential dry rot, documenting every anomaly.
Next, perform a foundation assessment to ensure the base won’t shift under added loads; look for settlement, uneven floors, and stairwell alignment. If doubts persist, bring in a structural engineer for calculations, especially for conversion loads, insulation, and fire escape routes.
Only after confirming stability should you tackle design changes and budget allocations.
Check Load-Bearing Elements
Before you start designing changes, verify you’re not overloading the structure. You’ll perform a targeted load assessment to confirm existing beams, joists, and walls can support added weight.
Identify load paths from roof, floors, and services, then map where concentrated loads land. Check joist spans, bearing conditions, and potential deflections under planned loads.
If you spot undersized members or weak connections, plan minimal, cost-effective structural reinforcement options that align with your budget, not guesswork.
Consider alternative layouts that minimize new stresses.
Document all findings, including assumed live and dead loads, and any temporary shoring needs during work.
Communicate critical limits to your team so dimensions and placements stay within safe thresholds, reducing retrofit costs later.
Engage Professional Surveyor
Engaging a professional surveyor is essential to confirm feasibility before you proceed. You’ll arrange a focused structural assessment to verify load paths, joist sizing, and ridge behavior, ensuring the existing framework can sustain a loft conversion.
A professional surveyor evaluates foundations, roof structure, and wall ties, identifying potential weaknesses and required reinforcements without overdesign. They document constraints, such as ceiling heights, eaves, and access, guiding cost-effective scope decisions.
Expect a concise report detailing required drawings, permits, and compliance considerations for party walls and building regulations. Use the findings to prioritize budgeted upgrades, like strengthening timber or upgrading rafters, rather than speculative changes.
Hire a qualified specialist to minimize risks, avoid costly delays, and anchor your project in a reliable structural assessment.
Plan the Core Layout: Stairs, Doors, and Essential Rooms
Begin with a clear core plan that defines stairs, doors, and the essential rooms you’ll need on the loft floor. Map stair access to minimize corridor waste and maximize usable space, placing landings near primary rooms. Position doors to avoid cross-traffic and to create quiet zones for bedrooms or study areas.
Identify essential rooms first: a compact en suite, a flexible living area, and a storage zone that won’t steal headroom. Plan service routes for plumbing, electrical, and HVAC to run above ceilings with minimal disruption.
Consider loft lighting as a core element—cue layered lighting, task zones, and dimmable options. Align furniture arrangement with traffic flow, ensuring clear pathways and proportional scale to room size.
Keep walls clear for future reconfiguration without structural changes.
Cost-Saving Design Tweaks That Keep Style
Smart lofts get big gains from smart savings: you can maintain style by tailoring finishes and layouts to the core plan without compromising quality. You focus on design tweaks that deliver impact with minimal cost.
Use built-in storage, compact joinery, and exposed structural elements to reduce finish work while preserving character. Prioritize silhouettes and proportion over expensive textures; stick to neutral walls and selective pops of color.
Vintage fixtures can add authenticity without breaking the budget, especially when blended with contemporary hardware for cohesion. Artistic lighting should emphasize function and mood—think layered sources, dimmers, and warm LEDs.
Maintain daylight and airflow through simple window and stair alignments, avoiding excessive framing. These choices keep style intact while trimming overruns.
Budget-Friendly Materials for Floors, Insulation, and Finishes
You’ll evaluate budget floor options, balancing cost per square meter with durability and moisture resistance.
For insulation, pick materials that meet energy targets without overspending, prioritizing R-value and install ease.
For finishes, choose surface options that tolerate wear yet keep aesthetics simple and cost-effective.
Budget Floor Choices
When planning budget-friendly floors for a loft conversion, start with durable, low-cost materials that tolerate uneven joists and limited height. Choose options like engineered wood or laminate with tongue-and-groove edges for quick install and stable layering over uneven subfloors.
Vinyl plank can offer water resistance and a softer feel underfoot, while high-density plywood underlayment helps prevent bounce without adding excessive height.
Opt for stairs-side earnings such as integrated treads or lightweight steel-joist supports if necessary, keeping structural changes minimal.
Consider resilient flooring in high-traffic zones for longevity and easier maintenance.
Plan storage and layout before installation to enable creative storage and efficient placement of furniture.
Integrate lighting solutions into the design to reduce floor clutter and maximize usable space.
Insulation Material Picks
For budget-friendly loft insulation, prioritize materials that deliver warmth with minimal thickness and simple installation over uneven joists. You’ll want products with high insulation efficiency per thickness, so choose dense, properly rated options that fit between or over joists without costly flattening or rework.
Consider insulated panels or compressed mineral wool batt systems for rapid install and reliable air sealing, reducing thermal bridges. Favor materials with proven long-term performance and easy handling, minimizing waste and labor.
Evaluate moisture resistance and compatibility with existing decking to prevent rot and mold. Track insulation efficiency metrics and ensure installers provide accurate R-values for each layer.
Prioritize material sustainability, sourcing from suppliers with recycled content, low embodied energy, and responsible disposal options at end of life.
Finish Surface Options
Finish surface options balance cost, durability, and install ease, prioritizing materials that pair well with budget lofts and existing framing. You’ll want finishes that offer straightforward installation, minimal subfloor work, and reliable long-term performance.
For floors, consider engineered timber or LVT in a tight-grain plywood base; both resist humidity and provide quick layout with modest costs.
In walls and ceilings, choose gypsum board with low-VOC paint or plaster skim for a smooth, durable surface that’s easy to repair.
Insulation remains critical behind finishes, so guarantee vapor barriers stay intact and joints stay sealed.
For aesthetic enhancements, select neutral tones, subtle textures, and consistent grain to maximize light reflection.
Finish surface options should simplify repairs, maintain resale value, and support future upgrades.
DIY vs. Professional Help: What to Do Yourself and What to Outsource
Deciding what to DIY and what to outsource is about matching tasks to your skills, budget, and timeline. You should assess structural, electrical, and roofing tasks for safety, compliance, and long-term integrity.
On the DIY side, handle non-structural finishes, insulation checks, and basic painting, as these save time and money if you’re comfortable with measurements and hand tools.
Outsource critical elements like major electrical work, plumbing connections, and load-bearing modifications to licensed professionals to reduce risk and guarantee code compliance.
When planning, consider creative storage solutions and efficient lighting options early, so fixes integrate with framing and ceilings.
Coordinate scheduling to minimize rework, and document warranties and contractor scopes.
Prioritize high-impact tasks, balancing cost, risk, and your available time.
Navigating Permits and Permissions Without Drama
Managing permits and permissions without drama starts with a clear plan: identify which approvals you need, from building permits to zoning variances, early in the project. You should map the permit process from submission to inspection, noting required documentation, timelines, and fee structures.
Confirm permission requirements with local authorities before design decisions lock in, so you don’t backtrack. Prepare a concise package: site plan, structural sketches, and energy compliance evidence if needed.
Communicate milestones to your contractor and architect, so inspections align with progress. Anticipate potential delays by building in buffer time and budget for contingencies.
Track status daily and revise schedules as approvals evolve. Maintain records of all responses and amendments. This disciplined approach minimizes rework and keeps the loft conversion on budget.
Smart Insulation and Ventilation for Long-Term Savings
Smart insulation and ventilation are crucial for long-term savings because they directly affect energy use and comfort in a loft conversion. You’ll optimize envelope performance by selecting high-R materials and continuous insulation details, minimizing thermal bridges.
Prioritize airtight sealing with airtight membranes and careful window detailing to reduce unwanted heat exchange. For ventilation, implement a balanced or mechanical heat recovery system (MVHR) where feasible, balancing airflow with heat retention to sustain indoor comfort without excessive energy use.
Ensure ductwork runs are short, insulated, and protected from cold bridging. Combine smart insulation with demand-controlled ventilation, which adjusts intake based on occupancy and humidity.
Monitor performance via energy modeling and blower door tests to verify ventilation efficiency and ongoing savings.
Planning for Resale: Future-Proofing Within a Budget
Planning for resale starts with prioritizing features that add lasting value without breaking the budget. You should identify durable, low-maintenance elements that appeal broadly and age well. Favor adaptable spaces over niche gimmicks to maximize marketability.
Focus on structural integrity, safe exits, and compliant electricals and insulation, as these underpin future value. Choose finishes with broad appeal and easy replacement cycles to minimize sunk costs.
Plan for creative storage ideas that don’t overwhelm rooms but improve usability, boosting perceived quality and utility. Prioritize aesthetic harmony by aligning materials, tones, and fixtures across levels, avoiding discordant accents that could deter buyers.
Budget for future-proofing upgrades like ventilation, lighting controls, and smart-ready elements that don’t require full redecorating later. Keep documentation organized for smooth resale negotiations.
Frequently Asked Questions
How Long Does a Budget Loft Conversion Typically Take?
A budget loft conversion typically takes 4–6 weeks, depending on scope and access. Plan for roof insulation and compliance with Building regulations, with inspections at milestone stages to guarantee safety, energy efficiency, and uninterrupted workflow.
What Are Hidden Costs to Expect Beyond Estimates?
Hidden costs include design changes and unforeseen complications; you’ll want contingency planning. Expect overruns in design ideas and material costs, plus scaffolding, permits, and access issues that can extend timelines and budget. Plan accordingly, monitor, adjust diligently.
Can I Convert Without Planning Permission in My Area?
You can’t usually convert without planning permission in your area; check local rules. You must meet building regulations and insulation standards, obtain approvals, and coordinate inspections to guarantee compliance and avoid penalties.
Which Trades Are Essential to Hire for Quality Results?
Yes—hire trades in this order: structural engineer, builder, electrician, plumber, HVAC, insulation, plasterer, roofer, and surveyor as needed. Design ideas and material choices hinge on airtightness, loads, and compliance for quality results. This is totally doable.
How Will a Loft Conversion Affect Property Taxes?
A loft conversion can raise your property value and trigger different tax assessment, depending on local rules. You’ll likely see higher taxes if assessed value increases, but exemptions or caps may apply; consult your assessor for precise impacts.
Conclusion
You’ve got a clear path: define budget, verify structure, and phase work to maximize value. Remember, DIY basics cut costs, while licensed pros handle electrical and plumbing for safety. An independent, practical stat: DIY projects can save homeowners up to 20–30% on total project costs, but missteps can erase those gains. So plan, spec smart materials, and secure permits early. Prioritize core functionality, durable finishes, and future resale value to keep your loft affordable and functional long term.





