Upgrade your garden or patio fastest by matching each DIY build to your space, sun path, and goals like privacy, shade, storage, or hosting. You’ll get the best results by putting most of your budget into structural essentials—footings, anchors, fasteners, and weather-rated lumber—then keeping finishes simple. Scavenge reclaimed boards safely, pre-drill old stock, and seal end grain. Add quick wins like solar lighting, a planter, or pavers sloped 1/8 in per foot; next, you’ll pick the best weekend build.
Choose DIY Outdoor Projects by Space and Goal
Although you can tackle almost any DIY outdoor project with basic tools, you’ll get better results faster if you match the build to your available space and your primary goal—privacy, shade, storage, growing, or entertaining. Start by measuring your footprint, sun path, and access routes, then sketch a simple Garden layout with clear circulation and service zones.
For tight patios, choose vertical solutions: wall planters, fold-down tables, and slim storage benches that keep egress clear.
For open yards, build structure first—pergolas for shade, screens for privacy, or raised beds for growing—then size them to avoid crowding utilities and drainage paths.
Let Plant selection follow microclimates: drought-tolerant species near heat-reflective paving, shade plants under canopies, and fragrant herbs near seating to reinforce the project’s purpose.
Set a Budget (and Where to Splurge)
Set a clear budget by ranking upgrades by impact—traffic flow, drainage, safety, and long-term curb appeal—so you fund what moves the needle first.
Keep costs down on finishes and decor, but don’t skimp on structural elements like footings, fasteners, and load-bearing lumber.
You’ll get better ROI when you splurge on durable, weather-rated materials that reduce maintenance and premature replacement.
Prioritize High-Impact Upgrades
Where should your money go first when you’re planning DIY outdoor upgrades? Start with changes that maximize function and visual payoff per dollar. Map your space, then list pain points: poor lighting, cluttered storage, weak seating layout, or bare sightlines. Allocate funds to fixes that alter how you use the area daily, not just how it looks once.
For garden aesthetics, focus on one “anchor” zone: entry path, dining nook, or fire-pit circle. Add outdoor decor that frames that zone—string lights on a timer, a coordinated planter set, or a simple privacy screen.
Use a 70/20/10 budget split: 70% essentials, 20% visual upgrades, 10% contingency. Track every purchase, and pause spending when you hit your cap.
Splurge On Durable Materials
Before you start buying lumber and fixtures, lock in a realistic budget and decide which components must survive weather, foot traffic, and constant use. Put more money into structural and wear surfaces: pressure-treated or rot-resistant cedar, stainless or hot-dipped galvanized fasteners, exterior-rated adhesives, and UV-stable composites. These choices cut maintenance and prevent premature failures.
Keep savings for replaceable or decorative parts. You can paint basic planters, choose standard pavers, and add style later with premium garden accessories like powder-coated hooks, irrigation timers, and LED path lights.
If you’re aiming for luxury landscaping, splurge on a proper base: compacted gravel, geotextile fabric, and drainage. Budget for sealers and finishes too—oil-based stains, penetrating stone sealants, and marine-grade hardware deliver the longest service life outdoors.
Scavenge and Prep Materials the Smart Way
Although new lumber and hardware look tempting, you’ll get better value (and fewer surprises) by scavenging with a plan and prepping everything to spec. Start with material sourcing: check pallets, offcuts, and reclaimed decking for straight grain, minimal checks, and no soft spots. Verify treatment stamps; skip unknown chemicals for edible gardens.
Pull every fastener, then scan edges for embedded metal that can ruin cuts later. Sort by thickness and species so joints stay consistent. For safety precautions, wear gloves and a respirator when handling weathered boards, and wet-scrub mold before sanding.
Mill surfaces flat, square the ends, and pre-drill old stock to prevent splits. Finally, seal end grain and stage pieces indoors so moisture content stabilizes before assembly.
Tools You Actually Need for Weekend Builds
If you keep your tool list tight, you’ll build faster and waste less time fighting sloppy cuts and weak joints. For most weekend outdoor decor builds, you only need a small core kit that guarantees square layout, clean cuts, and repeatable fastening.
Skip specialty gear until a design demands it, and spend your budget on accuracy and safe handling. Keep blades sharp and bits matched to fasteners so assemblies seat flush and resist racking.
You’ll also work cleaner around soil and plants, limiting disturbance that can invite garden pests into fresh lumber stacks.
- Tape measure + speed square for layout and 90° checks
- Circular saw with guide for straight cuts
- Drill/driver with countersink and bit set
- Clamps and a sander for tight joints and smooth edges
Weatherproofing Basics: Sealers, Stain, and Hardware
Now you’ll lock in durability by choosing the right sealer or stain for your wood species, exposure level, and desired finish—film-forming for maximum moisture blocking or penetrating for easier maintenance.
Apply it to clean, dry surfaces and seal end grain first, because that’s where water enters fastest.
Then you’ll prevent corrosion and loosening by specifying exterior-rated hardware like stainless or hot-dip galvanized fasteners, plus washers and brackets that match the metal to the treatment and environment.
Choosing Sealers And Stains
How do you pick a sealer or stain that actually survives sun, rain, and temperature swings? Start with substrate and exposure: horizontal surfaces need tougher films than vertical trim.
For Sealer selection, match chemistry to the job—penetrating sealers reduce moisture uptake, while film-formers add UV protection but demand stricter prep.
For stain application, control moisture content (below ~15%), scuff-sand, and wipe dust so adhesion doesn’t fail. Use test boards to confirm color and beading.
- Choose oil-based penetrating stain for deep grain protection and easy touch-ups.
- Use water-based acrylic stain when you need faster recoat and lower odor.
- Pick a UV-rated clear sealer only over stable, previously sealed wood.
- Apply thin coats, follow recoat windows, and cure fully before exposure.
Weatherproof Hardware Essentials
Although sealers and stains handle the surface, your project usually fails first at the fasteners, hinges, and brackets, so choose hardware that won’t corrode, seize, or stain the wood when the weather cycles.
Start with 304/316 stainless screws and bolts for coastal or wet zones; use hot-dip galvanized for ground-contact framing. Avoid electroplated zinc outdoors—it pits fast.
Match metals to prevent galvanic corrosion: don’t pair stainless with bare aluminum; isolate with nylon washers.
For gates and lids, pick sealed-bearing hinges, stainless pins, and UV-stable bushings.
Use exterior-rated structural screws, not drywall screws. Pre-drill to prevent splitting, then bed hardware in a polyurethane sealant to block capillary leaks.
Verify Weatherproof hardware ratings on outdoor fixtures.
Build Easy Outdoor Planters for Fast Color
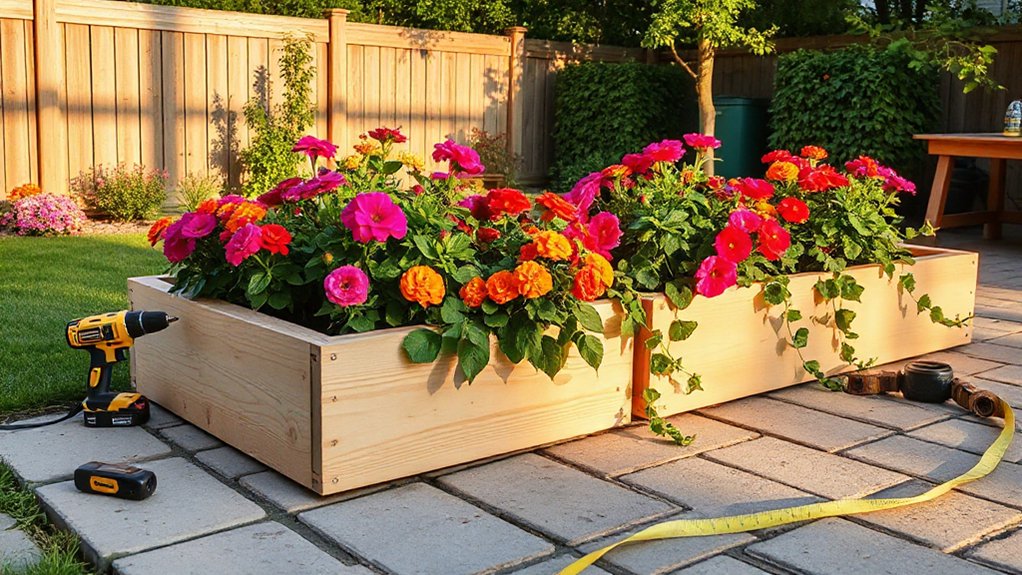
If your patio or entry feels flat, you can add instant impact by building simple outdoor planters that go together in an afternoon and deliver fast, seasonal color. For durability, use cedar or exterior plywood, stainless screws, and waterproof glue. Drill pilot holes, then assemble a box with a 1/2-inch base gap for drainage and airflow. Line the interior with landscape fabric, not plastic, so roots breathe. Prime and paint, or seal with exterior oil for a clean finish that reads as Garden art.
For Container gardening, size each planter to your plant’s root ball and your watering habits.
- Cut panels square; sand edges.
- Pre-drill; countersink fasteners.
- Add feet; keep wood off wet slabs.
- Fill: potting mix + slow-release fertilizer + mulch.
Add Warm Outdoor Lighting Without Wiring Headaches
You can add warm outdoor lighting fast by choosing fixtures that don’t require new wiring and by planning placement like you’d any other outdoor hardware.
Set solar path lights where they get full sun and clearly define edges. Then use battery lanterns and sconces to fill in seating areas or dark corners without running conduit.
Finish with LED string lights mounted to sturdy anchors—posts, fascia boards, or tensioned guide wire—so the run stays taut, weather-safe, and evenly lit.
Solar Path Lights Placement
Where should solar path lights go so they cast a warm, useful glow without turning your yard into an airport runway? Start with function: guide feet, highlight edges, and support plant placement without glare. Space fixtures 6–10 feet apart, stagger them on alternating sides, and aim for overlap, not hotspots. Keep heads low and shielded, and avoid placing them where sprinklers blast the solar panel. For reliable charging, give each panel 6+ hours of direct sun, and trim back foliage that shades it.
- Mark trip points: steps, turns, thresholds.
- Light boundaries: driveway edge, borders, mulch lines.
- Accentuate garden decor: pots, trellises, sculptures.
- Test at dusk, then adjust angle and spacing.
Battery Lanterns And Sconces
Although hardwired fixtures offer permanence, battery lanterns and wall sconces deliver the same warm, directional glow with zero trenching, no electrician, and far less planning. Choose weather-rated units (IP44+), warm-white LEDs (2200–2700K), and a high-CRI emitter to keep skin tones and plant color natural.
For consistent lighting ambiance, match color temperature across fixtures and dim if the model supports it.
Mount sconces 60–66 inches above grade to reduce glare and cast light across seating, steps, or entry hardware. Dial in lantern placement by setting lanterns at table height, then shifting them until shadows fall behind walk paths, not across them.
Use rechargeable lithium cells, keep spare batteries indoors, and set a timer or motion mode to stretch runtime and reduce maintenance.
LED String Lights Mounting
Since LED string lights run on low-voltage power and tolerate flexible layouts, they’re the fastest way to add warm outdoor ambiance without opening walls or pulling permits. Start by mapping anchor points and measuring span so you don’t over-tension the cable. Use outdoor-rated LED lighting, a GFCI outlet, and a weatherproof timer or smart plug.
Pick mounting techniques that match your surface and wind load:
- Screw-in cup hooks into joists or posts; predrill to prevent splits.
- Use stainless cable and turnbuckles for long runs; clip lights with carabiners.
- Apply UV-rated adhesive clips on metal or vinyl; degrease first.
- Wrap straps around trees or railings; avoid nails that injure bark.
Keep the transformer elevated and drip-loop cords.
Make a Simple Privacy Screen (Wood, Lattice, or Plants)
If your patio feels exposed or you need to block an unattractive view, you can build a simple privacy screen in a weekend using wood panels, lattice, or a planted trellis.
Set two 4×4 posts in concrete or use heavy planters as freestanding bases, then attach framed panels with exterior screws.
For lattice, add a perimeter frame to prevent warping and mount it with standoffs for airflow.
Use privacy strategies like angling the screen to block sightlines while preserving light and breezes.
For a greener option, pick a trellis and focus on plant selection: choose fast climbers (star jasmine, clematis) for moderate sun, or evergreen vines (ivy) for year-round cover.
Keep plants irrigated and tie new growth weekly.
Add level feet to prevent wobble.
Paint or Stain Concrete, Tile, and Furniture Outdoors
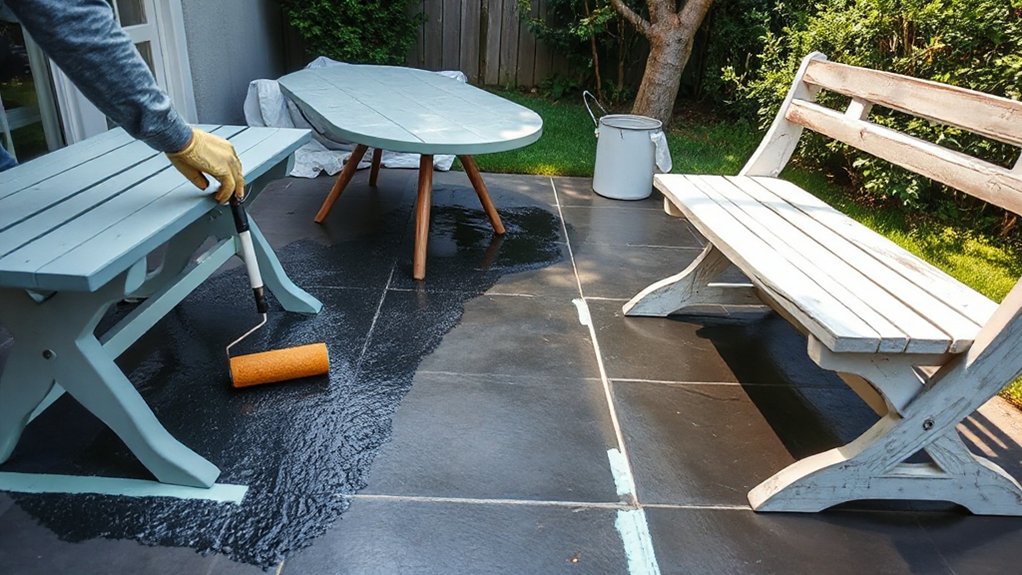
A privacy screen can hide a view, but a fresh finish can make the whole outdoor area look intentional—especially when concrete, tile, and weathered furniture start to show stains, chalking, or sun fade. Start with aggressive cleaning: degrease, rinse, and let surfaces dry fully. Then choose coatings rated for UV and moisture, and follow the manufacturer’s recoat windows.
- Prep concrete: etch or grind for profile, patch cracks, then apply Concrete staining or a concrete paint system.
- Refresh tile: scuff-gloss with 120–180 grit, use bonding primer, then roll porch-and-floor enamel.
- Revive Outdoor furniture: sand to bare or feather edges, wipe with solvent, then prime and topcoat.
- Protect: add a compatible clear sealer for slip resistance and easier cleanup.
Build a Storage Bench for Small Patios
Where do you stash cushions, toys, and garden gear when your patio barely has room for a chair? Build a compact storage bench that works as seating and a weather-resistant bin.
Use exterior-grade plywood or cedar, and size it to fit a wall run: 16–18 inches deep, 18 inches high, and whatever length your space allows. Assemble a box with pocket screws and waterproof glue, then add a hinged lid with stainless piano hinge and a lid stay.
Drill drain holes and line the base with a removable plastic tray for storage organization. Add a slatted back or no back for tight clearances.
Top it with 2–3 inch outdoor foam for seating comfort, and seal all edges with spar urethane.
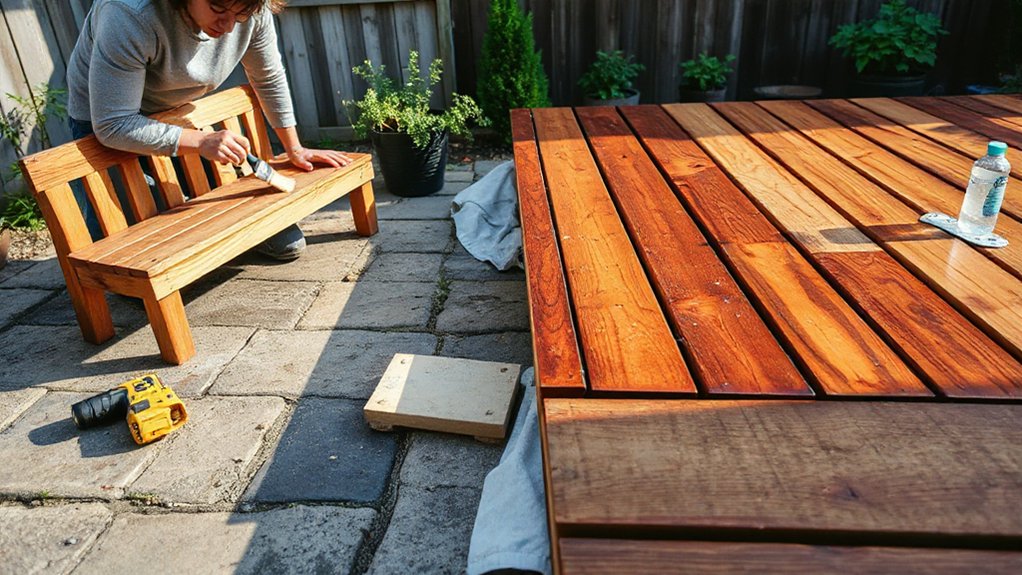
Build a Sturdy Outdoor Table for Hosting
Although a wobbly patio table can ruin an otherwise smooth get-together, you can build a hosting-ready outdoor table that stays rigid, drains water, and shrugs off weather.
Choose rot-resistant cedar or pressure-treated pine, and mill straight 2x4s for the base. Use half-lap or pocket-hole joints, then lock everything with exterior glue and stainless screws.
For the top, space deck boards 1/8 inch for drainage and seasonal movement.
Add diagonal bracing between legs to eliminate racking, and level with adjustable feet on pavers.
Finish with penetrating exterior oil or marine spar varnish, sealing end grain twice.
This Garden furniture piece doubles as Outdoor decor when you match stain to nearby planters and railings.
- Cut list first
- Square the base
- Gap the tabletop
- Seal all faces
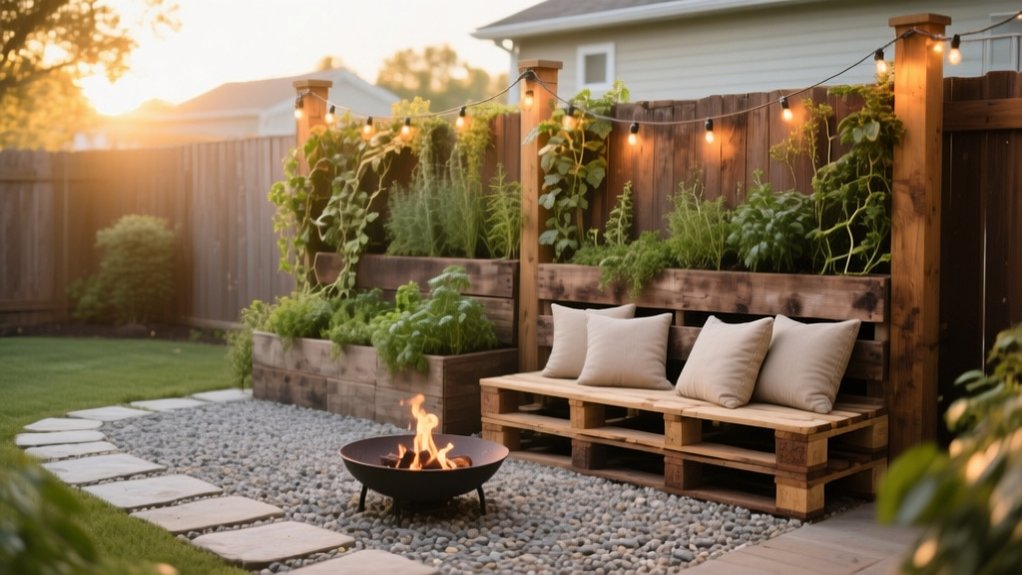
Make Pallet Seating That’s Comfy and Durable
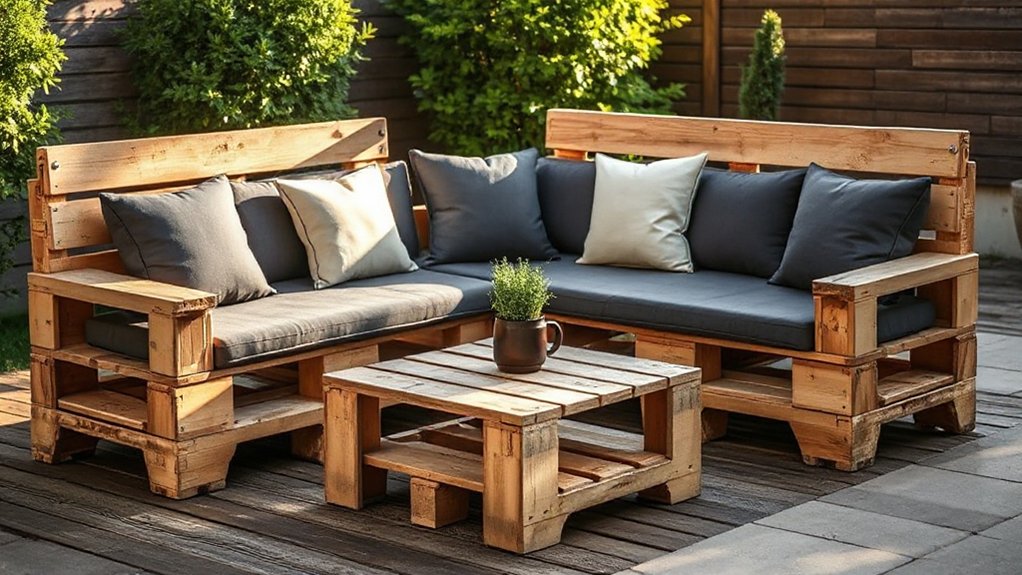
Hosting gets easier when you add modular pallet seating beside your new outdoor table, and you can build it to feel solid rather than splintery or saggy. Start with heat-treated pallets (stamped HT), then plane rough edges and sand to 120 grit.
Square the base: screw pallets together with exterior-rated structural screws, add 2×4 blocking at corners, and install leveling feet or shims so the frame won’t rack.
For a backrest, bolt a second pallet at a 100–105° angle using mending plates and carriage bolts.
Seal everything with an exterior stain or paint, especially end grain.
Add slats or plywood to support foam, then secure outdoor cushions with hook-and-loop straps.
Your Pallet furniture stays comfortable and durable.
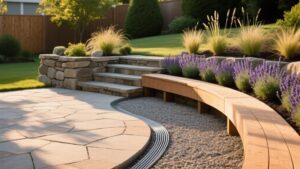
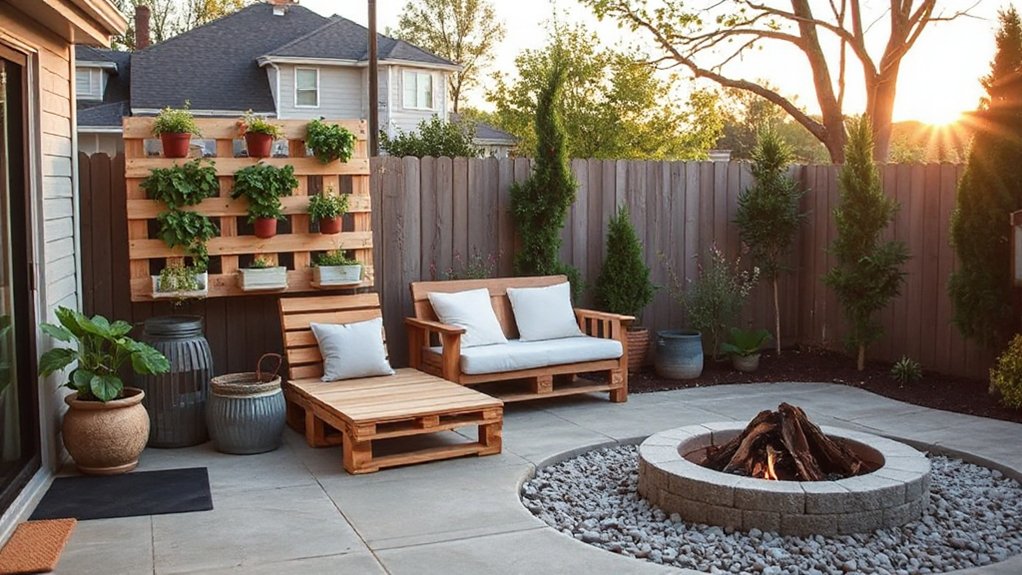
Upgrade the Backyard With Pavers, a Fire Pit, or Shade
Once you’ve built sturdy seating, upgrade the whole yard by locking in a stable surface with pavers, adding a dedicated fire pit zone, or installing shade that actually covers the hangout area.
Start with layout: mark edges with paint, then excavate 6–8 inches for patio base and drainage. Compact 4 inches of crushed stone, add 1 inch of bedding sand, and screed flat before setting pavers. Keep joints tight, sweep polymeric sand, and mist to lock everything in.
- Slope pavers 1/8 inch per foot away from the house.
- Set a fire pit on gravel with 36 inches clearance to combustibles.
- Anchor a shade sail to posts set in concrete, not fascia boards.
- Integrate garden art and water features at sightlines, not walk paths.
Frequently Asked Questions
Do I Need a Permit for a Pergola, Deck, or Outdoor Fireplace?
You often do: check local codes for Pergola permits, Deck regulations, and outdoor fireplace rules. You’ll need approval for attached, tall, or load-bearing builds, and for gas/wood-burning units; always confirm zoning setbacks and inspections.
How Can I Deter Mosquitoes and Ants Around New Outdoor Builds?
Send mosquitoes and ants packing by eliminating standing water, sealing gaps, and trimming vegetation. Use Natural repellents like citronella, eucalyptus, and cedar oil. Combine pest control methods: bait stations, diatomaceous earth, and targeted perimeter sprays.
What’s the Best Way to Protect Outdoor Projects From Termites?
Use termite resistant wood and keep all lumber off soil on concrete footings. Seal cuts, improve drainage, and inspect annually. Add chemical treatment options like borate sprays or termiticides around posts per label.
How Do I Safely Anchor Structures in Areas With High Winds?
You test the theory: deeper anchors equal safer builds—and you confirm it. You’ll use wind resistant anchors set below frost line, then apply secure fastening techniques: through-bolts, hurricane ties, and tensioned straps to rated footings.
What Plants Are Safest for Pets Around Patios and Planters?
Choose Pet friendly plants like spider plant, Boston fern, areca palm, basil, rosemary, and catnip. Practice Toxic plant avoidance: skip lilies, sago palm, oleander, and dieffenbachia. You’ll still verify ASPCA lists for your species.
Conclusion
Now you’ve got a clear plan: match projects to your space, set a realistic budget, source and prep materials, and use the right tools with proper sealing, stain, and corrosion-resistant hardware. When you build a storage bench, hosting table, or pallet seating, you’re not just assembling wood and fasteners—you’re laying pavers on a new chapter of outdoor living. Keep measurements tight, anchor where needed, and weatherproof every cut edge so your upgrades last.