Hardscaping makes your garden more functional by adding stable patios, paths, steps, and retaining walls that guide circulation and create usable outdoor rooms. Start with a quick yard assessment to map soggy spots, erosion, grades, and desire lines, then solve drainage with 1–2% slopes, swales, or permeable pavers with proper base compaction and edge restraints. Use edging, seat walls, and raised planters to define tidy zones, and add warm, shielded lighting for safe nighttime use. Keep going to see how to avoid costly install mistakes.
Hardscaping Basics: What It Includes
Although landscaping often brings plants to mind, hardscaping covers the built, non-living components that define how you move through and use an outdoor space. You typically include patios, pavers, walkways, steps, retaining walls, edging, and drive surfaces that manage traffic and grade changes.
You’ll also use structural elements—pergolas, seat walls, raised planters, and fences—to shape zones and support circulation.
For performance, you specify base materials, compaction, and jointing to control settling, drainage, and frost heave.
You integrate Water features such as fountains, rills, or ponds with pumps, liners, and access panels for serviceability.
You place Garden sculptures on stable footings to prevent tilt and protect finishes.
You can add lighting conduit and sleeves early, so upgrades won’t require demolition.
Start With a Quick Yard Assessment
Before you add anything, you’ll run a quick yard assessment to flag problem areas like erosion, soggy spots, uneven grades, and high-traffic wear.
You’ll also map sun exposure across the day and season so you can place plants, seating, and shade structures where they’ll perform.
You’ll also trace drainage paths during or after rain to see where water collects and where it needs to be redirected.
Identify Problem Areas
Where does your yard fight you the hardest—standing water after rain, bare patches that won’t fill in, or a walkway that funnels traffic through planting beds? Start by walking the site with a notepad and marking each friction point you repeatedly work around. Note ruts, erosion channels, slippery changeovers, and pinch points where mowing or wheelbarrows snag.
Check door-to-yard routes and identify where you need stable landings for Garden furniture, grills, or storage. Flag edges where soil spills onto paving, or where mulch migrates downslope. Locate nuisance zones: muddy gates, splashed siding, and areas that stay compacted from foot traffic.
Finally, tag corners you want to protect as wildlife habitats so future hardscape directs use away from them. Assign each issue a priority and approximate square footage.
Map Sun And Drainage
How does light and water actually move across your yard over a normal day and after a storm? Start with Sun mapping: mark full sun, part shade, and deep shade at 9 a.m., noon, and late afternoon. Note reflective heat from walls and paving, plus wind-exposed corners that dry faster. Use these data to place patios, paths, and seating where comfort lasts, and to protect plants near hardscape edges.
Next, shift to drainage planning. During rainfall, trace flow lines, puddling zones, and downspout discharge points. Check slopes with a 4-foot level or laser; you’re aiming for positive drainage away from foundations. Flag low spots for regrading, swales, catch basins, or permeable pavers to reduce runoff.
Plan Around How You Use the Yard
What matters most in your yard—dining, play, gardening, entertaining, or low-maintenance downtime? List your top two activities, then assign each a dedicated zone with clear circulation between them. You’ll get better flow if you size paths to traffic: 36 inches for single-file movement, 48 inches where people pass or carry trays.
Place a patio near the kitchen for efficiency, and position seating to capture shade and views you mapped earlier. If you garden, add a hard edge around beds to simplify access and keep tools staged nearby.
Use focal points—Garden art or a compact water feature—to anchor sightlines. Reserve corners for Wildlife habitats with layered plantings, leaving quiet buffers away from high-activity areas.
Fix Muddy Spots With Pavers and Gravel
Once you’ve mapped activity zones and circulation, tackle the spots that ruin that flow—muddy chokepoints near gates, downspouts, hose bibs, and high-traffic paths.
For Muddy spots, excavate to firm subsoil, then install a geotextile to separate fines from your base. Add 4–6 inches of compacted crushed stone, crown it slightly, and lock edges with steel or concrete restraints.
For Paver solutions, set pavers on a 1-inch bedding layer of concrete sand, keep joints tight, and sweep in polymeric sand to resist washout.
Where you need quicker coverage, use angular gravel in a framed pad; choose 3/8-inch minus for better compaction. Finish with a smooth transition to adjacent turf.
Solve Drainage First: Grading and Permeable Pavers
A good outdoor space starts with drainage, because water dictates where surfaces fail, plants struggle, and traffic turns to mud. You’ll get better results by grading first: set a consistent slope away from foundations, typically 1–2% (about 1/8–1/4 inch per foot), and route runoff to a swale, dry well, or rain garden.
Compact subgrade in lifts so it won’t settle and create low spots.
Then choose Drainage solutions that infiltrate, not shed. Install permeable pavers over an open-graded base and bedding layer, with edge restraints to lock lines.
Use Permeable materials in joints and base aggregate to store water temporarily and release it into soil.
Add underdrains where clay or high water tables limit infiltration rates.
Choose Materials That Match Your Home
Once drainage is handled, you’ll want to specify hardscape and furniture materials that mirror your home’s exterior palette and surface character. Match complementary color and texture by referencing existing brick, siding, stucco, or trim tones.
Then select stone, wood, or composite finishes that echo that grain, sheen, and scale. Keep the style and finish coordinated—modern, traditional, or rustic—so railings, pavers, metals, and stains read as one system instead of competing elements.
Complementary Color And Texture
Because your outdoor space reads as an extension of your home, select colors and textures that echo the house’s existing palette and finishes rather than competing with them. Start by sampling fixed elements—roofing, siding, brick, and trim—then pull two or three dominant tones for pavers, edging, and retaining walls to achieve Color harmony.
Use undertones deliberately: pair warm stone with warm brick, cool concrete with cool-painted siding, and keep saturation moderate to prevent visual noise.
Add Texture contrast to improve legibility and safety underfoot. Combine smooth caps with lightly cleft wall stone, or mix fine-grain concrete with rough gravel bands to signal shifts. Keep joints, aggregate size, and surface roughness consistent across adjacent planes so the texture reads intentional, not accidental.
Test samples outdoors in morning and dusk light.
Coordinated Style And Finish
To make the yard feel like it truly belongs to the house, you’ll want to coordinate style and finish across every hardscape surface, not just color. Start by matching architectural cues: modern homes read best with large-format pavers, tight joints, and honed concrete. Traditional facades suit tumbled stone, brick, and softened edges.
Use Color coordination to echo fixed elements like roof shingles, siding, and trim, then set one dominant tone and one accent to avoid visual noise.
Apply Texture blending deliberately: pair a smooth patio with a lightly textured walkway, but keep aggregate size and sheen consistent.
Choose compatible edge restraints, coping profiles, and metal finishes so stairs, walls, and borders look engineered as one system. This also improves maintenance and replacement sourcing later.
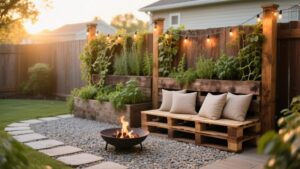
Patios for Dining and Entertaining
How do you turn a plain backyard into a functional room for meals and gatherings? Start with a patio sized to your table plus 36 inches of clearance on all sides for chair pull-back and circulation. Choose concrete pavers, stone, or porcelain set on a compacted base with edge restraints, then pitch the surface 1–2% away from the house for drainage.
Add a dedicated grill zone with noncombustible surfacing and a landing counter to keep traffic organized. Build comfort with shade: a pergola, cantilever umbrella, or retractable awning. Layer lighting with low-glare sconces and step lights on dimmers.
Finish with Rustic decor and Water features to mask noise and cool the space. Use weatherproof seating.
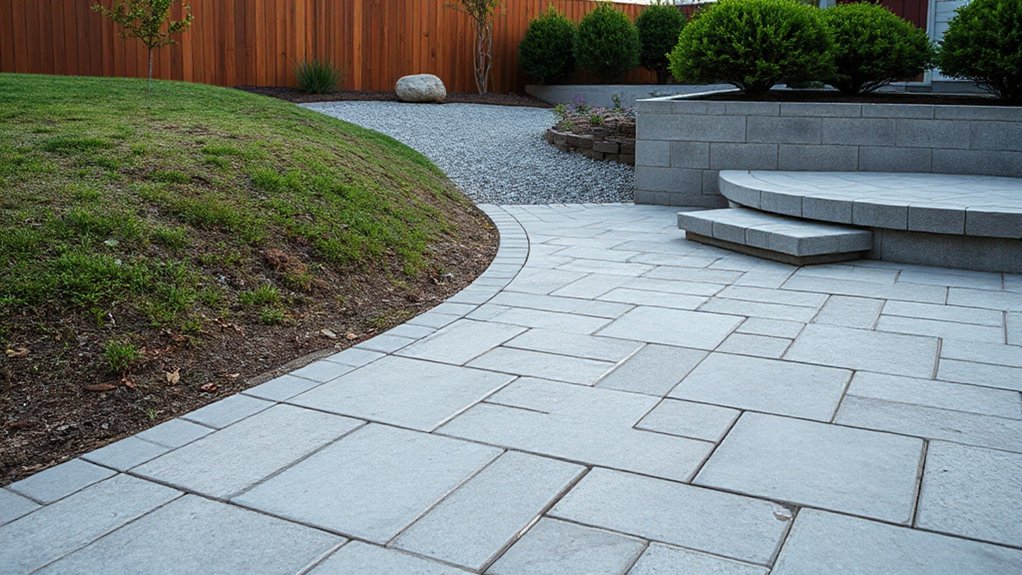
Paths That Improve Garden Flow
You’ll improve garden circulation by defining natural walkways that follow desire lines and maintain consistent widths.
Connect key zones—entry, patio, beds, and utility areas—with direct routes and gentle curves where sightlines need softening.
Choose materials that deliver safe footing in wet conditions, control grade changes, and provide stable edges to prevent trip hazards.
Defining Natural Walkways
Where does the foot traffic naturally want to go once you step into the garden? You’ll define that desire line with hardscape that guides movement without forcing it.
Start by observing wear patterns after watering or a gathering, then stake a centerline and set a consistent width (30–36 inches for one person, 48 inches for two).
Build Natural pathways with gentle curves, clear edges, and stable footing. Use Organic materials like decomposed granite, compacted fines, bark mulch, or flat stone set in screenings, chosen for drainage and slip resistance.
Excavate 4–6 inches, add geotextile to limit weeds, install a compacted base, then top-dress and recompact. Keep grades under 5% and add subtle cross-slope for runoff.
Connecting Key Garden Zones
Once you’ve established the primary desire line, connect the garden’s key zones—entry, patio, lawn, beds, shed, and compost—with a clear path hierarchy that reduces backtracking and conflicts. Assign a main route for daily traffic, then add secondary spurs to service areas so you’re not cutting through planting beds.
Keep intersections simple: align routes to sightlines from doors and seating, and terminate views with Garden art to cue direction changes. Use gentle curves only when they improve access; otherwise, keep runs direct for efficient circulation and maintenance.
Plan turning and passing points near gates, tool storage, and bins so you can move carts without snagging foliage. Preserve wildlife habitats by routing edges around nesting cover and keeping quiet zones undisturbed during peak use times.
Materials For Safe Steps
Because footing drives both safety and circulation speed, choose path materials that stay stable under load, shed water quickly, and provide traction in wet or leaf-covered conditions.
For Safe steps, start with compacted crushed stone fines over a geotextile base; it locks in, drains, and resists rutting.
Use broom-finished concrete or flamed granite where you need continuous, slip-resistant runs, and specify a slight cross-slope to move runoff.
Clay brick and textured pavers work well if you set them on a properly graded, well-compacted bedding layer with restrained edges.
Avoid smooth flagstone and rounded river rock in travel lanes; they shift and glaze.
Prioritize Material durability with frost-rated units, tight joints, and regular joint-sand top-ups.
Safer Steps and Landings on Slopes
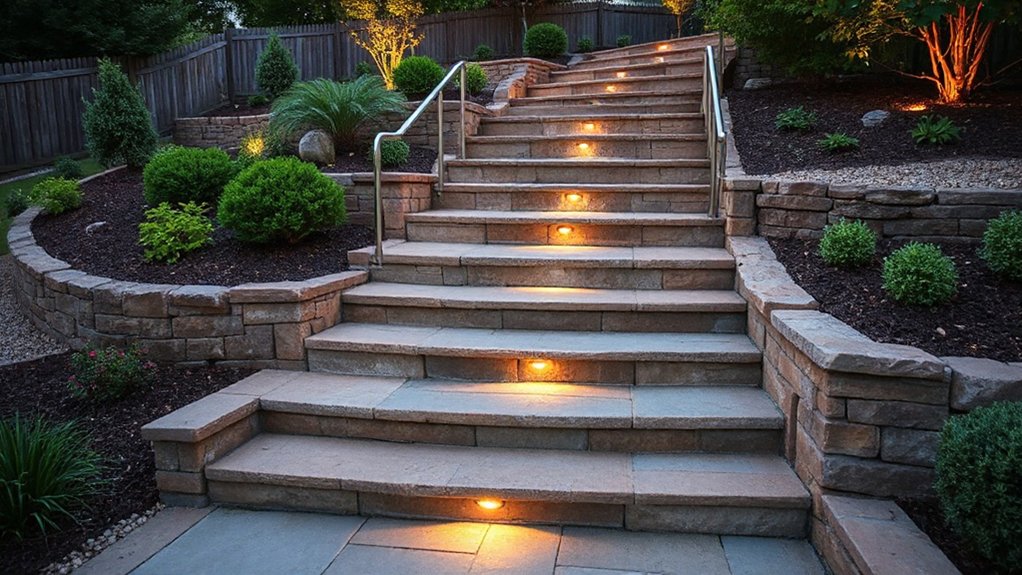
Although a sloped yard can look dramatic, it also concentrates risk at every change in elevation, so you’ll want steps and landings that control footing, drainage, and fall distance.
On sloped terrain, set consistent riser heights and tread depths so your gait stays predictable; even small variations cause trips. Break long runs with level landings every 8–12 feet of vertical travel, and make each landing at least as deep as the stair width so you can pause and turn safely.
Pitch treads slightly (about 1–2%) to shed water away from travel lines, and add a compacted, free-draining base to prevent frost heave and settling.
Where garden pathways meet stairs, widen progressions, provide edge restraints, and use visual nosing contrast for low-light navigation.
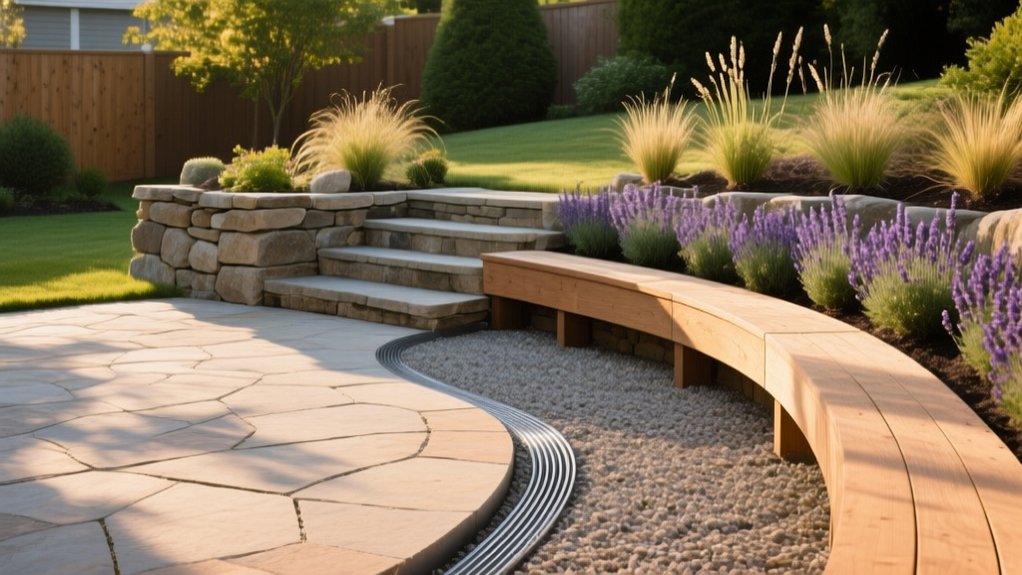
Retaining Walls to Level and Expand Space
When you’re managing sloped terrain, you can use retaining walls to cut and hold grade safely while controlling runoff and erosion.
You’ll create usable garden levels by terracing the site into stable, compacted benches that support planting beds and walkable surfaces.
With the right wall height, drainage, and backfill, you can expand planting and patio space without over-steepening the remaining slope.
Managing Sloped Terrain
If your yard drops away from the house, you can still create usable, level outdoor rooms by cutting and filling the slope and locking that soil in place with a retaining wall.
Start by measuring grade change and locating utilities, then choose a wall system rated for your soil and height.
For slope stabilization, excavate to undisturbed subsoil, set a compacted gravel base, and step courses back into the bank.
Add geogrid reinforcement where required, and use free-draining backfill to reduce hydrostatic pressure.
For erosion control, install a perforated drainpipe at the base, wrap it in filter fabric, and daylight it to a safe outlet.
Cap the wall to shed water, and keep surface runoff directed away from the face.
Creating Usable Garden Levels
How do you turn a sloped or cramped yard into functional outdoor “rooms”? You build level terraces with retaining walls that create stable, code-ready platforms. Start with a measured grade plan, then size wall height and setback to match soil conditions and loads.
Use compacted, free-draining base material, install geogrid where required, and add perforated drainage behind the wall to relieve hydrostatic pressure. Cap each tier with a consistent finish so you get clean transitions between zones.
Once the surfaces are flat and aligned, you can place garden furniture without shimming legs or fighting wobble, and you can anchor outdoor sculptures on solid pads. Add steps or landings between levels to keep circulation safe and predictable.
Expanding Planting And Patio Space
Why let a slope or narrow setback steal usable square footage when a well-designed retaining wall can convert it into flat planting beds and a stable patio pad? You’ll gain predictable grades for furniture, grills, and pavers, while increasing soil depth for shrubs and perennials.
Build with proper footing depth, compacted base, and drainage: install gravel backfill, a perforated drain pipe, and weep paths so hydrostatic pressure won’t push the wall. Step the wall to follow contours, or terrace it to create multiple microclimates and planting zones.
Capstones double as seating, and wall faces become backdrops for garden art. Add pockets for creeping plants, stone gaps, and adjacent natives to support wildlife habitats.
Built-In Seating: Benches, Caps, and Ledges
Where can you add comfortable seating without sacrificing floor space? Integrate built-in seating directly into your hardscape so circulation stays clear. Cap a low retaining wall with smooth stone or precast concrete to create a durable perch.
Specify a 16–18 inch seat height and 18–20 inch depth for ergonomic support, and use a slight pitch for drainage. Add thermal breaks or wood/composite tops where stone gets too hot or cold.
For dedicated garden benches, anchor them to masonry piers or a paved pad to prevent settling and wobble. Keep edges eased to reduce chipping, and maintain consistent joint widths for clean lines.
Place seating near paths and activity zones so you’ll actually use it.
Add Privacy With Walls, Screens, and Height
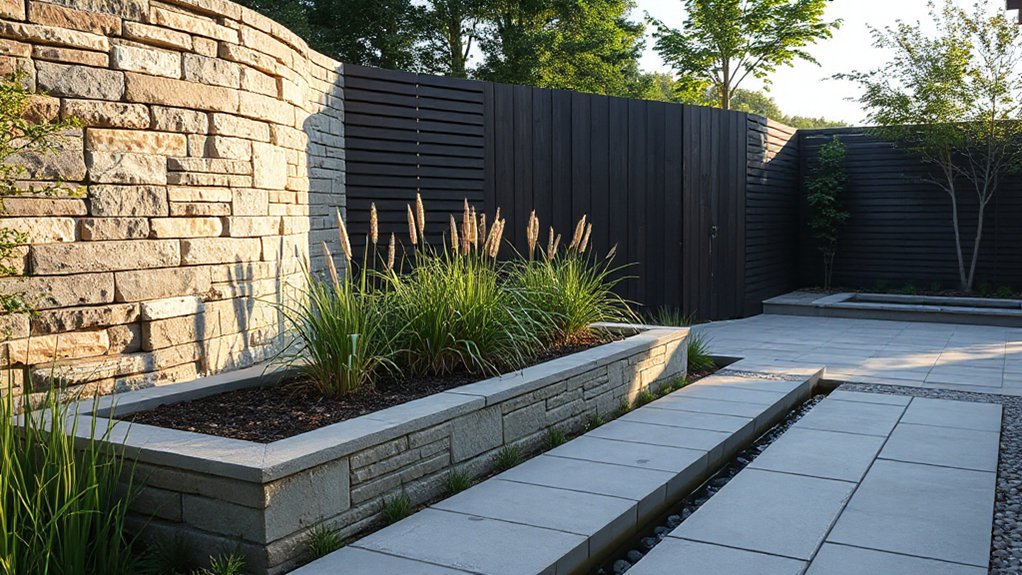
Even if you don’t have room for wide planting beds, you can build real privacy by combining vertical elements—low walls, slatted screens, trellises, and grade changes—right at the edge of your hardscape.
Start by mapping sightlines from neighbors’ windows and the street, then set target heights (typically 4–6 feet) where you sit or cook.
Use privacy walls in masonry or segmented block to block views and buffer noise; cap them for weather protection and a clean finish.
For lighter screening options, anchor wood or metal screens to posts set in concrete, or bolt panels to a retaining wall.
Add a step-up terrace or raised patio to change angles, and stagger elements to prevent tunnel-like wind effects.
Keep Beds Tidy With Edging and Borders
Once you’ve set your layout, define bed edges so soil, mulch, and irrigation stay where you designed them. Choose edging that matches your maintenance level: steel strips for crisp lines, brick-on-edge for durability, or poured concrete for maximum root and gravel containment. Install borders on a compacted base, keep the top flush with mower height, and use stakes every 24–36 inches to prevent heave. Create a shallow trench to lock materials and stop mulch migration during storms.
- Use a mowing strip to eliminate string trimming and reduce turf creep.
- Add a low border to frame Garden art without blocking sightlines.
- Leave small gaps for runoff while preserving a wildlife habitat for beetles and frogs.
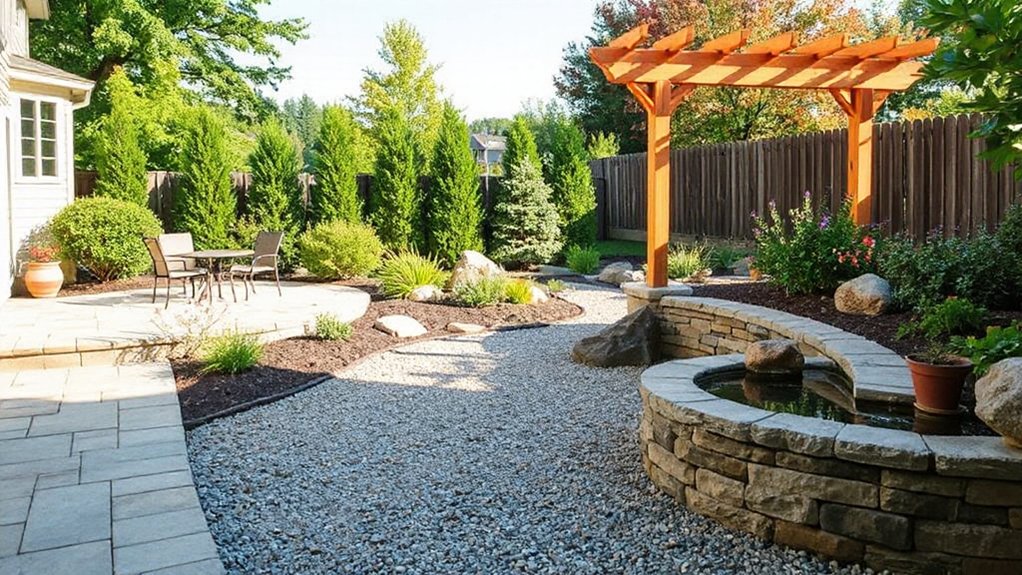
Zone Your Yard With Hardscaping and Plants
After you’ve established clean bed lines, zone your yard by using hardscape elements to set clear “rooms” and then reinforcing each zone with plant structure. Use a patio or gravel court as the primary gathering zone, then connect it to service and circulation zones with paver paths sized for traffic and wheelbarrows.
Define edges with low seat walls, raised planters, or steps that control grade changes and keep flows intuitive.
Anchor each room with vertical plants—hedges, multi-stem shrubs, or trellised vines—so boundaries read from multiple viewpoints. Layer perennials and groundcovers to cue use: tougher species along routes, softer textures in lounging areas.
Place Garden art at focal nodes to pull sightlines through progressions. Reserve a back corner for a wildlife habitat with dense cover, water, and native bloom sequences.
Lighting That Makes Hardscapes Usable at Night
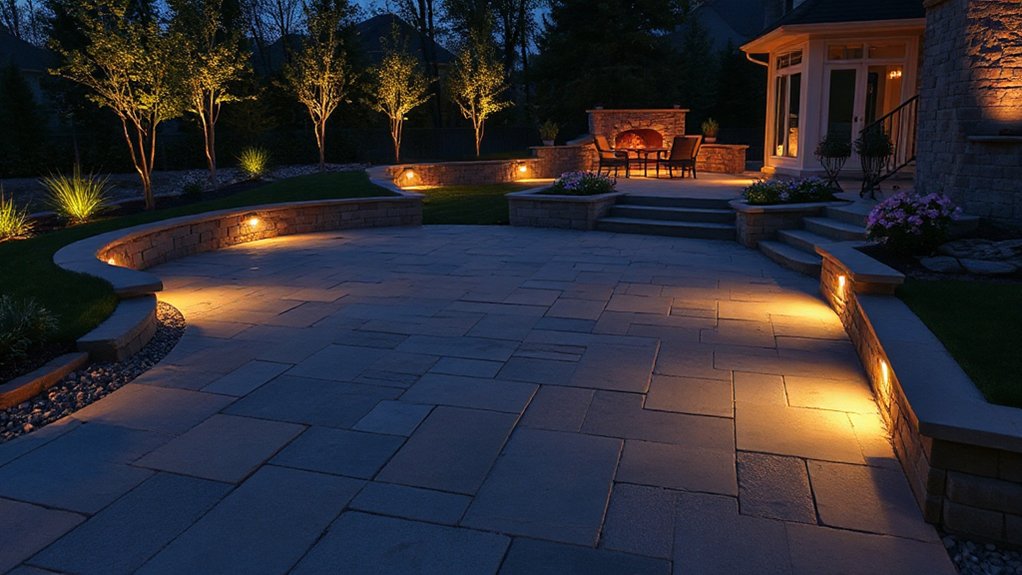
Because hardscapes turn into trip hazards the moment daylight fades, you need a lighting plan that prioritizes safe footing first and ambiance second. Use layered garden lighting to define edges, elevations, and *progressions*, so every step reads clearly without glare. Aim for warm 2700–3000K LEDs, shielded optics, and consistent spacing that avoids “zebra” shadows on pavers and stairs.
- Place low path lights 18–24 inches tall, offset from walking lines to reduce hotspots.
- Add step, riser, or under-cap lights to mark grade changes and seat-wall edges.
- Use uplights sparingly on focal plants or textures to build outdoor ambiance without washing the whole yard.
Tie fixtures to a photocell plus timer, and choose weather-rated housings with serviceable drivers.
Avoid Costly Mistakes: DIY vs Hiring a Pro
Balancing budget, safety, and finish quality, you’ll need to decide early which parts of the project you can execute confidently and which require a licensed, insured pro. Start by separating cosmetic work from structural and code-driven tasks.
You can handle paver placement, edging, and polymeric sand if you can grade to a consistent slope, compact in lifts, and follow manufacturer specs. Watch for common DIY pitfalls: inadequate base depth, poor drainage, and skipped geotextile, all of which cause settling and heaving.
Bring in a pro for retaining walls, steps, gas lines, and electrical runs; errors there risk failure, fines, and injury. Compare professional costs against rework: demolition, material waste, and lost weekends often exceed contractor labor.
Ask for itemized bids, warranties, and permit management upfront.
Frequently Asked Questions
Do Hardscaping Projects Require Permits or HOA Approval?
Yes, you often need them, depending on scope and location. Check local Landscaping permits for patios, walls, drainage, or electrical. Review your HOA approval process early, submit plans, and document compliance to avoid fines.
How Often Do Pavers and Stone Need Resealing or Maintenance?
You’ll reseal pavers every 2–4 years and stone every 1–3, depending on traffic and climate; an ounce of prevention is worth a pound of cure. Match Color options with sealers; follow manufacturer maintenance frequency.
What Is the Typical Lifespan of Common Hardscaping Materials?
You’ll typically get 20–30 years from pavers, 30–50 from poured concrete, 50+ from natural stone, and 15–25 from timber. Durability expectations and material longevity vary with base prep, drainage, climate, and traffic.
How Can Hardscaping Choices Affect Home Resale Value?
You can raise resale value by selecting hardscaping that signals quality and low maintenance. Prioritize landscape integration and material durability, use consistent finishes, add functional patios and paths, and guarantee proper drainage, permits, and safety lighting.
Are Hardscape Materials Safe for Pets and Children?
Yes, you can choose hardscape materials that are safe for pets and kids if you specify Pet safety and Child proof materials: sealed, low-VOC pavers, rounded edges, slip-resistant finishes, cool-surface options, and non-toxic joint sand.
Conclusion
When you treat hardscaping as infrastructure, your yard starts working for you. You’ve assessed use patterns, stabilized muddy traffic lanes with pavers or gravel, corrected drainage with proper grading and permeable systems, and kept beds crisp with edging. Zoning and low-glare lighting extend usability after dark. Don’t let a DIY impulse create rework—know when to call a pro for base prep, slopes, and compaction. Build it right, and you’ll host like a Roman engineer.