Start with a quick night-time lighting checkup and mark glare, dark zones, and mismatched bulbs. Fix the biggest issue first by layering light: add an ambient floor lamp in corners, task lighting where you work, and an accent like a picture light. Choose room-appropriate lumens (about 1,500–3,000 for living rooms) in warm 2700K–3000K, and go 90+ CRI for truer colors. Add LED-rated dimmers and bounce light with mirrors. There’s more to fine-tuning.
Do a Quick Home Lighting Checkup
Before you buy new bulbs or fixtures, take five minutes to audit what you’ve already got: walk room to room after dark, flip on each light, and note where you’re squinting, where glare bounces off screens, and where “dead zones” make the space feel flat.
Next, check bulb types and color temperature; mixed 2700K and 5000K can make a home feel patchy. Snap photos of each fixture and record base size (A19, BR30), wattage, and dimmer compatibility so replacements fit the first time.
Look at placement: are lampshades blocking output, or are recessed cans too spotty?
Finally, log what’s on for hours daily to prioritize Energy efficiency, and flag spots where Smart controls (dimmers, motion sensors, schedules) will cut waste without sacrificing comfort.
Fix the Biggest Lighting Problem First
Start by spotting your home’s darkest zones—hallways, corners, and task spots like counters—so you’re fixing what actually feels broken.
Then balance your light layers by pairing ambient overheads with targeted task lighting and a few warm accent sources for that modern, lived-in look.
Finally, upgrade the key fixtures in those problem areas first, prioritizing better output, proper spread, and dimmable LEDs.
Identify Dark Zones
Where does your home feel dim even after you’ve flipped every switch? Start by mapping “dark zones” at the times you actually live there: early morning, work-from-home afternoons, and post-sunset evenings.
Walk each room and note where your eyes strain—hallways, corners by sofas, closet fronts, and the sink run. Don’t guess; use your phone’s exposure meter or snap photos to reveal shadow pockets.
Check what blocks Natural sources like window light: heavy drapes, tall furniture, or dirty glass. Then step outside and review outdoor lighting; a brighter porch or path can reduce that cave-like entry feeling.
- Mark problem spots on a simple floor plan
- Identify obstructions and glare sources
- Prioritize high-traffic, task-heavy areas first
Balance Light Layers
Once you’ve spotted the dark zones, fix the biggest lighting issue by balancing your light layers—ambient (overall glow), task (focused work light), and accent (visual depth)—so the room doesn’t rely on a single harsh ceiling fixture.
Start with ambient: add evenly spaced, warm (2700–3000K) sources to smooth shadows and set the baseline.
Then place task light where you actually work—desk, vanity, sink, reading chair—aimed downward and bright enough to prevent eye strain.
Finish with accent to create Light harmony: wash a wall, highlight art, or backlight shelves for depth.
Check your Layer balance at night: stand in each zone, dim or reposition until glare drops and contrast feels intentional, not accidental.
Upgrade Key Fixtures
If your room still feels harsh or dim after you’ve layered light, the culprit is usually one outdated “main” fixture that throws glare, uneven shadows, or a sickly color. Fix it first, and the whole space snaps into focus.
Start with Fixture selection: scale it to the room, choose a diffuser or shade, and match color temperature (2700–3000K for cozy, 3500K for crisp). Prioritize Design integration so the fixture reinforces your style, not fights it.
- Replace bare bulbs with a shaded pendant, semi-flush, or drum fixture
- Add a dimmer and high-CRI LEDs (90+) to improve skin tones and finishes
- Re-aim or swap recessed trims to reduce hotspot glare and shadowing
You’ll get smoother light, better mood, and less eye strain instantly.
Choose Bulb Brightness by Room (Lumens)
Next, match bulb brightness to each room using lumens, not watts, so you get the look you want without overlighting.
As a quick baseline, aim for about 1,500–3,000 lumens in living rooms, 2,000–4,000 in kitchens, 1,000–2,000 in bedrooms, and 4,000+ for garages or workshops.
Layer ambient light for overall fill, then add higher-lumen task lighting where you cook, read, shave, or work.
Recommended Lumens By Room
Because brightness needs change with how you use each space, you’ll get better results by choosing bulbs based on lumens (total light output) instead of watts.
Aim for a layered, modern look by matching output to room size, wall color, and how much Natural sunlight you get, while keeping energy efficiency in mind with LEDs.
- Living room: 1,500–3,000 lumens total for a cozy-but-clear vibe
- Kitchen: 3,000–6,000 lumens total, especially if cabinets are dark
- Bedroom: 1,000–2,000 lumens total for relaxed evenings
For bathrooms, target 2,000–4,000 lumens; choose higher levels if you’ve got matte finishes that absorb light.
In a home office, plan 2,000–4,000 lumens and reduce glare by using frosted bulbs.
Adjust upward for high ceilings.
Task Vs Ambient Brightness
While your room’s total lumens set the overall mood, you’ll get the most usable light by separating ambient brightness (general, even illumination) from task brightness (focused light where you work). Start with ambient illumination that fills the space without glare: think ceiling fixtures, recessed cans, or a bright floor lamp bounced off a wall.
Then layer task lighting exactly where you read, cook, or groom—under-cabinet bars for counters, a swing-arm lamp by the sofa, or a vanity light aimed at your face. If your living room feels flat, raise ambient lumens slightly and add a dimmer for evenings.
If your desk strains your eyes, keep ambient moderate and boost task lumens with a focused shade.
Pick a Warm Color Temperature (2700K–3000K)
If you want your space to feel inviting instead of clinical, choose warm white bulbs in the 2700K–3000K range. This sweet spot delivers a Warm ambiance and a cozy atmosphere without making rooms look yellowed.
Use 2700K for bedrooms and living areas where you unwind, and lean 3000K in kitchens or hallways when you want a slightly cleaner, modern look. Match bulbs across connected spaces so lighting feels intentional, not patchy.
When you shop, check the Kelvin rating on the box, not just “soft white.” For quick wins, start here:
- Swap overhead bulbs first; they set the tone
- Keep lamps in the same Kelvin range
- Use dimmers to stay warm at night
Use High-CRI Bulbs for Better Color
After you’ve nailed a warm 2700K–3000K tone, you’ll notice color still looks “off” if your bulbs have a low CRI—skin, wood, and paint can read dull or slightly gray.
High-CRI bulbs fix that by rendering colors more accurately, which is why they’re a go-to upgrade in kitchens, bathrooms, and anywhere you care about finishes.
When you shop, you’ll want CRI 90+ (and ideally strong R9/red performance) so your space looks true-to-life, not just bright.
Why High-CRI Matters
Because lighting doesn’t just brighten a room—it shapes how everything in it looks—high‑CRI bulbs are one of the most noticeable upgrades you can make. Better color rendering means paint reads true, skin tones look healthy, and food appears fresh instead of dull or gray.
You’ll also notice how light temperature feels more consistent: warm white stays inviting without turning yellow, and neutral tones don’t go green or harsh.
High‑CRI shines most where you care about accuracy and vibe:
- Matching textiles, makeup, and artwork without surprise color shifts
- Making wood grains, plants, and finishes look richer and more dimensional
- Improving photos and video calls so your space looks like it does in person
Swap a few key fixtures first, and you’ll see the difference immediately.
Choosing The Right CRI
While most bulbs list lumens and “warm vs. cool,” CRI is the spec that tells you whether your colors will look right. For everyday living spaces, choose CRI 90+; it keeps skin tones natural and prevents grayish whites.
If you’re upgrading a kitchen, vanity, or art wall, push to 95+ so paint, food, and fabrics stay true. Don’t confuse CRI with Color temperature: 2700K–3000K reads cozy, 3500K–4000K feels clean and modern, and 5000K+ mimics daylight.
CRI controls Color rendering at any Kelvin. Check packaging for “Ra” or “CRI,” and avoid bargain LEDs that omit the rating. Test one bulb first, then match the whole room for consistency.
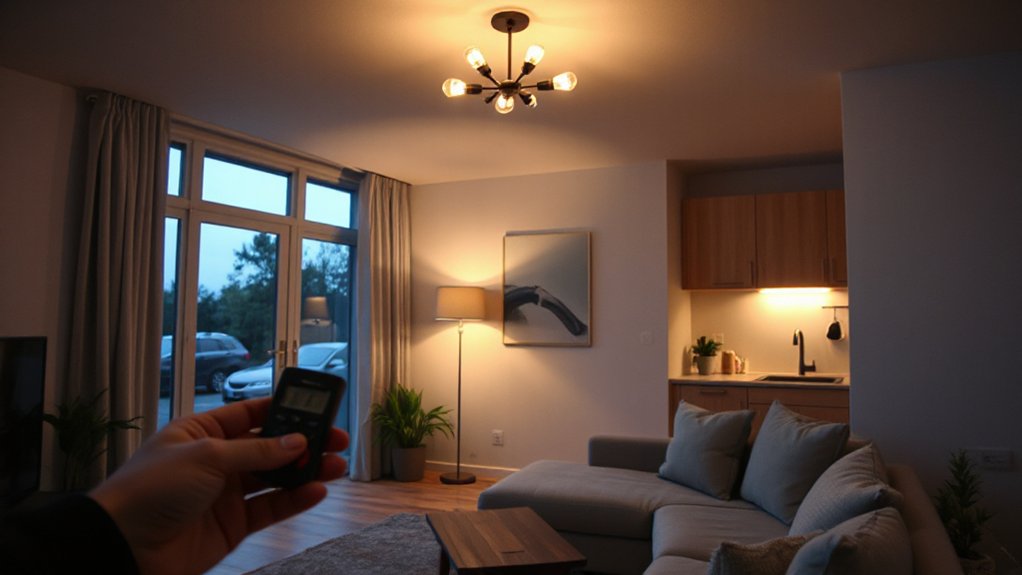
Add Dimmers for Instant Flexibility
If you want one upgrade that instantly changes how a room feels, add dimmers to your most-used lights. With dimmer switches, you’ll get lighting flexibility for everything from bright morning cleanup to low-glow wind-down without swapping bulbs.
Choose LED-rated dimmers to avoid flicker, buzzing, or limited range, and match the control style to your habits—slider for fine tuning, paddle with presets for speed, or smart dimmers for schedules and voice control.
Before you buy, confirm bulb compatibility and total wattage, then label the circuit at the panel. You’ll notice better comfort and less glare fast.
- Pick LED/CFL-compatible dimmers
- Test for smooth fade and no flicker
- Set favorite levels (movie, dinner, nightlight)
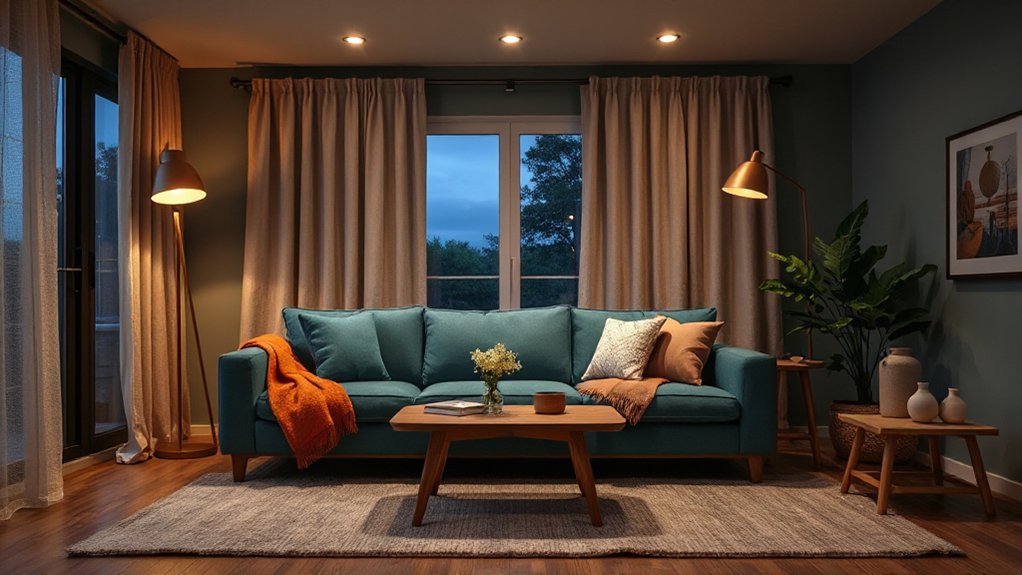
Layer Ambient, Task, and Accent Lighting
When you layer ambient, task, and accent lighting, you control both how a room functions and how it feels without relying on a single harsh overhead fixture.
Start with ambient: a pair of floor lamps or wall sconces that wash the room evenly.
Add task lighting where you work—an adjustable desk lamp, under-cabinet strips, or a reading light aimed at your chair—so you’re not straining your eyes.
Finish with accent lighting to add depth: picture lights, small uplights behind plants, or LED tape along shelving.
For clean Layer blending, keep color temperature consistent (2700K–3000K) and put key zones on separate switches.
Mix Fixture styles thoughtfully—match finishes, vary silhouettes—to look curated, not cluttered.
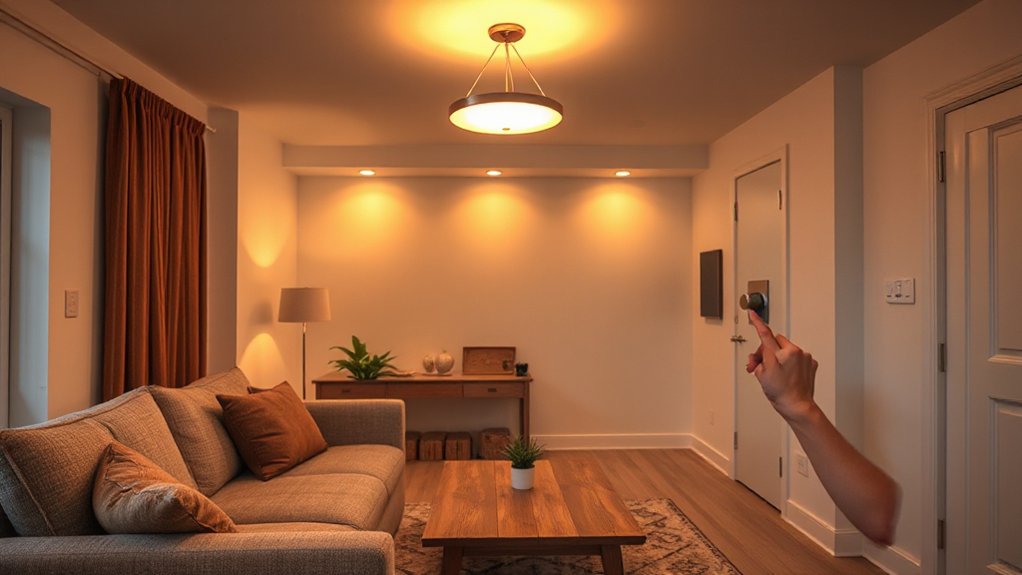
Swap in a Statement Ceiling Light
Swap in a statement ceiling light to anchor the room and instantly modernize your lighting scheme. You’ll want a fixture that matches the scale and style of your space—think oversized drum shades, sculptural LEDs, or a clean-lined chandelier.
You should center it over key zones like the dining table or seating area. Before you install, confirm box support, hanging height, and dimmer compatibility so it looks right and performs flawlessly.
Choosing The Right Fixture
How do you turn an ordinary room into one that feels intentional and current? You choose a statement ceiling light that matches your lifestyle and your room’s vibe.
Start by comparing fixture styles—globe, lantern, linear, sculptural, or classic chandelier—and decide whether you want the light to blend in or become the focal point.
Then nail color coordination: echo existing metals (brass, black, chrome) or intentionally mix finishes for contrast, but keep undertones consistent (warm with warm, cool with cool).
- Pick a silhouette that mirrors your furniture lines (curvy vs. angular).
- Match shade material to mood: glass for airy, linen for soft, metal for crisp.
- Scale the fixture to the room so it feels balanced, not bossy.
Placement And Installation Tips
Although a statement ceiling light can instantly modernize a room, placement and installation make or break the look (and the comfort). Center it over the room’s primary “anchor” (dining table, seating zone, bed), not always the ceiling box, so the lighting design feels intentional.
Keep proportions tight: in dining areas, hang the bottom about 30–36 inches above the tabletop; in living spaces, leave at least 7 feet of clearance. If your ceiling is low, choose a semi-flush or compact drum to avoid glare and head bumps.
Put it on a dimmer so you can shift from task to ambiance, and swap in LEDs for energy efficiency. Before wiring, verify fixture weight, use a rated box, and shut off the breaker.
Soften Overhead Lighting With Table Lamps
When your ceiling fixture feels too harsh or flat, a well-placed table lamp instantly adds warmer, more flattering light at eye level. You’ll soften shadows, reduce glare, and make the room feel layered without touching your overhead fixtures.
Choose table lamps with fabric or frosted shades to diffuse light, and aim for bulbs in the 2700K–3000K range for a cozy, modern glow.
- Set the lamp on a sideboard or console to bounce light across walls
- Pair two matching lamps on nightstands for balanced symmetry
- Use a dimmable LED or smart bulb to fine-tune mood and brightness
Keep the lamp’s bottom shade edge near seated eye height, and hide cords with clips for a clean, styled look.
Add Wall Sconces to Save Space
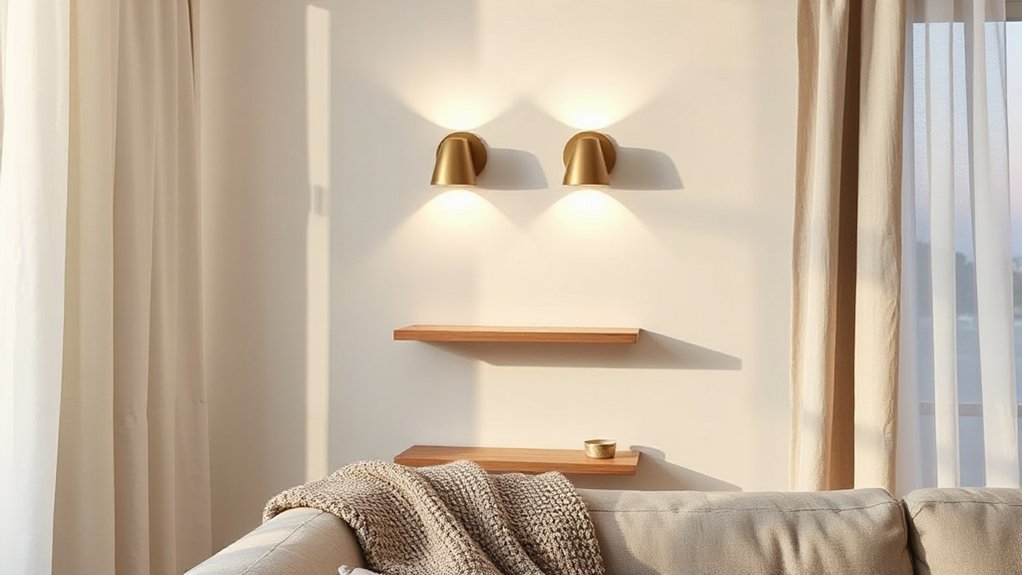
Table lamps add that warm, eye-level glow, but wall sconces give you the same layered lighting while freeing up every inch of tabletop and nightstand space.
Install them beside your bed, over a reading chair, or flanking a mirror to brighten faces and reduce shadows. For a streamlined, trend-forward look, choose slim plug-in Wall sconces with fabric cords, or go hardwired for a cleaner wall.
Place the fixture’s center about 60–66 inches from the floor, then fine-tune based on seating height.
Pick dimmable LED bulbs (2700K–3000K) so you can shift from task lighting to wind-down mode.
Swing-arm styles add flexibility, and you’ll keep surfaces clear for books, chargers, and decor.
Add Under-Cabinet Kitchen Lighting
Ever wonder why your countertops still feel dim even with bright ceiling lights? Add under-cabinet fixtures to push light exactly where you prep, chop, and plate, without harsh glare. Choose slim LED bars or puck lights with a diffused lens, then mount them toward the front of the cabinet to eliminate shadows from your hands.
For a modern look, match color temperature across the kitchen (2700K warm, 3000K neutral). Prioritize energy efficiency with high-lumen-per-watt options and low standby draw.
For easy control, build in lighting automation using a motion sensor or smart switch that ties into your evening routine. Focus on these essentials:
- 90+ CRI for true food color
- Dimmable driver for task-to-ambient shifts
- Hardwired or plug-in routing that hides cords neatly
Use LED Strips for Shelves and Toe-Kicks
Because LED strips run thin and flexible, you can tuck them under shelves and along toe-kicks to add a clean “floating” glow that doubles as night navigation without lighting up the whole room.
For Shelf accentuation, mount strips toward the front edge so items read crisp, not shadowy, and hide the diode line with an aluminum channel and frosted diffuser. Pick 2700–3000K for warm residential spaces, or 3500K if you want a sharper, modern look.
Use high-CRI strips so wood tones and finishes don’t look flat.
For Toe kick illumination, aim the light downward and slightly back to avoid glare when you walk by.
Add a dimmer or motion sensor, and choose waterproof strips in bathrooms.
Run low-voltage wiring neatly.
Light Artwork With Picture Lights or Spots
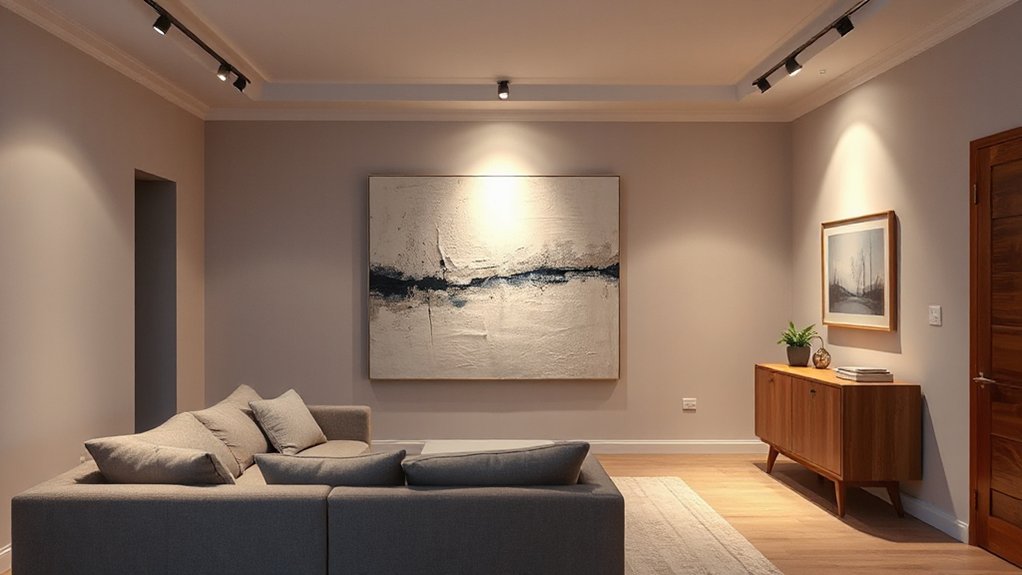
Once you’ve added that low, architectural glow with strips, give your walls the same intentional treatment by lighting artwork with a dedicated picture light or a small adjustable spot. Picture lighting makes a gallery moment out of a single print, and it keeps the room feeling curated after dark.
Choose warm-dim LEDs (2700–3000K) for flattering artwork illumination, and aim the beam at about 30 degrees to cut glare on glass.
- Match fixture finish to nearby hardware for a built-in look
- Pick a beam spread (narrow for small pieces, wider for large canvases)
- Use high CRI (90+) so colors stay true
Hardwire for clean lines, or use a plug-in model with a hidden cord channel for renters. Add a dimmer for control.
Brighten Corners With Floor Lamps
Where do your rooms feel a little flat after sunset? Tuck a floor lamp into the darkest corner to add height, depth, and a welcoming glow without rewiring. Choose from today’s Floor lamp styles: slim arc lamps for sectionals, tripod bases for mid-century vibes, or torchières that bounce light upward for softer ambient fill.
Use smart Corner lighting techniques: aim the shade toward a wall to reduce glare, keep the bulb’s color temperature around 2700–3000K for cozy consistency, and pick dimmable LEDs so you can shift from movie-night mood to task lighting.
If the corner sits near a chair, add a swing-arm lamp head for reading. Hide cords with a paintable channel, and you’ll keep the look clean.
Make Light Go Further With Mirrors
If your lighting still feels underpowered after dark, you can stretch every lumen by placing mirrors where they’ll bounce light back into the room. Smart mirror placement doubles the impact of a single lamp or sconce, especially in narrow halls and small living rooms. Aim them toward the brightest source, not the dark wall, so reflective surfaces act like a soft secondary window.
- Hang a large mirror opposite a floor lamp to spread light across seating.
- Lean a full-length mirror near a corner to brighten dead zones without new wiring.
- Use mirrored trays or glossy decor near bulbs to add sparkle without glare.
Pick thin black frames for a modern look, or warm brass to match current hardware trends.
Avoid Common Home Lighting Upgrade Mistakes
Although new fixtures and LEDs promise quick wins, you can waste money—and end up with harsher, dimmer rooms—by repeating a few common lighting upgrade mistakes. Don’t swap bulbs without checking lumens, beam angle, and CRI; a “bright” bulb can still look flat or spotlighty.
Avoid mixing color temperatures—keep warm (2700–3000K) for living spaces and neutral (3500–4000K) for task zones.
Skip the single-ceiling-fixture trap; layer ambient, task, and accent lighting design so shadows don’t fight you.
Put dimmers on compatible LEDs to prevent flicker and buzzing, and choose matte diffusers to cut glare.
Finally, don’t chase wattage—prioritize Energy efficiency with quality drivers, smart schedules, and the right fixture for the room.
Frequently Asked Questions
Do I Need an Electrician to Install New Light Fixtures?
You don’t always need an electrician, but you should hire one if wiring’s unfamiliar or codes apply. Check wiring safety and fixture compatibility (voltage, box rating, dimmer type). DIY only if you can shut power.
How Much Do Simple Lighting Upgrades Typically Cost per Room?
You’ll typically spend $100–$500 per room for simple lighting upgrades, or $500–$1,500 with fixtures. Prioritize lighting design and energy efficiency: LED bulbs, dimmers, smart switches, and layered task lighting for a modern look.
Are Smart Bulbs Worth It Compared to Smart Switches?
Yes—smart bulbs are worth it when you want Energy efficiency and Color customization; smart switches win for whole-room control. Like a stitch in time, you’ll save setup hassle. Choose bulbs for renters; switches for longevity.
How Can I Match New Fixtures With Existing Hardware Finishes?
Match new fixtures by sampling your dominant metal, then choose pieces within the same undertone. Check Finishes compatibility across warm/cool. Use Fixture coordination by repeating one accent finish 2–3 times, not everywhere.
What Lighting Upgrades Add the Most Resale Value?
You’ll boost resale most by adding dimmable LED recessed lights, statement pendants, and smart switches—like swapping gloomy corners for sunlit scenes. Buyers notice energy efficiency, clean trims, and cohesive aesthetic appeal in kitchens, baths, and entries.
Conclusion
Funny how you’ll repaint a whole room, then wonder why it still feels “off”—when it’s the lighting all along. Do a quick checkup, tackle the worst spot first, and match lumens to each room. Stick with warm 2700K–3000K, choose high-CRI bulbs, and aim picture lights or spots at art. Park a floor lamp in dead corners, bounce light with mirrors, and skip the usual mistakes. Suddenly, your space looks expensive—without trying.