
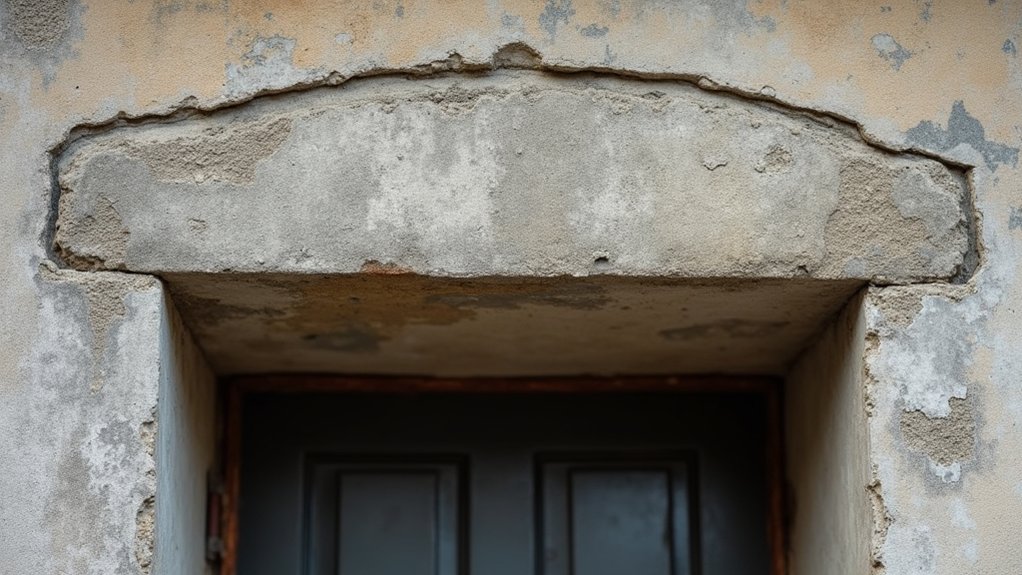
Did you know tiny cracks in concrete lintels can start from microcracking during curing and quietly worsen under load? You’ll want to examine how moisture, freeze–thaw cycles, and misalignment tax the steel reinforcement and surrounding concrete, often with hairline cracks that lead to spalling or rust. If you’re evaluating longevity, you’ll need to understand signs of deterioration and the steps to prevent future failures, which can keep your structure safer and more durable.
Why Concrete Lintels Crack (And How to Prevent It)
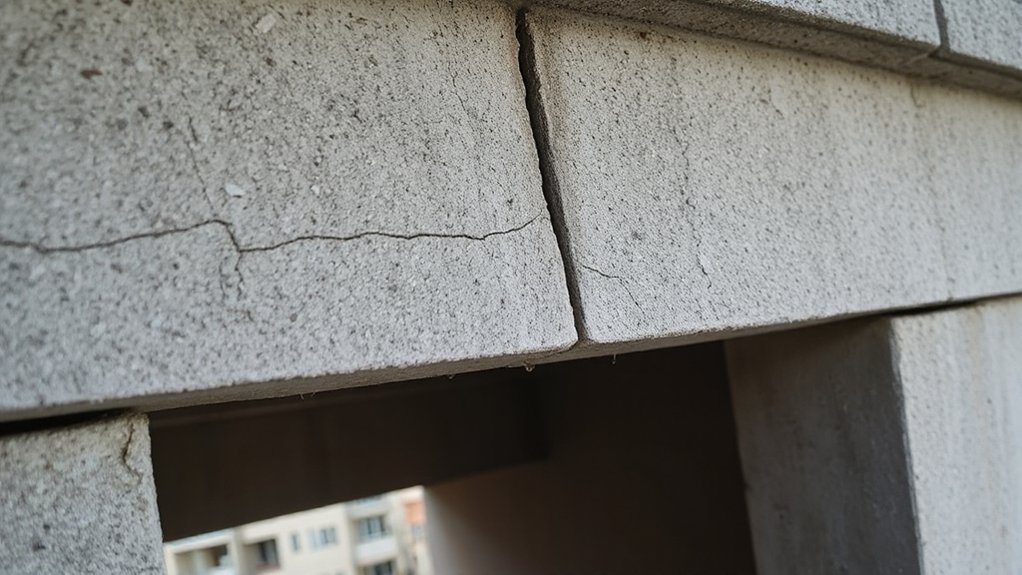
Concrete lintels crack primarily due to combined internal stresses and external loads that exceed their capacity. You assess the root cause by examining concrete composition, where variability in aggregate, cement, and water ratios can create weak planes and differential curing. When mixing isn’t uniform, microcracking forms early, reducing post-load resistance.
Manufacturing defects, such as inconsistent reinforcement placement, improper curing, or air entrapment, further compromise tensile strength and crack control. You should evaluate the design for excessive spans, concentrated loads, and poor support conditions, all of which amplify stress concentrations.
Prevention hinges on controlling material quality and production processes: specify appropriate concrete grades, ensure proper mixing and curing, and verify reinforcement coverage. Early quality checks minimize crack initiation, preserving lintel integrity under service loads.
Signs Your Lintel Is Deteriorating
Watch for hairline cracks, which can signal initiation of deterioration, and note any changes in width or pattern.
Spalling and flaking concrete as the surface peels away indicate advancing damage and reduced cover to the reinforcing steel.
Quick assessment and documentation of these signs help determine whether further inspection or remediation is required.
Hairline Cracks Appearance
Hairline cracks can indicate early deterioration of a lintel and warrant quick inspection. You’ll notice hairline cracks along the face or joints, often less than 0.5 mm wide, but their pattern matters.
Random, isolated marks may reflect plastic shrinkage or thermal movement, while intersecting or widening cracks suggest ongoing distress and potential water ingress. You should assess whether cracks align with load paths, openings, or previous expansion joints, as misalignment implies tensile stress concentrations.
Addressing these cracks promptly helps preserve surface finish and prevents aesthetic decline, even if structural capacity remains adequate. Document crack length, location, and moisture exposure, and monitor for propagation.
If cracking persists or compounds, consult a structural engineer for remedial options, such as crack sealing, reinforcement, or lintel replacement, to maintain performance and aesthetic appeal.
Spalling And Deterioration Signs
Spalling indicates concrete failure at the surface where droplets, flakes, or chips detach from the lintel, often exposing exposed steel or aggregate underneath. You should inspect for progressive loss of cover, rebar corrosion indicators, and powdery or hollow-sounding patches, which signal material deterioration.
Rust formation on exposed reinforcement accelerates section loss and reduces bond strength, compromising load transfer. Look for chipping along edges, scaling around openings, and embedded grit-filled irregularities that imply moisture intrusion and freeze–thaw damage.
Thermal expansion cycles aggravate existing cracks, widening them and creating leakage paths. Monitor for staining, efflorescence, or darkened zones indicating moisture retention.
If deterioration progresses, plan prompt repair or replacement, as delayed intervention increases rust propagation, reduces structural capacity, and elevates safety risks in lintel-supported masonry. Regular inspection and timely remediation preserve performance and service life.
How Moisture and Curing Affect Lintel Health
Moisture exposure and curing practices directly influence lintel durability, affecting shrinkage, cracking, and long-term strength. You’ll want to monitor moisture ingress and proper curing to prevent weakened bond and reduced load capacity.
This section starts with how moisture and curing interact to shape lintel performance and failure risk.
Moisture Effects On Lintels
Concrete lintels are highly sensitive to moisture and curing conditions, which directly influence their long-term performance. You must assess moisture exposure during installation and throughout service, because moisture intrusion drives degradation mechanisms that compromise structure.
When water penetrates the concrete matrix, it can accelerate freeze–thaw damage, promote corrosion of any embedded steel, and trigger internal cracking that weakens lintel capacity.
You should also consider humidity cycles and damp environments that sustain efflorescence, leading to surface spalling and loss of cross-section.
Confirm proper detailing at joints, flashing, and bearing surfaces to minimize ingress paths.
Select mix designs and curing regimes that optimize pore structure and reduce permeability.
Regular inspections help detect early signs of water damage and moisture-related distress before failures occur.
Curing Impact On Strength
Proper curing and the moisture environment during cure dictate the early-age strength and the long-term health of a lintel. You control this through appropriate curing techniques and monitoring moisture retention during early days.
Inadequate curing leads to microcracking, reduced hydrated cement volume, and lowered ultimate strength, compromising load transfer and durability. Temperature, humidity, and wind speed influence evaporation rates, so you must maintain a stable ambiance and protect from rapid drying.
Use sealed or misted conditions for initial 24 to 72 hours, then implement a curing schedule that sustains moisture for the required period according to mix design. Documented curing techniques, such as wet coverings or sealants, help minimize shrinkage and internal stresses.
Align curing schedules with plaster and masonry timelines to prevent interface weaknesses and ensure long-term lintel performance.
How Overloading and Misalignment Endanger Lintels
Overloading a lintel or misaligning its bearing can dramatically reduce its load-carrying capacity and cause premature failure. You must recognize how load distribution shifts when a lintel bears uneven loads or when support lines are off.
Concentrated loads near one edge or atop an existing crack concentrate stress, raising the risk of cracking, crushing, and spalling of surrounding concrete. Misalignment disrupts structural alignment, creating bending moments that the lintel wasn’t designed to resist.
When bearing isn’t level or properly seated, local gaps allow settlement and differential movement, amplifying shear reactions and buckle potential. Confirm that loads are spread across the entire lintel width and that supports are true, level, and continuous.
Regular inspections verify bearing conditions, preventing progressive deterioration and unexpected door or window failures.
Why Steel Rebar Corrodes and Its Consequences
Corrosion of steel rebar compromises the bond between steel and surrounding concrete, reducing tensile capacity and accelerating crack growth. You observe that the corrosion process disrupts the steel-concrete interface, creating microvoids and spalling that undermine load transfer and stiffness.
As corrosion progresses, reinforcement degradation accelerates, increasing flexural and shear vulnerabilities in lintels. Chloride ingress, carbonation, and moisture exposure drive anodic reactions, forming rust products that occupy greater volume than the original steel, generating internal pressures and cracking.
This degradation reduces service life, increases maintenance needs, and raises failure risk under bending, deflection, or impact. You must recognize that corrosion-related deterioration often remains hidden until cracks widen or delamination occurs, complicating assessment.
Addressing corrosion early preserves capacity, serviceability, and structural safety of lintels.
How to Repair Lintels and Prevent Future Failures
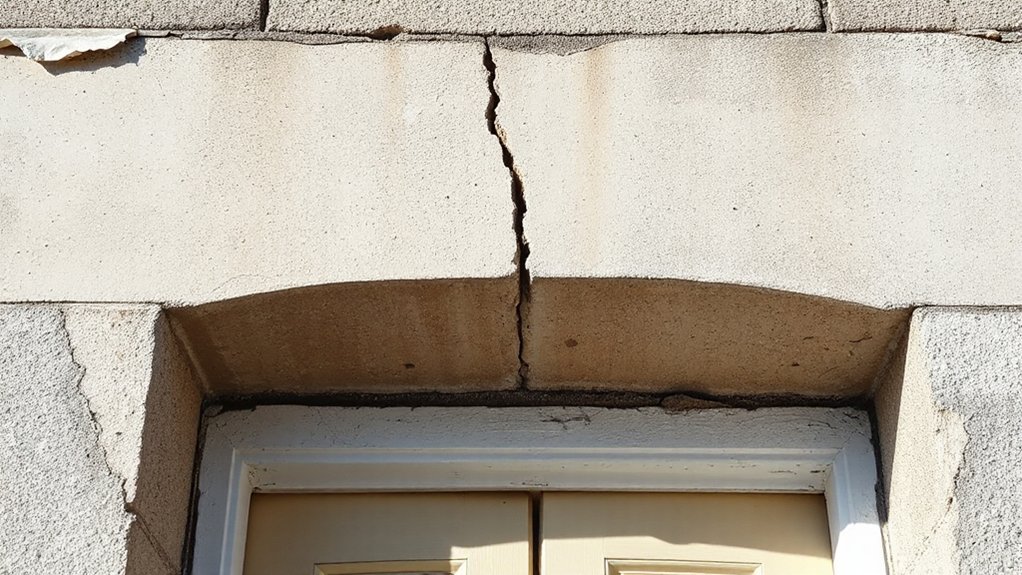
Repairing lintels and preventing future failures requires addressing both the degraded reinforcement and the surrounding concrete. Begin with a thorough inspection technique to identify active corrosion, cracks, delamination, and spalling. Document geometry, load paths, and mortar integrity before supporting the structure.
For repairs, remove unsound concrete around the lintel, expose the reinforcement, and clean corrosion from bars. If bars are severely compromised, replace sections or install new supplementary reinforcement, ensuring proper anchorage.
Recast the surrounding concrete with a compatible mix and adequate cover, using formwork and curing to minimize shrinkage.
Implement maintenance tips that prioritize protection against moisture ingress, chloride exposure, and freeze-thaw cycles. Schedule regular inspections after significant events or seasonal changeovers, and track any movement, cracking, or changes in load behavior for early intervention.
Materials and Design Details That Prevent Lintel Failures
Use high-quality concrete with appropriate grade, adequate cover, and proper aggregate size to minimize voids and stress concentrations.
Incorporate steel reinforcement with correct yield strength, spacing, and protective coating, and specify anchorages that resist movement under load.
Design optimization involves detailing for end bearing, seat geometry, and load transfer to prevent splitting or spalling.
Include crack-control measures, such as proper joint detailing and debonding where required.
Document workmanship standards, curing, and inspection intervals to sustain integrity over the structure’s life.
Frequently Asked Questions
How Long Do Concrete Lintels Typically Last in Different Climates?
Concrete lintels typically last 50–100 years, but climate affects longevity. In hot, humid, coastal areas, material deterioration accelerates due to moisture and salt ingress.
While freeze–thaw cycles in colder regions hasten cracks and spalling. You should expect shorter lifespans where aggressive de-icing chemicals are used.
Load stress remains a critical factor; appropriately designed lintels under consistent loads endure longer.
Regular inspections help you detect deterioration early and plan maintenance before failures occur.
Do Lintels Require Annual Professional Inspection and Testing?
Lintels don’t require annual professional inspection if you’re keeping up with routine maintenance, but periodic evaluation is prudent.
You should schedule lintel maintenance checks after significant events (earthquakes, heavy loading) and at least every 3–5 years depending on age and environment.
An inspection frequency plan helps you catch corrosion or cracking early.
While not always mandatory annually, you’ll benefit from professional testing when signs appear or performance degrades.
Can DIY Repairs Worsen Lintel Damage or Void Warranties?
Yes, DIY repairs can worsen lintel damage or void warranties. If you patch cracks without a structural assessment, you may trap moisture, alter load paths, or miss hidden corrosion.
DIY pitfalls include improper material selection, insufficient curing, and noncompliant anchoring.
Warranty concerns arise because most manufacturers require professional installation and documented inspections.
To protect performance and coverage, consult a qualified masonry contractor, follow approved repair procedures, and maintain detailed records of materials and workmanship.
What Signs Indicate Hidden Substructure Issues Affecting Lintels?
Sure thing: signs of hidden substructure issues include substructure deterioration and hidden cracks near lintels. You may notice doors or windows sticking, uneven floor or wall bowing, and unexpected movement after seasonal changes.
Look for efflorescence, rust stains on steel lintels, or spalling masonry above openings. If you detect these, stop load, document, and consult a structural engineer for assessment and remediation plans to prevent further damage.
Are There Cost-Effective Retrofits to Strengthen Aging Lintels?
Yes, there are cost-effective retrofits to strengthen aging lintels. You can explore alternative materials and modern reinforcement techniques to restore capacity without full replacement.
Retrofit options include steel or FRP bars, shotcrete wraps, or composite encasements combined with anchorage upgrades. You’ll benefit from minimal disruption and improved shear and flexural performance.
Guarantee proper design, detailing, and load-path verification, and consult a structural engineer to tailor alternative materials to your lintel’s dimensions and exposure conditions.
Conclusion
Maintaining concrete lintels is essential; neglect invites subtle, cumulative issues. By staying vigilant, you’ll reduce the risk of hidden deterioration and avoid costly repairs. Regular inspections, proper curing, and appropriate loading keep steel ties from creeping into corrosion, and moisture from quietly compromising integrity. Embrace conservative designs and disciplined maintenance—these are your quiet safeguards. In short, proactive care is your best bet to extend lintel life and preserve structural reliability, without inviting unforeseen, disruptive consequences.





