
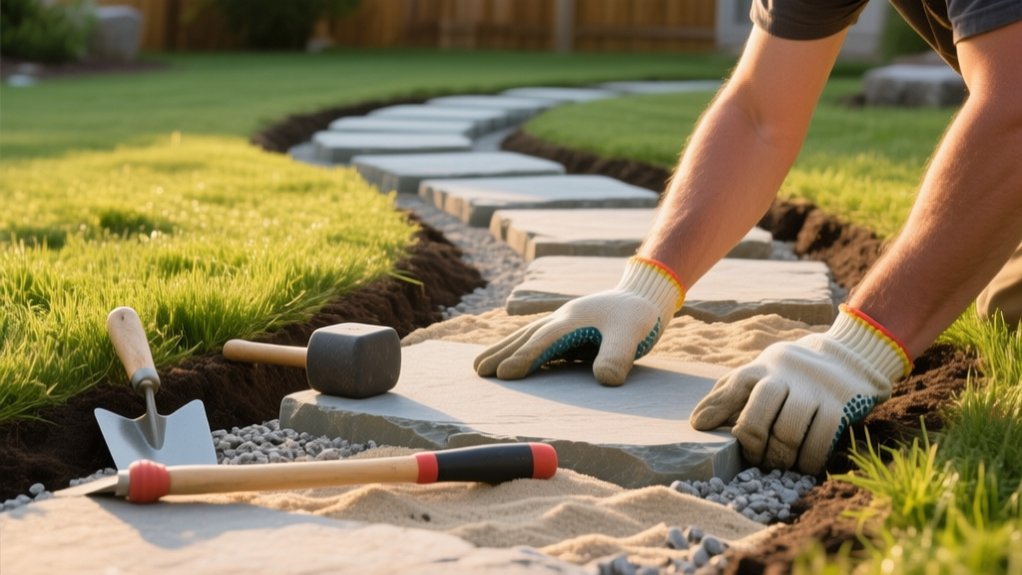
You’ll start by mapping desire lines, pegging and stringing the centreline, and setting a 600–900 mm width (1,000–1,200 mm for two abreast), keeping gradients gentle with a 1:60 crossfall. Excavate for 100–150 mm MOT Type 1 plus 30–50 mm bedding, then compact in 50–75 mm lifts and install edging on a firm bed. Dry-fit from the most visible edge, bed and mallet stones level, then brush in polymeric sand or gravel. Next you’ll refine cuts, joints, and long-term fixes.
Plan Your Stone Pathway Route and Width
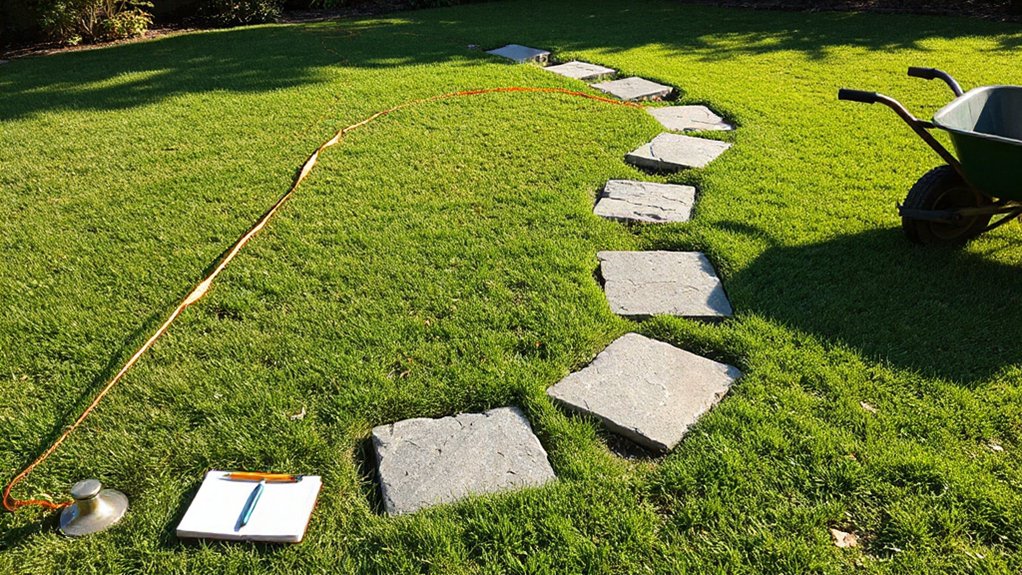
Before you order stone or lift a spade, map the pathway’s route and set its width based on how it’ll be used and the ground you’re working with. Mark desire lines between doors, bins, sheds, and seating, then peg and string the centreline. Keep gradients gentle; on slopes, route across the fall where possible to reduce run-off and erosion.
Set width to function: 600–900 mm for single-file access, 1,000–1,200 mm for two people or wheelbarrow clearance. Widen at corners and thresholds to avoid edge failure. Check soil type and drainage; in clay, allow for sub-base thickness and a slight crossfall (1:60) to shed water.
Confirm clearances around roots and services. Align the route to preserve pathway aesthetic while supporting material durability.
Choose a Stone Pathway Style and Pattern
Although the route and width set the bones of your path, the stone style and laying pattern determine how it wears, drains, and reads in the garden. Start by matching the pathway’s formality to the setting: straight runs and tight joints suit modern plots, while gentle curves and varied joint lines suit cottage planting.
For traction and longevity, align joints to shed water across the fall, not along the direction of travel, and stagger courses to avoid continuous seams. Use a running bond for speed and stability, a random ashlar look for controlled variety, or a stepping-stone rhythm for lighter foot traffic.
When choosing materials, keep thickness and surface texture consistent. Your aesthetic considerations should also include joint width, edge treatment, and how patterns meet borders.
Pick the Best Stone: Flagstone, Pavers, or Cobble
Because the stone you choose dictates load capacity, slip resistance, cut tolerance, and long-term maintenance, treat flagstone, pavers, and cobbles as different systems rather than interchangeable finishes.
Choose flagstone when you want irregular joints and a natural cleft surface; check thickness consistency and expect more on-site trimming.
Select concrete or clay pavers for tight lines and repeatable geometry; you’ll get predictable laying tolerances, easy edge alignment, and straightforward replacements.
Pick cobbles where you need high stone durability under point loads, but accept a more textured tread and slower installation due to small units.
Match porosity and frost resistance to your climate, and verify each product’s compressive strength.
Balance technical performance with aesthetic appeal: rustic flagstone, crisp pavers, or heritage cobbles.
Choose a Base Type for Your Stone Pathway
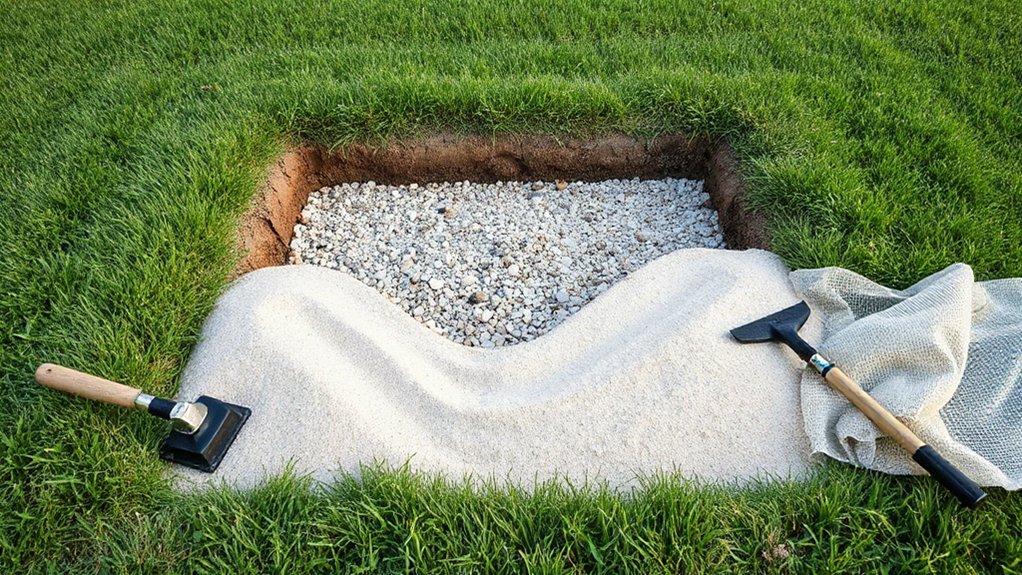
You’ll choose between a sand base and a compacted gravel base depending on how you want the path to perform.
A sand bed levels quickly, makes minor height adjustments easy, and suits light foot traffic where drainage is already adequate.
Compacted MOT Type 1 or similar gravel delivers higher load-bearing stability, better resistance to frost heave, and a firmer platform for pavers or cobbles.
Sand Base Benefits
When you need a base that drains freely and levels quickly, a compacted sand bed offers a practical starting point for a stone pathway. You can screed sharp sand to a consistent thickness, usually 25–40 mm, then compact it to minimise later settlement and keep units aligned.
Sand benefits include easy grade correction, fast bedding adjustments, and even load transfer under individual stones. You’ll also find it kinder on irregular flagstones, since you can feather the bed to support high and low points without rocking.
For pathway aesthetics, sand lets you fine-tune joint spacing and maintain clean lines along edging restraints. Use damp, well-graded sharp sand, not building sand, and keep it free of organic fines that hold water. Compact in thin lifts for best results.
Gravel Base Stability
Although a sand bed levels quickly, a well-compacted gravel sub-base gives your stone pathway superior stability by creating a dense, interlocking layer that spreads loads and resists rutting and lateral creep.
For Gravel stability, you’ll want 75–150 mm of MOT Type 1 or clean crushed stone, installed in 50 mm lifts and compacted with a vibrating plate until it won’t visibly deflect underfoot. Maintain a consistent fall for drainage, and avoid rounded pea shingle, which won’t lock together.
Edge restraints are essential. Set kerbs or steel edging on haunched concrete to stop the base migrating sideways.
Finish with 10–20 mm of sharp sand or grit as a bedding layer, then seat each slab firmly. Re-compact, top-up, and check levels as you go.
Calculate Stone and Base Materials
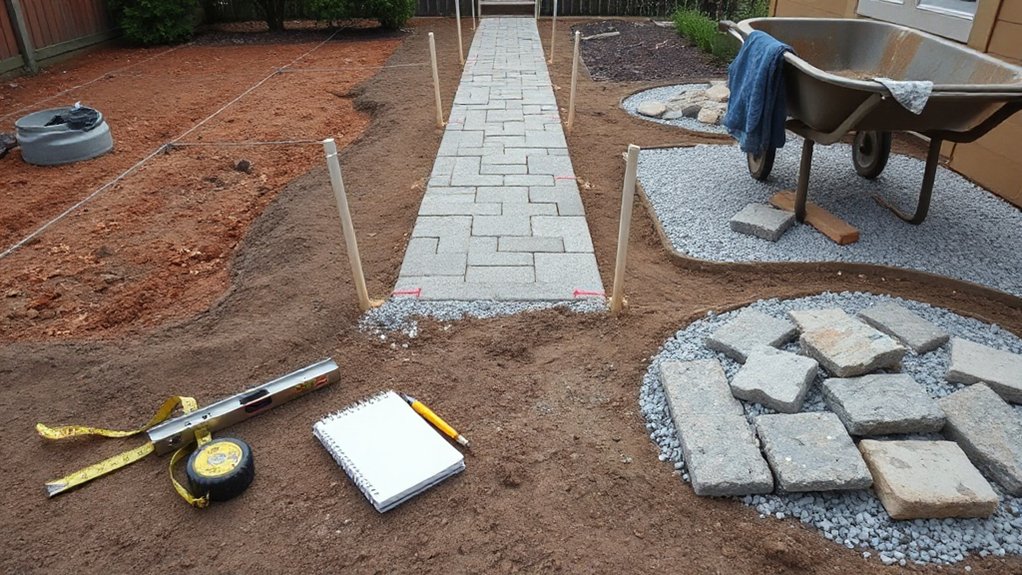
You’ll start by measuring your path’s length and width in metres, then multiply them to get the area you’re covering.
You’ll estimate stone coverage by applying the supplier’s m²-per-pack rate and adding a sensible allowance for cuts, breakage, and joint gaps.
Next, you’ll calculate base gravel volume by multiplying the same area by your planned compacted depth, then converting the result into tonnes using the aggregate’s bulk density.
Measure Path Length And Width
- Peg each end and any bend.
- Measure centreline length, then confirm edge-to-edge width.
- Write all figures on a sketch with scale.
Estimate Stone Coverage Needs
Next, how much stone and base will your path actually consume? Start with the measured area (length × width) in m².
Choose your stone format: setts, flagstones, or gravel.
For slabs, calculate coverage by dividing the path area by a single slab’s face area, then add 5–10% for cuts, breakage, and edge trimming.
For setts, use the manufacturer’s “pieces per m²” rate and add the same wastage.
If you’re blending sizes for garden aesthetics, base your order on the dominant size, then allocate a small overage for infill.
Confirm thickness and nominal dimensions before stone sourcing, as “calibrated” and “riven” can vary.
Record quantities per section to avoid over-ordering.
Calculate Base Gravel Volume
A solid base starts with an accurate volume calculation, because gravel is sold by the tonne but specified on site by depth. Measure the pathway’s length and average width in metres, then multiply by your compacted base depth (typically 75–100 mm). That gives cubic metres.
Convert to tonnes by multiplying by the supplier’s bulk density (often 1.6–1.8 t/m³ for MOT Type 1). Add 10% for compaction and trimming around curves, edging, Garden lighting conduits, and Plant integration beds.
- Mark out the route with string lines and record dimensions at 1 m intervals.
- Use depth = finished level minus stone thickness minus bedding layer.
- Calculate: volume = L × W × D; tonnes = volume × density × 1.10.
Gather Tools for Building a Stone Pathway
Before you start laying stone, gather and check the core tools you’ll need to excavate, level, and compact the base accurately: a tape measure and line with stakes for setting out, a spade and trenching shovel for cutting clean edges, a rake and wheelbarrow for shifting and grading sub-base, a spirit level and straightedge for controlling falls, and a rubber mallet for bedding stones without chipping.
Add a hand tamper or vibrating plate (hire) to achieve proper compaction, plus a garden hoe for trimming high spots. Keep a lump hammer and cold chisel for dressing cuts, and knee pads for prolonged setting.
For a decorative border, bring edging trowels, masonry pins, and a pointing tool. If you’re planning lighting options, you’ll also need a cable detector and conduit cutters.
Mark the Stone Pathway Edges With Paint and String
You’ll first choose the pathway alignment, checking sightlines, gradients, and clearances against fixed features such as drains, walls, and planting beds.
Set taut string guide lines between stakes to lock in straight runs or consistent curves, measuring offsets from reference points to keep the route true.
Then paint the edge boundaries along the strings with marking paint, producing crisp cut lines you can follow during excavation.
Choose Pathway Alignment
Once you’ve settled on the route, lock the pathway alignment in place by marking both edges on the ground with line-marking paint and taut string lines. Keep the line readable from standing height, and maintain consistent width for safe footing and clean cuts later.
Aim for landscape integration by following natural desire lines, skirting root zones, and respecting drainage falls, so water won’t pond along the edge. Use smooth curves rather than tight bends; they’re easier to excavate and look more intentional.
- Spray short dashes, not a continuous band, so you can tweak curves without overpainting.
- Step back every few metres to check sightlines from key viewpoints and entrances.
- Confirm clearances to doors, steps, and beds, keeping enough room for edging and bedding layers.
Set String Guide Lines
Although the paint line shows the general route, set taut string guide lines to lock in the exact pathway edges and keep excavation and edging straight.
Drive timber stakes just outside the intended edges at 1–1.5 m intervals, adding extra stakes on curves.
Run masonry line between stakes on each side, pulling it tight and tying off with a clove hitch.
Use a line level or spirit level to keep both strings consistent, and measure the finished path width between strings at several points.
Adjust stakes until the width is uniform and curves are smooth.
Check squareness at junctions using the 3-4-5 method.
Once satisfied, you’ve created a reliable marking boundary that won’t shift as you work.
Recheck tension before digging begins.
Paint Edge Boundaries
Before you lift a spade, define the pathway edges with line-marking spray paint so the layout stays visible from every angle and survives light foot traffic. Use your string lines from the previous step as your datum, then paint boundaries just outside the string to account for edging and bedding depth. Keep the can upright, spray in short bursts, and aim for a crisp, continuous line. For curves, shift the string in small increments and repaint until the radius reads cleanly.
- Peg both ends, tension the string, and check it’s square to fixed features.
- Spray boundary marking along the string, then lift the string and repaint any gaps.
- Walk the route, view from doorways, and adjust the paint boundaries before excavation begins.
Excavate to the Right Depth for Your Base
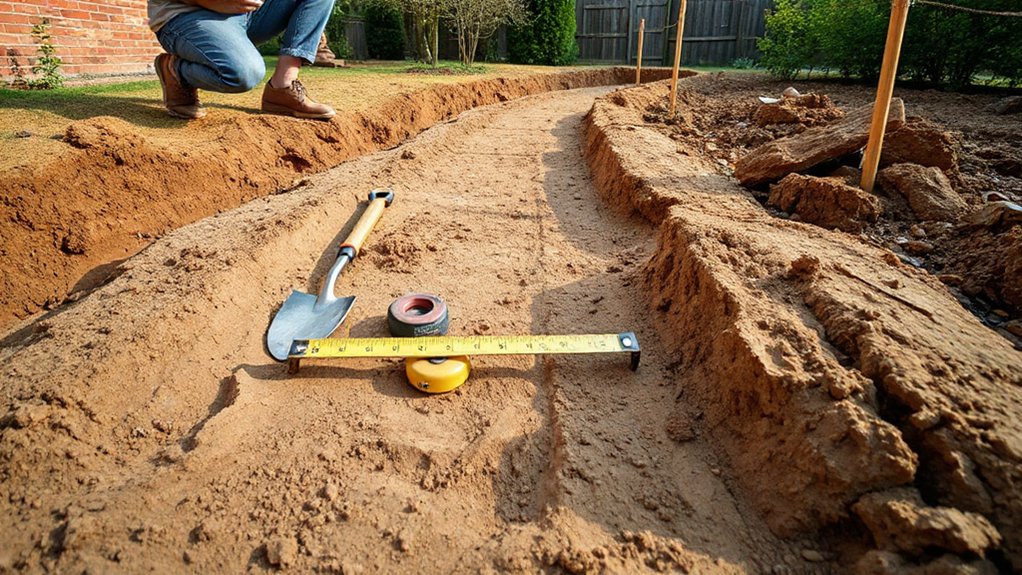
To get a stable, long-lasting hardscape, you’ll need to excavate deep enough to accommodate both the compacted sub-base and the bedding layer without leaving the finished surface proud or low.
Set your target by adding stone thickness plus 30–50 mm bedding sand and 100–150 mm MOT Type 1 (more on soft ground).
Confirm conditions with Soil testing: dig small trial holes, check for clay, peat, or saturated silt, and adjust depth or sub-base thickness accordingly.
Maintain a consistent formation level using taut stringlines and a spirit level, allowing a 1:60 fall away from buildings for drainage.
Excavate beyond the path edges by 100 mm to support restraints.
Where Plant integration matters, keep clear of major roots and allow space for edging and future mulch without undermining the base.
Add Landscape Fabric (When It Helps, When It Hurts)
You’ll use landscape fabric most effectively as a separation layer between subgrade and your granular base, or under decorative gravel to limit fines migration and reduce weed establishment.
You shouldn’t rely on it for drainage or structural strength, and you must keep it flat and fully covered, because UV exposure and wrinkling lead to tearing and soft spots.
It can cause problems where it clogs with silt, traps water above the subgrade, or creates a slip plane that lets the base shear under load.
Best Uses For Fabric
Where does landscape fabric actually earn its keep in DIY hardscaping? You’ll get the best results when you treat it as a separator and temporary weed barrier beneath your stone path build-up, not as a cure-all. Good Fabric installation starts on a graded, compacted sub-base: rake it smooth, roll fabric tight, and overlap joints by 150–200 mm so fines can’t migrate.
- Under a crushed-stone base to keep soil and aggregate from mixing, preserving drainage and compaction.
- Over subsoil in boggy spots to reduce pumping and rutting while you bed the pathway.
- Beneath decorative gravel shoulders to limit weed germination and make raking and topping-up cleaner.
Pin it every 300–500 mm, then cover promptly to prevent UV degradation.
When Fabric Causes Problems
Although landscape fabric can stabilise a base and slow early weed growth, it starts causing problems when it traps fines, blocks drainage, or gets misused as a permanent weed-proof layer under decorative stone.
Once silt migrates into the weave, it forms a thin soil layer that seeds exploit, so your weed control actually degrades. Water then ponds above the fabric, softening the sub-base and pumping slurry into joints under footfall.
If you lay fabric directly under gravel without a properly compacted, graded sub-base, the stone grinds it, tears it, and you’ll see Fabric problems: ruts, exposed edges, and uneven settlement. Overlapping sheets can create ridges that telegraph through the path.
If you must use it, keep it off clay, avoid impermeable membranes, and maintain drainage falls.
Build the Gravel Base and Compact It
Once the excavation hits the correct depth and you’ve confirmed the levels, start building the sub-base with a well-graded crushed aggregate (typically MOT Type 1) laid in 50–75 mm lifts. Spread each lift evenly with a rake, then check falls with a straightedge and spirit level so water runs off the path, not into borders—practical Gardening tips that support good garden design. Lightly mist dusty stone so it binds, then compact thoroughly.
Tip in aggregate, pull it tight to the edges, and keep thickness consistent.
Run a plate compactor in overlapping passes, working from edges towards the centre.
Repeat lift-and-compact until you reach the required build-up, with no soft spots underfoot.
Re-check levels after compaction; correct hollows by adding more aggregate and re-compacting.
Add a Leveling Layer: Sand or Stone Dust
After you’ve compacted the sub-base and confirmed the falls, add a 20–30 mm levelling layer of sharp sand or stone dust to create a uniform bedding surface for your pavers.
Tip it in small piles, then rake roughly to grade without disturbing the base.
Use screed rails (25 mm conduit or timber battens) set parallel, then pull a straightedge across in smooth passes to strike off to a consistent thickness.
Don’t compact this layer; you’ll seat pavers into it later.
Keep the material dry and free of clay, and remove stones that could cause high spots.
Work in sections so you don’t walk on screeded areas.
Trim edges neatly to suit decorative plantings and leave clear lines for lighting accents, cabling, and housings.
Set Slope and Drainage So Water Sheds
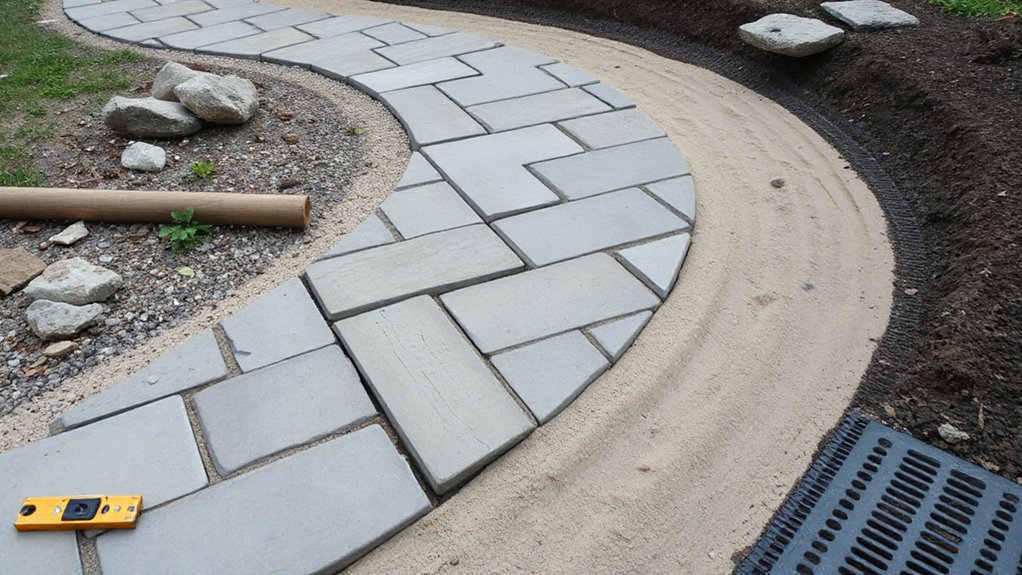
Because water will always take the easiest path, you need to build the fall into the finished surface so it drains away from buildings and doesn’t pond on joints.
Start your drainage planning by setting a consistent crossfall of 1:60 to 1:40 (about 1.5–2.5%) across the path, then keep longitudinal grades gentle so stones don’t creep.
- Peg two taut string lines: one at finished level, one showing the fall, and check with a line level.
- Use a straightedge and spirit level to confirm the bedding follows the strings; make slope adjustments by shaving highs, topping lows, and re-screeding.
- Where water concentrates, form a shallow swale or add a compacted granular strip beneath joints to guide flow to planting beds.
Install Edging to Keep Stones From Spreading
Get the fall right and water will shed as planned; the next job is to lock the layout so that slope doesn’t slowly flatten as the paving migrates.
Set edging lines with taut string, then trench to the edging depth plus 25–50 mm for bedding.
Choose edging materials to suit loads: steel or aluminium for clean curves, concrete kerbs for driveable edges, treated timber only where it won’t stay wet.
Use proven installation techniques: bed the edge in compacted Type 1, haunch rigid units with a lean concrete fillet, and pin flexible edging with galvanised spikes at 300–450 mm centres.
Keep the top of the edging fractionally below finished stone height to hide it, and check alignment with a straightedge.
Dry-Fit Stones: Spacing, Cuts, and Layout
With the edging fixed, you can now dry-fit the stones to prove the pattern, control joint width, and minimise awkward slivers before any bedding goes down.
Start from the most visible edge and work outwards, keeping your intended joint consistent with spacers or offcuts. Rotate each stone to find its best face and grain, then mark any clashes with chalk.
Where you need shaping, score cut lines and plan controlled stone carving rather than random nibbling, so edges read clean and joints stay even. If you’re building decorative mosaics, dry-lay the feature panel as a module and photograph it for reference.
- Set full stones first, then infill gaps.
- Stagger joints to avoid continuous seams.
- Keep cut edges to the least-visible sides.
Set and Level Each Stone Firmly
Once you’re happy the dry-fit layout works, lift one stone at a time and bed it properly so it can’t rock, creep, or settle unevenly later. Scrape high spots, top up low spots with compactable sharp sand or fine grit, and re-compact the sub-base beneath with a hand tamper.
Set the stone down, then tap it with a rubber mallet across the surface to seat it evenly without bruising edges. Check level in both directions with a spirit level; introduce a slight fall for drainage rather than dead-flat.
Use a straightedge to keep adjacent stones flush and toe-safe. Where you’re using Decorative edging, align the stone faces parallel and lock edging stakes tight.
Maintain Moisture barriers under the bedding layer.
Fill Joints: Polymeric Sand, Gravel, or Soil
After you’ve set and levelled the stones, fill the joints promptly to lock the pattern, resist lateral creep, and control weed growth. Effective joint filling depends on material selection, joint width, and permeability.
Brush your chosen infill diagonally so you don’t drag material back out, then top up until the joints are fully packed and the stone faces are clean.
- Polymeric sand: for tight joints (about 3–20 mm); sweep in dry, compact with light vibration, mist gently to activate binders.
- Fine gravel (2–5 mm): suits wider gaps; rake in lifts, tamp with a rubber mallet, and keep it slightly below the stone edge.
- Soil: for a softer, planted look; work screened loam in firmly and water lightly to settle.
Troubleshoot Rocking Stones, Weeds, and Low Spots
Although a properly built base should hold each stone firm, you’ll still see the same three faults crop up in DIY hardscaping: rocking units from poor bedding contact, weeds exploiting light-filled joints, and low spots caused by settlement or inadequate compaction.
To restore rock stability, lift the rocking stone, scrape out loose bedding, and re-lay on a fresh 10–15 mm screeded layer of sharp sand or grit. Tap with a rubber mallet, then check for full bearing with a straightedge.
For weed prevention, remove growth to the root, top up joints, and compact polymeric sand; mist lightly so it binds without washing out.
If a low spot holds water, excavate to the sub-base, re-compact in 50 mm lifts, re-level, and reset the stone flush.
Frequently Asked Questions
Do I Need a Permit or HOA Approval for a Stone Pathway?
You might need Permit requirements or HOA approval; it depends on local council rules and your covenant. You should check planning portals, setbacks, drainage changes, and listed-building constraints, then get written HOA confirmation before work starts.
How Do I Protect Nearby Tree Roots While Building the Path?
You protect roots by acting like the Tree Root Protection police: hand-dig, keep excavation precautions shallow (50–75mm), avoid cuts, use an air spade, install geotextile, then add sharp sand bedding, not hardcore.
What’s the Best Way to Keep Ants From Nesting Between Stones?
You’ll keep ants out by compacting a well-graded sub-base and locking joints with polymeric sand. For Ant deterrents and nesting prevention, top up joints, avoid organic debris, and spot-treat with diatomaceous earth.
How Do I Prevent Stone Surfaces From Becoming Slippery in Winter?
Why let winter catch you out? Apply Anti slip treatments to stone and keep joints clear for drainage. Choose Ice melt options like calcium magnesium acetate over rock salt. Brush on grit-based sealers, and remove snow promptly.
How Should I Clean and Seal the Stones After Installation?
Clean stones with a stiff brush and pH-neutral detergent; rinse thoroughly and let them dry 48 hours. For stone cleaning, remove efflorescence using a mild acid wash. Apply sealing techniques: two thin coats, breathable sealer.
Conclusion
Now you’ve planned the route, chosen the pattern, selected the stone, and built the right base. You’ve measured accurately, dry-fitted carefully, set each unit level, and packed the joints tight. Keep checking alignment, keep topping up jointing, keep brushing debris clear, and keep drainage open. If a stone rocks, lift and re-bed it; if weeds appear, re-sand and compact; if dips form, regrade promptly. Maintain it, and it’ll perform year-round.





