

Start with the wall you see first when you walk in, ideally a clean run behind a sofa or headboard, and avoid damp, doors, or cracked render. For a beginner win, you can paint a bold block or stripe layout using low-tack tape, a level, and pencil marks, after washing with sugar soap, filling, and sanding. Prefer low-sheen matt or eggshell for UK durability. You’ll also find simple slats, decals, and board-and-batten options next.
Choose the Best Wall for an Accent
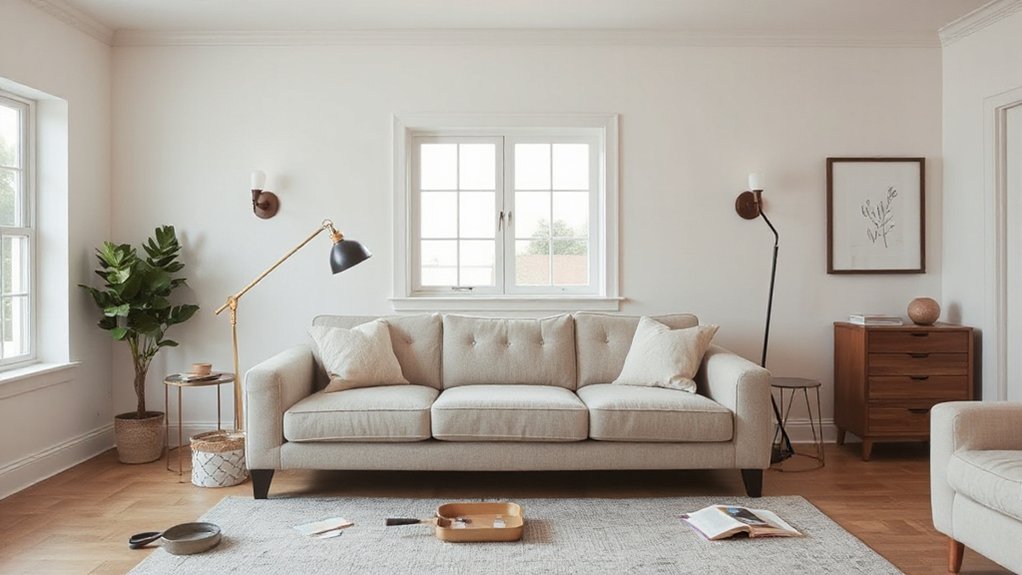
Although you might be tempted to pick the first empty surface you see, the best accent wall is the one your eye naturally lands on when you enter the room—typically the wall behind the sofa, the headboard wall in a bedroom, or the chimney breast in a living space. Check sightlines from the doorway and main seating, then verify the wall isn’t broken up by too many doors, radiators, or awkward alcoves.
Assess wall material before you commit: fresh plaster needs curing, older lath-and-plaster may crumble, and dot-and-dab plasterboard can hide voids. Make structural considerations early—avoid walls with persistent damp, loose render, or movement cracks, and keep clear of boiler flues, sockets, and trunking.
You’ll get a cleaner, sharper result.
Pick Your DIY Accent Wall Style (Budget, Time, Renter-Safe)
Once you’ve chosen the right wall, pick a style that fits your budget, your available time, and whether you need a renter‑safe finish.
Start with Budget considerations: paint is usually cheapest, while timber slats, panelling, and acoustic boards cost more and need tools, fixings, and possibly a stud finder.
If you’ve only got an afternoon, choose peel‑and‑stick wallpaper, decals, or a simple taped geometric design.
If you can spare a weekend, try half‑height panelling kits, picture‑frame moulding, or a limewash‑look effect using ready-mixed products.
Check Renter restrictions before you buy materials: favour removable adhesives, Command strips, and freestanding features, and avoid drilling, heavy grab adhesives, and anything that damages plaster.
Plan waste, offcuts, and returns from UK DIY chains.
Choose Paint Color and Sheen That Work
Start by choosing a colour mood that suits the room’s purpose—calming neutrals for bedrooms, richer tones for snug living spaces, or bright shades for a home office.
You’ll need to test sample pots on the wall and check them morning, afternoon, and under your main evening lighting, because UK daylight and warm bulbs can shift undertones dramatically.
Finish by selecting the right sheen: matt hides uneven plaster, eggshell balances durability and softness, and satin or soft sheen stands up best in high-traffic areas.
Pick A Color Mood
Before you buy a single tin of paint, decide the mood you want your accent wall to set—cosy and cocooning, bright and upbeat, or calm and minimalist—then choose a colour and sheen that support it in your room’s light.
Use Color psychology for mood enhancement: warm terracotta or inky green can feel snug, while soft sage or powder blue quietens a busy space.
Match sheen to how you live; matt hides uneven plaster, while eggshell wipes clean in family homes.
- Cosy: deeper, warmer tones plus matt for a velvety finish
- Upbeat: clearer hues with eggshell to sharpen edges and bounce light
- Calm: muted neutrals in matt to reduce glare and visual noise
Keep your palette tied to existing flooring, skirting, and soft furnishings for cohesion.
Test Samples In Lighting
Although a paint swatch can look spot-on in the shop, your room’s orientation, glazing, and bulb colour temperature will shift it dramatically, so you need to test samples in situ before committing.
Paint A4-sized blocks on the actual accent wall, not on card, and leave a white border so surrounding colour doesn’t skew it.
Run a proper lighting test: view the patches at breakfast, midday, dusk, and at night with your usual lamps.
Switch between warm (2700K) and cooler (4000K) bulbs if you’ve got mixed fittings.
Check sample brightness from multiple angles, especially near bay windows, radiators, and alcoves where shadows pool.
Stand back to sofa distance, then up close, and note any unwanted undertones.
Repeat for two finalists before buying.
Choose The Right Sheen
When you’ve nailed your colour choice, the sheen you pick will decide whether your accent wall looks plush and forgiving or crisp and architectural. In UK homes, light is often cool and changeable, so Sheen selection matters as much as colour: higher sheen bounces daylight and highlights every dent, while flatter finishes soften imperfections.
- Matt: best for older plaster, low glare, hides patching, but marks more easily.
- Eggshell/Satin: balanced reflectivity, wipes clean, ideal for hallways and family rooms.
- Silk/Gloss: sharpest contrast, great on panelling, but it’ll spotlight roller lines.
Match sheen to how you live: kids, pets, and radiators call for durability. Do a small test patch, then commit to consistent strokes for professional Finishing touches.
Prep the Wall: Clean, Patch, and Tape
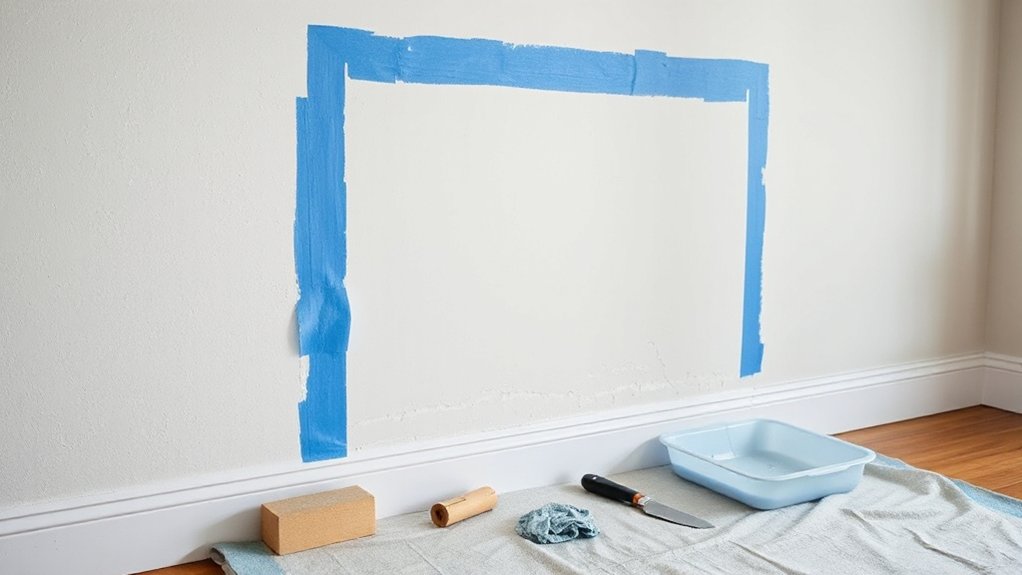
To get a crisp, long-lasting accent wall, you’ll need to prep the surface properly: wash off grease and dust with sugar soap, fill dents and cracks with a ready-mixed filler, then sand smooth and wipe down again.
Check wall texture under a raking light; any nibs or proud filler will telegraph through once painted. For sound paint preparation, scrape away loose flakes, then feather edges with 120–180 grit so gradual changes disappear.
Vacuum the dust, and run a tack cloth lightly if you’ve got one.
Protect sockets by switching off at the consumer unit, removing plates, and masking the back boxes. Finally, tape skirting, coving, and adjacent walls with quality low-tack painter’s tape, burnishing the edge for a sharp line.
Fast Paint Wins: Primer, Edging, and “One-Coat” Tools
Since good prep’s already done, you can speed up the painting stage by picking the right primer, cutting in cleanly, and using tools designed for high coverage.
Match primer to your wall: stain-blocking for old marks, adhesion for glossy paint, and a tinted base to reduce topcoat passes—simple primer techniques that save time.
Cut in first so your roller can fly; use quality edging tools, not a wobbly brush. A mini roller hugs corners faster, and a paint guard keeps skirting boards crisp.
For “one-coat” claims, trust the tool, not the tin: load a microfibre roller (10–12mm nap), keep a wet edge, and back-roll once.
- Primer choice prevents bleed-through and patch flash
- Clean edges make the finish look professional
- High-load rollers cut labour without shortcuts
Make a Color-Block Accent Wall (Easy Layout)
Start by choosing complementary colours that suit your room’s light and existing furnishings.
Then plan your blocks to balance bold and neutral tones.
Mark the layout with a tape measure and pencil.
Apply low-tack masking tape with firm pressure along the edges, and seal it for crisp lines.
Paint each section in sequence, let it go touch-dry, then peel the tape back at a 45° angle to reveal sharp colour blocks.
Choose Complementary Colors
Two well-chosen complementary colours can turn a plain wall into a crisp, modern colour-block feature without complicated measuring. Start with Color harmony: pair opposites on the colour wheel (blue/orange, green/magenta) so the contrast looks intentional, not jarring.
Then focus on shade selection by matching undertones to your room’s light; north-facing spaces in the UK prefer warmer versions, while south-facing rooms can take cooler, cleaner hues. Test paint cards at different times of day and against your skirting and flooring, so the block feels anchored.
- Pick one dominant colour (about 70%) and one accent (30%) for balance.
- Keep the intensity consistent: either both muted or both saturated.
- Tie in existing finishes (oak, brass, grey carpet) to avoid clashes.
Mark Your Block Layout
Before you crack open the tins, mark out your colour-block layout so the edges land exactly where you want them and the finished wall looks deliberate rather than “eyeballed”.
Start with accurate wall measurement: note total width and height, then decide block sizes in millimetres so they align with sockets, radiators, and skirting lines.
Use a steel tape, a spirit level, and a pencil rather than marker, which can bleed through.
Apply reliable marking techniques: snap a chalk line for long horizontals, and use a laser level for verticals if you’ve got one.
Check squareness by measuring diagonals; if they differ, adjust blocks to hide any wonkiness near corners.
Lightly label each block with its colour name to prevent confusion later.
Tape, Paint, And Reveal
Once your layout lines look spot-on, lock them in with quality painter’s tape and a steady painting order. Burnish the tape edge with a plastic card, then seal it by brushing on the base colour first; this blocks bleed and keeps your blocks crisp. Let that flash off, then roll your feature colour from tape toward the centre in thin coats, keeping a wet edge.
- Crisp lines come from pressure and patience, not extra paint
- Clean blocks rely on sequencing: base, colour, then reveal
- A tidy finish depends on control at the edges
For tape removal, pull at a 45° angle while the paint’s just tacky; score with a sharp blade if it skins. Fix slips with paint touch ups using an artist brush.
Paint Crisp Stripes With Tape (No Bleed Tips)
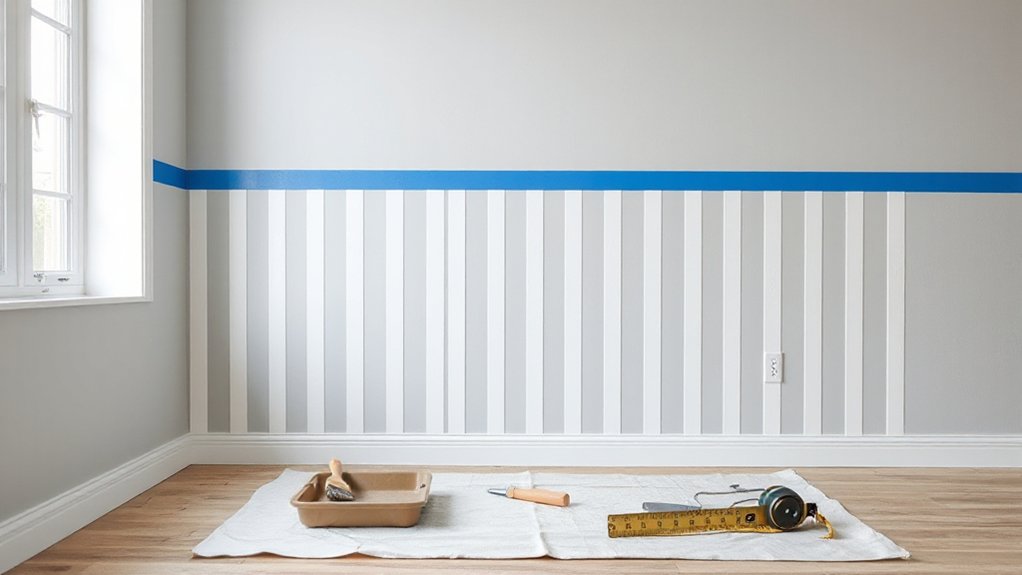
Although striped accent walls look deceptively simple, you’ll only get that sharp, designer finish if you control paint bleed from the start. Start with a fully cured base coat (leave it overnight in typical UK humidity). Mark stripe positions with a pencil and spirit level, then apply low-tack masking tape using firm, even pressure.
For the best Tape techniques, run a plastic scraper or old bank card along the tape edge to seal it. For bleed prevention, paint a thin “seal coat” of your base colour over the tape edge first; it blocks gaps and dries fast.
Then roll your stripe colour in light passes, working away from the tape edge. Remove tape while paint’s still slightly wet, pulling back on itself at 45°. Touch up with a fine brush.
Stencil a Painted Pattern Without It Looking DIY
To stencil a painted pattern without it looking DIY, you’ve got to prioritise crisp edges and clean lines, starting with a firmly secured stencil and minimal paint on the roller or brush.
You’ll keep it sharp by working in light passes and lifting the stencil straight off before any paint skins over.
Plan a repeatable layout and spacing with a measured grid and consistent reference points, so every repeat lands perfectly across the wall.
Crisp Edges, Clean Lines
If you want a stencilled accent wall to read as bespoke rather than “done at the weekend”, you’ve got to prioritise crisp edges and consistent spacing from the start. Sharp edges, clean lines come from prep and control, not luck. Degrease with sugar soap, let it dry, then key glossy paint with 240-grit so the stencil sits flat.
Seal the stencil’s perimeter with low-tack painter’s tape and burnish with a plastic card to stop bleed. Use a dense foam roller or stencil brush and offload paint onto a tray liner; you want almost-dry passes, not wet coverage.
- Control paint load: less paint equals less seep.
- Control contact: keep the stencil fully pressed down.
- Control removal: lift tape and stencil slowly while tacky.
Repeatable Layout And Spacing
Once you’ve nailed crisp edges, the finish still falls apart fast without a repeatable layout that keeps every motif level, centred, and evenly spaced.
Start by finding your datum: mark a light pencil centre line and a horizontal level line using a spirit level or laser. Measure your stencil’s full repeat, including any overlap tabs, then cut a cardboard spacer to that exact length so you can step the design along without guesswork.
Snap chalk lines if you’re covering a whole wall. Work from the centre out to avoid skinny end gaps. Check every third placement with a tape measure and level to lock in consistent spacing.
If the wall’s out of square, adjust the border, not the repeatable pattern.
Peel-and-Stick Wallpaper for Renters (Install + Removal)
Although you might assume wallpapering is a permanent commitment, peel-and-stick wallpaper gives renters a genuinely low-risk way to create an accent wall with sharp, professional-looking results.
Start with a clean, fully dry surface; wipe with sugar soap, then let it cure overnight.
Measure the wall, plumb a vertical guideline with a spirit level, and hang from the top down, peeling a little backing at a time while smoothing with a plastic squeegee to push air out.
Overlap or butt seams exactly as the print requires, and trim at skirting boards with a sharp snap-off blade.
- Test a small offcut for 48 hours to check paint lift.
- Warm edges with a hairdryer for easier repositioning.
- Use slow peel, low angle, and gentle heat as removal tips for renters’ wallpaper.
Budget DIY Murals: Decals, Projectors, Paint Pens
If you want mural impact without mural prices, you can use peel-and-stick decal murals for crisp shapes and fast, renter-friendly changes.
For a bespoke look, you’ll get reliable results by projecting your design onto the wall, tracing key lines lightly, then sharpening edges with paint pens.
You’ll keep costs down and control the finish by testing adhesion and ink flow on a hidden patch first, especially on freshly painted UK plaster.
Peel-And-Stick Decal Murals
Why commit to paint when peel-and-stick decal murals let you transform a wall in minutes with no mess and minimal tools? You’ll get big impact on a UK budget, and you can remove them cleanly when you move or change your mind.
Start by checking wall texture: matte, smooth plaster and primed MDF take decals best, while heavy orange-peel or flaky paint can ruin adhesion.
For decal durability, buy PVC-free or thick vinyl rated for interior walls, and let the room sit above 15°C so the adhesive cures properly.
- Measure, mark a level centreline, then work outward to keep panels aligned.
- Smooth with a plastic squeegee, pushing air to edges to avoid bubbles.
- Seal edges with firm pressure, especially near radiators and sunlight.
Projector Tracing With Paint Pens
When you want a custom mural without freehand stress, projector tracing paired with paint pens gives you crisp lines and repeatable shapes on a tight UK budget. Set up your projector on a tripod, square it to the wall, and choose high-contrast artwork. Use low-tack masking tape to mark reference points, then lightly trace key outlines in pencil so you can realign if the projector shifts.
Once you’re confident, switch to paint pens for the final linework. Prime the wall with a matt emulsion (Dulux or Valspar), let it cure, then test pen flow on card. Work from top down to avoid smudging, and keep a microfibre cloth handy for quick wipe-offs while the paint’s wet. Seal with a clear matt varnish for durability.
Add Vertical Wood Slats (Spacing and Leveling)
Before you reach for the nail gun, set out a clear spacing plan and establish a true vertical reference, because even a few millimetres of drift will jump out across the whole wall. Mark a plumb line with a laser level or spirit level, then measure your vertical spacing from that datum, not from the skirting or ceiling, which can be out.
Cut a spacer block to your chosen gap so every slat lands consistently. Check each piece for twist, and dry-fit two or three to confirm the rhythm reads right in UK light.
- A single plumb baseline stops cumulative error.
- Spacer blocks turn judgement into repeatable accuracy.
- Frequent checks keep your leveling techniques honest.
Build a Board-and-Batten Accent Wall
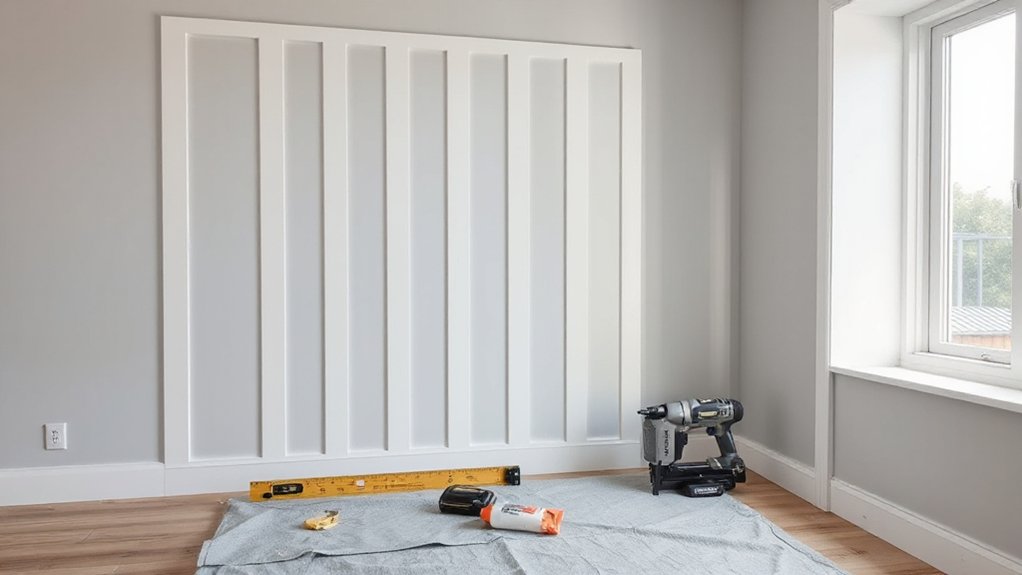
Although board-and-batten looks like a simple grid, you’ll get a sharper, more expensive finish if you treat it like a layout job first and a carpentry job second.
Start by measuring the wall and marking a level datum line; in older UK homes, don’t trust skirting or ceilings. Mock up your spacing with painter’s tape, then adjust for equal margins at corners and around sockets.
Fix a top rail with grab adhesive and a nailer into studs or plugs, then add battens, checking plumb each time.
Use MDF for crisp edges, or primed timber for tougher wall texture. Fill, sand, caulk seams, then paint in a durable eggshell.
Raking lighting effects will highlight any bumps, so prep properly.
Use Faux Brick/Stone Panels (Seams and Outlets)
Even if faux brick or stone panels go up quickly, the finish lives or dies on how you treat seams and sockets. Dry-fit first, then stagger joints like real masonry so Faux brick looks believable. Leave a 2–3mm gap at panel joins, back it with a slim batten, and run colour-matched flexible filler; tool it to mimic mortar lines, then touch in with masonry paint.
For Seams and outlets, isolate power at the consumer unit, remove faceplates, and use a multi-tool to notch panels cleanly so plates sit flush on pattress boxes. Don’t squash cables or bridge gaps.
Focus on:
- Alignment and staggered courses
- Hidden backing for strong seams
- Flush, safe outlet detailing
Accent Wall Mistakes to Avoid (and Quick Fixes)
When an accent wall looks “off”, it’s usually down to a handful of avoidable errors—poor prep, rushed layout, the wrong paint finish, or messy cut-ins around sockets and skirting.
Start by filling and sanding, then mist-coat fresh plaster and degrease with sugar soap so paint bonds evenly.
Don’t pick colour in isolation: test 2–3 samples in morning and evening; follow lighting tips by checking under your actual bulbs, not shop LEDs.
If the wall feels heavy, switch to a matt or durable matt; save silk for woodwork.
Keep lines sharp: mask, cut in with a quality angled brush, and isolate power before removing faceplates.
Finally, nail furniture coordination—centre art or headboards, and avoid pushing bulky pieces against patterned features.
Quick fix: add a picture rail or slim shelf to reset proportions.
Frequently Asked Questions
How Much Does a Beginner Accent Wall Typically Cost Overall?
You’ll typically spend £60–£250 overall, depending on paint, wallpaper, or panels and tool needs. For cost estimation, price materials first; for budget tips, buy tester pots, reuse rollers, and avoid costly feature lighting.
Can I Create an Accent Wall Without Moving Heavy Furniture?
Why shift a sofa at all? You can create an accent wall without moving heavy furniture; pull pieces forward slightly, cover with dust sheets, handle wall prep carefully, and choose low-odour paint selection for easier UK ventilation.
How Long Should I Wait Before Hanging Art on the New Wall?
Wait 24–48 hours before hanging art; allow proper drying time. If you’ve used thick coats or humid conditions, wait 72 hours. Prioritise wall preparation: guarantee paint’s cured, anchors suit plasterboard, fixings level.
Will an Accent Wall Affect My Home’s Resale Value?
Say you sell a Bristol terrace: a bold navy Wall paint feature boosts viewings when it’s tidy and neutral-ish. You’ll usually protect resale if you keep Color contrast controlled, and you’ll repaint easily.
What Lighting Changes Make an Accent Wall Look Better at Night?
You’ll improve it by layering Ambient lighting with dimmable wall sconces, uplights, and warm LED strips. Aim for 2700–3000K, angle light to graze texture, and boost Color contrast by lighting nearby surfaces more softly.
Conclusion
You’ve now got everything you need to pull off a beginner-friendly DIY accent wall with confidence. Choose the right wall, match the style to your budget and tenancy rules, and don’t skip prep—cleaning, filling, and sharp tape lines make all the difference. Use the right sheen, prime when needed, and measure twice for slats or battens. Handle seams and sockets carefully on panels. Done properly, your room will sing like a well-tuned choir.


