
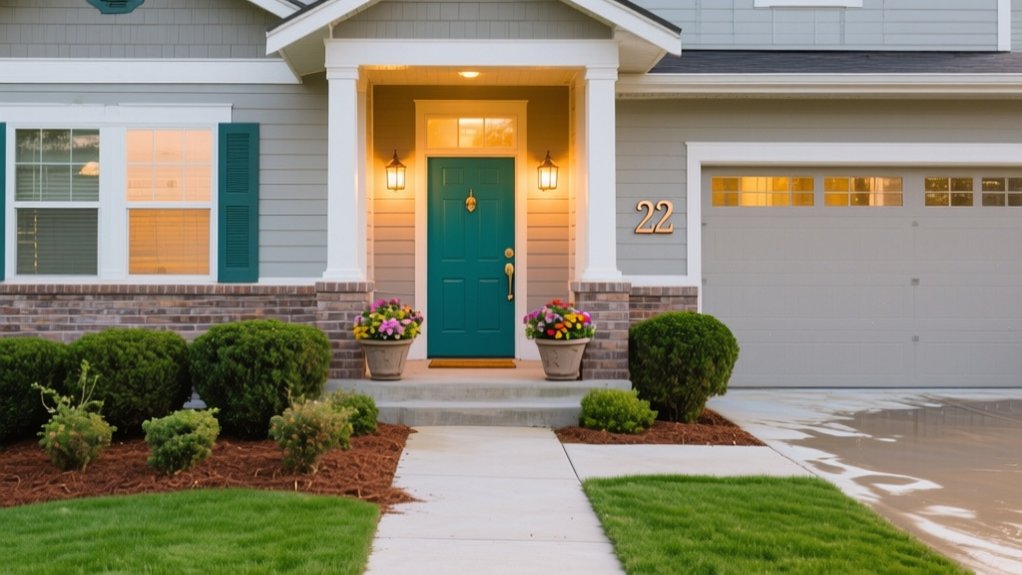
Boost curb appeal fast by starting at your front door: clean, sand, prime, and paint it in a standout satin or semi-gloss exterior enamel that suits your home’s undertones. Swap dated house numbers for bold 4–6 inch modern digits and match the mailbox finish for a cohesive look. Upgrade porch lights to fixtures sized about 1/4–1/3 of your door height, then edge the lawn, refresh mulch, and add symmetrical planters near the entry for instant polish. Keep going for a simple weekend game plan.
Choose Curb Appeal Projects by Time and Budget
Before you buy a single plant or gallon of paint, pick curb appeal projects based on two filters you can’t ignore: how much time you realistically have and what you’re willing to spend.
If you’ve got one afternoon and under $100, focus on tidy, high-contrast wins: edge the walkway, weed beds, refresh mulch, and replace worn house numbers.
With a weekend and $200–$500, layer in landscape lighting along the path and uplights on a feature tree for a modern, “designed” look.
If your budget’s higher, upgrade outdoor furniture on the porch—one cohesive set in neutral tones reads intentional, not cluttered.
Always price materials first, then schedule tasks by cure times and weather, so you don’t start what you can’t finish.
Paint the Front Door (Best Fast Upgrade)
Paint your front door for the fastest curb-appeal win, and choose a standout color that complements your siding, trim, and today’s popular hardware finishes.
You’ll get a pro result by cleaning, sanding, and priming properly—especially if you’re covering stains, bare spots, or switching from oil to latex.
Finish strong with two smooth, durable coats designed for exterior doors so it cures hard and resists scuffs, sun, and rain.
Choose A Standout Color
If you want the biggest curb-appeal payoff in a single afternoon, choose a standout front-door color that complements your home’s exterior instead of blending into it. Start with your fixed elements: roof, brick, stone, and hardscaping.
Then pick a hue that contrasts just enough—ink black on light siding, deep navy with warm brick, or rich olive against cream. Use Color psychology to guide your choice: red reads energetic and welcoming, blue feels calm and trustworthy, and charcoal looks modern and upscale.
For trend-aware options, consider muted jewel tones, warm terracotta, or a saturated forest green. Finally, match sheen to sun exposure and traffic; a quality exterior enamel boosts paint durability and resists scuffs and fading long-term.
Prep And Prime Properly
Since even the best color can look amateur without a solid base, you’ll get the cleanest, longest-lasting front-door refresh by prepping and priming with intent. Start by pulling the door hardware, labeling screws, and protecting your threshold with rosin paper.
Wash off oils and sunscreen smudges using a degreasing cleaner, then rinse and let it dry fully. Scuff-sand glossy areas with 150–220 grit so primer bonds, and feather any chips to a smooth edge. Fill dings with exterior-ready filler, then spot-sand. Wipe dust with a tack cloth.
Tape hinges and glass neatly, and mask nearby trim to keep lines crisp. Choose a bonding primer matched to your door’s material and existing finish, especially if your entry sits under hot landscape lighting or near outdoor furniture that sheds grit.
Apply Smooth Durable Coats
Once your primer cures, your technique—not just your color—determines whether the door reads high-end or hurried.
Choose an exterior enamel in satin or semi-gloss for wipeable durability, then stir well to lock in color consistency.
Cut in edges with a quality angled sash brush, then roll flats with a 4-inch foam or microfiber mini-roller to avoid stipple.
Work top to bottom, keeping a wet edge, and don’t over-brush as it starts to tack.
Apply two thin coats instead of one heavy coat; you’ll get fewer drips and crisper panel lines.
Lightly sand between coats with 220-grit for a smoother feel, even if you like Textured finishes.
Let it cure before rehanging hardware.
Pick a Front Door Color That Fits Your Home
Although trendy hues come and go, the right front door color should complement your home’s architecture, fixed exterior elements (roofing, brick, stone), and undertones in your siding. Start by sampling 2–3 shades on poster board and viewing them morning and evening; sunlight shifts color fast.
If your exterior runs warm, try deep olive, oxblood, or creamy greige. For cool schemes, consider navy, charcoal, or crisp white. Use sheen strategically: satin hides dings better than gloss and still reads fresh.
Match or intentionally contrast your door hardware—matte black pops on light colors, while brass warms darker tones. While you’re upgrading, confirm door security with a solid deadbolt and reinforced strike plate.
Swap in Modern House Numbers and Mailbox
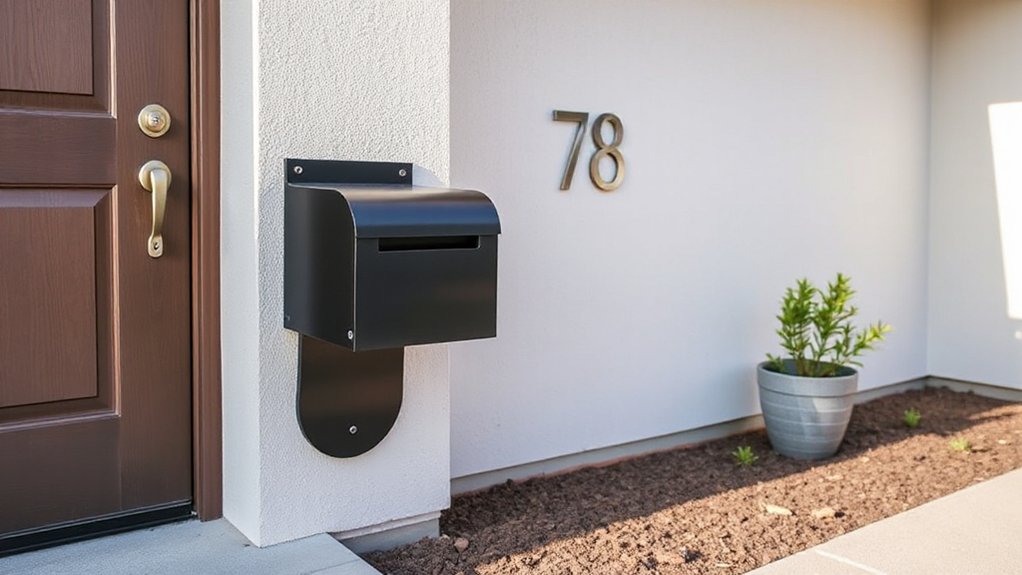
Even if your landscaping’s dialed in, dated house numbers and a scuffed mailbox can make the whole front elevation feel tired. Swap to clean, easy-to-read numbers for quick Modern updates: think matte black, brushed nickel, or warm brass in a simple sans-serif style. Size matters—use 4–6 inch numbers so they’re visible from the street, and mount them level with a template and painter’s tape.
For a Mailbox makeover, replace a dented box with a streamlined wall-mount or post style that matches your hardware finish. Check USPS-approved sizing, then update the post cap and mounting screws for a cohesive look.
Add a fresh flag or subtle vinyl address label, and touch up surrounding trim paint for crisp edges.
Upgrade Porch Lights (Brightness and Style Basics)
If your entry still feels dim or dated at night, upgrading your porch lights delivers a fast curb-appeal win while improving safety and visibility.
Start by sizing fixtures to your door: choose sconces about 1/4 to 1/3 the door’s height, mounted 66–72 inches from the floor.
For brightness, use LED bulbs around 800–1,600 lumens per fixture; go warmer (2700K) for welcoming lighting ambiance or slightly cooler (3000K) for a crisp look.
Add a dusk-to-dawn photocell or motion sensor so you don’t forget to switch them on.
Match finishes to nearby hardware, and pick fixture styles that fit your home—sleek black lanterns, modern cylinders, or classic craftsman boxes.
Keep glass clean for max output.
Add Solar Path Lights to Guide the Walkway
When your front walk disappears after sunset, solar path lights give you an instant curb-appeal upgrade while making every step safer. You’ll create a clear solar pathway that feels intentional, not like an afterthought.
Choose warm-white LEDs (around 2700–3000K) for welcoming lighting ambiance, and pick finishes that match your home’s exterior hardware—black, bronze, or brushed nickel.
Space lights 6–8 feet apart, staggered on alternating sides, to avoid runway glare and highlight landscaping edges. Install them where panels get 6+ hours of sun, and keep them out of sprinkler spray for longer life.
For a modern look, mix low bollard styles with a few subtle spot-style path lights near turns or steps. Walk the route at dusk and adjust placement for balanced coverage.
Replace the Welcome Mat and Tidy the Entry
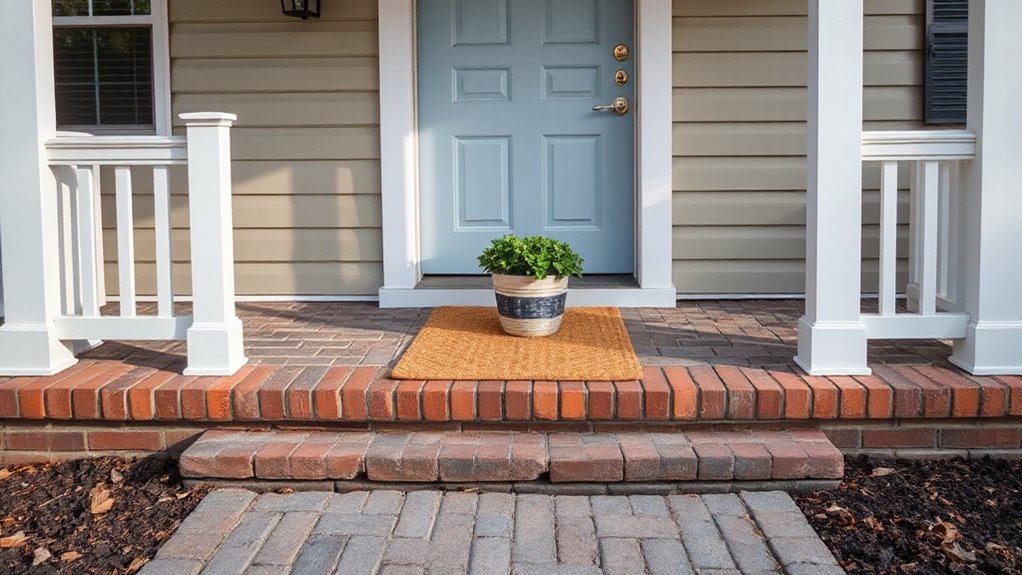
Swap in a fresh, clean-lined welcome mat—think durable coir or a low-profile patterned rug that won’t curl at the edges.
Clear the entry fast by stashing shoes, sweeping debris, and removing any mismatched pots or tired decor that crowds the threshold.
Finish with one or two simple accents, like a modern house-number plaque or a single seasonal planter, so your front door looks intentional and inviting.
Choose A Fresh Mat
One small upgrade can make your entry feel instantly more polished: replace that faded, curled welcome mat and clean up the space around it. Choose a mat sized to your door width (ideally 80–90%) so it looks intentional, not like an afterthought.
Go for low-profile coir or recycled rubber with crisp typography or subtle stripes—both feel current and hide dirt. If your porch is exposed, pick a quick-drying, slip-resistant backing and a darker tone to prevent staining.
Give the area a fast sweep, then rinse the stoop and let it dry before placing the mat. Tie the look into Seasonal planting by echoing pot colors or blooms, and keep it cohesive with your yard work—after Lawn aeration, you’ll track less soil inside with a sturdier scraper-style mat.
Clear And Declutter Entry
Even if your porch is small, a clear, decluttered entry reads expensive and makes every other upgrade look more intentional. Start by pulling everything off the stoop: stray shoes, delivery boxes, old planters, and dead leaves. Sweep corners, shake out the new mat, and scrub the threshold so the doorway looks crisp in photos and in person.
Next, edit what comes back. Keep only what you use daily, and corral it: one package bin, one umbrella stand, one key hook inside. Check entrance security while you’re there—tighten the handle set, clear sightlines to the lock, and angle your doorbell camera unobstructed.
Finally, swap tired seasonal decorations for one clean, weatherproof piece, then store the rest out of view.
Add Simple Entry Accents
Once your entry is cleared and edited, a few simple accents can make it look finished instead of just “clean.” Start with the welcome mat: replace anything faded, curled, or undersized with a low-profile, weatherproof mat that fits the width of the door and complements your home’s exterior (think coir with a clean border, rubber-backed polypropylene, or a layered look with a neutral outdoor rug).
Then tighten up the rest so it reads intentional, not temporary:
- Add garden lighting along the walk or a warm porch sconce bulb for evening polish.
- Group one planter and one lantern; keep colors within your exterior palette.
- Limit outdoor furniture to a single bench or chair, not a mismatched set.
- Hide clutter: slim boot tray, wall hook, and a small lidded bin.
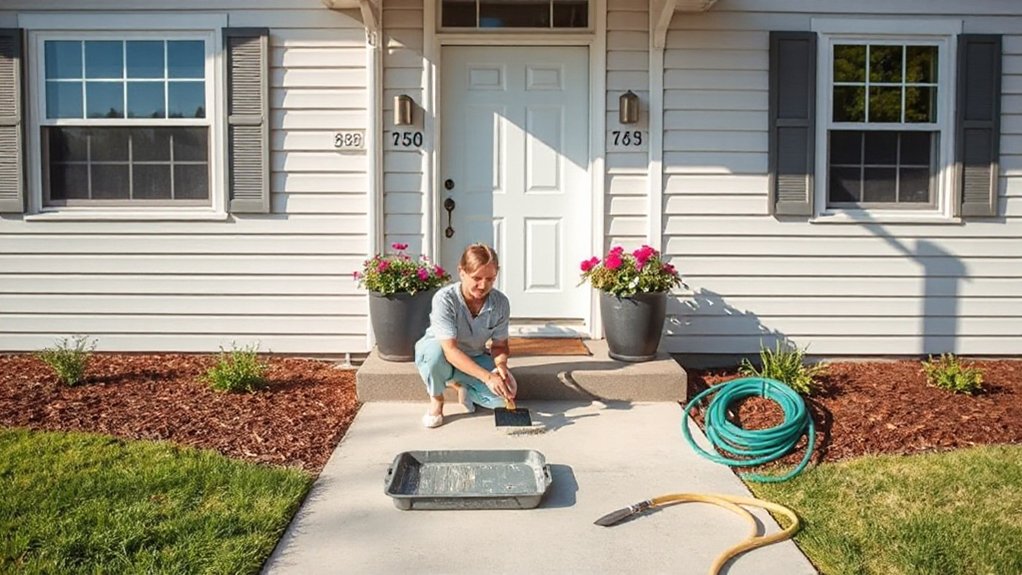
Power Wash the Driveway, Steps, and Sidewalk
After a long season of rain, pollen, and tire grime, your concrete can look dingy no matter how tidy the rest of your yard is. A quick pressure washing session instantly sharpens your driveway, steps, and sidewalk, making the whole entry feel newer.
Start by sweeping grit and pre-treating stains with a concrete cleaner or degreaser. Use a 25-degree tip and keep the wand moving to avoid etching.
For big flat areas, rent a surface cleaning attachment—it’s faster, reduces stripes, and looks more “pro” (a current curb-appeal trend). Work from the house outward so you don’t track sludge back onto clean zones.
Finish by rinsing thoroughly and letting everything dry before parking or walking heavily.
Wear eye protection and closed-toe shoes.
Touch Up Trim and Railing Paint for a Clean Finish
When your trim or railings show chips, scuffs, or sun-faded patches, the whole exterior reads neglected—no matter how fresh the landscaping looks. A targeted paint touch-up is fast outdoor maintenance that delivers a crisp, “recently updated” vibe without repainting everything.
Focus on high-visibility edges first, then blend like a pro.
- Scrape loose paint, feather edges with 120–220 grit, and wipe dust clean.
- Spot-prime bare wood or metal to block stains and prevent rust bleed-through.
- Use a small sash brush or foam roller; keep a damp rag for quick line fixes.
- Match sheen (often satin/semigloss) and paint in shade to avoid lap marks.
Work in thin coats, let them dry fully, and you’ll get that clean, finished look that photographs well.
Mulch Beds for the Quickest Landscaping Win
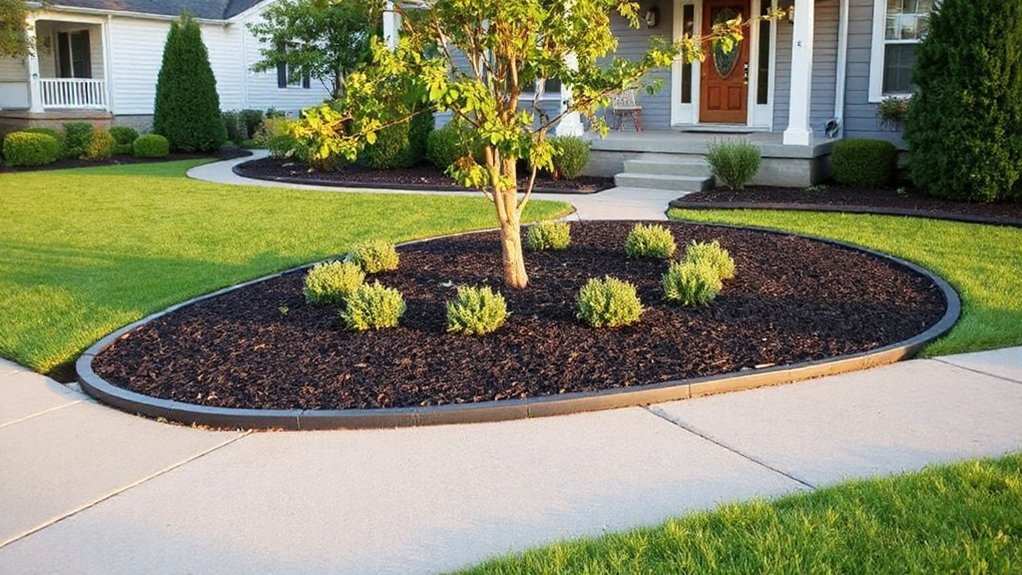
Even if your plants look healthy, fresh mulch instantly sharpens your beds and makes the whole front yard read “maintained” from the curb. Start by redefining edges with a spade for crisp lines that match your garden layout, then pull weeds and rake out old, matted mulch.
For soil preparation, loosen the top inch, top-dress with compost if it’s compacted, and water lightly so the soil isn’t dusty. Choose a modern, cohesive mulch color—dark brown or black for a clean contrast, natural for a softer look.
Spread 2–3 inches, keeping it a few inches back from stems and trunks to prevent rot. Finish by brooming stray pieces off walks and driveway.
Plant Low-Maintenance Shrubs for Structure
If you want your front yard to look polished year-round without weekly fussing, anchor it with a few low-maintenance shrubs that hold their shape and color in every season. You’ll instantly add structure, soften the foundation, and make seasonal flowers look intentional instead of scattered.
For low maintenance landscaping, pick compact varieties that stay tidy with minimal pruning, and group plants in odd numbers for a designer-like rhythm.
- Choose evergreen shrubs like boxwood, inkberry, or dwarf yaupon for consistent form.
- Match mature size to the space so you won’t battle overgrowth later.
- Plant in simple layers: taller near walls, lower toward the walkway.
- Add one accent shrub (hydrangea or spirea) for modern texture and bloom.
Water weekly the first season, then taper off.
Edge the Lawn for Clean, Crisp Lines
Because crisp borders make every other upgrade look more intentional, edge your lawn to create sharp lines between turf, beds, and hardscaping. Start after mowing so you can see the true edge.
Use a half-moon edger or flat spade for beds, and a string trimmer turned vertical for sidewalks and driveways. Cut 1–2 inches deep, then pull loose sod and soil into a bucket so the edge stays clean.
For curves, lay a hose as a guide; for straight runs, snap a chalk line. Keep your trench consistent, and don’t scalp the turf.
This simple lawn edging trick delivers crisp lines that read “pro” from the street. Re-edge monthly in peak growth, and touch up after rainstorms.
Add Planters for Color Near the Front Door

Add planters near your front door to inject instant color and make the entry feel intentional.
Choose a planter size and style that matches your home’s scale and finish, then layer complementary blooms and foliage in staggered heights for a modern, designer look.
Set them where they frame the door without blocking the walkway, so the color reads from the curb and up close.
Choose Planter Size And Style
While your front door might be the focal point, the right planter size and style makes it look intentional—and instantly more inviting. Start by matching scale to your entry: a small pot disappears on wide steps, while an oversized plant container can crowd a narrow landing.
Choose a planter style that echoes your home’s lines—clean cylinders for modern, tapered urns for traditional—then stick to one finish for a pulled-together look. Favor heavier materials or add a hidden weight so wind won’t tip them, and pick drainage you can manage.
- Aim for planters about 1/3 the door’s height
- Leave 6–8 inches of walkway clearance
- Match finishes to hardware (matte black, brushed brass)
- Use saucers or feet to protect wood and concrete
Layer Colors And Heights
Where do you start if you want your entry to feel styled instead of randomly “planted”? Build a simple recipe: thrill, fill, spill.
Pick one bold “thriller” plant (upright grass, dwarf conifer, or cordyline) to anchor the look, then surround it with rounded “fillers” like begonias or coleus, and finish with a trailing “spiller” such as sweet potato vine or ivy.
Next, layer colors with intention. Pull one shade from your door or hardware, add a complementary accent, and keep the rest green for a modern, calm palette.
Create height variation by mixing one tall focal plant with mid-height blooms and low draping foliage.
Repeat the same color notes in both planters so the design reads cohesive, not busy.
Place For Maximum Impact
Once you’ve nailed the thriller–filler–spiller mix and a tight color palette, placement does the heavy lifting for curb appeal. Frame your front door with a matched pair of planters, set just outside the swing path, to create an instant “entry moment.” Keep them close enough to read from the street, but far enough to keep the stoop clear for packages and outdoor furniture flow.
- Center each pot on the door’s vertical lines, not the wall’s edges
- Pull planters forward to the top step for depth and shadow
- Align heights with sidelights/railings for a clean, modern look
- Add garden lighting at the base to wash foliage after dark
If your porch is tight, go taller and slimmer to preserve walking space.
Follow This 2-Hour Curb Appeal Weekend Plan
If you’ve got two hours and a free weekend slot, you can make your home look noticeably more polished from the street with a simple, high-impact sequence.
Start with a 20-minute reset: sweep the porch, pull weeds, and edge the walkway for crisp lines in your garden design.
Next, spend 25 minutes power-washing the stoop and steps, then let them dry.
Use 20 minutes to refresh the front door: wipe it down, polish hardware, and add a modern matte-black or brass house-number update.
Dedicate 25 minutes to plants: swap in one tall thriller pot by the entry and two low fillers for symmetry.
Finish with 10 minutes staging outdoor furniture—align chairs, add a neutral cushion, and tuck clutter out of sight.
Frequently Asked Questions
Do Curb Appeal Upgrades Increase Home Value Before Selling?
Yes—curb appeal upgrades can increase your home’s value and help it sell faster. You’ll see the best ROI with landscaping enhancements and exterior lighting, especially clean lines, warm LEDs, and tidy plantings buyers notice immediately.
What Curb Appeal Improvements Require Permits or HOA Approval?
You’ll need permits for fences, retaining walls, driveway changes, exterior lighting rewires, tree removal, new windows/doors, and major paint. You’ll need HOA approval for colors, landscaping, signage, and visible fixtures—check permitting guidelines, HOA restrictions.
How Can I Boost Curb Appeal as a Renter Without Permanent Changes?
Like giving your entry a facelift, you can boost curb appeal by adding renter-safe landscaping ideas in pots, swapping a stylish doormat, and using peel-off numbers. Use battery outdoor lighting—stake lights or sconces—no drilling, just glow.
What Are Common Curb Appeal Mistakes That Make Homes Look Cheaper?
You make homes look cheaper with overgrown, mismatched landscaping, cluttered porches, peeling paint, dated hardware, and harsh or missing Exterior lighting. Use Landscaping tips: crisp edging, cohesive planters, and warm LEDs for a polished finish.
How Often Should Curb Appeal Maintenance Be Done Throughout the Year?
Like a tidy haircut, you should do curb appeal maintenance weekly for quick touch-ups, monthly for deeper cleanups, and seasonally for refreshes. Follow landscaping tips, trim regularly, and check outdoor lighting bulbs, timers, and fixtures.
Conclusion
Step back to the curb and you’ll see it: a crisp door color catching the light, sleek house numbers popping against fresh paint, and porch lights casting a warm, modern glow at dusk. Your shrubs frame the entry like clean brackets, the lawn edge reads razor-sharp, and planters add a punch of seasonal color by your feet. You didn’t need a contractor—just a smart plan, a few upgrades, and a focused weekend.


