You can sort common bathroom niggles fast with basic tools. Stop a running loo by turning off the stopcock, checking the float and overflow, and swapping a worn flapper. Fix a dripping tap by shutting the valves, pulling the headwork, and replacing washers or O‑rings. Clear a slow drain by lifting out hair, flushing hot water, and plunging. Re-seal mouldy silicone with scraper, alcohol wipe, and sanitary sealant, then ventilate and wait 24 hours. Next up: quick upgrades and safer fixings.
Start With These Bathroom DIY Fixes First
Before you start ripping tiles off the wall, tackle the quick bathroom DIY fixes that stop damage spreading and make the room feel cleaner straight away.
First, reseal mouldy silicone around the bath and shower: scrape it out, wipe with isopropyl alcohol, dry fully, then run a neat bead of sanitary sealant and smooth with a profiling tool.
Next, unblock slow drains with a hair snake and hot water; avoid harsh chemicals that can damage UK pipework.
Tighten loose toilet-seat fixings, replace cracked tap washers, and fit a new shower hose if it’s weeping.
For bathroom organization, add adhesive hooks, a caddy, and labelled baskets to keep surfaces dry.
For water conservation, fit an aerator, check for drips, and shorten shower times.
Fix a Running Toilet (Fast DIY Bathroom Fix)
A running toilet wastes far more water than a dripping tap, so once you’ve sorted the quick wins like fresh sealant and a clear drain, tackle the cistern next.
Turn off the isolation valve (or the stopcock), flush, then sponge out what’s left.
Lift the lid and check the Toilet tank components: float, fill valve, overflow, and chain.
If the water sits above the overflow, lower the float or adjust the fill valve screw; if it keeps refilling, the seal’s leaking.
Inspect the flapper: if it’s warped, slimy, or the chain’s too tight, you’ll need Flapper valve replacements.
Take the old one to Screwfix or B&Q for a match.
Refit, reopen water, and test for silent refills.
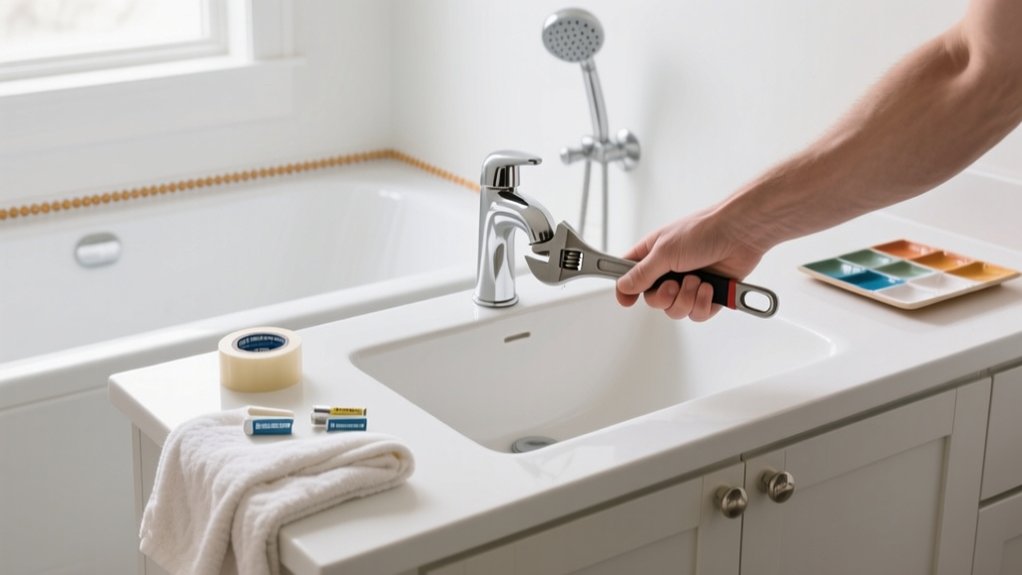
Stop a Dripping Faucet With Fresh Washers
Even though a dripping tap seems minor, swapping the washers usually fixes it for pennies and stops the constant waste. Turn off the isolation valve under the basin (or the stopcock if you’ve not got one), then open the tap to relieve pressure. Plug the waste so you don’t lose screws. Remove the cap, undo the handle screw, and lift off the handle.
Use an adjustable spanner to loosen the headwork and pull out the valve.
- Match the old washer size (usually 12–16mm) and take it to Screwfix/B&Q.
- Clean limescale from the seat, then fit the new washer and O‑ring.
- Reassemble, turn water back on, and check for leaks.
That’s solid Faucet maintenance and proper Washer replacement.
Clear a Slow Bathroom Drain Without Chemicals
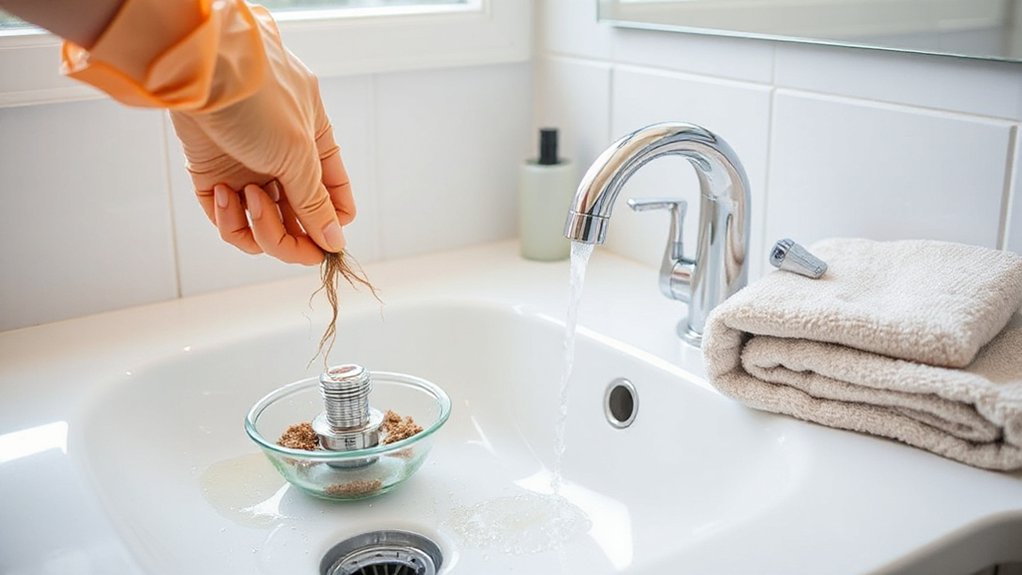
When water starts pooling around your feet in the shower or basin, you can usually clear the blockage with a few simple, chemical-free steps. Start by lifting out the plug and pulling visible hair with a gloved hand or a small drain hook.
Flush with a full kettle of hot (not boiling) water to soften soap scum, especially in older UK plastic pipework.
Next, use Plunger techniques: cover the overflow with a wet cloth, add enough water to seal the cup, then plunge in short, firm bursts for 20–30 seconds. Check for improved flow.
If the Drain obstruction persists, remove the trap under the basin: place a bowl, undo the slip nuts by hand, clear debris, rinse, and refit snugly without overtightening.
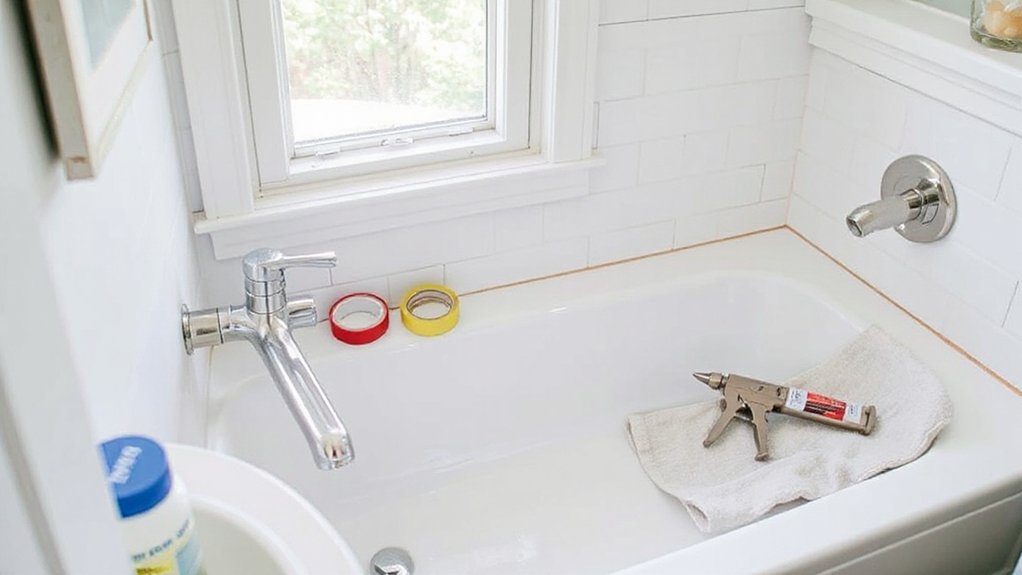
Re-Caulk the Tub for a Watertight Seal
If your bath’s sealant has split, lifted, or gone mouldy, re-caulking the joint between the tub and tiles stops water tracking behind the wall and into the floor. Start by scraping out old silicone with a sealant remover tool, then wipe the area with white spirit and let it dry fully.
Run masking tape along both edges for a neat line, and keep the room ventilated. Choose sanitary, mould-resistant silicone (clear or white) and fit a nozzle cut to the bead size.
- Fill the tub with cold water to settle it before you seal.
- Apply a steady bead, then smooth with a profiling tool dipped in soapy water.
- Peel tape immediately and leave 24 hours before using.
Good Caulk maintenance and smart sealing techniques prevent leaks.
Clean and Refresh Grout for a Brighter Look
Although grout looks solid, it’s porous and quickly traps soap scum, limescale, and mildew, so cleaning it properly can brighten the whole bathroom without replacing tiles. Start by ventilating, then spray a UK mould remover or a paste of bicarbonate of soda and water. Scrub with an old toothbrush along the joints, and rinse with warm water.
For stubborn limescale, apply white vinegar to ceramic only (avoid natural stone) and wipe clean. If the grout color still looks dull, use a grout pen or colourant, keeping lines neat with masking tape. Once dry, apply sealing techniques: brush on a penetrating grout sealer, wipe off excess, and let it cure 24 hours for longer-lasting, easier-clean grout.
Tighten a Loose Toilet Base and Prevent Leaks
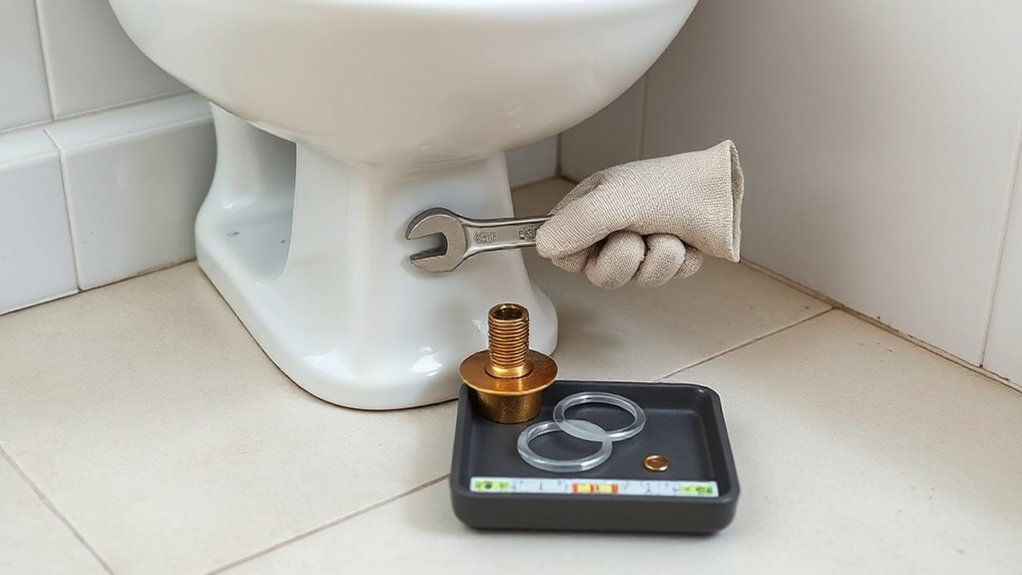
If your toilet rocks, you’ll need to check the closet bolts at the base and tighten them evenly with a spanner, stopping as soon as it feels firm to avoid cracking the pan.
If it still moves or you spot damp patches, shut off the water, lift the toilet, and reseal it with a new wax ring (or a modern sealing ring) before refitting.
This quick fix helps stop leaks into the floor and keeps smells out.
Check Closet Bolts
Ever wondered why a toilet rocks or leaves a mysterious damp patch at the base? Start with a quick closet bolt inspection: those two bolts at 3 and 9 o’clock clamp the pan to the floor. Pop off the plastic caps, then check for rust, wobble, or a missing washer.
- Hold each bolt upright and tighten the nut with an adjustable spanner, alternating sides so you don’t twist the pan.
- Stop when snug; don’t overdo it or you’ll crack the ceramic.
- If the bolt spins, keep gentle downward pressure on it.
Do a toilet flange check by watching for movement at the base while you push lightly side-to-side.
Wipe dry, flush once, and recheck for any fresh moisture around the rim.
Reseal With New Wax
Once you’ve confirmed the closet bolts aren’t the culprit, replace the wax ring to stop rocking and seal out leaks properly. Shut off the isolation valve, flush, and sponge out the cistern and pan.
Disconnect the flexi hose, pop the caps, and undo the nuts. Lift the toilet straight up; bag the old wax and scrape the flange clean. Check the pan connector and soil pipe for cracks and replace if worn.
Fit new closet bolts, then press on a fresh wax ring or wax-free seal, centred for reliable wax sealing. Lower the toilet squarely, compress evenly, and tighten nuts gradually—don’t overtighten.
Reconnect, turn water back on, and check for seepage. Finish with neat silicone for bathroom re sealing and stability.
Rehang a Loose Towel Bar So It Stays Put
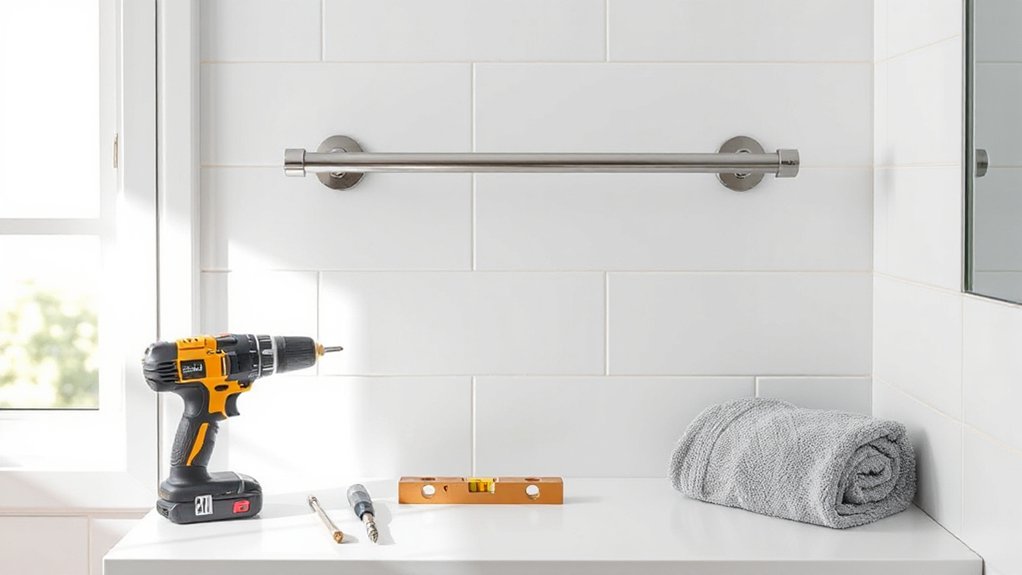
Although a loose towel bar seems like a minor annoyance, it usually means the wall fixings have worked free and they won’t hold for long without a proper rehang.
For a lasting towel bar repair, remove the bar, then the brackets, and inspect the holes. If screws bite into nothing, you must re-anchor into something solid.
- Find structure: Use a stud finder, or tap-test; in UK plasterboard, aim for a stud/noggin where possible.
- Upgrade fixings: If you can’t hit timber, fit proper plasterboard anchors (toggle or metal cavity fixings), not worn plastic plugs.
- Rehang and tighten: Refit brackets level, pre-drill, then tighten set screws and check the bar’s seated fully.
Finish by giving it a firm tug; it shouldn’t twist or creep.
Install New Bathroom Hardware for a Quick Upgrade
If your bathroom feels dated but the suite’s still sound, swapping out the small hardware—towel rail, toilet roll holder, robe hooks, and cabinet pulls—gives you a quick, high-impact upgrade without touching tiles or plumbing.
Start by matching finishes (chrome, brushed nickel, matt black) so everything looks intentional. Use a stud finder or knock test, then mark fixing points with masking tape.
For solid walls, drill with a masonry bit and fit wall plugs; for plasterboard, use hollow-wall anchors so the rail won’t rip out. Replace cabinet pulls with like-for-like hole centres to avoid filling and repainting.
While you’re at it, upgrade bathroom lighting with an IP-rated mirror light and add storage solutions like a stick-on shower caddy or extra hooks behind the door.
Frequently Asked Questions
What Tools Should Every Beginner Keep for Bathroom DIY Repairs?
Keep an adjustable spanner, PTFE tape, screwdriver set, pliers, utility knife, sealant gun, spirit level, and bucket. You’ll handle Toilet maintenance, leaks, and Bathroom cleaning. Add rubber gloves, microfibre cloths, and a torch.
How Do I Shut off the Bathroom Water Supply Before Starting Repairs?
Like closing a tap before Bathroom paint splashes, you’ll stop leaks fast. Turn the isolation valve under the basin/loo clockwise, or shut the mains stopcock (often under the kitchen sink). Test by flushing, opening taps; remove Shower curtain.
When Should I Call a Plumber Instead of Doing the Fix Myself?
Call a plumber if you’ve got leaks behind walls, persistent low pressure, sewage smells, or you can’t isolate the supply. Check plumbing insurance first, then get a professional consultation for UK regs compliance.
How Can I Prevent Mold and Mildew From Returning After Repairs?
Keep it crisp, not clammy: you’ll stop mold returning with steady ventilation tips and strict cleaning routines. Run the extractor 20 minutes, crack a window, wipe tiles daily, squeegee glass, wash grout weekly.
How Much Do These DIY Fixes Typically Cost Compared to Hiring a Pro?
You’ll usually spend £10–£80 DIY versus £150–£500+ with a pro; that cost comparison improves if you already own tools. For budget tips, buy multipacks, shop Screwfix/Wickes deals, and tackle small jobs first.
Conclusion
When you tackle these simple bathroom DIY fixes, you’ll notice a coincidence: the smallest tweaks often stop the biggest headaches. Swap washers, clear the trap, refresh silicone, and suddenly the drip, the whiff, and the wobble all disappear at once. Keep a basic kit handy—adjustable spanner, PTFE tape, screwdriver, and a sealant gun—and you won’t wait for a call-out. Do it now, and your bathroom stays dry, tight, and smarter.