
You can refresh your kitchen fast without remodeling by swapping cabinet pulls (match existing hole spacing), adding plug-in or battery under-cabinet LED bars, and installing a peel-and-stick backsplash with seams tucked in low-visibility spots. Paint walls a soft neutral and repeat one accent color in textiles for a cohesive look. If counters look tired, use a refinishing kit or vinyl wrap after degreasing and light sanding. Keep going to see the highest-impact upgrades ranked.
Best Low-Cost Kitchen Updates (Ranked by Impact)
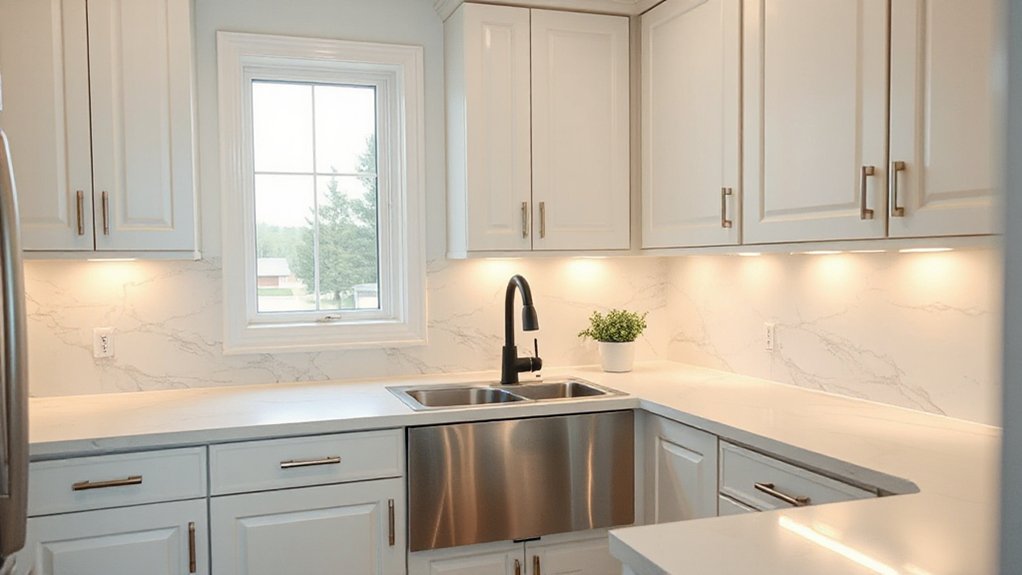
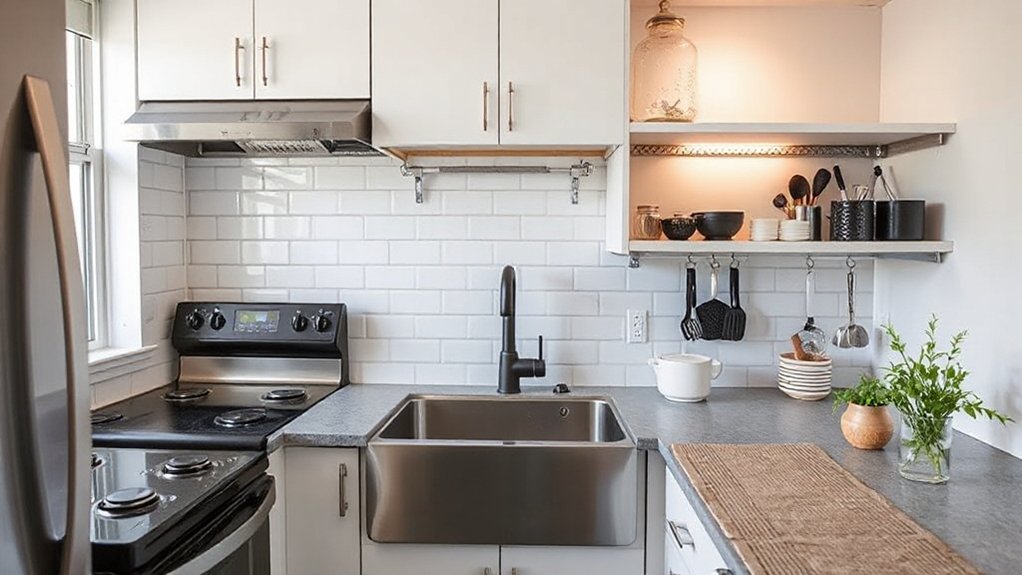
Where can you spend the least and feel the biggest difference? Start with light: swap in warm LEDs under cabinets and a cleaner overhead fixture; you’ll instantly sharpen surfaces and make the room feel newer.
Next, refine your Kitchen color schemes: paint just the walls or ceiling in a soft neutral, then repeat one accent color in textiles and small decor for a deliberate look.
Third, upgrade your sink zone with a modern pull-down faucet and a deeper, easy-clean basin if your budget allows; daily use makes the impact huge.
Fourth, reduce visual clutter with matching containers and a slim dish rack.
Finally, plan appliance upgrades strategically: replace the most dated, high-visibility item first (usually the range or microwave).
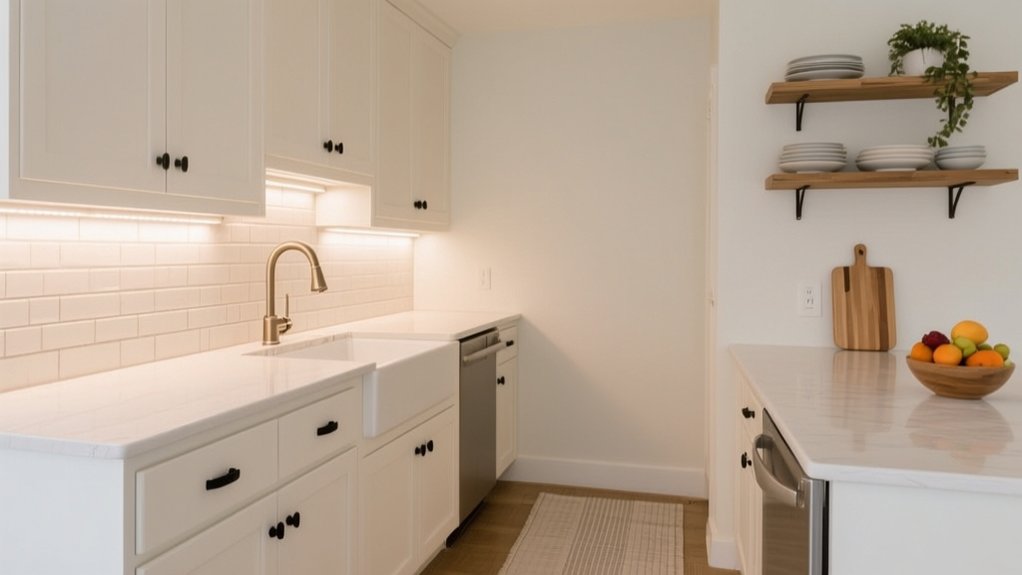
Swap Cabinet Hardware for an Instant Refresh
After you’ve tackled lighting, paint, and the sink zone, cabinet hardware is the fastest way to make the whole kitchen read newer for very little money.
Measure your existing hole spacing first, then shop for replacements that match so you won’t need patching or drilling. If you want a subtle upgrade, choose clean bar pulls in a durable finish; for more personality, mix in Decorative cabinet pulls on a few key doors or the pantry.
Focus on hardware color coordination: repeat one metal throughout so the room feels intentional, not piecemeal. Matte black modernizes quickly, brushed nickel stays timeless, and champagne bronze warms up cool cabinets.
Buy multipacks to cut cost, and keep one extra pull for future damage. Install with a simple screwdriver, and you’re done in an hour.
Budget Lighting Upgrades (No Rewiring Needed)
Even if you can’t add new wiring, you can dramatically improve how your kitchen looks and functions by swapping in plug-in and battery-powered lighting. Start with under-cabinet LED bars to brighten prep zones and make counters look cleaner.
Add a plug-in pendant or swag light over a table or island to create a focal point without hiring an electrician.
For late-night snacks, motion-sensor night lights guide you safely and cut wasted power, boosting energy efficiency.
- Plug-in under-cabinet LEDs with diffusers for even, shadow-free task light
- Battery puck lights inside dark cabinets or pantries for quick visibility
- Smart lighting bulbs in existing fixtures for dimming, schedules, and warmer tones
Pick 2700K–3000K for inviting warmth, and match finishes to your hardware for cohesion.
Install a Peel-and-Stick Backsplash in a Day
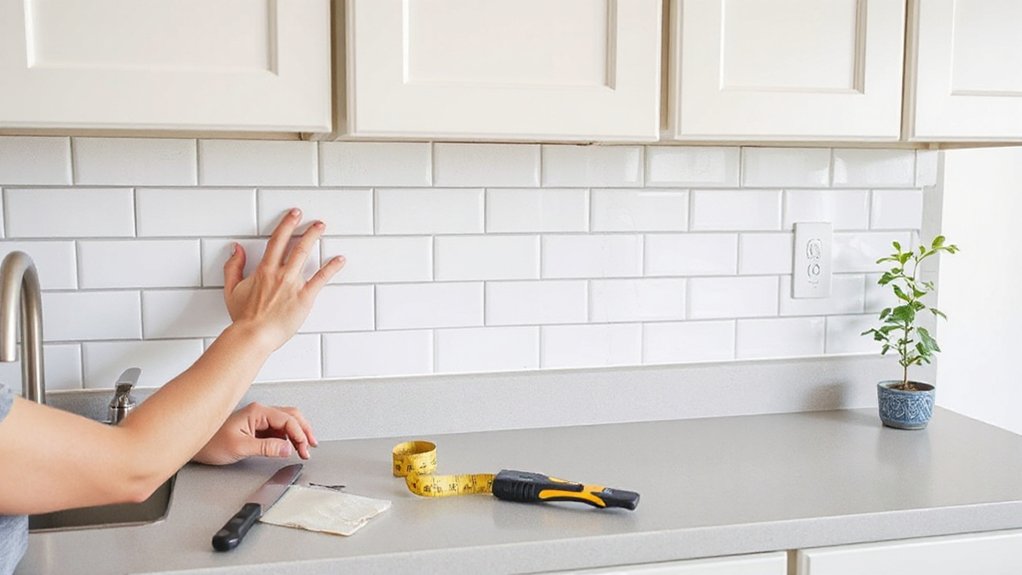
If your counters look tired but your budget’s tight, a peel-and-stick backsplash delivers a high-end “new kitchen” vibe in a single afternoon. Choose Decorative tile that echoes your cabinet color or hardware finish—marble-look for classic, geometric for modern, or warm stone tones for cozy.
Clean and degrease the wall, then measure twice and dry-fit sheets so seams land in low-visibility spots. Start at a straight reference line, press from the center out, and use a utility knife for outlets and edges.
Add a thin bead of caulk where the backsplash meets the counter and cabinets for a built-in look. Pair it with under-cabinet backsplash lighting to highlight texture and hide tiny alignment errors. Total cost stays modest.
Refresh Countertops Cheaply (Paint, Wrap, Kits)
When your countertops drag down the whole kitchen, you can fake a full replacement for a fraction of the price with paint, vinyl wrap, or a countertop refinishing kit. Start by degreasing, sanding lightly, and masking edges so the finish looks intentional, not DIY.
- Use Countertop paint techniques like thin coats, a foam roller, and a speckle or veining sponge to mimic stone.
- Explore countertop wrap options in matte concrete, marble, or terrazzo; heat and a squeegee help you hug edges and seams.
- Choose a kit if you want built-in primer, color, and a hard topcoat; it’s pricier than paint but tougher for daily use.
Finish with a durable clear coat, and wait the full cure time before heavy cooking.
Paint Cabinets for a Remodel-Level Change
Painting your cabinets is the fastest way to get a remodel-level change without remodel-level costs, but only if you use the right cabinet-grade paint. You’ll get a smooth, pro look by prepping properly—cleaning, deglossing, sanding, and priming—so the finish actually bonds.
Seal it with a durable topcoat and you’ll keep that fresh, design-forward color from chipping and scuffing in daily use.
Choose The Right Paint
Ever wonder why some painted cabinets look factory-fresh while others chip within months? It starts with choosing a cabinet-grade formula, not leftover wall paint. Look for alkyd or acrylic-alkyd enamels that level smoothly and cure hard, giving you durability without pro-level costs.
Let color psychology guide your shade: warm whites feel inviting, soft greens calm, and deep navy adds tailored drama.
- Pick an enamel labeled “cabinet/trim” for harder wear
- Match your paint finish to use: satin for balanced, semi-gloss for wipeable
- Choose low-VOC options to keep odors and downtime minimal
Buy one high-quality gallon rather than multiple bargain cans; fewer coats and better coverage save money and time. Then commit to one cohesive palette across uppers and lowers.
Prep Cabinets Properly
How do you get that remodel-level cabinet finish without paying for new doors? You prep like a pro. Start by emptying boxes and sorting for smart cabinet organization; you’ll work faster and spot what you actually need. Label every door and drawer, then bag hinges and screws so nothing goes missing.
Degrease thoroughly, especially around pulls and cook zones, because paint won’t bond to oils. Lightly scuff surfaces and knock down glossy factory sheen; sand just enough for grip, then vacuum and wipe clean. Fill dings, caulk seams, and let repairs cure.
Finally, plan hardware selection now—measure hole spacing, test placement, and patch old holes before you paint so the finished layout looks intentional. You’ll avoid costly do-overs later.
Finish With Durable Topcoat
Once your color coats have cured, lock in that remodel-level look with a durable topcoat that can handle daily wipes, steam, and the occasional bump. A clear coat adds depth, evens sheen, and helps your paint job read like factory-finished cabinetry, not a weekend project.
Choose water-based polycrylic or cabinet-rated polyurethane for low odor and easy cleanup, and stick to a satin or matte sheen for a modern, design-forward feel.
- Lightly scuff-sand with 220 grit, then vacuum and tack-cloth
- Apply thin, even coats with a quality synthetic brush or foam roller
- Let each coat dry fully and cure before reinstalling hardware
Two to three coats typically deliver a long lasting finish, without pricey replacements.
Update Your Faucet and Sink on a Budget
You can change your kitchen’s look fast by swapping in a budget-friendly faucet with a clean finish that matches your hardware. Then refresh your sink with a deep clean and new accessories, or replace it with a value pick that fits your existing cutout to avoid costly countertop work.
With a few basic tools, you can handle most installs yourself—shut off the water, measure twice, and use fresh plumber’s tape for leak-free results.
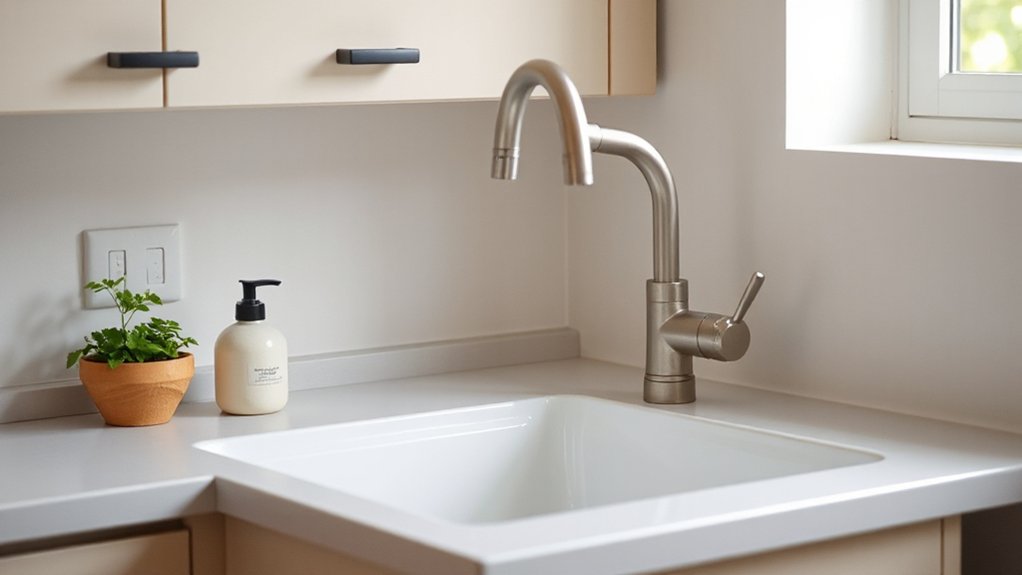
Choose A Budget Faucet
Where should you spend—and save—when updating a tired sink area? Put your money into a reliable budget faucet with a solid brass or stainless body, then save by skipping luxury finishes and flashy brand markups. A well-chosen midrange model can look designer if you match your cabinet hardware and keep lines simple.
- Choose a single-handle pull-down with a smooth ceramic cartridge for fewer drips and easier temperature control.
- Look for Smart faucet features you’ll actually use, like touch activation or an auto-shutoff timer, not app-only gimmicks.
- Prioritize Water saving techniques: a 1.5–1.8 GPM aerator, pause button, and spray modes that rinse faster with less flow.
Stick to standard hole patterns, verify reach and height, and you’ll upgrade function without overspending.
Refresh Or Replace Sink
After you’ve picked a reliable budget faucet, the sink itself becomes the next high-impact upgrade. If your current Kitchen sink is structurally sound, refresh it first: deep-clean stains with a non-scratch paste, polish stainless with a fine finishing pad, or recoat worn cast iron with a DIY refinishing kit for a brighter, newer look.
When replacement makes more sense, choose a drop-in or low-profile undermount sized to your existing cutout to avoid countertop costs. A single-bowl composite or stainless option often looks more modern and maximizes usable space without premium pricing.
Match the finish to your faucet for a cohesive, design-forward feel. Before you buy, check bowl depth, drain location, and cabinet clearance so your plumbing upgrades stay simple and affordable overall.
Easy DIY Installation Tips
Although a faucet-and-sink swap looks like a big-ticket project, a few prep steps keep it firmly in budget: shut off the valves, clear the cabinet, snap photos of the plumbing, and measure your existing hole spacing, cutout size, and sink depth before buying anything.
Then pick a standard-size drop-in or undermount and a midrange pull-down faucet for a designer feel without premium pricing.
Reuse supply lines only if they’re spotless and flexible; otherwise replace them for cheap insurance.
Work slowly, hand-tighten first, and check for drips with a dry paper towel.
- Use a basin wrench and painter’s tape to protect finishes.
- Add creative storage with a roll-out tray around the trap.
- Time faucet installs alongside appliance upgrades so finishes match.
Declutter Fast With Smart Kitchen Organization
If your kitchen feels cramped, you don’t need a remodel—you need a faster, smarter organization reset. Start with a 15-minute sweep: clear counters, trash duplicates, and relocate anything that doesn’t belong. Use decluttering strategies like “one drawer at a time” and “keep only daily-use tools within arm’s reach” to avoid burnout.
Next, upgrade smart storage on a budget. Add adhesive hooks inside cabinet doors for measuring cups, mount a slim rail for utensils, and corral snacks in labeled bins so shelves look intentional. Stackable clear containers make pantry staples feel boutique without the price tag.
Finally, create zones—coffee, prep, baking—so every item has a home and cleanup takes seconds. You’ll gain space, calm, and a cleaner design line.
Budget-Friendly Floors: Rugs, Vinyl, Tile Stickers
If your kitchen floor looks tired, you can refresh it fast with a washable runner rug that adds color, comfort, and spill-friendly practicality.
For a bigger change without a big bill, you can lay peel-and-stick vinyl planks or sheets that mimic wood or stone and install in an afternoon.
You can also use tile stickers to update dated patterns and tie the whole space to your cabinets and hardware.
Washable Runner Rugs
When your kitchen floor needs a refresh but you don’t want a full renovation, a washable runner rug delivers instant impact for a low buy-in. You’ll soften hard surfaces, cover scuffs, and add color without committing to permanent changes. Pick a durable material that handles traffic, splashes, and chair scrapes, then choose design patterns that echo your backsplash or cabinets for a pulled-together look.
- Measure your walkway and leave clearance for doors and drawers to swing.
- Look for low-pile, nonslip backing so it stays put and crumbs vacuum up fast.
- Choose machine-washable options with stain resistance to keep maintenance cheap.
You can rotate two runners seasonally, extend their life, and keep your kitchen feeling styled, not stressed.
Peel-And-Stick Flooring Options
A washable runner rug covers a lot, but peel-and-stick flooring takes the refresh further by changing the surface itself without a contractor-level budget. You can layer vinyl planks over smooth, clean subfloors to fake wood or stone, then trim edges with a utility knife for crisp lines. Choose decorative patterns if you want instant personality; keep the palette tight so your cabinets and counters still lead.
If you’re not ready for full coverage, use peel-and-stick tile stickers to update dated squares around the sink or stove. Prioritize adhesive durability: degrease, dry, and press firmly with a roller, then seal seams where splashes hit.
You’ll get a high-impact look with minimal downtime and easy swap-out later.
Add Open Shelving With Minimal Tools and Holes
Even without a full remodel, you can add open shelving that looks intentional and stays budget-friendly by using lightweight boards and a simple bracket system that hits studs whenever possible.
Keep the spans short (24–30 inches) so thinner wood won’t sag, and use a level plus painter’s tape to mark a clean, straight line.
With minimal tools, you’ll get a built-in look fast: drill pilot holes, drive screws, then add shelves and caulk tiny gaps for a crisp finish.
Paint shelves to match your wall for a quiet backdrop, or stain for warmth and contrast.
- 1×10 pine or laminated boards for low-cost open shelving
- Slim L-brackets or concealed brackets for a cleaner profile
- Black screws, wall anchors (only when needed), and a small level
Renter-Friendly Kitchen Upgrades That Remove Cleanly
If your lease limits drills and paint, you can still make the kitchen feel custom with peel-and-stick materials and swap-in parts that come off cleanly.
Start with removable vinyl backsplash tiles behind the sink for a high-end look at a low price; heat them gently to lift later.
Upgrade hardware by saving the old pulls in a labeled bag, then install new knobs with the same screw spacing.
Add a battery puck light under cabinets with adhesive pads to boost task lighting.
Use Appliance covers—magnetic panels or vinyl wraps—to unify mismatched finishes without committing to replacement.
Finish with Kitchen plantings: a slim herb rail on tension rods or a windowsill tray to soften hard surfaces.
You’ll get style now, and your deposit back later.
Frequently Asked Questions
How Can I Update a Kitchen Without Changing Its Layout?
You can refresh your kitchen without changing its layout by focusing on finishes: cabinet painting for a clean, modern base, backsplash installation for impact, plus updated pulls, lighting, and a fresh faucet. Keep costs tight.
What Low-Cost Upgrades Add the Most Resale Value?
You’ll get the most value from paint, updated hardware, modern lighting, and a new faucet—resale enhancing upgrades buyers notice fast. Choose budget friendly ideas like refreshed cabinets, clean backsplash peel-and-stick, and deep cleaning.
How Do I Choose an Update Style That Matches the Rest of My Home?
Match your update style by echoing your home’s dominant era, colors, and finishes. Use Material choices that repeat elsewhere (wood tone, metal). Add Decorative accents that mirror adjacent rooms, keeping patterns simple and costs predictable.
Which Kitchen Updates Require Permits or Building-Code Compliance?
Skip paint, not plumbing: you’ll need Building permits and code compliance for moving walls, rerouting electrical, adding outlets, new circuits, gas-line work, vented range hoods, and major plumbing changes. Always check your local inspector first.
How Can I Estimate the Total Cost Before Starting DIY Updates?
Build a line-item spreadsheet for budget planning and cost estimation: materials, tools, rentals, permits, and waste. Get three quotes, price-match finishes, add 15% contingency, then phase work so you don’t overspend mid-project.
Conclusion
You don’t need a remodel to love your kitchen—you need a plan. Swap the hardware, warm up the lighting, and stick on a backsplash that looks custom. Wrap or paint tired counters, corral clutter with simple organizers, and soften the floor with a rug or peel-and-stick vinyl. Add a shelf, add a statement, add breathing room. Spend less, see more, feel better. And if you rent, choose upgrades that peel off cleanly.


