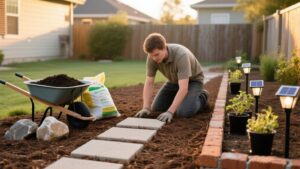
Plan garden hardscaping like infrastructure: define how you’ll use the space for dining, circulation, storage, or play, then stake layouts and confirm clearances. Evaluate slope, sun, soil bearing, and drainage so water moves away from structures, and add permeable joints or underdrains where needed. Check permits, setbacks, wall limits, and mark utilities before excavation. Choose slip-resistant, climate-appropriate materials with proper bases and edging. Next, you’ll see how to size, balance, and phase the work.
What Is Garden Hardscaping (and What Isn’t)?
Although the term gets used loosely, garden hardscaping refers to the built, non-living components that shape how you move through and use an outdoor space—such as patios, paths, retaining walls, steps, edging, and drainage features—typically made from stone, concrete, brick, metal, or composite materials.
You design these elements to manage grade, water, and access, and you install them with defined bases, compaction, and jointing to control settlement and runoff.
Hardscaping doesn’t include living materials such as turf, shrubs, trees, or seasonal planting; those belong to softscaping. It also excludes routine garden decoration that’s movable or purely temporary, like lightweight pots or stand-alone ornaments.
However, anchored ornamental features—built-in benches, fixed pergolas, masonry planters, and lighting integrated into paving—typically qualify as hardscape.
How Will You Use Your Hardscaped Space?
Before you finalize any hardscape layout, you should define the primary activities it must support, such as dining, circulation, storage, or play.
Next, you’ll plan traffic flow by mapping direct, unobstructed routes between entrances, seating, and service areas to prevent bottlenecks and protect adjacent planting beds.
Finally, you should design for future flexibility by sizing surfaces and selecting modular elements that can adapt to new furniture, access needs, or landscape changes.
Define Primary Activities
How do you plan to use the space once the hardscape goes in? Define your primary activities before selecting materials or dimensions.
If you’ll dine outdoors, specify seating count, table clearance, and proximity to utilities.
If you’ll cook, allocate noncombustible surfaces, ventilation separation, and service zones for prep and storage.
If relaxation is the goal, determine whether you need shade structures, wind screening, or integrated lighting.
For gardening tasks, plan for potting ledges, tool staging, and durable edging that supports landscaping etiquette with neighboring properties.
For play or pets, prioritize impact-resistant finishes and cleanable joints.
Each activity imposes load, drainage, and maintenance requirements, so document performance targets and verify they align with your garden aesthetics and budget.
Plan Traffic Flow
Once you’ve defined your primary activities, map the circulation routes that connect entries, doors, utilities, and key zones so people can move through the space without bottlenecks or conflicts. Treat paths as functional infrastructure, not decoration, and size them for realistic passing and turning.
In your Garden layout, align walkways with desire lines between the house, seating, beds, and storage, and keep service access direct for bins, hoses, and maintenance.
- Set primary paths at 36–48 inches; secondary at 24–30 inches.
- Use clear sightlines at junctions; avoid blind corners near steps.
- Separate wet/dirty routes (compost, potting) from clean routes (patio, dining).
- Coordinate Plant placement to maintain a consistent clear width and prevent overhang.
Consider Future Flexibility
Although a hardscape feels permanent, you’ll get better long-term value if you design it for changing needs, seasonal routines, and equipment upgrades. Define likely use cases now: dining, play, storage, grilling, or access for maintenance.
Size patios and paths to accommodate furniture clearances and turning radii for wheelbarrows, mowers, or mobility aids.
Apply future proof design by reserving conduit sleeves under paving for lighting, irrigation, or audio, and by planning load ratings for hot tubs or planters.
Specify adaptable features such as modular pavers, removable edging, and adjustable pedestal systems for decks.
Keep a service corridor to reach drains, valves, and foundations without demolition.
Finally, select fastening methods and jointing materials that allow partial replacement and straightforward regrading later.
What’s Your Site Like: Slope, Sun, Soil, Drainage?
Before you choose materials or lay out paths and patios, evaluate your site’s slope, sun exposure, soil profile, and drainage patterns, because these conditions dictate grading requirements, base design, and long-term performance.
You’ll reduce settlement, heaving, and runoff damage when you measure and document constraints early, then match solutions to them.
- Map slope direction and percent grade; plan positive drainage away from structures and hardscape edges.
- Track sun by season; place heat-sensitive surfaces and garden lighting to avoid glare, overheating, and shaded trip zones.
- Test soil texture and compaction; specify geotextile, aggregate depth, and edge restraint based on bearing capacity.
- Identify runoff paths and low spots; add swales, permeable joints, or underdrains, then align your maintenance schedule to clean inlets and joints.
Do You Need Permits or Utility Marking First?
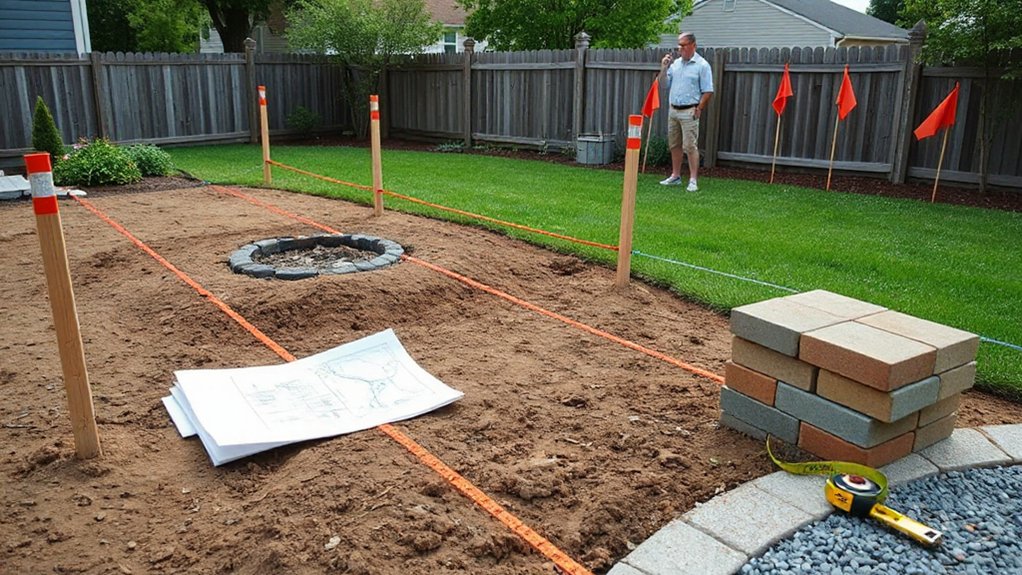
Since permit requirements and buried utilities can change your design and construction sequence, confirm approvals and request utility marking early in your planning. Check local codes for setbacks, lot coverage, retaining wall height limits, drainage rules, and any HOA standards that could constrain layout or grading.
If you’re adding electrical, gas, or water features, verify inspection steps and licensed-trade requirements before you finalize drawings and budgets.
Before you excavate, schedule utility marking through your regional locate service and wait for clear field markings. Treat marks as approximate; hand-dig test holes near lines and maintain required clearance distances.
If marks conflict with your proposed footing, trench, or post locations, revise dimensions rather than forcing placement. Document permits, approvals, and locate tickets to reduce liability and rework.
Which Garden Hardscaping Materials Fit Your Climate?
When you match hardscaping materials to your local freeze–thaw cycles, heat, humidity, salt exposure, and rainfall intensity, you reduce cracking, heaving, staining, and premature joint failure. Start by mapping your site’s microclimates and selecting climate-specific materials with proven seasonal durability, not just aesthetic appeal.
Specify base depth, edge restraint, and jointing systems that tolerate expected movement and moisture.
- In freeze–thaw zones, use air-entrained concrete pavers, dense granite, and polymeric sand rated for deicing salts.
- In hot, arid regions, choose UV-stable stone, light-colored pavers, and flexible joints that accommodate thermal expansion.
- In humid climates, favor low-porosity porcelain pavers and sealed concrete to limit algae, efflorescence, and staining.
- In coastal sites, select nonferrous fasteners and salt-resistant aggregates, then seal regularly.
Which Surface Is Safest Underfoot (Wet, Icy, Shady)?
Although a patio or path may look finished on day one, its real test comes in wet weather, winter ice, and low-light shade where slick biofilm can form. For Footwear safety, prioritize textured finishes and verified coefficients of friction.
Use broom-finished concrete, flamed granite, tumbled pavers, or resin-bound aggregate; they shed water and maintain microtexture, producing slip resistant surfaces. Avoid polished stone, smooth sealed concrete, and glazed tile outdoors.
In shade, specify open-joint pavers or permeable systems to reduce standing water, then plan routine brushing and biocide-free cleaning to limit algae.
For icing, choose materials with low surface glazing and pair them with good drainage, proper slope, and de-icing practices compatible with the material.
Add handrails on grades and use contrasting edge bands for visibility.
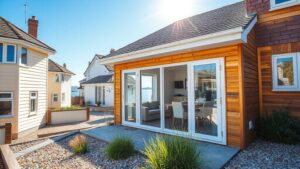
How Do You Match Hardscaping to Your Home’s Style?
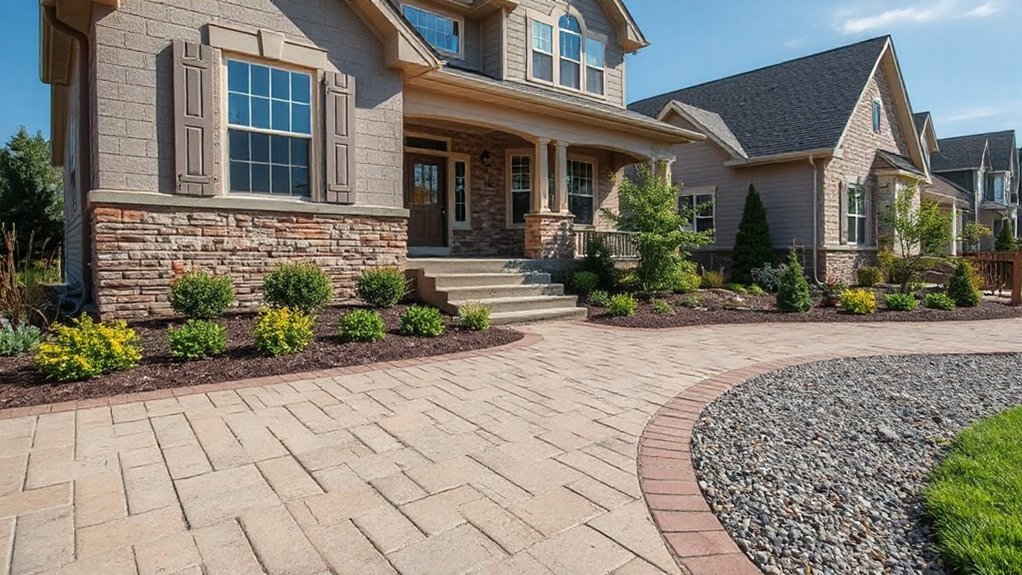
To match hardscaping to your home’s style, you should first identify architectural cues such as rooflines, façade geometry, trim profiles, and existing masonry patterns.
Next, you’ll coordinate hardscape materials, textures, and colors with the home’s dominant finishes so connections read intentional rather than added-on.
When you align these cues and specifications, you create a cohesive exterior composition that performs well and looks integrated.
Identify Architectural Cues
Because your home already establishes a visual language, you’ll get the most cohesive hardscape by extracting specific architectural cues and repeating them outdoors. Start with a brief elevation scan and note dominant geometries, proportions, and rhythm; then translate those patterns into layouts and built forms.
You’ll avoid stylistic drift by tying every new element to something already present on the facade, porch, or roofline. Use ornamental features and decorative accents sparingly, and only when they echo existing motifs.
- Mirror roof pitch or gable angles in pergola or trellis profiles
- Repeat window bay spacing in path joints or step cadence
- Match trim thickness with seat-wall cap proportions
- Echo arch or column shapes in gate openings and retaining-wall curves
Coordinate Materials And Colors
Once you’ve identified your home’s architectural cues, match your hardscape materials and colors to that palette so the exterior reads as one continuous composition.
Start with Material selection: align paving texture and aggregate size with the façade’s scale—tight joints and smooth stone suit modern lines, while tumbled pavers and brick complement traditional profiles.
Use Color coordination to echo fixed elements such as roof shingles, window trim, and foundation stone; pull one dominant tone and one secondary accent, then keep joints, edging, and caps within that range.
Specify consistent finishes (matte vs. polished) to control glare and perceived brightness.
Before ordering, confirm samples outdoors under sun and shade, wet and dry, so undertones don’t clash.
Limit variations to avoid visual noise.
How Wide Should Garden Paths and Patios Be?
While materials and layout shape a path’s look, width determines how well it functions for everyday traffic, tools, and accessibility. Set Garden path width by primary use: one-person circulation can work at 30–36 inches, while two people passing needs 48 inches. If you’ll move a wheelbarrow or bins, aim for 42–48 inches and keep turns generous to reduce snagging.
- Use 30–36 in. for secondary routes and light foot traffic
- Use 42–48 in. for carts, barrows, and frequent maintenance runs
- Use 48–60 in. for main approaches or side-by-side walking
- Set patio size by furniture: allow 24–30 in. clear behind chairs
Confirm dimensions with stakes, then walk the layout before building.
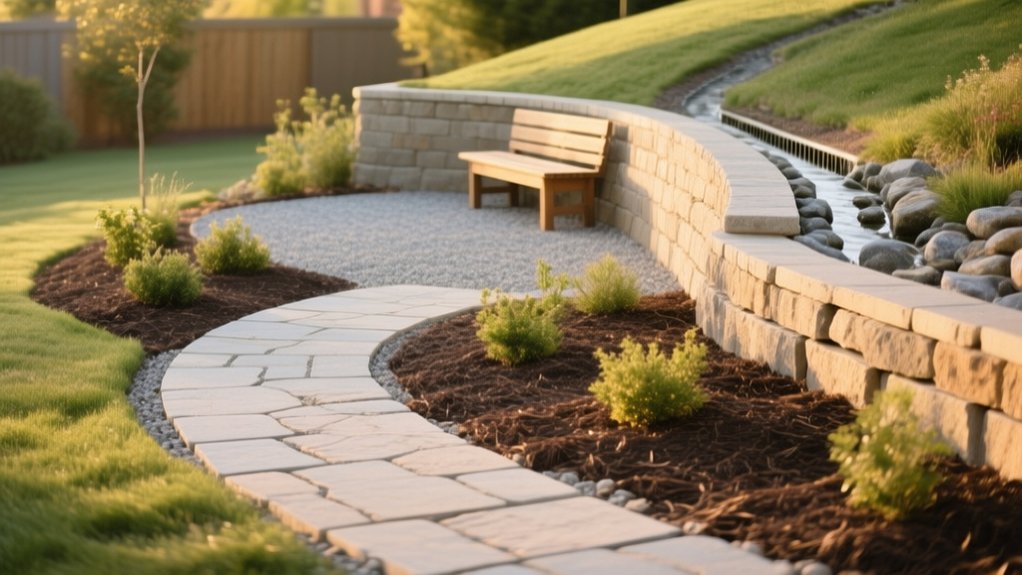
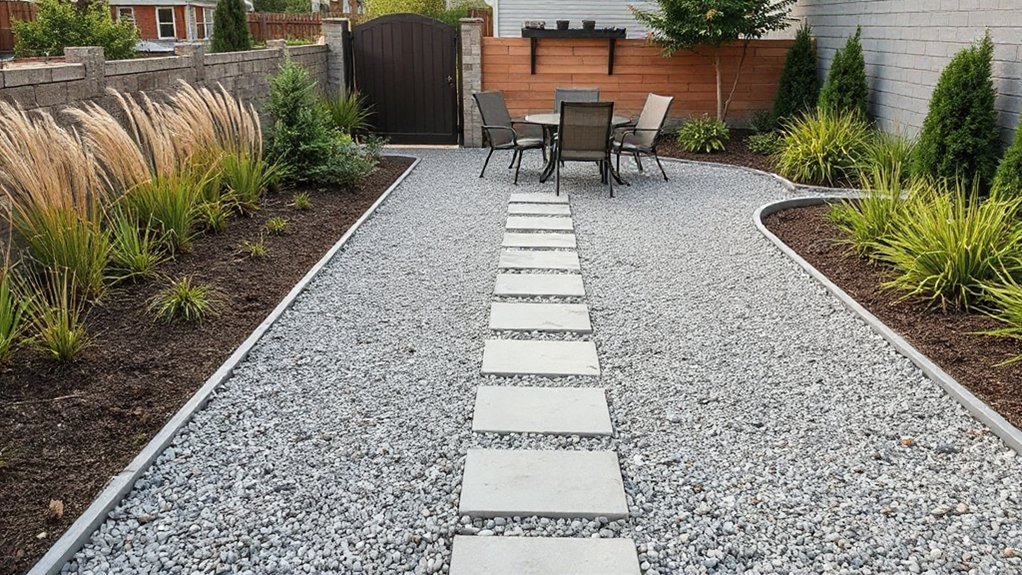
How Do You Balance Hardscape With Plants and Permeability?
You balance hardscape with planting by sizing paving and walls to the garden’s function while reserving sufficient contiguous bed area for root zones and visual softness.
You’ll reduce runoff and improve infiltration by specifying permeable systems such as permeable pavers, resin-bound aggregate, gravel with stabilizing grids, or open-joint stone set on a free-draining base.
You should map impervious coverage early and adjust layouts so planted areas and permeable surfaces handle stormwater without compromising circulation.
Proportion Hardscape To Planting
Because every square foot of paving displaces living soil, proportion hardscape to planting by defining circulation and use areas first, then allocating the remaining footprint to plantable, permeable ground that can absorb, store, and infiltrate stormwater. Set a target ratio (often 30–50% hardscape) and verify it against access, maintenance, and drainage performance.
Use Plant placement to shade paving edges, reduce heat gain, and protect roots from compaction by widening beds where foot traffic concentrates. Use mulch selection to stabilize soil moisture, limit splash erosion, and improve infiltration at bed margins.
- Map paths, patios, and service zones to minimum functional widths
- Reserve contiguous planting zones instead of narrow residual strips
- Keep hard edges away from trunk flare and primary root zones
- Tie downspouts and grading to planted capture areas, not pavement
Use Permeable Surface Options
After you’ve set the footprint for circulation and use areas, shift the remaining hardscape to permeable surface options—permeable interlocking pavers, porous asphalt, pervious concrete, resin-bound aggregate, or stabilized gravel—so rainfall can pass through the wearing course into a properly designed open-graded base and then into native soil or an underdrain.
You’ll reduce runoff, improve infiltration, and protect planting zones from erosion and compaction. Specify edge restraints and geotextiles where needed to prevent migration of fines and maintain void space. Match the base thickness to expected loads and local frost depth, and keep slopes minimal so water doesn’t bypass joints.
Use paving alternatives around beds and tree drip lines to preserve oxygen exchange. These eco-friendly surfaces also help meet stormwater requirements without sacrificing durability or clean detailing.
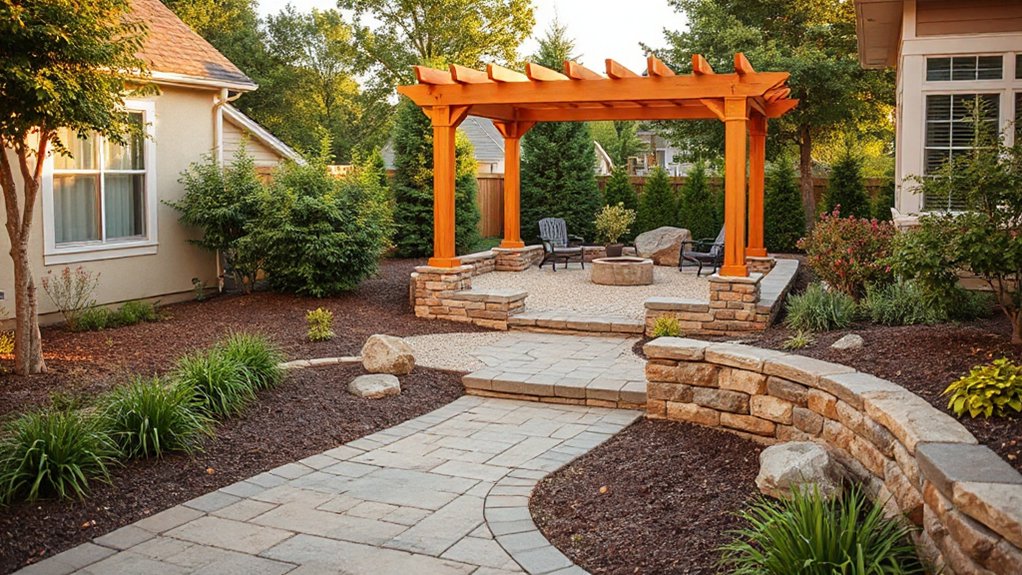
What Does Garden Hardscaping Cost (and What to Phase)?
While hardscaping costs vary widely by site conditions and material choices, most budgets hinge on three drivers: excavation and base preparation, drainage management, and the labor complexity of the build. You’ll pay more on sloped lots, expansive clay soils, and where access limits equipment.
To control spend, price your project by functional zones, then phase in noncritical upgrades after performance is proven.
- Install subbase, edging, and drainage first to protect future surfaces.
- Build primary paths and a small patio before larger gathering areas.
- Add retaining walls only where grade and runoff demand structural control.
- Finish with landscape lighting and garden art once circulation and grading work.
You’ll reduce rework by sequencing from hidden infrastructure to visible finishes and verifying flow paths after rain events.
What Can You DIY vs Hire Out in Hardscaping?
Even if you’re comfortable with tools, you should split hardscaping tasks by the risk they carry: DIY work suits layout, minor excavation, and surface installation on stable ground, but you’ll want a contractor for anything that affects structural stability, water movement, or code compliance.
You can handle DIY projects like setting edging, spreading and compacting gravel, installing pavers over a properly prepared base, and assembling modular steps or planters.
You should hire out retaining walls over 3–4 feet, steep-slope work, footings, reinforced concrete, and any tied-in drainage (catch basins, French drains, pipe runs).
Professional installation also makes sense for gas/electrical for lighting, permits, and inspections.
If you’re unsure, treat settlement, runoff, and load as red flags.
Frequently Asked Questions
How Do I Maintain and Clean Hardscaping Materials Year-Round?
Maintain hardscaping year-round by scheduling seasonal cleaning: sweep debris, rinse surfaces, and spot-treat stains promptly. Apply appropriate sealing techniques to stone, concrete, and pavers; inspect joints, manage drainage, and remove ice carefully.
How Long Will Different Hardscaping Materials Typically Last?
Like a clock, you’ll track material durability: concrete lasts 30–50 years, natural stone 50+ years, brick 25–100, pavers 20–40, wood 10–25, gravel indefinite. Your lifespan estimates depend on climate, drainage, loads.
Can Hardscaping Increase My Home’s Resale Value?
Yes, hardscaping can increase your home’s resale value when you prioritize landscape integration and precise material selection. You’ll enhance curb appeal, reduce perceived maintenance, and add functional outdoor square footage that appraisers and buyers can quantify.
How Do I Prevent Weeds From Growing Between Pavers?
You can prevent weeds between pavers by using polymeric sand and compacting joints; studies show up to 90% fewer weeds versus plain sand. Prioritize weed prevention with geotextile base, edge restraints, and periodic paver sealing.
What Lighting Options Work Best for Paths, Steps, and Patios?
For paths, steps, and patios, you’ll get best results with low-voltage LED bollards, recessed step lights, and downlights for pathway illumination; choose weather-rated, glare-controlled outdoor lighting options with motion sensors, timers, and consistent spacing.
Conclusion
You’ve defined hardscape vs softscape, mapped how you’ll use the space, and checked slope, sun, soil, and drainage. You’ve confirmed permits, marked utilities, and matched materials to your climate. You’ve set practical widths, protected permeability, and planned costs with phased work. You’ve decided what you can DIY and what needs a pro. Now comes the part that determines whether everything lasts: your base prep and water management—get those right, and the finish won’t matter.