
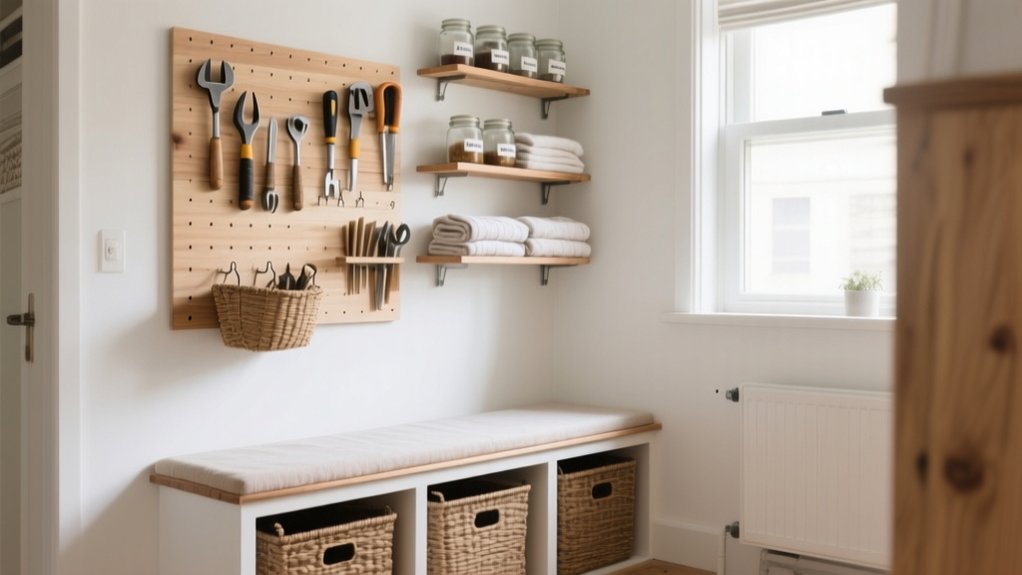
Start by measuring wall-to-wall widths, ceiling height, door swings, outlets, and any vents you can’t block, then sketch a quick map. Use walls first with sturdy hooks, pegboards, rails, and slim shelves to free up floor space. Add over-the-door racks for instant, renter-safe vertical storage. Build floating shelves by hitting studs or using toggles, and upgrade deep cabinets with pull-out trays. Next, you’ll find room-by-room ideas that fit your routines and style.
Start With Measurements and a Quick Space Map
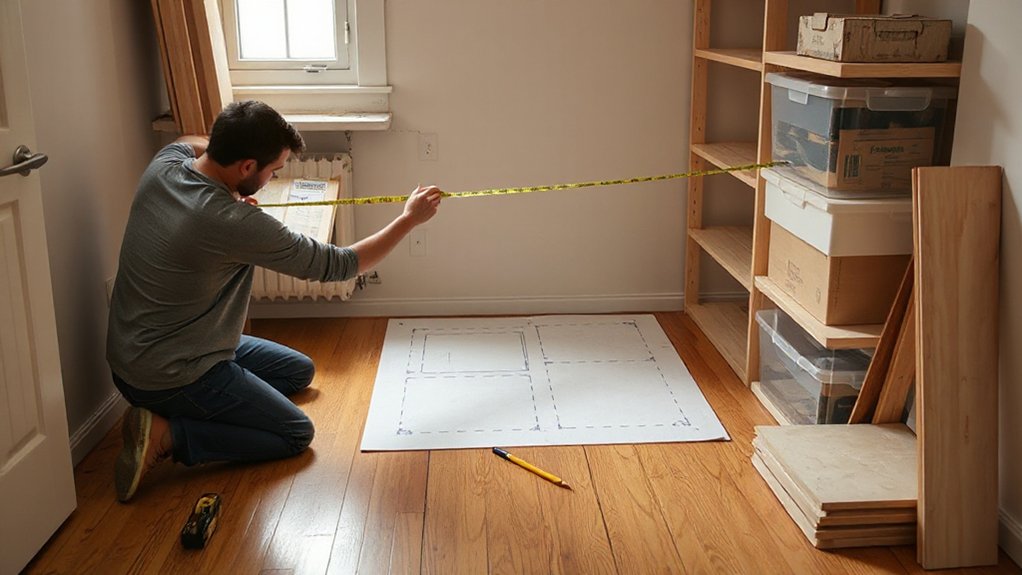
Before you buy bins or cut wood, grab a tape measure and sketch a quick map of your space so every storage piece fits on purpose. Measure wall-to-wall widths, ceiling height, baseboards, outlets, and door swings, then note any radiators or vents you can’t block.
For measurement accuracy, write numbers directly on your sketch and double-check tight spots like corners and under-sink plumbing. Mark “no-go” zones and traffic paths so your storage doesn’t pinch circulation.
Next, plot vertical opportunities: above doors, over appliances, and full-height niches. Keep clearances for drawers, cabinet doors, and pull-out baskets, and leave a small tolerance for trim and hardware.
With smart space planning, you’ll design pieces that look intentional, not jammed in.
Pick DIY Storage by Room and Daily Habits
Although every home has different square footage, the best DIY storage starts with how you actually move through each room every day. Track your “drop zones”: keys by the door, mail on the counter, shoes in the hallway. Then build storage right where the clutter lands, not where you wish it would go.
In the entry, add a slim wall ledge for essentials and a vertical shoe corral to keep the floor clear.
In the kitchen, store everyday mugs and spices at eye level, and shift rarely used gadgets up high.
In the bedroom, use under-bed bins for off-season clothing and a bedside caddy for charging.
In the bath, corral routines with labeled trays.
This Creative organization supports Aesthetic design through matching containers and consistent finishes.
Gather Tools, Fasteners, and Renter-Safe Options
Before you build, you’ll save space and time by pulling a tight essentials checklist—tape measure, level, drill/driver, stud finder, and a compact bit set.
Choose fasteners that match your wall and load, from screws with anchors to toggles, so shelves sit clean and secure.
If you’re renting, keep it polished with damage-minimizing options like removable strips, tension rods, and over-the-door brackets.
Essential Tools Checklist
Whether you’re building a floating shelf, a closet caddy, or an under-bed drawer system, you’ll save time (and wall repairs) by assembling a tight, renter-friendly tool kit first. Start with a compact tape measure, pencil, level, and stud finder, then add a multi-bit screwdriver, hex keys, and a small claw hammer or rubber mallet.
For clean cuts, choose a folding utility knife and a mini miter box with a fine saw. Keep surfaces pristine with painter’s tape, a putty knife, and a microfiber cloth.
Prioritize Safety precautions: wear eye protection, clamp work, and cut away from your body.
For Tool maintenance, wipe blades, store bits in labeled cases, and keep batteries charged in a slim pouch.
Smart Fastener Choices
With your tool kit sorted, the fasteners you choose will decide how clean the install looks and how painless move-out day feels. Match hardware to the load: use wood screws for studs and solid lumber, machine screws with nuts for metal brackets, and short pan-head screws for thin panels to avoid blowouts.
Prioritize Fastener durability with coated or stainless options in humid kitchens and baths, and keep a few lengths so you don’t stack washers to “make it work.” Check screw compatibility with your drivers—Phillips, Torx, or square—so heads don’t strip in tight corners.
Choose low-profile heads and finish washers where visible; they read intentional, not improvised. Buy a small organizer and label by size for quick swaps.
Renter-Safe Mounting Options
Since most leases treat walls like a security deposit, build your storage plan around renter-safe mounting and keep a small “install kit” ready: a stud finder, level, painter’s tape, a few wall anchors, and a couple of truly removable options like Command strips/hooks, removable adhesive picture-hanging strips, or tension rods.
Use painter’s tape to map shelf lines and hole placement before you commit.
For light items, lean on mounting adhesives and temporary hooks to lift essentials off counters—keys, utensils, cables, and small planters—without visual clutter.
For heavier loads, hit studs when you can; if you can’t, choose anchors rated well above the item’s weight.
Add tension rods in closets for vertical shoe or bag storage.
Patch tiny holes fast with spackle and touch-up paint.
Use Walls First: Hooks, Rails, and Shelves
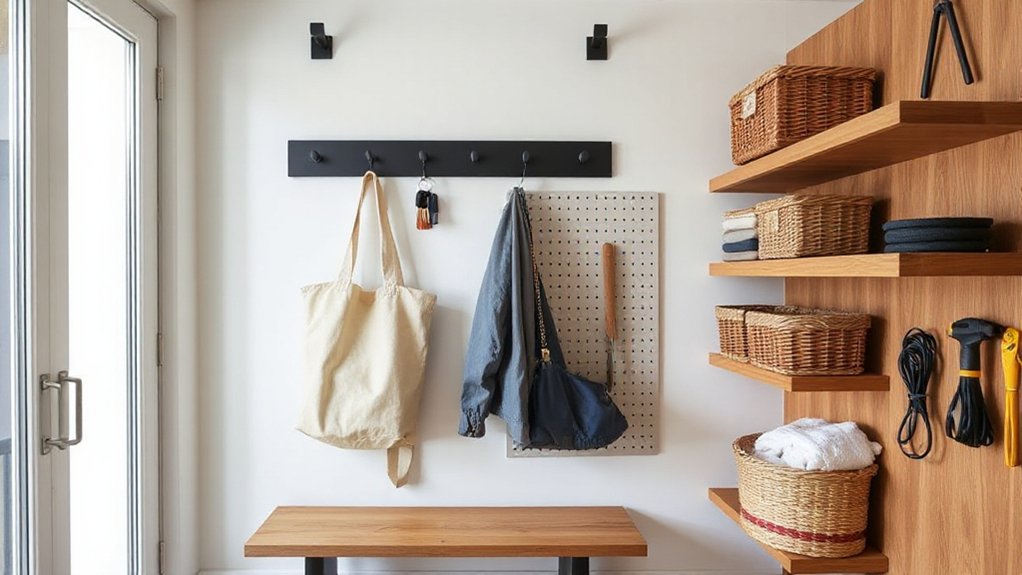
Start with your walls—you’ll free up floor space fast and make your storage look intentional. Install sturdy hooks and a pegboard to keep everyday tools, bags, and gear visible, sorted, and easy to grab.
Then add a rail system and slim shelves to stack vertical storage where it counts without crowding the room.
Install Hooks And Pegboards
Before you buy another bin, put your walls to work by installing hooks and a pegboard system that keeps everyday items visible, reachable, and off the floor. You’ll free drawers, clear counters, and make your small space feel intentionally styled—without adding bulky furniture. Choose matte black, brass, or wood pegs so the setup reads like decor, not clutter, and keep a small catch tray below for keys.
- Mount entry hooks for coats, bags, and umbrellas; stagger heights so nothing overlaps.
- Hang a kitchen or craft pegboard for tools, scissors, and cups; outline zones with consistent spacing.
- Add removable hooks inside cabinets or on closet walls for belts and jewelry, then pair with Decorative shelving and Under bed storage to keep overflow hidden.
Add Rails And Shelves
Even if you don’t have room for another cabinet, you can add serious storage by running slim rails and floating shelves along unused wall space. Mount a rail above your counter to hang utensils, mugs, and small bins, keeping surfaces clear.
Add a narrow shelf near the entry for keys and mail, then mirror it in the bath for daily essentials. Use wall-mounted baskets on rails to corral produce, chargers, or craft supplies without blocking light.
In the kitchen, place shelves high for rarely used platters and low for spices you grab daily. Pair this with under-sink organizers so heavy cleaners stay down low while everything else moves up the wall.
Finish with matching brackets and consistent spacing for a built-in look.
Build Sturdy Floating Shelves (With Anchors)
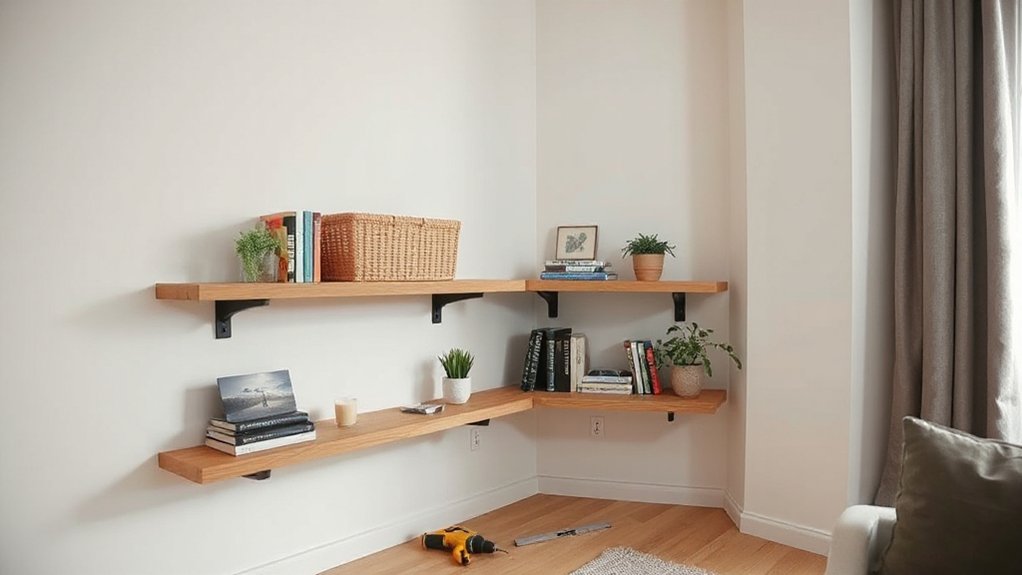
Looking for storage that frees up floor space and still looks built-in? Build Floating shelves with the right anchors, and you’ll get clean lines plus real strength. Start by finding studs and marking a level line; when you hit wood, lag screws beat everything. When you don’t, choose Anchor types that match your wall and load, then keep spans modest for a crisp, modern look.
Use a hidden bracket or cleat so the shelf seems to hover, and cap it with edge banding or a simple round-over for a finished, furniture-grade vibe.
- Use a stud finder, level, and painter’s tape for layout.
- Pick anchors: toggles for drywall, sleeves for masonry.
- Pre-drill, drive fasteners, then slide shelves on tight.
Install a Pegboard Wall for Flexible Storage
Pick a pegboard location that keeps your most-used tools within arm’s reach and off your work surfaces. Mount the board securely into studs or with heavy-duty anchors, using spacers so hooks lock in cleanly and the wall stays protected.
Then arrange hooks and bins in tidy zones—vertical where possible—so you can reconfigure storage as your projects change.
Choose Pegboard Location
Where will a pegboard earn its keep the most—right where you reach for tools and supplies every day. Pick a wall that supports your routines: near the entry for keys and mail, beside your desk for cables and stationery, or by the kitchen for small prep tools. You’ll get cleaner counters when you treat it as one of your primary Wall mounted solutions, not an afterthought.
Keep sightlines in mind, too; a well-placed board can read like intentional decor, especially with smart Pegboard customization.
- Choose a “grab zone” within arm’s reach of your main work surface.
- Avoid door swings, cabinet doors, and tight walk paths.
- Use natural light and a blank vertical plane to minimize visual clutter.
Mount Pegboard Securely
Once you’ve chosen the right wall, mount the pegboard so it stays flat, strong, and ready to reconfigure. Find studs with a finder, then mark a level top line and predrill clean pilot holes to prevent splitting.
Use a frame or spacer strips behind the board so the holes stay open and the surface won’t bow; paint the spacers to match for a crisp, built-in look.
For rentals, use a French cleat anchored into studs to spread weight and simplify removal.
If you’re mounting on masonry, switch to sleeve anchors and a masonry bit.
These wall mounting techniques make pegboard customization reliable, tidy, and safe.
Finish with edge trim to protect corners and elevate the design.
Arrange Hooks And Bins
After the board sits flat and solid, map your layout before you hang anything so every inch earns its keep. Group tools by task and size, then dedicate zones: daily-use at eye level, occasional pieces higher, and messy items over a wipeable mat. Balance function with Decorative storage by mixing matching bins, slim shelves, and a few display hooks for plants or framed prints.
- Place heavy-duty hooks on studs for bags, pans, or bikes; keep weight centered to prevent wobble.
- Use clear bins for fast scanning, then label edges; swap in Innovative materials like cork cups or magnetic trays for tiny hardware.
- Leave two empty rows for future add-ons, and mirror spacing for a clean, design-led grid.
Add Over-the-Door Racks Without Drilling
If you need instant vertical storage but can’t put holes in the wall, over-the-door racks give you a clean, removable upgrade in minutes. Choose a slim profile so the door still closes smoothly, then add felt pads to protect paint and cut down noise.
Use tiers for pantry staples, toiletries, or cleaning sprays, and reserve lower pockets for everyday grab-and-go items. For a calmer look, decant small items into matching bins or pouches and label the front edge.
Over the door racks also work on closet doors to organize scarves, belts, and handbags without stealing shelf space. Stick to one finish—matte black, white, or bamboo—to match your hardware and keep it cohesive.
These are classic Renter friendly solutions that move with you.
Build Rolling Under-Bed Drawers for Hidden Space
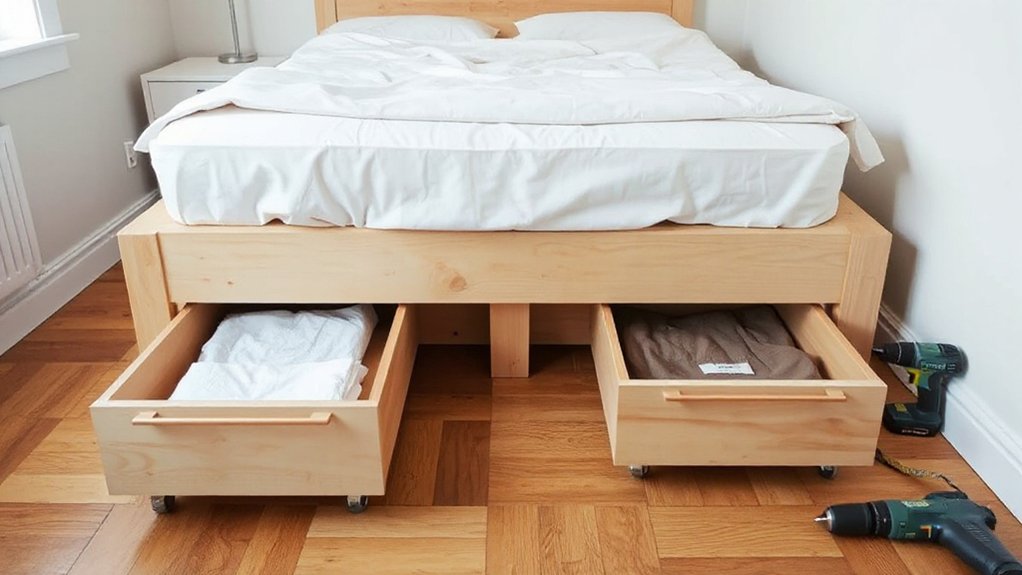
Start by measuring your bed’s clearance and mapping a layout that fits bins, shoes, or linens without scraping the frame.
Build low-profile drawer boxes and mount them on smooth casters so they roll out cleanly and disappear when pushed back.
Finish with simple pulls for quick access and add discreet stops so the drawers don’t drift or bump the wall.
Measure Clearance And Layout
Before you cut a single panel, map the exact space under your bed so the drawers glide freely and look intentional. Slide a tape measure from floor to frame, then check the lowest point of slats, center rail, and any hardware. Confirm how far your bed sits from walls so you can pull drawers out without bumping nightstands or baseboards—smart furniture arrangement matters in tight rooms.
Keep the layout design-led: align drawer fronts with bed legs and leave a clean reveal so everything feels built-in. Finally, plan for lighting optimization: note where lamps or under-bed LEDs cast shadows, and avoid placing pulls where they’ll disappear in the dark.
- Measure height, width, and usable depth.
- Mark obstructions and access paths.
- Sketch drawer sizes with 1/2″ clearance.
Build Drawer Boxes On Casters
Once your measurements lock in, build drawer boxes that ride on low-profile casters so they roll out smoothly, clear slats and rails, and tuck back under the frame like they belong there.
Use 1/2-inch plywood for the sides and bottom to keep weight down, and glue-and-screw the corners for a rigid, quiet box.
Keep the overall height low, then mount four swiveling casters near the corners so the load stays stable on carpet or wood.
Add a thin face strip if you want a clean, furniture-like edge.
Plan Drawer labeling now: mark zones for linens, off-season clothes, or shoes so you don’t rummage.
Schedule Casters maintenance—vacuum hair, check screws, and replace worn wheels—so rolling stays effortless.
Add Pulls And Stops
With the drawer boxes rolling smoothly on their casters, you can finish them like built-ins by adding pulls that feel good in your hand and stops that keep the drawers from wandering under the bed. Choose Decorative pulls that match your room’s hardware so the storage disappears into the design. Place pulls centered on the drawer face, predrill, and use machine screws with washers so they won’t loosen with daily tugging.
- Pick pull style: low-profile bar pulls reduce snagging on bedding and look sleek.
- Add safety stops: screw a thin cleat to the bed frame or floor so drawers stop flush, not crooked.
- Fine-tune travel: stick felt pads on stop points to quiet contact and prevent scuffs.
Now you’ll open, close, and align drawers effortlessly.
Add Toe-Kick Drawers in Kitchen Cabinets
Although that recessed strip under your base cabinets looks like dead space, you can turn it into sleek toe-kick drawers that stash flat, awkward items—think baking sheets, cutting boards, placemats, and pet bowls—without adding visual clutter.
Measure the toe-kick height and depth, then build shallow boxes from plywood to fit between cabinet sides. Mount low-profile full-extension slides or toe-kick hardware, keeping clear of cabinet legs and plumbing.
Add a discreet finger groove or push-to-open catch so the front stays flush and modern. Line each drawer with a grippy mat to stop rattling, and group items by task for faster kitchen organization.
Toe kick drawers work best when you label zones inside, not on the face, for a seamless look.
Turn Dead Corners Into Corner Shelving
Toe-kick drawers prove you don’t need new cabinets to gain storage; you just need to reclaim the spaces you’ve been ignoring—like those dead corners. Turn them into corner shelving that lifts clutter off counters and makes the room feel tailored. Use a simple triangular plywood shelf set, or float two L-brackets per tier for a lighter look. Paint shelves to match walls for a built-in effect, or stain them to warm up bland corners.
Add Corner lighting with a slim LED strip under each level so the nook looks intentional, not leftover. Style it with functional containers and a few decorative accents to keep it curated.
- Measure the corner’s angle and depth before cutting.
- Anchor brackets into studs or use heavy-duty toggles.
- Keep the lowest shelf taller for baskets and taller items.
Make a Storage Ottoman With a Hidden Bin
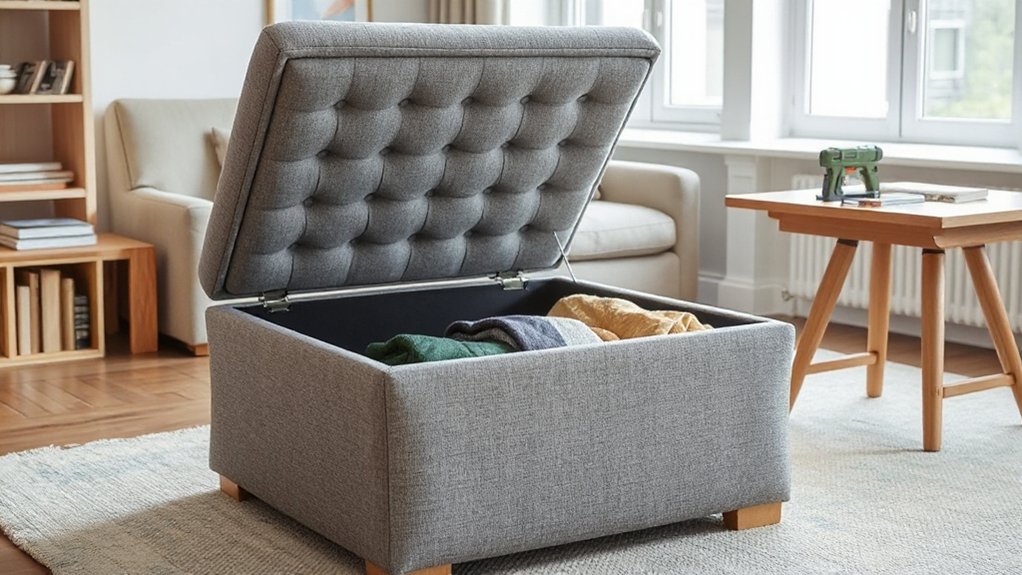
When your living room needs extra storage but you can’t spare another cabinet, build a storage ottoman with a hidden bin that works as seating, a footrest, and a catch-all in one clean silhouette.
Start with a plywood box sized to your sofa height, then reinforce corners with cleats so it won’t rack. Add a hinged lid or lift-off top with a finger pull, and line the bin with felt to quiet clatter.
Wrap the exterior in foam and upholstery fabric, then staple neatly underneath for a tailored edge. Choose a performance textile or faux leather to handle daily use, and add low-profile casters if you’ll move it often.
With the right fabric, it reads as a Decorative ottoman, while delivering serious Hidden storage for blankets, remotes, and games.
Max Out Small Closets With Double-Hang Rods
If your closet’s single rod leaves a big dead zone under short-hang clothes, add a double-hang setup to turn that vertical gap into usable storage. You’ll instantly double capacity for shirts, blouses, and folded trousers while keeping sightlines clean and tailored.
- Measure and mark: Hang the top rod at standard height, then place the lower rod about 40 inches below so hangers don’t collide.
- Use sturdy hardware: Anchor brackets into studs or heavy-duty toggles; a sagging rod ruins Closet organization and looks sloppy.
- Refine the system: Reserve one side for daily wear, add slim hangers, and use matching bins on the floor for shoes to finish Clothing storage neatly.
Add Pull-Out Trays for Deep Cabinets
Double-hang rods fix wasted vertical space in closets, and pull-out trays do the same for deep cabinets by bringing everything forward instead of letting it disappear in the back.
Start by measuring your Deep cabinet’s interior width, depth, and opening clearance, then choose full-extension slides rated for the weight you’ll store.
Build simple plywood boxes with low sides so you can see labels at a glance, and add a slim front rail to keep bottles upright.
Install trays in tiers: taller items on the bottom, shorter bins above, leaving finger room between each level.
Use Pull out trays for pots, pantry staples, cleaning supplies, and small appliances so you stop stacking and start accessing.
Finish with a clear matte seal and matching pulls for a built-in look.
Build a Slim Entryway Shoe-and-Key Rack
Because entryways collect clutter fast, a slim shoe-and-key rack gives you a dedicated drop zone without eating floor space. Build yours from a 1×6 backboard, two narrow shelves, and a small ledge: mount it at shoulder height so shoes sit below and keys land up top. Keep it tight—4–6 inches deep—so the walkway stays clear. Match stains or paint to your color schemes, then add Decorative accents like brass hooks or a leather pull to elevate the look. Finish with a wipeable topcoat for wet umbrellas and winter grit.
- Install a French cleat for strong, hidden support.
- Add three to five hooks for keys and bags.
- Slot a lower rail to corral two pairs of shoes.
Add Above-Toilet Shelves for Bathroom Clutter
The same slim, purposeful approach you used in the entryway works in the bathroom, too—especially over the toilet, where vertical space often goes unused. Hang two to three shallow shelves (4–6 inches deep) so you keep sightlines clean and avoid bumping your head. Use a level, hit studs when you can, and choose moisture-resistant wood or sealed plywood for longevity.
Reserve the bottom shelf for daily essentials: a lidded canister of cotton pads, a small tray for skincare, and a neat stack of Toilet paper. Add matching baskets up top to hide backups and tame bathroom clutter without crowding the vanity.
Finish with consistent hardware—black, brass, or chrome—to echo your faucet and make the storage look built-in, not tacked on.
Create Vertical Storage in Tiny Laundry Areas
When your laundry nook barely fits the machine, go vertical so every inch above it earns its keep. Treat the wall like a slim utility spine: clean lines, light colors, and hardware that matches your fixtures so it looks intentional, not improvised.
Add stackable elements that shift with your routine and keep supplies off the floor.
- Mount a rail system with adjustable shelves and hooks for detergents, spray bottles, and a fold-down drying rack.
- Install a narrow cabinet or open cubbies above the washer; pair with labeled bins and a pull-out hamper like Compact furniture.
- Hang a pegboard beside the machine, then add small planters for Vertical gardening herbs or air plants to soften the look.
Avoid Common Small-Space DIY Storage Mistakes
Although small-space storage projects look simple on paper, a few predictable missteps can make your room feel tighter and your system harder to use. Don’t build before you declutter; Clutter reduction sets the footprint, not the other way around.
Avoid deep bins in narrow closets—choose shallow, labeled containers so you can see everything at a glance. Don’t block airflow or access: leave door swings, radiator gaps, and outlet clearance, or you’ll hate using the space daily.
Skip oversized hardware; chunky brackets and thick shelves steal inches. Measure twice, then mock up with painter’s tape to verify reach and sightlines.
For space optimization, prioritize vertical zones, add adjustable shelves, and keep heavy items low. Finally, don’t mix too many systems—repeat materials and colors for a calmer look.
Frequently Asked Questions
How Can I Soundproof Storage Cabinets in a Small Apartment?
Add adhesive mass-loaded vinyl inside panels, then apply cabinet insulation foam and weatherstripping to doors. Use felt pads on shelves, soft-close hinges, and tight latches. These soundproofing techniques stay slim, tidy, and design-led.
What’s the Best Way to Childproof DIY Shelves and Drawers?
Anchor shelves to studs, add anti-tip straps, and install soft-close slides. Use Child safety latches and DIY locks on drawers. Keep heavy items low, corners rounded, gaps tight, and hardware flush.
How Do I Prevent Moisture and Mold in Under-Bed Storage?
Like a clam sealing out the tide, you’ll stop damp by lifting bins on risers, adding silica packs, and ventilating weekly. For moisture control and mold prevention, use breathable fabric boxes, avoid overstuffing, and vacuum-dry floors.
Which DIY Storage Materials Are Safest for People With Allergies?
You’ll do best with hypoallergenic materials like solid hardwood, sealed plywood, metal, or glass, paired with non toxic finishes. Skip MDF and heavy fabrics. Choose smooth, wipeable bins, tight lids, and low-dust felt pads.
How Can I Match DIY Storage Finishes to Existing Furniture Cheaply?
Match finishes cheaply by color-matching a sample, then test custom paint finishes on scrap and seal with matte topcoat. You’ll unify pieces with peel-and-stick veneer and strategic hardware upgrades that echo existing pulls.
Conclusion
Measure once more, then let every inch earn its keep. When you match storage to your daily rhythm, clutter stops roaming and starts parking. Treat your walls like a clean skyline—hooks, rails, and shelves rising upward instead of spreading out. Anchor floating shelves, keep entry racks slim, and use the space above the toilet and washer. Choose renter-safe fasteners when needed, and skip overbuilding—light, sturdy, and intentional always wins.





