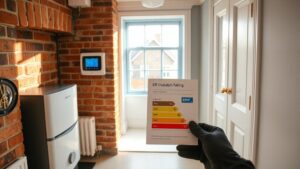
Around 60% of damp chimney issues come from exterior leaks or faulty flashing, not just interior condensation. You can spot early signs from damp patches near the breast, flaky brick, or a musty smell after rain; the real test is whether water shows up with a heavy shower or persists in dry spells. Tackle cracks, check flashing, and improve ventilation, but persistent damp may require a pro—so you’ll want to know where to start and what to expect next.
How Damp Appears on Chimney Breasts

Damp on chimney breasts often shows up where warm indoor air meets cooler exterior surfaces, creating condensation that soaks into plaster or brick. You’ll notice damp patches, a musty odor, and peeling paint or wallpaper near the hearth.
Moisture absorption occurs when porous materials draw water from the interior’s humidity, then trap it behind finishes. In older homes, historic renovations often replaced or altered original ventilation paths, accelerating damp buildup.
You should inspect for bridging timbers, deteriorated plaster, or failed damp-proof membranes that disrupt the wall’s drying capacity. Monitor seasonal changes—wet months worsen conditions, dry periods reveal hidden damage.
Address the pattern promptly with targeted drying, ventilation improvements, and surface repair. This approach aligns with Historical renovation practices to preserve structural integrity while reducing moisture risks.
Common Damp Causes in Chimneys (Leaks, Flue, Condensation)
Common damp in chimneys usually stems from leaks, flue issues, or condensation, each demanding a targeted fix. You’ll first inspect external seals around brickwork and the chimney crown for cracks, as leaks travel along mortar joints and into the breast.
Flue problems—like broken liners, poor flashing, or blockages—impair venting and push moisture into adjoining walls.
Condensation rises when warm, moist air meets cold chimney surfaces; improve this with better insulation and controlled ventilation.
Historical chimney design often underestimated water ingress, so reseal joints and consider repointing with breathable, damp-resistant mortar.
Modern insulation techniques minimize heat loss and reduce condensation risk, but you must guarantee a continuous vapour barrier and proper damper maintenance.
Address issues promptly to prevent escalating damage and preserve structural integrity.
Diagnose Damp at Home: Step-by-Step Checklist
To diagnose damp at home, follow this step-by-step checklist to identify the source and prioritize fixes.
Start with a visual survey of the chimney breast for staining, peeling paint, or efflorescence. Note any seasonal patterns and suspect leaks around flashing, stack joints, or nearby gutters.
Check inside for damp patches on walls, and inspect attic and loft spaces for roof moisture or condensation buildup.
Test ventilation by monitoring humidity and airflow, especially in historically built rooms with decorative finishes where moisture can hide.
Probe brickwork for damp-by-capillary rise using a masonry brush test, and assess existing waterproofing or coatings.
Document findings, prioritize fixes by impact, and remember that certain historic or decorative finishes demand careful treatment to avoid damage.
Historical building considerations guide cautious assessment.
DIY Damp Repairs for Chimney Breasts

Having identified the damp sources and patterns in the chimney breast, you can begin practical repairs that you can safely perform yourself. Focus on simple, effective steps that prevent recurrence and don’t overpromise outcomes.
1) Clean and inspect surfaces, removing loose flaking paint and debris to reveal sound brick or plaster.
2) Apply a breathable moisture barrier to exterior walls and inner faces as appropriate, ensuring good adhesion and coverage.
3) Seal minor cracks with flexible masonry filler, then repaint with durable chimney paint designed for damp conditions.
4) Install or refresh a soil-and-water diversion at exterior breaches and maintain a vented, heated area to reduce condensation.
When to Call a Pro for Chimney Damp
If you notice persistent damp after your DIY fixes, it’s time to call a pro. Persistent moisture can signal hidden structural damage or chronic moisture intrusion that warrants professional assessment. A specialist will perform a thorough inspection, identify the source, and distinguish between masonry issues, flashing failures, or ventilation gaps.
Don’t delay if you observe rising damp, mold growth, or efflorescence around the chimney breast. When you bring in an expert, discuss Historical chimney restoration options only if you plan future preservation or re-pointing, and request a detailed remediation plan with timelines.
Guarantee fire safety precautions are reviewed during any work, including temporary containment and proper ventilation. Schedule guidance and cost estimates upfront, and verify contractor credentials and insurance before work begins.
Frequently Asked Questions
Can Chimney Damp Cause Health Issues Beyond Mold?
Yes, chimney damp can affect more than mold. You may experience respiratory irritation, headaches, and worsened asthma or allergies from damp environments.
Prolonged exposure can contribute to metal corrosion, wood rot, and structural damage, increasing safety risks like fire or collapse.
Implement moisture control and mold prevention to protect health and property. Regular ventilation, damp proofing, and prompt remediation are essential.
Prioritize health risks awareness, and consult professionals for accurate assessments and effective mold prevention strategies.
What’s the Best Non-Invasive Moisture Meter for Chimneys?
A moisture meter like the Protimeter non-invasive detection model is your best bet for chimneys. It reads moisture through masonry without drilling, giving fast, reliable results.
In a real scenario, you test the chimney breast from room side to confirm damp origins before repairs. You’ll get precise readings, helping you decide on drying or sealing strategies.
Choose a device with pinless mode, clear display, and enough range for plaster, brick, and mortar.
Do Attic Vents Affect Chimney Damp Levels?
Attic vents can affect chimney damp levels. If attic ventilation is poor, moisture rises and condenses in the chimney breast, increasing damp risk. Make certain adequate attic airflow and avoid blocked vents.
Pair this with proper roof insulation to reduce temperature differentials that drive condensation. Regularly inspect for chimney cap leaks and sealing gaps around the chimney chase.
Are There Seasonal Patterns to Chimney Damp?
Yes, there are seasonal patterns to chimney damp. You’ll notice higher issues in winter and early spring, when cold, wet weather and heating use raise condensation and condensation-driven damp.
Seasonal variation drives moisture swings as temperatures fluctuate and humidity shifts.
Weather influence matters most: rain, snowmelt, and strong winds can drive damp deeper.
You can mitigate by sealing leaks, improving ventilation, and monitoring humidity, especially during damp, windy months and cold snaps.
How Long Does It Take to Dry Damp Chimney Breasts?
Drying damp chimney breasts typically takes days to weeks, depending on moisture level and drying methods you use. If you improve ventilation issues and fix any structural leaks, you’ll accelerate drying.
Start by airing the area, using dehumidifiers, and warming the space safely. Expect faster results with continuous airflow and moisture removal.
Monitor moisture with a meter, recheck for leaks, then re-seal cracks. Patience matters; ignore lingering damp, or it’ll return.
Conclusion
Damp on a chimney breast isn’t mysterious fate; it’s a signal you can read. Start with a careful check of flashing, brickwork, and gutters, then seal cracks with flexible masonry filler and breathe new life into the walls with breathable barriers. Improve ventilation and steady heating to curb condensation. If leaks persist or damage deepens, call in a pro—chimneys don’t fix themselves, but with precise steps and prompt attention, you can restore calm to your walls and your home.