
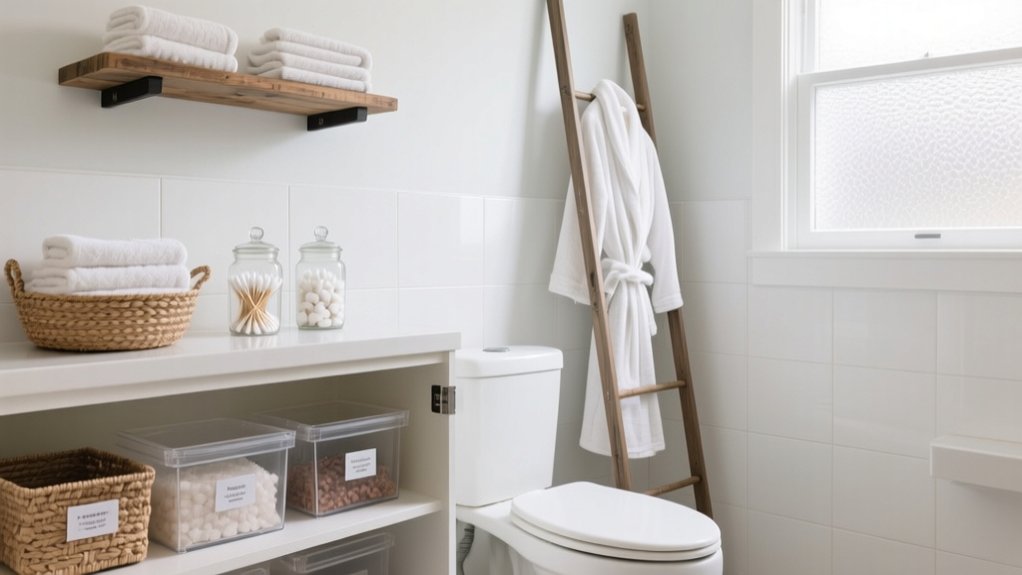
Start by zoning your bathroom (basin, shower, loo, door swing) and sketching it to scale so shelves and hooks don’t clash with pipes or splash zones. Add renter-friendly storage with adhesive hooks and suction caddies on cleaned tiles, then boost vertical space with sealed timber floating shelves or a floor-braced over-the-toilet unit. Tame clutter with under-sink U-shaped bases, drawer dividers, and labelled wall baskets. Keep going to pick the best layout for your space.
Map Your Bathroom Zones and Measure Space
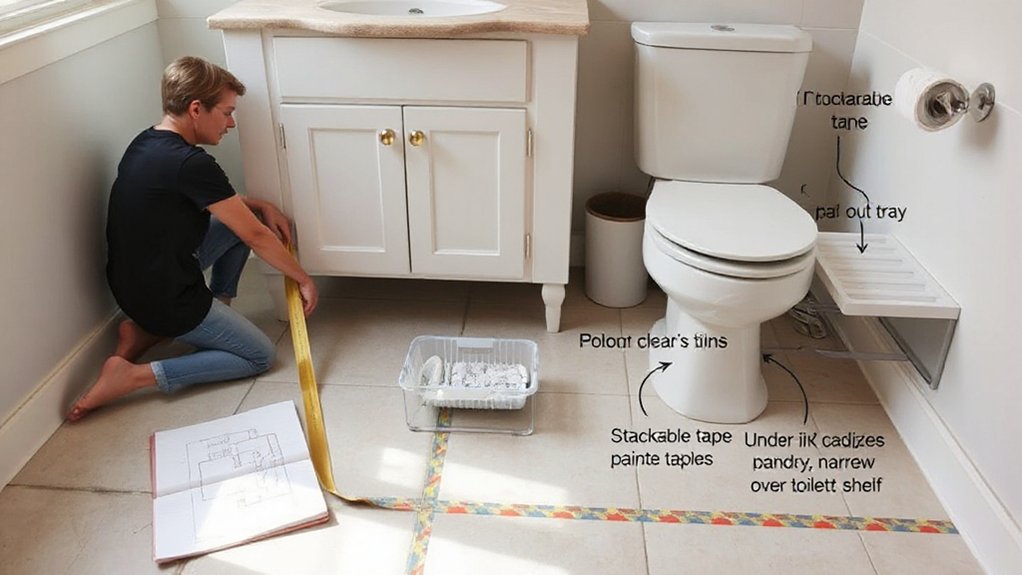
Before you buy timber or brackets, map your bathroom into clear zones—basin, shower/bath, toilet, door swing and any towel-radiator area—so every storage idea fits how you actually use the room.
Sketch the layout to scale on A4, then measure wall widths, usable height, and the depth you can spare without clipping the door or your knees.
Mark Plumbing fixtures: stopcock access, soil pipe boxing, cistern panels, and any service valves you’ll need to reach.
Note Bathroom lighting positions and pull-cord routes so shelves won’t cast shadows at the mirror or block fittings.
Check stud locations, tile lines, and existing fixings; in many UK bathrooms you’ll hit dot-and-dab plasterboard or masonry.
Record humidity hotspots and splash zones to plan sensible clearances.
Choose Renter-Friendly DIY Storage Options
If you’re renting, you’ll want storage you can fit without drilling and remove cleanly at the end of your tenancy. You can use no-drill wall storage like strong adhesive hooks, caddies, or suction shelves on smooth tiles, making sure you follow the weight limit and clean the surface with isopropyl alcohol first.
You can also add a removable over-toilet shelf unit that braces on the floor behind the pan, so you gain vertical storage without touching the walls.
No-Drill Wall Storage
Although you can’t put holes in the tiles, you can still add serious bathroom storage with no-drill options that hold up to daily use. Start with adhesive wall mounted caddies in the shower: choose stainless steel, check the weight rating, and stick them to smooth tile after cleaning with isopropyl alcohol. Press firmly for 30 seconds, then wait 24 hours before loading shampoo and conditioner.
For small items, add magnetic strips inside a mirrored cabinet or on a painted wall with removable pads; they’re ideal for tweezers, nail clippers, and bobby pins. Use suction hooks for loofahs and razors, but re-seat them weekly. Keep a spare pack of Command-style refills for quick repositioning later.
Removable Over-Toilet Shelves
Whether your loo sits in the only unused corner of the room or you’re working with a tight UK bathroom, a removable over-toilet shelf instantly adds vertical storage without drilling into tile or plaster.
Choose a freestanding ladder-style unit or a tension-pole frame that grips floor-to-ceiling; both lift baskets, loo roll, and cleaning sprays above the cistern.
Measure the pan’s width and the cistern height first, then pick shelves with adjustable legs so you can level it on uneven Victorian floors.
Add stick-on rubber feet to stop slipping on vinyl or tiles.
Use lidded boxes for toiletries, a slim tray for spare soap, and a small hook rail for flannels.
These removable over toilet shelves deliver tidy, renter-safe bathroom storage upgrades quickly.
Add Floating Shelves for Vertical Bathroom Storage
When floor space feels tight, floating shelves let you turn unused wall height into practical bathroom storage without adding bulky furniture. You’ll gain vertical storage for toiletries, spare loo rolls, and folded flannels while keeping the room looking light and tidy.
Pick moisture-resistant timber (sealed MDF, treated pine, or oak) and use rust-proof fixings. Find studs with a detector; if you’ve got plasterboard, use heavy-duty cavity anchors rated for the load.
Keep shelves level with a spirit level, and leave enough clearance above taps and towel rails. Fit a small lip or use baskets to stop bottles sliding, especially in family bathrooms.
Finish with mould-resistant paint or clear varnish, then wipe down regularly to prevent water marks and swelling.
Build an Over-the-Toilet Shelf for Extra Storage
Why waste the wall space above your loo when it can handle your everyday bathroom essentials? Build an over-the-toilet shelf that straddles the cistern and gives you reliable toilet storage without drilling into tiles.
Measure the width of your WC and the clearance to the flush, then cut two side panels and 2–3 shelves from 18mm moisture-resistant MDF or plywood.
Assemble with wood glue and countersunk screws, checking for square. Add a rear brace to stop racking, and fit adjustable feet so it sits level on uneven bathroom floors.
Seal edges with primer, then paint with bathroom-grade satin.
Use baskets for loo roll, wipes, and cleaning spray, keeping bathroom shelving tidy and splash-safe.
Install Towel Hooks and a Simple Robe Rail
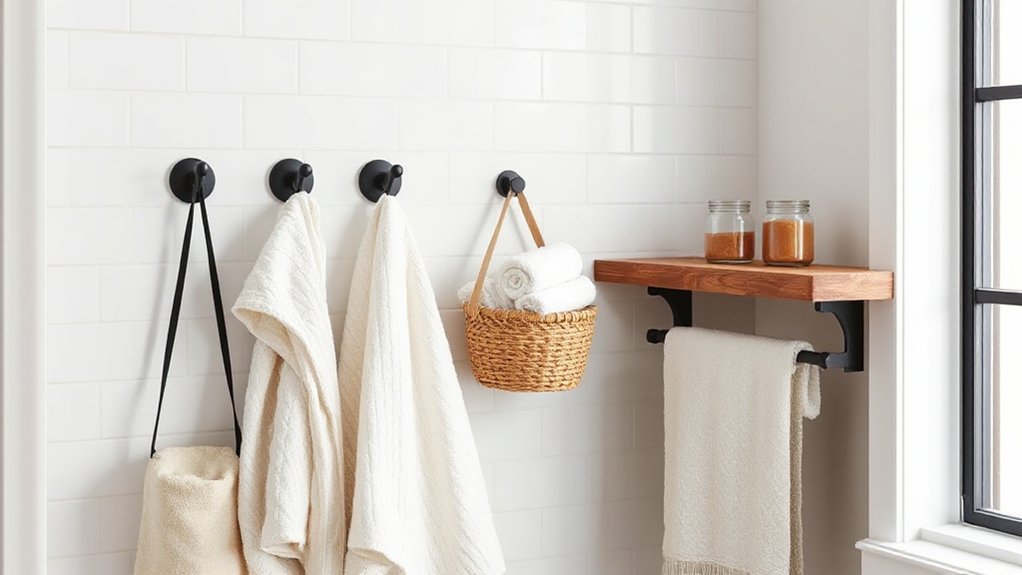
If your towels keep ending up on the radiator or the back of the door, fit a few sturdy towel hooks and a simple robe rail to create instant, no-nonsense storage.
Pick a spot near the shower but away from splash zones, then mark heights you can reach easily. Use a stud finder or heavy-duty wall plugs (Fischer or Rawlplug) for plasterboard; tile needs a carbide bit and masking tape to stop skidding.
- Fit Towel hooks at staggered heights so towels dry faster and don’t bunch.
- Install a Robe rail above hooks for dressing gowns or tomorrow’s clothes.
- Finish with stainless or powder-coated fittings to resist limescale and rust.
Check fixings quarterly, tighten screws, and wipe down with a mild cleaner.
Make an Under-Sink Organizer for Cleaning Supplies
Although the cupboard under your basin often turns into a jumble of sprays, sponges, and spare loo roll, you can tame it with a simple organiser that works around the waste trap and pipework.
Measure the internal width and depth, then cut 12mm ply to make a U-shaped base that slips around the pipes. Add two short side panels and a front lip to stop bottles tipping when you open the door.
Fix everything with waterproof wood glue and screws, then seal edges with varnish or leftover bathroom paint.
Screw in a pair of mini curtain rails or fit an extendable tension rod to hang trigger bottles by their handles.
Pop small Cleaning supplies into labelled caddies for quick under sink organization.
Fix Messy Drawers With DIY Dividers
Start by measuring your drawer’s internal width, depth, and height in millimetres, then check the size of what you’re storing—make-up, razors, cotton pads, and toiletries—so each section fits properly.
Cut thin plywood, MDF, or sturdy plastic sheet to suit, and use slots or notches so the pieces interlock and stay square.
Keep the layout adjustable by spacing dividers to suit changing contents, and you’ll stop everything sliding about every time you open the drawer.
Measure Drawers And Contents
Before you cut any dividers, how well do you actually know your drawer’s true usable space? Empty it fully, then measure internal width, depth, and height at the narrowest points (runners and lip trims can steal millimetres). Use reliable measurement tools: a steel tape, a small rule, and masking tape for marking. Note the drawer’s opening height too, so taller bottles don’t snag.
Next, measure what you’re storing, not what you wish you stored. Group items by function, then check the biggest footprint in each group. If you use storage containers, measure them filled, including lids. Record sizes in mm for UK accuracy.
- Toothpaste, floss, razors: count and stack height
- Skincare bottles: base diameter and cap height
- Hair tools: length and cable bulk
Build Adjustable Drawer Dividers
Once you’ve got your drawer and item measurements in hand, you can build adjustable dividers that keep toiletries separated while still letting you reconfigure the layout as your routine changes.
Start with smart Material selection: 6mm plywood or moisture-resistant MDF suits UK bathrooms; seal edges with clear varnish, or use 3mm acrylic for wipe-clean durability.
Cut long runners to the drawer’s depth, then slot in crosspieces.
For adjustment mechanisms, choose one: cut evenly spaced notches (every 20–25mm) so crosspieces drop in anywhere, or drill a row of 4mm holes and use small dowels to peg positions.
Add thin self-adhesive felt to divider bases to stop sliding and protect drawer finishes.
Test-fit, tweak, then label sections for quick resets.
Hang Wall Baskets for Daily Bathroom Essentials
Because countertop clutter builds up fast in a shared bathroom, wall baskets give you quick-access storage for the items you use every day. Fix them above the sink or beside the mirror so you can grab and go without knocking bottles over.
Choose rust-resistant wire, powder-coated steel, or sealed rattan, and pair them with matching hooks to keep your Wall decor cohesive and your storage aesthetics tidy. Use wall plugs suited to your surface (tile, plasterboard, or masonry) and keep baskets level with a spirit level.
Label fronts with a paint pen for faster routines, and wipe weekly to prevent soap scum.
- Toothpaste, spare brushes, and floss
- Deodorant, hair ties, and dry shampoo
- Hand cream, razors, and cotton pads
Add Corner Shelves for Tight Bathroom Layouts
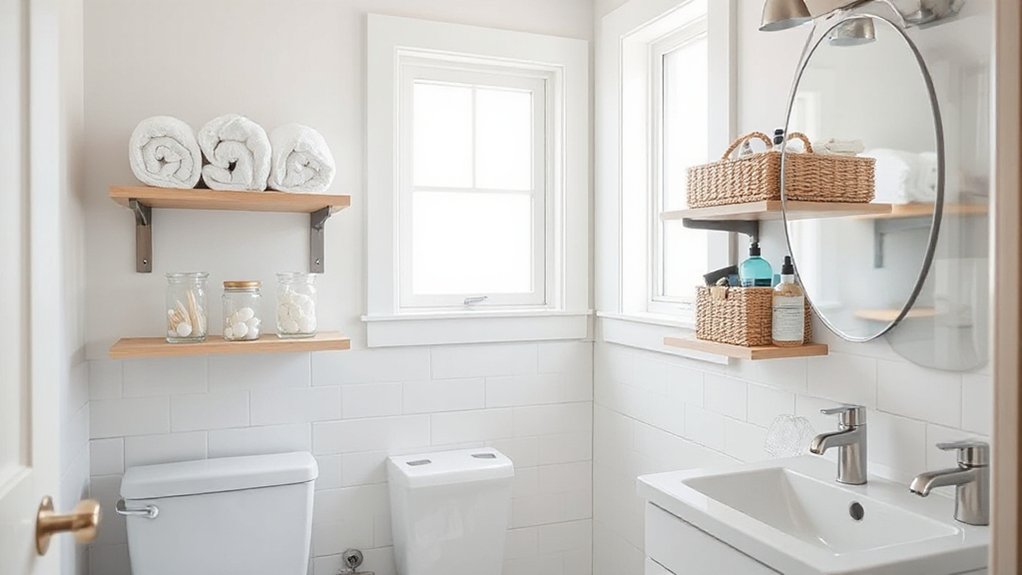
If your bathroom’s tight, you can reclaim unused corners with slim triangle shelves, tiered units, or wrap-around designs that sit neatly above the loo or beside the shower.
You’ll get a solid fit by checking the corner is square, marking fixings carefully, and using suitable wall plugs for plasterboard or tile before mounting.
Choose waterproof materials and finishes—sealed hardwood, PVC, stainless steel, or powder-coated metal—so the shelves won’t swell, rust, or peel in daily steam.
Space-Saving Corner Shelf Styles
While floor space disappears quickly in a tight bathroom, corner shelves let you add storage without narrowing the walkway or crowding the basin. Choose a style that suits your daily routine and your finishes, whether you’re working with white metro tiles, painted plaster, or a classic UK box room layout.
Aim for shallow depths so bottles don’t topple, and pick moisture-friendly materials like sealed timber, acrylic, or powder-coated steel.
- Triangular floating shelves: neat for spare loo rolls and a small plant, with minimal visual bulk.
- Tiered caddies: stack levels for shampoo, cleanser, and razors, keeping labels facing forward.
- Corner shelf alternatives like slim ladders or tension poles, when you need flexible, temporary storage.
For decorative corner shelving, match brackets and edging to taps and towel rails for a cohesive look.
Easy Installation And Mounting
Once you’ve picked a corner shelf style that suits your tiles and routine, the next job is getting it on the wall securely without cracking a single grout line. Mark height with masking tape, then use a spirit level and pencil to set your fixing points.
In UK bathrooms, you’ll often hit plasterboard over blockwork, so check with a stud/pipe detector before drilling.
Use a carbide tile bit, start slow, and keep the drill in hammer-off mode until you’re through the glaze. Swap to a masonry bit if needed. Fit suitable wall plugs, then screw the bracket tight without over-torquing.
Run a final level check before loading toiletries. Add decorative accents like small jars, and consider lighting solutions such as a compact battery puck above the shelf.
Waterproof Materials And Finishes
Because steam, splashes, and limescale hit every exposed edge in a UK bathroom, corner shelves need genuinely waterproof materials and finishes rather than “water-resistant” promises. Choose marine plywood, PVC board, or anodised aluminium so swelling and rust don’t wreck tight corners.
If you use timber, seal every face and drilled hole before you mount it, then cap edges with iron-on edging or a bead of silicone.
For tiles and grout lines, use neutral-cure silicone and don’t skimp on curing time in cold flats.
Aim for:
- moisture resistant finishes like two coats of polyurethane or yacht varnish
- waterproof sealants on joints, screws, and wall penetrations
- stainless fixings (A2/A4) to avoid tea-coloured rust stains
Wipe limescale weekly, and re-seal annually to keep shelves hygienic.
Label Bins and Baskets for a Quick Reset
After you’ve sorted your toiletries into bins and baskets, add clear labels so you can reset the bathroom in minutes instead of hunting for where things belong. Use a label maker, waterproof vinyl stickers, or laminated card tied with string for humid UK bathrooms. Keep wording short: “Floss”, “Plasters”, “Travel minis”, “Refills”. Place labels on the front and the lid so you can read them on a shelf or in a drawer.
Create zones for baskets organization: daily use, backstock, guests, and cleaning. When you label bins consistently, everyone in the house knows where to put items back after school runs or night shifts.
Add expiry-month dots for medicines and sunscreens, and you’ll spot what needs replacing fast.
Frequently Asked Questions
What Moisture-Resistant Materials Work Best for DIY Bathroom Storage Projects?
You’ll get best results using marine plywood, PVC board, sealed MDF, or hardwoods like oak, then add waterproof coatings. Choose rust proof hardware in stainless steel or brass, plus silicone-sealed joints for durability.
How Can I Prevent Mold and Mildew Behind Shelves and Organizers?
You’ll stop mold and mildew by letting air patrol like a night watchman: use ventilation techniques—run the extractor, fit spacers, drill airflow holes—and coat walls with mold resistant paints. Keep shelves off damp plaster.
What Tools Are Essential for Beginner-Friendly Bathroom Storage DIYS?
You’ll need a tape measure, spirit level, drill/driver with masonry bits, rawlplugs and screws, stud finder, saw, sandpaper, sealant, and PPE. Use them for custom shelving and securing decorative baskets safely.
How Do I Patch and Repaint Walls After Removing Adhesive Storage Solutions?
Scrape off residue, sand lightly, then fill dents with ready-mixed filler for Wall repair; let it dry, sand flush, prime bare patches, then apply paint touch ups using a small roller, matching finish and sheen.
What’s the Safest Way to Store Medications and Razors Away From Children?
Lock meds and blades like you’d cage a curious fox: use a wall-mounted lockbox, keep keys high, and store razors in a locked cabinet. Prioritise Medication safety, Razor storage; use child-resistant packs.
Conclusion
You’ve mapped zones, measured gaps, and made every inch count. With renter-friendly fixes—floating shelves, an over-the-loo unit, hooks, rails, and corner shelves—you’ll turn dead space into dependable storage. Tame clutter with DIY drawer dividers, then keep daily bits close in wall baskets. Finish with labelled bins so you can do a quick, consistent reset after busy mornings. Small, smart, space-saving tweaks deliver a calmer, cleaner bathroom—without costly call-outs or drama.





