
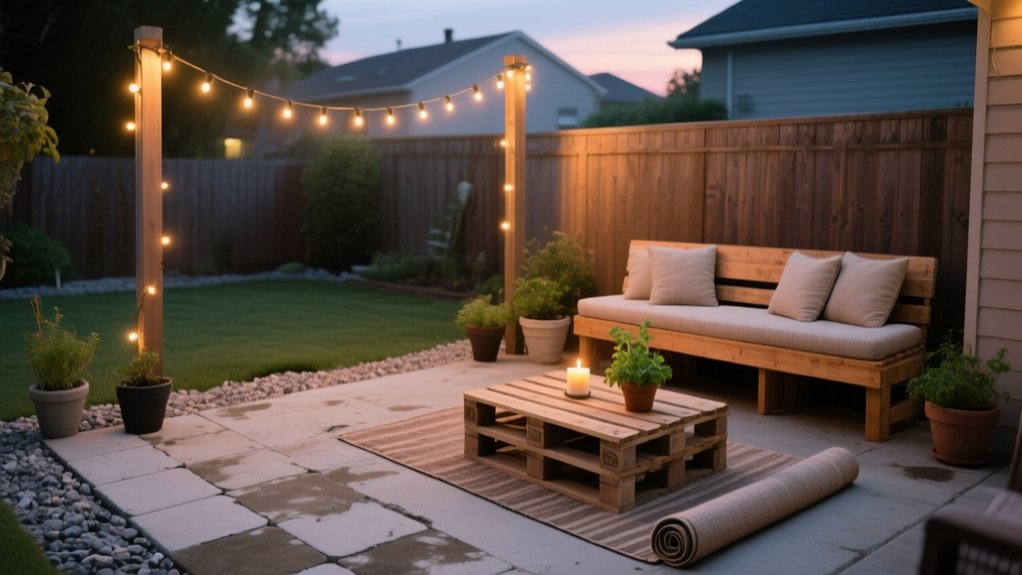
Measure your patio (length, width, diagonals) and sketch zones so you can place dining near the door and keep 36-inch paths clear. Define a seating area fast with a UV-resistant outdoor rug, leaving a 6–12 inch border for door swing and durability. Build cheap seating by stacking two heat-treated pallets and fastening with exterior deck screws, then sand and seal. Refresh tired concrete with porch-and-patio paint plus anti-slip additive. Keep going to see more low-cost upgrades.
Budget Patio Upgrades: Pick Your Top 3
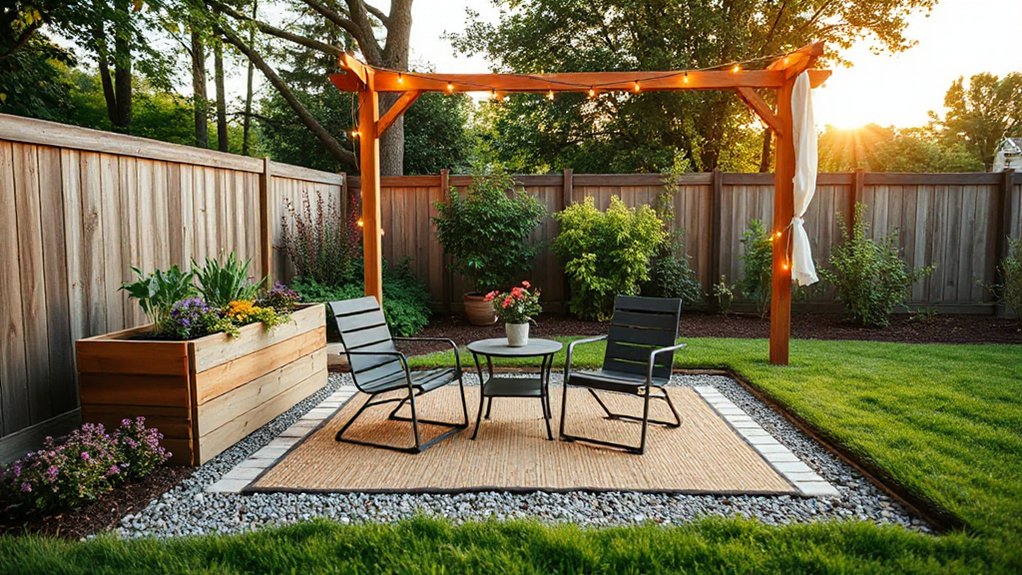
If you’re upgrading a patio on a tight budget, start by choosing three high-impact changes you can install yourself: better lighting, simple seating comfort, and a defined surface.
For lighting, run solar stake lights or a plug-in LED string on a timer; you’ll cut watts and improve safety at night.
For seating, upgrade garden furniture with weatherproof cushions, chair glides, and a small side table; you’ll boost usability without replacing frames.
For the surface, lay interlocking deck tiles, pea gravel in a bordered pad, or an outdoor rug over concrete; you’ll visually “finish” the space fast.
Keep patio decor functional: one durable planter, one storage bench, and a washable mat.
Price each item, cap totals, and buy off-season.
Measure Your Patio and Plan Zones
Start by measuring your patio’s exact length, width, and any obstructions, then sketch a simple scaled layout so you don’t waste money on ill-fitting pieces.
Assign clear activity zones—dining, lounging, grilling, storage—based on traffic paths, door swings, and safe clearances.
With accurate dimensions and defined zones, you’ll buy only what fits and functions.
Measure Dimensions Accurately
Before you buy a single piece of furniture or paver, lock down your patio’s exact dimensions so you don’t waste money on items that won’t fit. Use a 25-foot tape, a straightedge, and chalk to mark boundaries, then measure length, width, and diagonals to confirm squareness. Record numbers to the nearest 1/4 inch and sketch a scaled rectangle on graph paper (1 square = 6 inches) to prevent costly guesswork.
Note door swing arcs, step edges, and any posts or planters that shrink usable space. Measure clearances for patio furniture: allow 18–24 inches behind chairs and 36 inches for main walk paths. For garden lighting, measure outlet-to-fixture runs so you buy the shortest safe cord lengths.
Recheck everything once.
Map Functional Activity Zones
With your measurements and sketch locked in, use that plan to map functional activity zones so every square foot earns its keep. Start by defining primary circulation paths at least 36 inches wide, then place zones off those routes to prevent bottlenecks.
Assign a dining zone near the door for shorter carry distance, a lounge zone where shade or a budget umbrella can cover seating, and a grill/prep zone downwind and 24 inches from combustibles.
Size each zone around outdoor furniture footprints plus clearance: 24 inches behind chairs, 18 inches between tables and walls.
Tie edges together with simple landscaping design: gravel bands, pavers, or mulch to “draw” boundaries without building walls.
Keep utilities in mind for lighting and hoses.
Start With an Outdoor Rug Upgrade
Although you can swap out furniture later, an outdoor rug instantly defines your seating zone, cuts glare off hard surfaces, and makes the patio feel finished for relatively little money. Measure your zone and leave 6–12 inches of border so doors clear and edges don’t curl. Choose polypropylene or recycled PET for UV resistance, fast drying, and easy hose-off cleaning. Add a non-slip pad to reduce shear, protect decking, and extend rug life.
For outdoor decor, match the rug’s pattern scale to your table size, then echo one color in cushions. Tie it together with garden lighting: stake lights or warm string runs at 2700K to soften contrast and make textures pop at night.
- You’ll feel grounded, not scattered.
- Your feet get instant comfort.
- Your space looks intentional, not temporary.
- Evenings feel calmer and brighter.
DIY Pallet Seating for a Cheap Patio
Once your rug defines the seating zone, you can fill it without blowing your budget by building pallet seating. Source heat-treated pallets (look for the “HT” stamp) from local warehouses, then inspect for cracks, protruding nails, and oil stains.
For a low-profile bench, stack two pallets, align the stringers, and screw them together with 2-1/2″ exterior deck screws every 8–10 inches. Add blocking inside corners to stop racking, then attach 3″ locking casters if you need mobility on concrete.
Sand edges with 80/120 grit, then seal with an exterior wood preservative to reduce splinters and rot. This Pallet crafting project delivers durable, rustic furniture at near-zero material cost.
Add Cushions and Weatherproof Your Seating
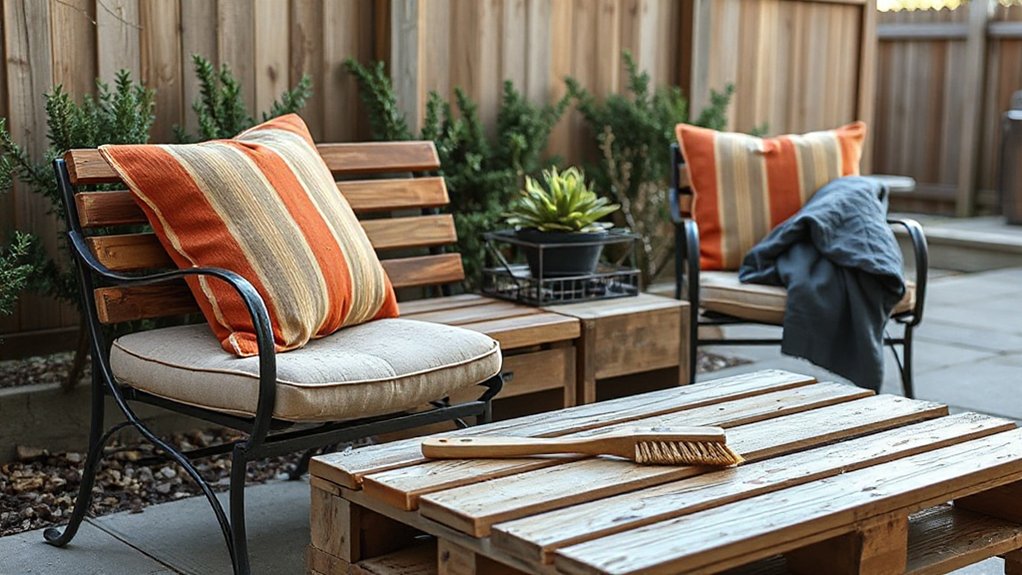
You’ll get the biggest comfort upgrade per dollar by choosing outdoor-grade cushions with UV-resistant fabric and quick-dry foam.
Add waterproof cushion covers or a spray-on water repellent to cut replacement costs and keep moisture from soaking in.
When rain hits, store cushions in a deck box and angle or cover seating so water can’t pool on the surfaces.
Choose Outdoor-Grade Cushions
Where do you get the biggest comfort upgrade for the least money on a patio set? You swap in outdoor-grade cushions that support your back, shed moisture, and survive sun without turning crunchy. Choose dense foam (1.8–2.5 lb/ft³) at 4–5 inches thick; it holds shape longer and costs less per season.
Look for outdoor fabric with tight weaves, UV inhibitors, and high weather resistance ratings so colors don’t fade fast. Pick quick-dry polyester fill or reticulated foam for damp climates.
Measure your frames first and buy standard sizes to avoid custom pricing.
- You’ll sit longer without fidgeting
- You’ll stop dreading soggy seats
- You’ll feel proud seeing fresh color
- You’ll relax when storms roll through
Add Waterproof Cushion Covers
Even if your cushions use outdoor fabric, a waterproof cover adds the cheapest layer of insurance against rain, spills, and morning dew. You’ll extend cushion life by blocking soak-through that leads to mildew, foam breakdown, and stains.
Choose Cushion covers with taped seams and a polyurethane or TPU laminate; they’re more durable than thin PVC and won’t crack as fast.
Measure each cushion (length, width, thickness) and buy covers with 1–2 inches of ease so zippers don’t strain. For budget control, cover only seat bottoms first; they take the most abuse.
Look for #5 nylon zippers, double stitching, and a hidden flap to reduce leakage at the closure.
If you DIY, seal seams with iron-on tape and add a drawcord channel for a snug fit.
Protect Seating From Rain
After a surprise shower, how fast does your seating turn into a sponge? You can stop that soggy cycle with cheap Rain protection and simple Seating shelter.
Start by adding quick-dry foam cushions or replacing inserts with reticulated foam so water drains fast. Then seal the frame: brush on exterior spar urethane for wood, or hit metal joints with rust-inhibiting primer and enamel.
Add plastic furniture risers or pavers to lift legs off puddles, and angle seats slightly so water sheds instead of pooling.
Finish with a $15–$30 tarp-style cover or a DIY mini awning from polycarbonate panel scraps and L-brackets.
- You’ll sit down without that cold, wet shock.
- You won’t smell mildew creeping in overnight.
- You’ll avoid warped boards and rusty screws.
- You’ll relax when clouds roll in.
DIY Patio Privacy Screen (Cheap + Removable)
If you need more privacy on your patio but don’t want to sink money into permanent fencing, a DIY privacy screen gives you fast coverage on a small budget—and you can take it down anytime.
Build a freestanding panel from two 2×2 uprights, two 1×2 crossbars, and exterior screws; skin it with reed fencing, lattice, or outdoor fabric.
Set the uprights in 5‑gallon buckets filled with gravel or quick‑set concrete for ballast. That makes a stable, removable barrier you can reposition without digging holes.
Use zip ties or staples for the facing so you can swap materials cheaply.
Add rubber pads under buckets to protect pavers and reduce sliding.
Keep panels 6–7 feet tall for sightline control.
Seal wood ends to slow rot.
Budget Patio Shade: Canopy or Sail?
Once you’ve blocked unwanted sightlines with a removable privacy screen, the next comfort upgrade is controlling sun and heat without building a roof. For tight budgets, your best Shade options are a pop-up canopy or a shade sail.
A canopy costs more but installs fast, includes a frame, and moves with you; choose vented tops and 50+ UPF fabric.
A sail is cheaper per square foot and boosts Patio aesthetics, but you’ll need solid anchor points, stainless hardware, and a steep pitch for rain runoff. Measure sun angles first, then size for afternoon coverage.
- Feel instant relief when glare disappears
- Enjoy cooler seats without paying for HVAC
- Relax knowing UV exposure drops dramatically
- Take pride in a clean, modern silhouette
Hang Patio String Lights the Easy Way
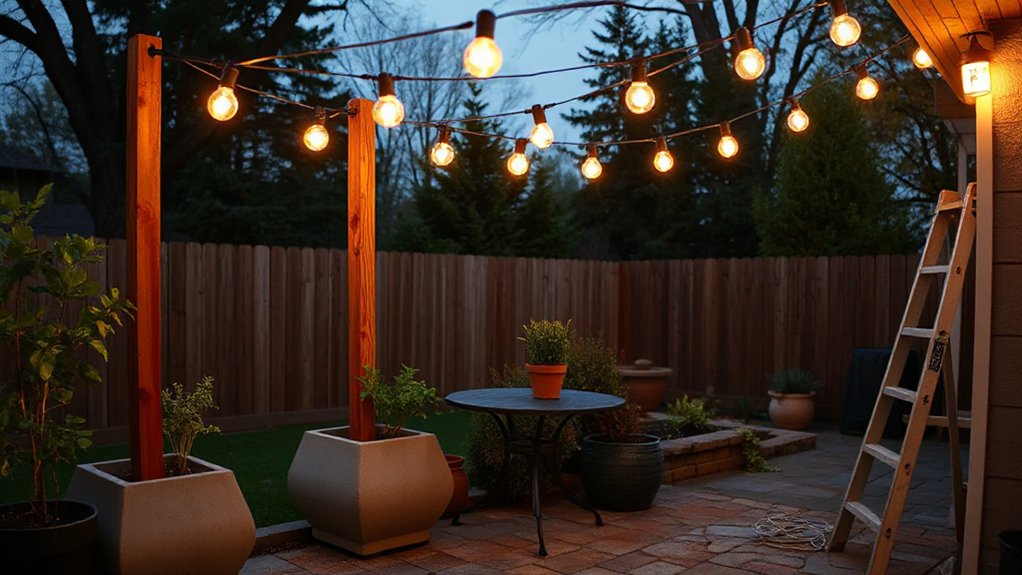
While you don’t need an electrician to get a polished glow, you do need a simple plan: map your light path first, then pick the cheapest solid support (existing eaves, a fence line, or a tensioned guide wire) so the string lights stay taut and off walking areas.
Measure the run, add 10% slack for turns, and buy commercial-grade String lights only where they’ll be exposed; cheaper indoor-rated sets fail fast.
Use screw-in cup hooks or eye bolts every 3–6 feet, then zip-tie the cord to the guide wire to stop sag.
Keep the plug end near a GFCI outlet, route the cord high, and drip-loop before the receptacle.
A simple dimmer-rated plug adds outdoor ambiance without rewiring.
Upgrade Solar Patio Lights With Simple Hacks
Because most “dim” solar fixtures fail from poor panel placement and weak batteries—not the LEDs—you can get a noticeable brightness boost with a few low-cost tweaks.
First, relocate the panel to full sun (6–8 hours) and wipe it with isopropyl alcohol; haze can cut charging fast.
Next, swap tired AAA NiMH cells for higher-capacity ones (800–1000 mAh) and match chemistry—don’t mix old/new.
If water’s getting in, add a thin bead of clear silicone around seams so you don’t lose nights to corrosion.
For steadier output, scuff contacts and retension springs so voltage drop stays low.
These solar hacks double as lighting tips you’ll feel immediately:
- You’ll stop squinting at “decorative” darkness
- You’ll enjoy safer steps and edges
- You’ll feel proud spending under $10
- You’ll relax knowing they’ll last longer
DIY Fire Pit on a Budget (Safe Setup)
Pick a level, noncombustible spot with overhead clearance and plenty of distance from your house, fences, and low branches, and check local burn rules before you build.
You’ll save money by using a simple metal fire ring or a recycled steel rim set on compacted gravel, then lining the outside with standard concrete pavers (not river rock that can crack or pop).
Add a spark screen and a clear 3–5 ft buffer of bare gravel so you’ve got a low-cost setup that’s stable and safer to use.
Safe Site Selection
Where you place a budget DIY fire pit matters as much as the materials you buy. Choose a level, noncombustible spot with stable drainage so rain can’t pool and crack surfaces. Keep at least 10–20 feet from structures, fences, sheds, and low branches, and stay clear of overhanging Landscape lighting wires. Check local codes and HOA rules, then map wind: set the pit so prevailing breezes push smoke away from seating and doors.
Don’t tuck it beside dry garden decor, mulch beds, or stacked firewood; give yourself a clear, trip-free access path for a hose or extinguisher. Use a simple perimeter to define the safe zone and protect kids and pets.
- You’ll relax without that “what if” worry.
- You’ll breathe easier with less smoke.
- You’ll protect your home and savings.
- You’ll host nights that feel secure.
Budget-Friendly Materials
Once you’ve locked in a safe, level spot with proper clearance, you can keep costs down by choosing materials that handle high heat without cracking or spalling. Start with concrete pavers or retaining-wall blocks rated for fire features; skip river rock, which can explode when heated.
Line the burn area with a thin bed of sand or compacted gravel for drainage and leveling, then add a steel fire ring to protect masonry and extend life.
For budget friendly sourcing, buy surplus pavers, check classifieds, or salvage intact block from demo sites. Choose sustainable materials like reclaimed brick or locally made concrete to cut transport costs.
Use high-temp construction adhesive only where manufacturer-approved; rely on dry-stacked courses for safer expansion and easy repairs.
Build a Simple Patio Bar or Drink Ledge
If your patio feels short on “set-down” space, a simple bar rail or drink ledge fixes that fast without blowing your budget. Build it from a 1×6 cedar or pressure-treated board, sealed and screwed into studs or masonry anchors, with L-brackets every 16 inches.
Keep it 42 inches high for standing comfort, or 36 inches to match chair arms. You’ll improve traffic flow and furniture arrangements by moving cups off small tables.
Tuck low-voltage Outdoor lighting beneath the ledge for safe, soft glow.
- You’ll finally relax without juggling drinks
- Guests will feel welcomed and cared for
- Cleanup gets faster, so you unwind sooner
- Your patio looks “finished” on a shoestring budget
Vertical Garden Patio Upgrade for Small Spaces
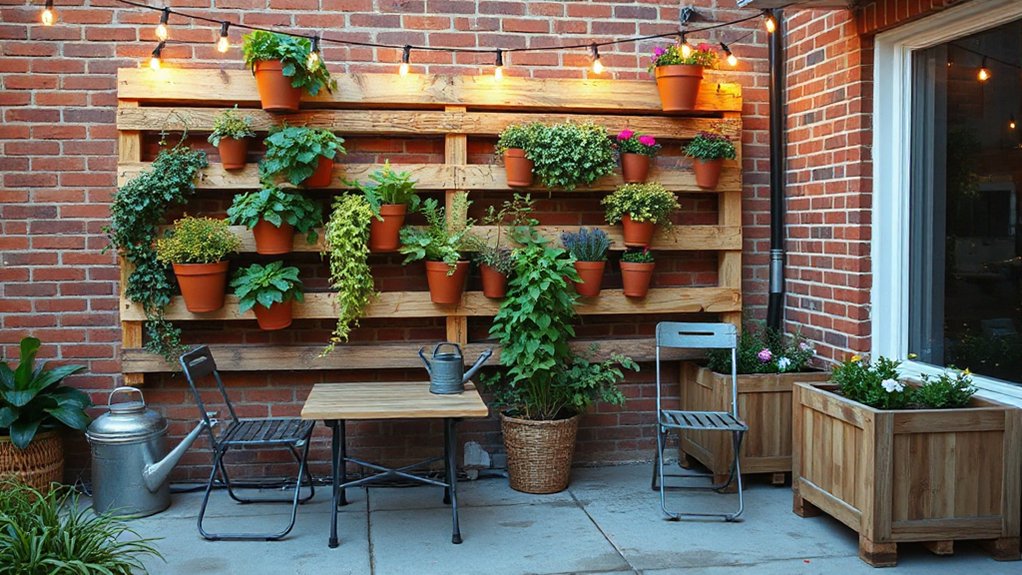
Although your patio footprint might be tight, you can add real greenery and privacy by going vertical with a simple, wall-mounted garden panel. Build one from a $20 lattice sheet or reclaimed pallet boards, then seal it for weather resistance.
Anchor it to studs or masonry with exterior-rated screws and spacers to create airflow behind the panel and prevent rot. Add a top rail and screw-in hooks so you can swap Hanging plants seasonally without re-drilling.
For irrigation, clip a narrow drip line along the upper slat and run it to a $10 timer or a manual valve at the spigot.
Finish with Vertical art: paint the frame matte black or stencil a geometric grid, then zip-tie small trellis netting for vine training.
Planters That Instantly Upgrade a Patio
You can upgrade your patio fast with planters that maximize growth per dollar and fit your layout. Build DIY raised planter boxes from pressure-treated lumber or cedar offcuts, mount vertical wall planters to reclaim floor space, and upcycle containers (buckets, crates, tins) with drilled drainage for near-zero cost.
You’ll get cleaner lines, better soil control, and scalable capacity without buying bulky outdoor furniture.
DIY Raised Planter Boxes
Because they add height, structure, and a clean edge in one build, DIY raised planter boxes deliver a high-impact patio upgrade on a tight budget. Build with 2×6 cedar or treated pine, exterior screws, and a weed-barrier liner; cap the top with a 1×2 to hide fasteners.
Keep boxes 16–24 inches tall so you can garden without kneeling, and size them to standard lumber lengths to cut waste. Place them to define your garden layout, frame seating, and route foot traffic.
Fill with a 60/40 topsoil-compost mix, then mulch to stabilize moisture for easier plant care.
- You’ll feel instant order where clutter used to win.
- You’ll enjoy cleaner edges and fewer weeds.
- You’ll harvest herbs within arm’s reach.
- You’ll relax, proud of a sharp, finished patio.
Vertical Wall Planter Ideas
Where can a small patio fit more plants without stealing floor space? Go vertical by turning a blank fence or exterior wall into a growing surface.
For Vertical gardening, mount a treated 1×4 ledger into studs or masonry anchors, then hang modular Wall mounted planters on a French cleat for quick removal.
Keep costs low by buying standard nursery pots and using inexpensive metal rail brackets or universal pot rings.
Aim for 12–16 inches between rows so foliage gets light and airflow.
Add a drip line or a simple soaker hose tied into a timer to reduce hand-watering.
Use lightweight potting mix, not garden soil, to limit load.
Check your wall’s weight rating and keep total wet weight under it.
Upcycled Container Planters
Even if your patio budget’s tight, upcycled container planters add serious greenery fast by turning everyday castoffs into durable pots. Start with creative container ideas like food-grade buckets, metal coffee cans, or cracked ceramic bowls; they’re often free. Drill 4–6 drainage holes, add a 1-inch gravel layer, then fill with potting mix and slow-release fertilizer. Seal rust-prone metal with clear spray, and line wood boxes with plastic plus holes.
Group mixed heights to fake a designer vignette, and use one repeating plant for cohesion. Upcycled garden containers also cut watering with deeper reservoirs and mulch.
- You’ll feel proud rescuing “trash” into beauty
- You’ll see instant color where concrete felt cold
- You’ll save cash without sacrificing style
- You’ll relax watching plants thrive you built
Paint or Stain Concrete for a Fast Facelift
If your patio slab looks tired but you don’t want the cost of replacing it, paint or stain gives you a fast, budget-friendly facelift with basic tools and a weekend window.
Start by checking for oil spots and peeling coatings; those affect adhesion and color.
For Concrete staining, choose acid stain for mottled, stone-like variation or water-based stain for predictable tones and easier cleanup.
Mask edges, then apply with a pump sprayer and back-roll to avoid lap marks.
For outdoor painting, pick a concrete porch-and-patio paint and add an anti-slip additive; it’s cheaper than pavers and hides cosmetic cracking.
Budget tip: buy sample quarts to test color in sun and shade before committing.
Easy Patio Maintenance: Clean, Seal, and Cover
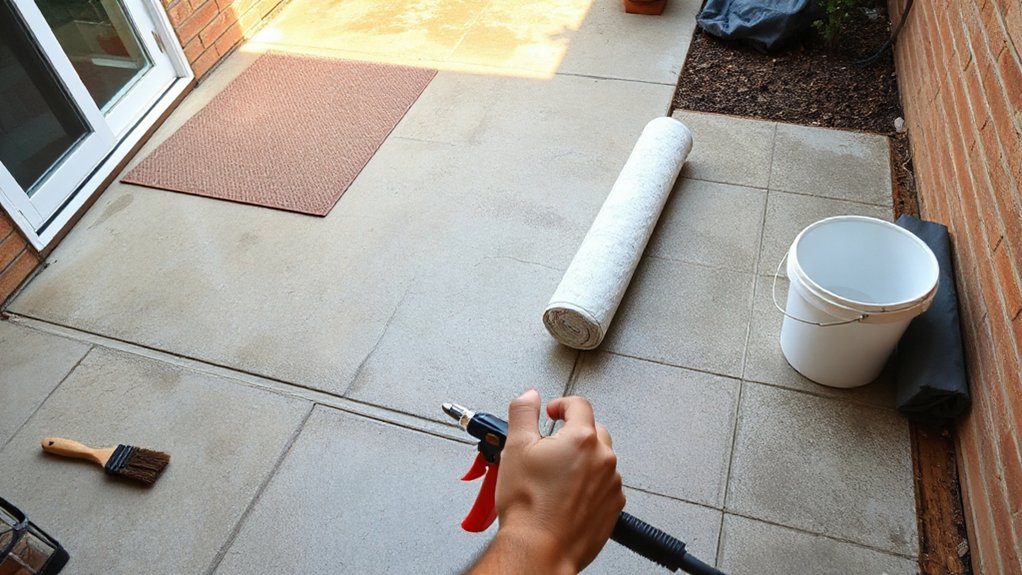
Because weather and foot traffic beat up outdoor surfaces fast, you’ll get the biggest budget win by maintaining what you already have. Start by pressure-washing or scrubbing with oxygen bleach to lift grime without etching concrete or stripping stain. Let it dry 48 hours, then roll on a water-based penetrating sealer; you’ll slow cracks, reduce staining, and extend prior finishes.
Add inexpensive covers: a tarp or fitted cover over furniture and a grill cover to block UV and rain. Patch wobbly chairs with epoxy, replace glides, and tighten hardware for patio furniture repair instead of buying new.
Pair cleaning with outdoor pest control by sealing gaps, removing standing water, and applying diatomaceous earth in joints.
- You’ll feel proud seeing stains disappear.
- You’ll relax knowing water can’t soak in.
- You’ll enjoy bug-free evenings.
- You’ll save cash, again.
Frequently Asked Questions
Do I Need a Permit for a Small Patio Upgrade Project?
You might need a permit if you alter grade, add footings, or wire new circuits; cosmetic upgrades usually don’t. Check local codes before buying Outdoor furniture or installing Landscape lighting, especially hardwired, to avoid fines.
What Budget Upgrades Are Renter-Friendly and Won’T Damage Surfaces?
Want upgrades that won’t scratch or drill? Choose clip-on Decorative lighting, solar stakes, and removable adhesive hooks; add felt-backed planters and greenery, rolling stands, and outdoor rugs. You’ll protect surfaces, keep costs low, and move everything easily.
How Can I Keep Cheap Patio Materials From Fading in the Sun?
You’ll slow fading by using UV-blocking clear sealant on plastics/wood, choosing solution-dyed fabrics, and adding shade sails. Cover Patio furniture when not used, and mount Decorative lighting in shaded spots. You’ll spend less.
What’s the Safest Way to Protect Wood Structures From Termites and Rot?
You’ll keep wood safe by keeping it dry, keeping it elevated, keeping it sealed. Install Termite barriers, apply borate Wood treatment, use pressure-treated lumber, and flash joints. Inspect yearly, fix leaks fast, and maintain drainage.
How Do I Plan Upgrades to Avoid Blocking Drainage and Water Runoff?
Map existing slopes and flow paths, then grade upgrades to shed water away from structures. Use Drainage solutions like gravel swales and perforated pipe; prioritize Water management with permeable surfaces, clear outlets, and inexpensive splash blocks.
Conclusion
You don’t need a full remodel to upgrade your patio; the “80/20” theory holds up here: a few high-impact changes drive most of the perceived improvement. If you measure first and zone the space, you’ll avoid wasted materials. Prioritize an outdoor rug, pallet seating with sealed cushions, and vertical planters—each delivers function per dollar. Finish by cleaning, sealing, and covering surfaces so your upgrades last longer and your maintenance costs stay low.





