
You can refresh old kitchen cabinets on a budget by saving sound carcasses, then fixing the basics first. Degrease with sugar soap, remove doors and handles, and lightly sand to key the surface. Tighten and adjust hinges, and repair stripped screw holes with matchsticks and wood glue. Fill chips with ready-mixed or epoxy filler, then prime properly before two thin coats of eggshell or satinwood—or apply peel-and-stick vinyl. Swap handles, and there’s more to come.
Are Your Old Kitchen Cabinets Worth Saving?
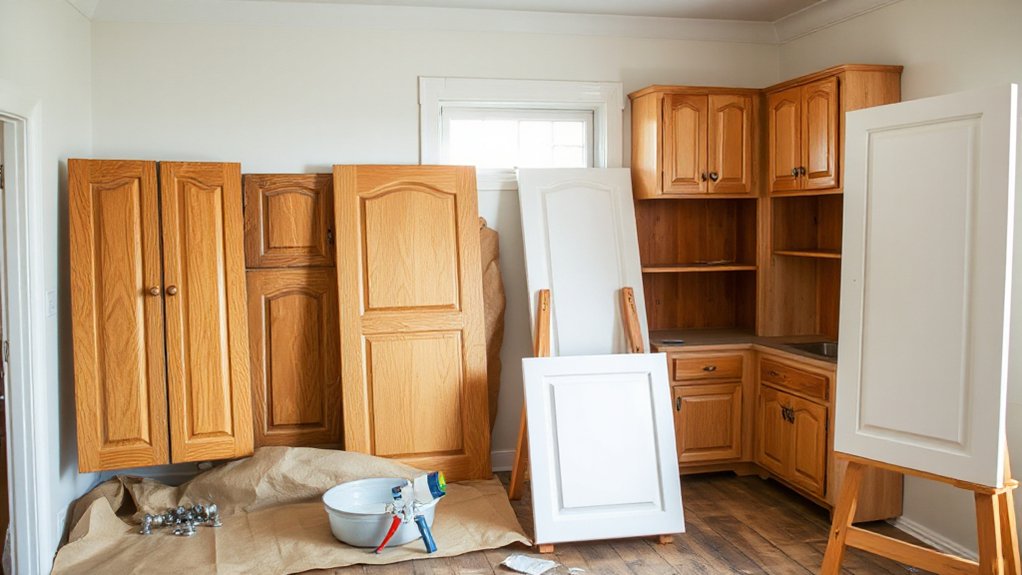
Before you spend a penny on paint or new doors, you need to work out whether your existing kitchen units are structurally sound. Check carcasses for sagging shelves, blown chipboard, and water damage around the sink unit.
Open and shut every door; if hinges have torn out or frames are racked, repairs may outweigh savings. Identify the cabinet material: solid timber and plywood usually take refurbishment well, while MDF or low-grade chipboard often swells and crumbles once wet.
Look for loose joints, delamination, and crumbling screw holes. Also weigh historical value—mid-century, handmade, or period joinery can justify careful retention, especially in older UK homes.
If the boxes are square and dry, you’re in a strong position to refresh them.
Choose a Budget Refresh: Paint, Vinyl, or Hardware
Once you’ve decided the cabinet boxes are worth keeping, pick the refresh that matches your budget, time, and tolerance for mess: paint for the biggest visual change, vinyl wrap for a quicker facelift with less disruption, or new hardware for an inexpensive upgrade you can finish in an afternoon.
If you paint, choose a hardwearing cabinet enamel and plan for sanding, priming, and two coats; you’ll get the best colour coordination with walls, worktops, and splashback.
If you use vinyl, buy heat- and moisture-resistant wrap and take time on measuring and trimming so edges don’t lift; material durability depends on quality film and careful fitting.
If you swap hardware, match hole centres or use backplates, and pick brushed nickel or black for timeless colour coordination.
Price all options at DIY sheds.
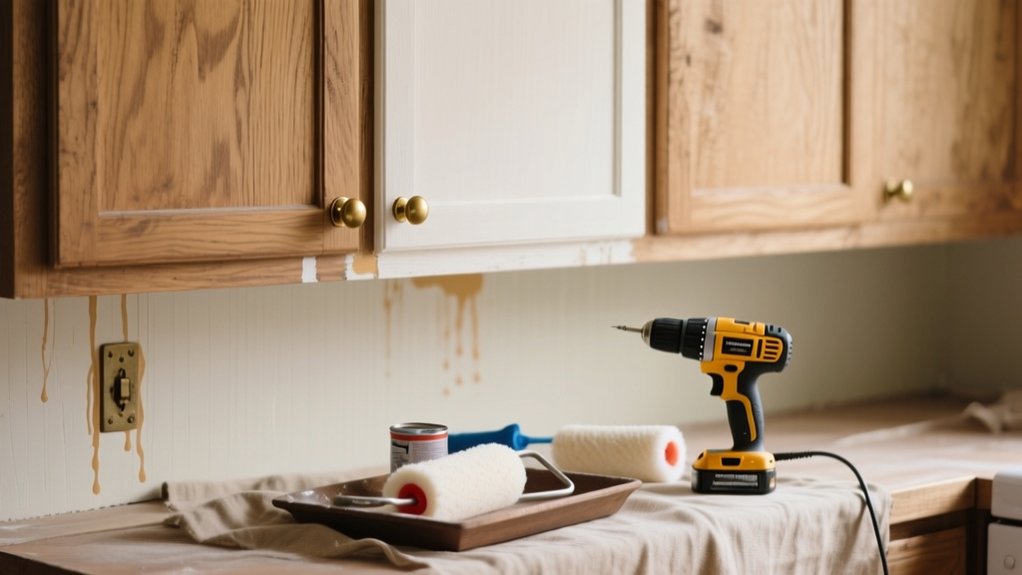
Degrease Old Kitchen Cabinets in 10 Minutes
You can degrease old kitchen cabinets in 10 minutes with a bucket of warm water, washing-up liquid or sugar soap, microfibre cloths, and a non-scratch sponge.
Work top to bottom: wipe, scrub the handles and edges, then rinse with clean water and dry straight away to stop streaks.
Do this first and your paint, vinyl, or new hardware won’t fail because of hidden grease.
Quick Degreasing Supplies
Although it’s tempting to dive straight into sanding or painting, a fast degrease makes the biggest difference to how well any finish sticks. Stock a small kit so you don’t waste time hunting for bits mid-job, and you’ll nail proper surface preparation.
Choose reliable cleaning agents: sugar soap (the DIY staple), a kitchen degreaser spray for heavy hob-side grime, and washing-up liquid for a quick pre-wipe. Keep microfibre cloths, non-scratch scourers, and a soft nail brush for profiles and shaker grooves.
Grab a bucket, a spray bottle, and a measuring jug so you can mix consistently. Wear marigolds, and have a roll of kitchen towel for immediate wipe-downs. Finish with clean water in a second bucket to avoid smearing grease back on.
Fast Step-By-Step Method
With your degreasing kit ready to hand, get the cabinets properly clean in a quick 10-minute pass so primer and paint don’t peel later. Start a timer and open windows.
Minute 1: clear worktops; cover the hob and sink with an old towel.
Minute 2: remove knobs and label doors with masking tape.
Minutes 3–4: vacuum crumbs from rails, hinges, and corners.
Minutes 5–7: spray sugar soap or degreaser onto microfibre cloths (not the timber) and wipe top to bottom, following your kitchen layout to avoid missed runs.
Minute 8: tackle handles and grime around appliance placement, especially near the cooker hood.
Minute 9: rinse with a damp cloth.
Minute 10: dry fully with kitchen roll. Then let it air-dry 20 minutes.
Tighten Hinges and Fix Sagging Old Cabinet Doors
Start by checking each hinge for play—if the door wobbles or drops, you’ve found the culprit.
Use the hinge adjustment screws to square the door up, close the gaps evenly, and stop it catching on the carcase.
If a screw just spins, repair the stripped hole with matchsticks and wood glue (or a proper wood filler), then refit and tighten it securely.
Diagnose Loose Hinges
Why does that cabinet door keep sagging or catching on the frame? You’re usually dealing with loose hinges, worn screws, or a hinge cup that’s pulled away from the carcass.
Open the door and grip it at the handle edge; lift gently. If you feel play at the hinge side, the fix starts with diagnosis. Check each screw head: if it spins without biting, the hole’s stripped.
Look for hairline cracks in the MDF or chipboard around the fixing points, and inspect the hinge arm for bent metal. If the hinge squeaks or feels gritty, try hinge lubrication with a silicone spray, then wipe off excess.
If the hinge pin’s sloppy or the cup’s distorted, plan hinge replacement.
Adjust Doors For Alignment
Once you’ve confirmed the hinges aren’t damaged and the screws still bite, you can sort most sagging doors with a few careful adjustments. Open the door and support its weight with one hand or a folded cloth underneath.
Tighten the fixing screws on the cabinet side first, then the door side, checking the reveal as you go.
For modern concealed cabinet door hinges, use the built-in adjusters: the side-to-side screw centres the gap, the depth screw pulls the door in or out, and the height screw (often on the mounting plate) lifts or drops the door.
Make tiny turns, then close the door to check alignment against neighbouring fronts. These hinge adjustment tips help you level pairs and stop rubbing on the carcase or handle rail.
Repair Stripped Screw Holes
If the hinge screws keep spinning without tightening, you’re dealing with a stripped screw hole, and the door will sag no matter how much you tweak the adjusters.
Take the door off, remove the hinge, and inspect the carcass side first.
For quick screw hole repairs, pack the hole with hardwood matchsticks or a 6mm timber dowel and wood glue, tap it flush, then let it cure.
Re-drill a small pilot hole, then refit the hinge with the same gauge screw.
If the board’s blown out, use stripped screw solutions like moving the hinge plate slightly and drilling fresh holes, or fitting longer screws into solid timber behind the chipboard.
Tighten by hand, not an impact driver, to avoid stripping again.
Rehang the door and check the reveal.
Fill Dents, Chips, and Gaps for Smooth Cabinets
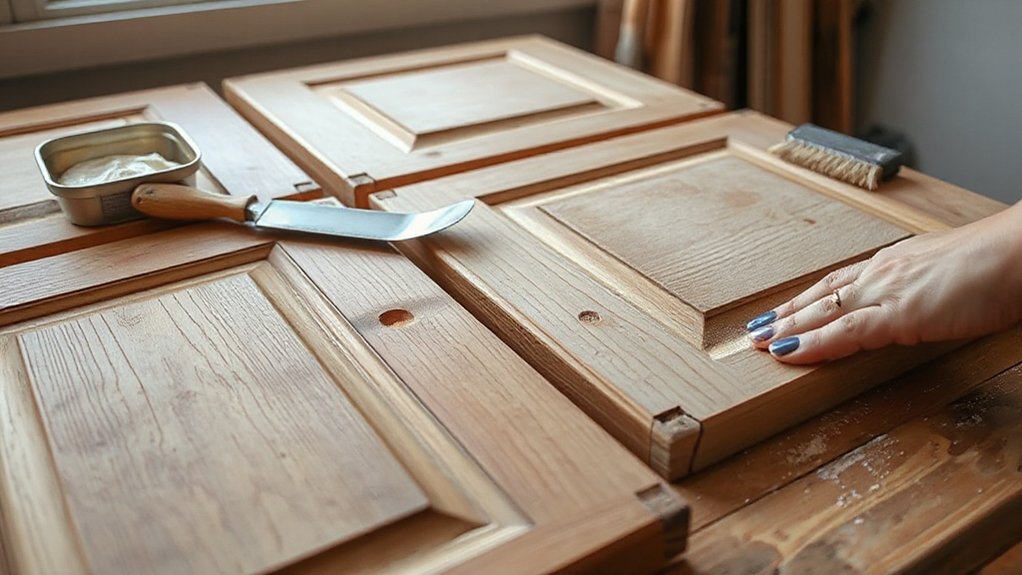
Although tired cabinet doors can look beyond saving, you can make them feel brand new by filling dents, chips, and gaps before you paint or wrap.
Start by degreasing with sugar soap, then dry thoroughly so filler bonds properly.
For shallow knocks, use ready-mixed wood filler; for deeper chips or missing corners, use two-part epoxy filler for a tougher cabinet restoration.
Press it in with a filling knife, slightly proud of the surface.
Once cured, sand with 120-grit then 180-grit, feathering edges for clean surface smoothing.
Run your fingertips across profiles and stile joints; if you feel ridges, refill and re-sand.
For open mitres or trim gaps, apply decorators’ caulk, smooth with a damp finger, and wipe excess.
Let everything harden fully.
Paint Old Kitchen Cabinets: Primer, Steps, Dry Time
You’ll get the best finish by choosing the right primer and paint for your cabinet material—use a stain-blocking primer for tannin bleed and a hardwearing satinwood or eggshell topcoat for daily use.
Work in a strict order: degrease with sugar soap, lightly sand, prime, apply two thin coats with a mini-roller, and keep a wet edge to avoid brush marks.
Let each coat dry fully to the tin’s recoat time, then leave the doors to cure for several days before rehanging and fitting handles.
Choosing Primer And Paint
Before you pick up a brush, lock in the right primer and paint for your cabinet material and the wear your kitchen dishes out daily.
For MDF, choose a solvent-based stain-block primer to stop swelling; for oak or pine, use a knotting solution plus adhesion primer to tame tannins.
If cabinets are glossy laminate, pick a high-bond primer designed for uPVC and melamine.
Then select hard-wearing paint finishes: a water-based eggshell or satinwood gives wipe-clean durability without looking plasticky; use matt only for low-traffic pantries.
Apply colour theory: cool greys calm small kitchens, warm whites soften north-facing rooms, and deep blues ground open-plan spaces.
- You’ll feel proud every time doors shut smoothly.
- Spills won’t spark panic.
- Scuffs won’t steal your joy.
- Your kitchen will finally look “done”.
Painting Steps And Dry Time
Once you’ve matched the right primer and paint to your cabinet material, the finish comes down to method and patience. Start by removing doors, drawers, and handles, then label everything. Lightly sand, vacuum dust, and wipe with sugar soap; let it dry fully.
Apply primer with a mini-roller for flat areas and a synthetic brush for mouldings, keeping a wet edge. Allow 2–4 hours between coats (or overnight if it’s cool and damp).
For topcoats, choose your Color options and apply two thin coats rather than one thick one. Use Finish techniques like laying off in one direction to minimise brush marks.
Touch-dry may be 1–2 hours, but leave 24 hours before rehanging and 7 days for full cure.
Use Peel-and-Stick Vinyl on Cabinet Doors
- You’ll feel relief when dents and stains disappear in minutes.
- You’ll regain pride when guests notice the “new” kitchen.
- You’ll enjoy calm when cleaning wipes away without fuss.
- You’ll save money for a better kettle or weekend away.
Measure each door, clean with sugar soap, dry fully, then apply from the centre, smoothing with a plastic scraper and trimming edges with a sharp craft knife.
Seal and Protect Refreshed Kitchen Cabinet Surfaces
After you’ve put in the effort to paint or re-cover your cabinet doors, a proper sealant stops everyday steam, splashes, and greasy fingerprints from undoing your work. Choose Surface sealing that matches the finish: water-based polyurethane for painted MDF, clear lacquer for timber, or a specialist edge sealer for vinyl wrap.
Clean with sugar soap, rinse, and let everything dry fully. Lightly key the surface with 240-grit, then wipe off dust with a tack cloth.
Apply a thin protective coating using a good-quality synthetic brush or foam roller, working with the grain and keeping a wet edge. Don’t flood corners or profiles; runs cure soft and attract grime.
Let it cure for 24–48 hours before heavy use, and avoid harsh sprays; use mild washing-up liquid instead.
Swap Hardware to Modernize Old Kitchen Cabinets
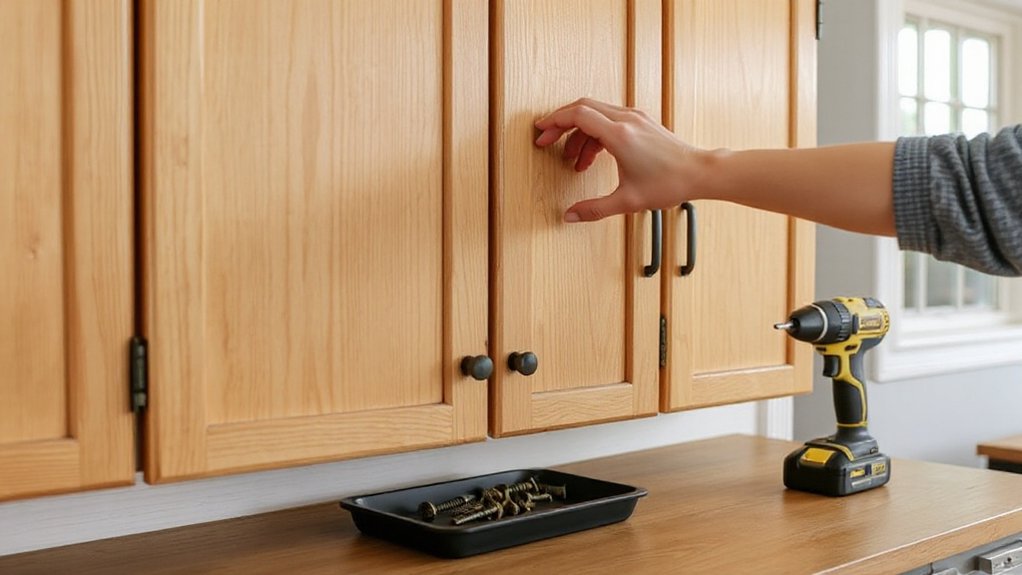
One of the quickest, cheapest upgrades you can make is swapping tired knobs and handles for modern hardware that suits your kitchen’s style and layout. Start by measuring your existing hole centres (usually 96mm or 128mm) so replacements fit without filler.
Choose Hardware styles that match your cabinet lines: slim bar pulls for flat doors, cup pulls for Shaker fronts, or round knobs for a softer look. Stick to durable finishes—brushed nickel, matt black, or brass—and buy spares for future damage.
When you fit Modern fixtures, use a screwdriver rather than a drill to avoid stripping old timber, and align everything with a simple jig or masking-tape guide.
- You’ll feel an instant “new kitchen” lift.
- You’ll enjoy a cleaner, more cohesive look.
- You’ll take pride in tidy, straight fittings.
- You’ll love the upgrade without the big spend.
Add Soft-Close and Under-Cabinet Lighting Upgrades
Fresh hardware sets the look, but soft-close hinges and under-cabinet lighting make your old cabinets feel properly updated day to day.
Start with Soft close upgrades: fit clip-on hinges that match your cabinet type (overlay, inset, or face-frame) and check the cup size, usually 35mm. If doors are sagging, swap the screws for proper cabinet bolts and use hinge plates with adjustment.
Then add under cabinet lighting to improve task visibility and make worktops look cleaner. Choose LED strip lights with a warm white (around 3000K) and a decent CRI, then run them via a fused spur or plug-in transformer.
Hide cables with mini trunking, and add a PIR sensor for hands-free switching.
Frequently Asked Questions
How Do I Refresh Cabinets Without Removing Doors or Drawer Fronts?
You can refresh cabinets in place by degreasing, sanding lightly, masking edges, then applying primer and durable paint or Faux finishing. Finish with Hardware updates—swap handles, hinges, and add soft-close catches for quick impact.
What’s the Cheapest Way to Change Cabinet Color Without Painting?
The cheapest way to change cabinet colour without painting is self-adhesive vinyl wrap or DC-Fix. You’ll cover doors quickly, then update cabinet hardware and add decorative accents like stick-on trims for a fresh look.
Can I Refinish Thermofoil or Laminate Cabinets on a Tight Budget?
Yes, you can refinish thermofoil or laminate cheaply if you degrease thoroughly, lightly abrade, and use a bonding primer plus hardwearing topcoat. Swap Cabinet hardware and add Decorative accessories for a fresher look.
How Long Should I Avoid Using Cabinets After Refinishing?
Avoid using cabinets for 24–48 hours; treat the finish like fresh rain on stone. Wait 7 days for full cure before refitting cabinet hardware. Use gentle cleaning techniques—microfibre cloth, mild washing-up liquid—no abrasives.
What Budget Options Hide Wood Grain for a Smoother, Modern Look?
You can hide Wood grain cheaply with high-build primer, then sand smooth and apply satin cabinet paint for a Modern finish. Use filler on open pores, or MDF/vinyl wrap panels for flat faces.
Conclusion
You don’t need a wrecking crew or a second mortgage to make your tired kitchen cabinets look brand-new. With a quick degrease, a few hinge tweaks, and some filler, you’ll erase years of wear in an afternoon. Paint or peel-and-stick vinyl gives you a dramatic facelift for pennies, then seal it so it survives real life. Finish with modern handles, soft-close fittings, and under-cabinet lights—suddenly your whole kitchen looks like it doubled in value.


