
Start with a proven plan that specifies joinery, materials, and a torsion-resistant base (4×4 legs or doubled 2x4s) with diagonal bracing or a stiff lower shelf. Set height to your knuckle-to-wrist crease (about 34–38 in) and keep at least 24 in depth with 36 in walk paths. Build a flat 1-1/2 in top by laminating two 3/4 in sheets, edge-cap, and seal. Attach it using slotted holes for wood movement, and you’ll see how to add vises, dog holes, and fix wobble next.
Pick a Simple Workbench Plan (Fast Overview)
Where do you start if you want a workbench that’s sturdy, fast to build, and won’t surprise you later? Pick a plan that specifies load path, joinery, and materials, not just a sketch.
You’ll want a torsion-resistant base (4×4 legs or doubled 2x4s), diagonal bracing or a lower shelf panel, and a top at least 1-1/2 in thick.
Confirm the plan calls out fasteners by size and grade, plus glue type, and includes a cut list with tolerances.
Choose designs that keep Workbench aesthetics secondary to serviceability: exposed fasteners are fine if accessible.
Finally, guarantee the plan includes finishing techniques—edge sealing, wipe-on oil or waterborne polyurethane—to limit moisture cycling and reduce splintering.
Choose Your Workbench Height and Footprint
How tall and how large should your workbench be to keep your posture neutral and your work stable? Set height from ergonomics: for general assembly, target knuckle-to-wrist crease height (typically 34–38 in).
For fine work, raise it 2–4 in; for heavy hand-planing, drop it 2–4 in to use body weight. Verify by standing square, shoulders relaxed, forearms near level on the work surface without hunching.
Size the footprint to your space and typical stock. Aim for at least 24 in depth so clamps clear, and 48–72 in length for sheet-good breakdown support.
Maintain 36 in clear walk paths. Reserve under-bench volume for storage options, but don’t reduce knee/toe clearance.
Choose a Top Material: Plywood vs. MDF vs. 2x
Before you cut a single sheet, pick a top material that meets your load, flatness, and fastening requirements, because it drives stiffness, weight, and long-term stability.
For general-duty benches, 3/4 in. cabinet-grade plywood resists screw pull-out, handles edge impacts, and stays flatter across spans; it also offers good material durability and decent aesthetic appeal when sealed.
MDF is the flattest and most uniform, ideal for layout and sanding, but it weakens at edges, swells with moisture, and needs a hardboard or laminate skin plus limited fastener reliance.
A 2x plank top (laminated) takes heavy point loads and holds hardware well, yet it moves seasonally; manage with elongated holes and a replaceable sacrificial layer.
Finish all tops with a moisture-resistant coating.
Buy the Right Lumber (and How to Pick Straight Boards)
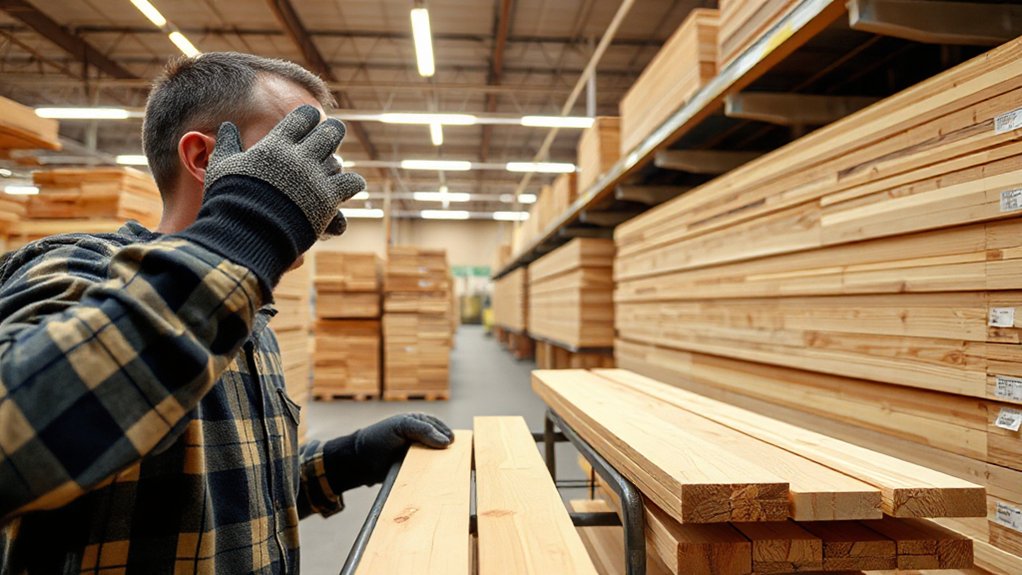
With your top material selected, lock in the rest of the bench’s performance by buying framing lumber that’s straight, dry, and graded for structural use. Favor No. 2 or better SPF/SYP with an agency stamp (SPIB, WWPA), and check for “KD” to limit shrinkage. Smart Lumber selection reduces racking and keeps joinery aligned.
- Sight each board on edge and face; reject crowns, bows, and twists beyond about 1/8 in over 8 ft.
- Check end grain for centered pith; off-center rings tend to warp less.
- Inspect for wane, loose knots, and slope of grain; keep defects out of legs and stretchers.
- Compare moisture by weight and feel; avoid boards that are cool, wet, or resin-bleeding.
Prioritize Board straightness over cosmetic color variations.
Gather Tools and Hardware (Quick Checklist)
Before you cut or assemble anything, you’ll stage your essential hand tools (tape measure, combination square, level, clamps, and a sharp pencil) and verify they’re calibrated and in spec.
You’ll also set up the required power tools—typically a circular saw or miter saw, a drill/driver, and a sander—with correct blades/bits installed and guards functioning.
Finally, you’ll inventory hardware and fasteners (wood glue, 2-1/2 in. construction screws, 1-1/4 in. screws, washers, and optional lag bolts) so every joint matches the intended load and fastening schedule.
Essential Hand Tools
- Measuring/marking: 25 ft tape, combination square, marking knife, and pencil; verify 90° with the square each layout.
- Cutting/paring: handsaw, utility knife, sharp chisel; pare to lines instead of “eyeballing.”
- Fastening: #2 screwdriver, hex keys, adjustable wrench, claw hammer; keep bits matched to fasteners.
- Clamping/assembly: two bar clamps, one corner clamp; add wood glue, 3″ screws, washers, and bolts.
Power Tools Needed
Although you can build a sturdy workbench with hand tools alone, a few power tools will tighten your tolerances, speed up repeatable cuts, and reduce assembly errors.
Use a circular saw with a guide rail or straightedge to break down sheet goods squarely. Add a miter saw for consistent crosscuts, or a table saw if you can control kickback and keep a calibrated fence.
A drill/driver handles pilot holes and driving; pair it with a cordless impact driver when you need torque without cam-out.
For flattening edges, use a router with a straight bit and edge guide.
Prioritize Power tool safety: eye/ear protection, dust extraction, guards in place, and disconnect power before blade changes.
Choose cordless vs corded based on duty cycle and available outlets.
Hardware And Fasteners
Once you’ve finalized your bench dimensions and joinery, lock in your hardware and fasteners so every hole size, bit, and driver matches the spec. Choose corrosion-resistant coatings and consistent head styles to reduce tool changes and prevent cam-out. Plan hardware placement to keep load paths straight, avoid end-grain pullout, and maintain safe edge distances.
- Structural screws/lag bolts: pick rated fastener types for stretchers-to-legs; predrill to manufacturer diameters.
- Bolts, washers, locknuts: use for knockdown joints; match SAE/metric threads and torque evenly.
- Wood screws: use for top attachment; add elongated holes or figure-eight clips for seasonal movement.
- Adhesives and inserts: keep PVA, epoxy, threaded inserts, and T-nuts for jigs, vises, and accessories.
Make a Cut List That Matches Your Bench
Start by measuring your bench footprint (overall length, width, and finished height) and record target tolerances so your cut list drives consistent assembly.
Select lumber dimensions that meet load and stiffness requirements, accounting for actual thickness/width, species, and straightness.
Then lay out each part on standard stock lengths to optimize cuts, maintain grain orientation where needed, and minimize waste with a clear rip/crosscut sequence.
Measure Your Bench Footprint
Before you cut any stock, lock in the workbench footprint by measuring the exact floor area you can dedicate and translating those constraints into a cut list. Use a tape, square, and masking tape outline to confirm clearance for stance, tool swing, and storage solutions, and treat access paths as non-negotiable for woodworking safety. Record dimensions in a notebook, then build a cut list around them, including allowances for overhangs and clamping zones.
- Mark the bench rectangle on the floor; verify door, drawer, and aisle clearances.
- Set target height and depth from your reach envelope; note any wall obstructions.
- Allocate underside volume for shelves or bins; confirm leg locations won’t block them.
- Translate footprint to part lengths with tolerances; label each piece and quantity.
Choose Lumber Dimensions
With your footprint, height, and clearance notes set, you can now select lumber sizes that meet those targets without forcing awkward joints or thin bearing surfaces.
Use nominal 2x4s for legs and stretchers when you need a stiff, readily available frame; step up to 2x6s if you’re spanning longer bays.
Choose straight, kiln-dried SPF for economy, or hardwood for wear points like vise blocks.
For the top, plan on doubled 3/4-in plywood or laminated 2x stock to achieve a flat reference plane.
Convert nominal to actual dimensions in your cut list (e.g., 2×4 = 1-1/2 x 3-1/2).
Specify Cutting techniques: square crosscuts, consistent stop-block lengths, and labeled part IDs.
Include allowances for joinery shoulders.
Optimize Cuts And Waste
Once you’ve locked in actual lumber dimensions and joinery allowances, lay out a cut list that maps every part ID to standard stock lengths (8, 10, 12 ft) so you can rip and crosscut in a sequence that minimizes kerf loss and offcuts.
Treat this as a controlled process: your material selection drives yield, stability, and budget, and your layout drives waste minimization.
- Assign each part an ID, final size, and net quantity; add trim and defect allowance per board.
- Nest parts on stock lengths, grouping identical widths to reduce fence resets and cumulative error.
- Plan crosscuts first, then rips, keeping grain orientation consistent for legs, rails, and top.
- Reserve offcuts by size class for stretchers, cleats, and test cuts; document leftovers.
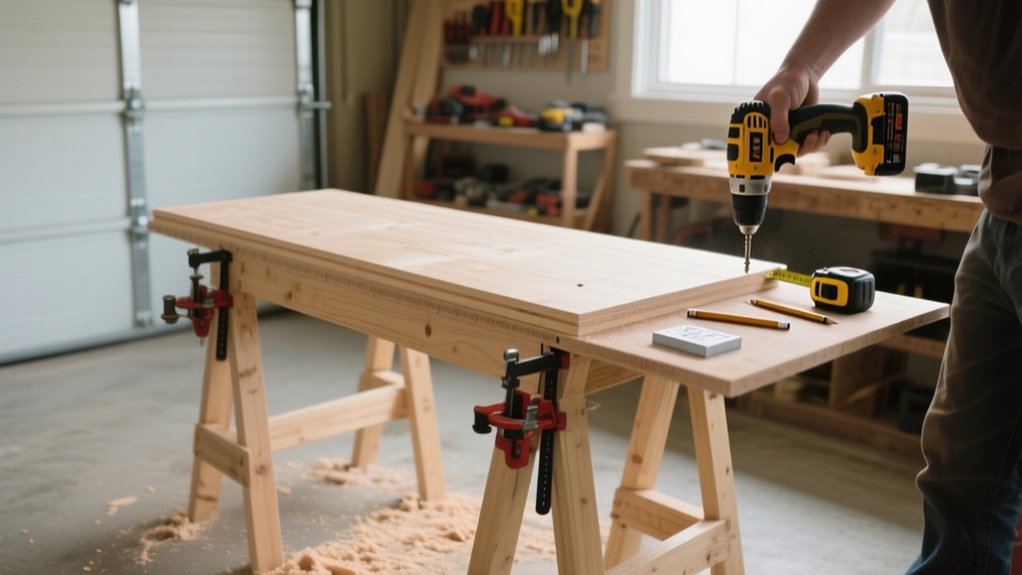
Build a Flat, Stiff Workbench Top
Even if your base goes together perfectly square, the workbench won’t work like a reference surface unless the top stays flat and resists twist under load.
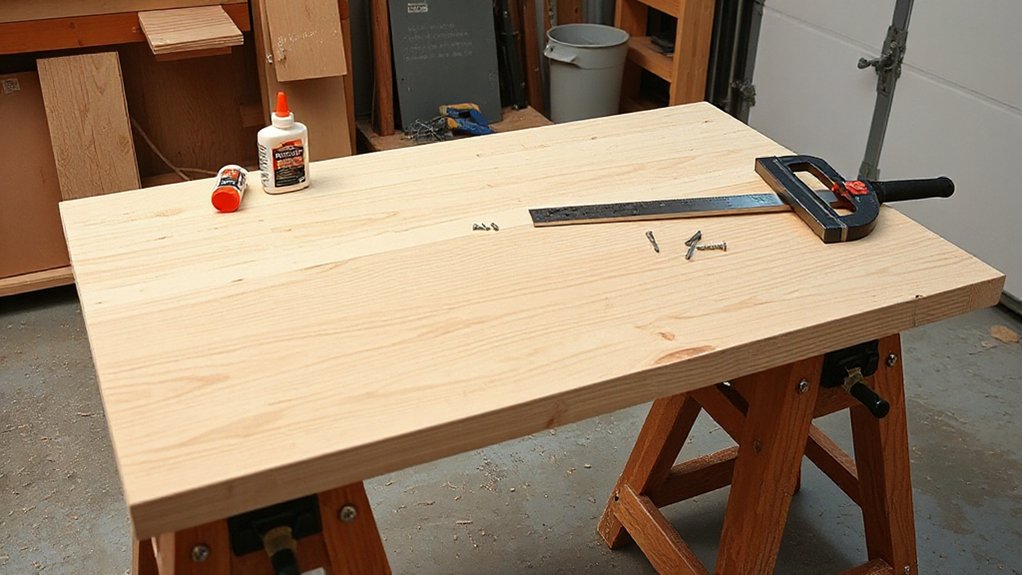
Build the top as a torsion-resistant panel: laminate two 3/4-inch sheets (plywood or MDF) with staggered seams, then cap the perimeter with hardwood edging to reduce edge crush and screw breakout.
If you use solid stock, alternate growth rings and orient wood grain consistently to limit cupping.
Use waterproof PVA (Type II) or polyurethane adhesive for moisture resistance, and spread glue with a notched trowel for full coverage.
Clamp or weight on a known-flat floor, then verify flatness with winding sticks and a 48-inch straightedge.
Plane or sand only after the glue cures fully.
Assemble the Base Square (Legs and Stretchers)
A flat, stiff top only performs like a reference surface if the base under it holds alignment, so assemble the legs and stretchers dead square and resistant to racking. Lay out your joinery from a single face and edge, then cut all shoulders to the same reference lines.
Dry-fit the two end frames first, checking diagonals and shoulder seating before you commit to fasteners or glue. Keep the stretchers in the same plane so load transfers straight into the legs and doesn’t telegraph twist into the top.
Favor clean, repeatable geometry; it supports Workbench aesthetics and echoes Historical designs without guesswork.
- Mark leg pairs and orient grain consistently.
- Clamp square blocks to control assembly shift.
- Measure corner-to-corner; match diagonals.
- Add temporary cross-bracing to prevent racking.
Level the Base and Fix Twist Before Fastening
Before you lock the joinery with glue or bolts, set the base on a known-flat surface and remove twist so the top won’t inherit it. Use a reference surface you trust: a cast-iron table saw top, torsion box, or leveled concrete.
Check all four feet with a 24–48 in. straightedge and feeler gauges; shim under low feet with hardboard or metal shims, then recheck diagonals.
For twist correction, place winding sticks across the front and rear stretchers. Sight their top edges; any offset indicates racking.
Apply opposing clamp pressure across the high corners, or wedge under the low corner, until the sticks read parallel. Confirm with a long level and diagonal measurements.
Only then mark feet for trimming or add adjustable glides.
Attach the Top With Slots for Wood Movement
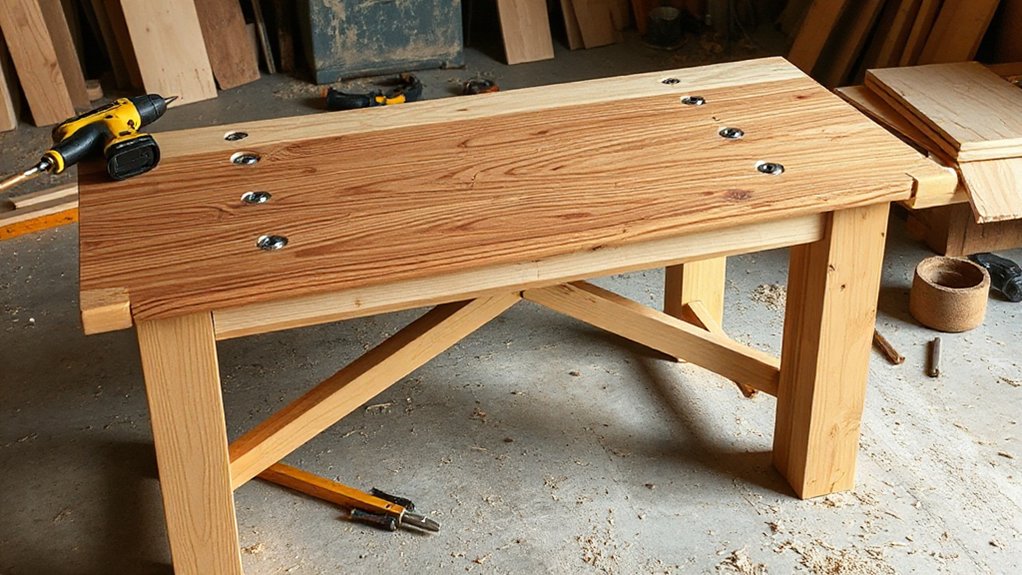
With the base sitting flat and free of twist, mount the top in a way that lets it expand and contract across the grain without splitting or forcing the base out of square. You’ll manage wood expansion by using slotted holes and controlled clamping pressure, not rigid fasteners.
- Mark fastener lines on the underside, keeping holes at least 1-1/2 in. from edges and away from end-grain checks.
- Drill clearance holes through the aprons, then elongate them perpendicular to the top’s grain with a file or router, leaving 3/8 in. travel.
- Use washers under screw heads so they bridge slots and maintain joint flexibility without pull-through.
- Snug screws until seated, then back off 1/8 turn; verify the top slides by hand pressure.
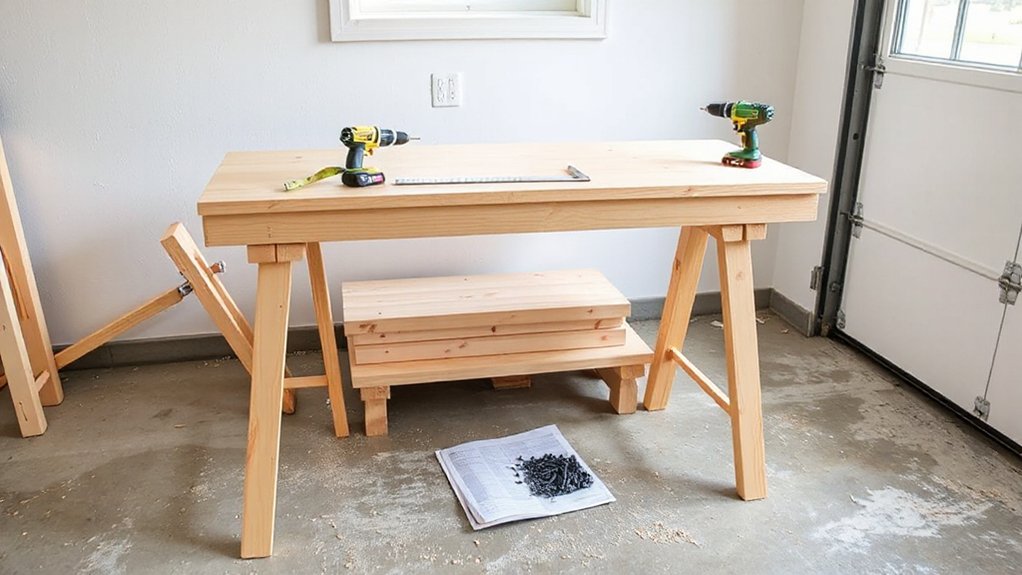
Add a Lower Shelf for Storage and Stiffness
You’ll add a lower shelf to increase torsional stiffness and keep tools off the floor, starting with shelf material that meets your load and moisture requirements (e.g., 3/4 in plywood or MDF, sealed on all faces). You’ll then install shelf supports—cleats, stretchers, or metal angles—kept co-planar and square, and fastened with appropriately sized screws into solid stock (pre-drilled to prevent splitting). You’ll verify clearance to the floor, allow for seasonal movement where applicable, and confirm the shelf sits flat without racking the base.
Choosing Shelf Material
Where should that lower shelf land in your design? Set the height to clear clamps and allow easy reach, then choose shelf material that matches load, moisture, and flatness requirements. For standards-led durability, you’ll want stable panels with sealed faces and edges, because that shelf also braces the base against racking.
Aim for a minimum 18 mm thickness for typical shop loads, and specify fastener-friendly cores that won’t crumble under repeated use. Plan storage solutions around bin sizes, tool cases, and airflow for finishes.
- Plywood (APA rated): strong, screw-holding, resists warping; seal edges.
- OSB/waferboard: economical; acceptable for dry storage, less smooth.
- MDF: flat, heavy; avoid damp areas, seal all faces.
- Solid boards: attractive; allow movement, keep spans short.
Installing Shelf Supports
Once you’ve picked a shelf panel that meets your thickness, moisture, and screw-holding requirements, lock its performance in place by installing rigid, square shelf supports.
Set the shelf height so you maintain toe clearance and keep the center of gravity low. Use shelf support types that match your frame: cleats (2×2 or ripped 2×4), angle brackets, or captured stretchers.
Lay out supports with a tape and square, then mark consistent reference lines on all legs. For mounting techniques, predrill to 70% of screw root diameter to prevent splitting, and drive #8 or #10 structural screws; avoid drywall screws.
Keep fasteners 3/4 in. from edges. Check for racking by measuring diagonals, then clamp and tighten. Add corner blocks if flex persists under load.
Stop Racking With Diagonal Braces or Panels
Even if you build the frame square, a simple workbench will rack under side loads unless you add a positive shear-resisting element. Use Diagonal braces or panel reinforcement to create a triangulated or diaphragm action path, similar to accepted light-frame practice, and fasten it so shear transfers into the legs, not just the stretchers.
- Diagonal braces: Install 1×2 or 2×2 braces at the rear and one end; keep angles 30–60° and orient them to resist push and pull.
- Gussets: Add plywood corner gussets with glue and screws to lock joints.
- Panel reinforcement: Skin the back (and/or one end) with 1/2-in plywood; stagger screws at ~6 in o.c. on edges.
- Load path: Tighten all fasteners, then recheck for square before curing.
Add Vises, Dog Holes, and Fix Common Wobbles
After you’ve stiffened the base against racking, add a front vise and at least one row of 3/4-in dog holes so you can clamp work securely. Then correct any remaining wobble by leveling the feet and tightening the hardware under load.
For Vise installation, bolt the rear jaw to the apron with 5/16-in or 3/8-in hardware, use fender washers, and keep the screw parallel to the benchtop within 1/32 in to prevent binding.
Lay out dog holes on 4-in centers, drill plumb with a guide block, and chamfer edges to reduce tear-out.
For Workbench durability, recheck fasteners after cycling the vise 20 times. If it rocks, shim low feet with steel shims, then lock nuts while someone leans on the top.
Frequently Asked Questions
How Much Does a DIY Workbench Typically Cost to Build?
You’ll typically spend $80–$300 building a DIY workbench, depending on Material options, hardware, and finish. Set Workbench height to 34–38 inches per ANSI/BSI ergonomics; thicker tops and leveling feet increase cost.
Do I Need Special Plans or Permits to Build a Workbench?
You don’t need special plans, and you usually don’t need permits; like a shipwright, you still follow a chart. Verify permit requirements and local regulations, use measured drawings, and build to shop safety standards.
How Long Does It Take to Build a Simple Workbench?
You’ll typically finish a simple workbench in 4–8 hours. You’ll spend most time on Material selection and precise fastening; don’t rush squaring, anchoring, and leveling, since Workbench stability requires measured cuts and tight joints.
What’s the Best Finish or Sealer to Protect the Bench Surface?
You’ll get the best protection with oil-based polyurethane or a two-part epoxy. For workbench durability, prep to 180-grit, seal end grain, and use finish application techniques: thin coats, scuff-sand, control dust, cure fully.
How Do I Make the Workbench Mobile With Locking Casters?
For workbench mobility, you’ll through-bolt four rated locking casters to reinforced corner blocks; follow locking caster installation specs, use washers and nylocs, verify load rating, add leveling feet, then torque fasteners and test locks.
Conclusion
You’ve built a bench that meets the basics: stable joinery, a flat top, and bracing that limits racking. That matters, because a modest 30 lb lateral push on an unbraced frame can create over 150 lb of racking force at the joints (simple moment arm effect). Keep your hardware torqued, recheck level, and let the top move by using slotted fasteners. Add vises and dog holes only after you’ve confirmed zero wobble.


