
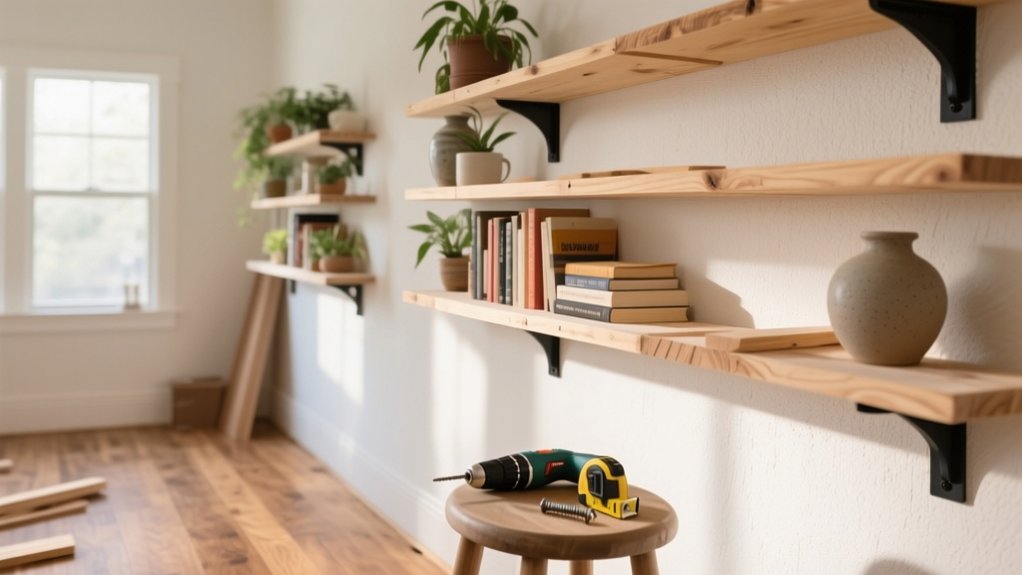
You can build DIY wooden shelving for any room by picking the right style: floating shelves for a clean look, steel-bracketed boards for heavy loads, or rail-and-upright systems for easy reconfiguring. Measure walls, sockets, radiators and stud positions, then keep spans sensible (around 600mm for books) to avoid sag. Use straight kiln-dried pine or plywood, seal MDF, and match plugs or toggles to your wall type. Next you’ll see room-by-room layouts, fixings and finishes.
Choose a DIY Wooden Shelving Style
Before you buy timber or pick up a drill, decide which shelving style suits your space, load requirements, and budget.
For clean, modern rooms, choose floating shelves with concealed brackets, but you’ll need solid wall fixings and straight timber.
For heavier loads, pick bracketed shelves; steel angle brackets or heritage cast-iron suits kitchens, utility rooms, and garages.
If you want flexibility, build a ladder or rail-and-upright system so you can reposition shelves without re-fixing the wall.
In period properties, consider alcove shelves for a built-in look.
Match shelf materials to use: pine for light duty, oak or birch ply for strength, MDF only if it’s sealed.
Plan your wooden finish early—oil, varnish, or paint drives preparation.
Plan Your DIY Wooden Shelving Layout (Measure + Spacing)
Although it’s tempting to start cutting timber straight away, you’ll get a cleaner, safer result if you plan the shelf layout on the wall first. Start with space planning: measure the wall width, ceiling height, and any skirtings, sockets, radiators, or coving that might clash. Mark studs with a detector, then pencil a centreline and key shelf heights.
For layout design, decide what you’re storing and size shelves accordingly: books need deeper boards than picture frames, and tall items demand extra clearance. Keep shelf spacing consistent for a calm look, but allow one “tall bay” where needed.
Use masking tape to mock up edges, then stand back at normal viewing distance. Finally, check door swings and walking routes before you commit.
Best Wood for DIY Wooden Shelving (By Budget)
Now that you’ve set your shelf sizes and spacing, you need to match the timber to your budget and the load you’ll put on it.
You can keep costs down with budget-friendly softwoods like planed pine or spruce, step up to midrange hardwoods such as oak or beech for better stiffness and wear, or choose premium options like walnut for standout finish quality.
Your choice affects sag resistance, fixings, and how well the shelves take stain, paint, or clear lacquer.
Budget-Friendly Softwoods
If you’re trying to keep costs down without compromising on a tidy finish, budget-friendly softwoods such as pine, spruce, and whitewood (often sold as “deal” in UK timber yards) make a dependable starting point for DIY wooden shelving. Choose kiln-dried, planed-all-round boards for straighter shelves and less sanding.
Inspect the wood grain: tighter, even grain dents less and takes stain more predictably, while wide knots can bleed resin and weaken screw holding. For better softwood durability, keep spans modest, add a front lipping strip, or use shelf brackets at 400–600mm centres.
Seal all faces, including edges, with primer, varnish, or hardwax oil to reduce cupping in heated UK homes. Buy extra length to cut out defects cleanly.
Midrange Hardwood Options
Stepping up from softwoods, midrange hardwoods give you noticeably better dent resistance and a cleaner long-term look without the price tag of premium species. In the UK, consider tulipwood for painted shelves, or ash and beech for a light, modern finish. Oak-faced plywood is another strong choice when you want stability across wider spans and clean edges with lipping.
You’ll find Midrange hardwoods machine well with sharp blades, but you should pre-drill for screws and allow for seasonal movement on solid boards.
For shelves holding books, aim for 18–22mm thickness and keep spans modest or add a front nosing to reduce sag.
Prioritise Sustainable sourcing: look for FSC or PEFC certification and ask your timber merchant about chain-of-custody paperwork.
Premium Wood Choices
Why choose premium timber for DIY shelving? You’ll get superior stability, richer grain, and longer service life, especially in centrally heated UK homes where cheaper boards can twist.
For a high-end look, choose European oak for strength and character, or walnut for dark, refined colour in studies and lounges.
If you want pale, modern shelves, consider maple or ash; both machine cleanly and take a crisp edge.
Buy kiln-dried stock (aim for 8–10% moisture content) and inspect for straightness before you cut.
Use quality fixings, because dense premium wood stresses screws.
For wood finishing, sand to 180–240 grit, seal end grain, then apply hardwax oil or satin lacquer for durable, wipe-clean shelves.
Tools, Screws, and Anchors You’ll Need
You’ll get cleaner, safer results if you start with the right measuring and cutting kit: a tape measure, combination square, spirit level, sharp pencil, and a circular saw or mitre saw matched with a straightedge.
Choose screws to suit the load and timber—typically 4.0–5.0 mm wood screws in sensible lengths (about 50–70 mm for brackets into studs, shorter for fixing shelf boards).
Match your wall anchors to the material: use proper plugs for brick and block, suitable fixings for plasterboard (hollow-wall anchors or toggles), and go straight into timber studs where you can.
Essential Measuring And Cutting Tools
Before you make a single cut, get your measuring and cutting kit sorted so every shelf fits true and square. Start with a 5m tape, steel rule, and combination square for repeatable measuring techniques; add a marking knife and sharp HB pencil for clean layout lines.
Use a spirit level and straightedge to confirm walls and battens aren’t out, and note any bow before you commit to lengths.
For cutting accuracy, use a fine-tooth handsaw for small trims, and a circular saw with a guide rail for long, straight rips in MDF or plywood. A mitre saw speeds up consistent crosscuts, while a jigsaw handles notches around sockets and skirting.
Clamp your work, support both sides, and always measure twice from the same reference edge.
Screw Types And Sizes
Accurate cuts only pay off if the fixings pull everything up tight and keep it there, so choose screw types and sizes to match your timber, board goods, and wall.
For battens and brackets into timber, use wood screws or construction screws with a sharp point and deep screw thread; 4.0–5.0mm diameter suits most shelf frames. Pick a length that gives 30–40mm bite into the stud after passing through the shelf support.
For plywood or MDF, use coarse-thread chipboard screws and pre-drill to prevent splitting; 3.5–4.0mm is usually enough.
Countersunk heads sit flush, while pan heads suit metal brackets.
Choose screw material to match humidity: zinc-plated indoors, stainless in bathrooms and utility rooms.
Anchors For Wall Materials
Where your shelf lands matters as much as the screw you choose, because plasterboard, brick, block, and stud walls all need different anchors to hold a safe load. In UK homes, start by identifying the substrate: tap for hollow plasterboard, look for mortar joints in brick, and use a stud finder on timber frames.
For plasterboard, use hollow-wall fixings: metal cavity anchors (Molly bolts) for medium loads, toggle anchors for heavy brackets, and self-drilling wall anchors for light shelves.
Into brick or block, drill with an SDS and fit nylon wall plugs (6–10mm) matched to your screw; choose resin anchors for crumbly masonry or high loads.
For studs, skip anchor types and screw directly into timber.
Always check the fixing’s rated load and keep edge distances sensible.
DIY Wooden Shelving Weight Limits (No-Sag Rules)
Even if your shelves look rock-solid on day one, they’ll sag over time if you ignore span, material strength, and how the load is distributed.
Start by sizing the span to the timber: for 18mm plywood or MDF, keep unsupported runs to about 600mm if you’re loading books; push beyond that and deflection climbs fast.
Solid softwood needs more thickness; hardwood buys you stiffness, not miracles.
Use no sag rules: increase thickness, reduce span, add a front lipping (say 20–30mm deep), or fit a central bearer.
Treat weight capacity as a system figure, not a single bracket rating.
Load heavy items over supports, keep uniform loads centred, and reserve long shelves for light décor only.
Mount Shelves to Drywall, Studs, Tile, or Plaster
A shelf that won’t sag still fails if it’s fixed into the wrong substrate, so match your fixings to the wall before you pick brackets and start drilling.
In UK homes, plasterboard needs the right drywall anchors: use metal cavity toggles for heavy loads, spring toggles where you can’t access behind, and self-drilling anchors only for light décor.
Find studs with a scanner and drive coach screws or wood screws into timber for the most reliable wall mounting.
For dot-and-dab, drill through plasterboard to the masonry and use longer frame fixings.
On tile, mark with tape, use a diamond bit, avoid hammer mode, then anchor into the solid wall behind.
On lath-and-plaster, hit studs or use toggle fixings, and pre-drill to prevent cracks.
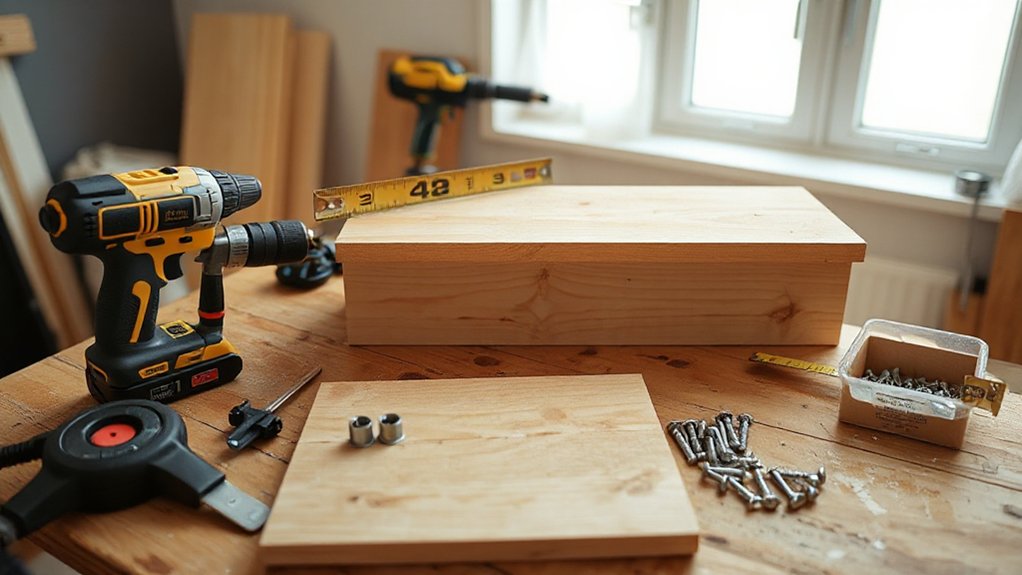
Build DIY Floating Wooden Shelves (Basic Method)
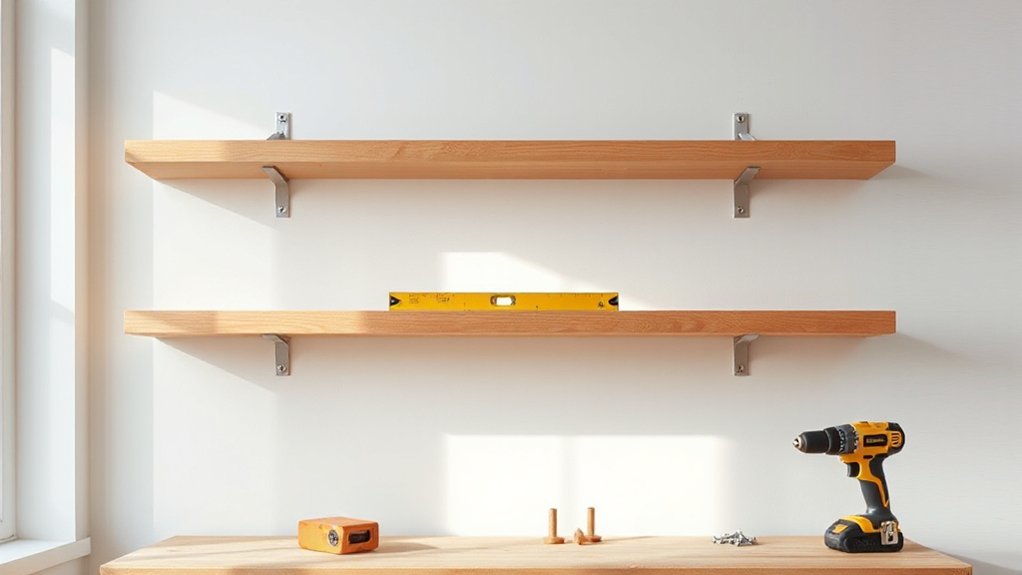
Once you’ve confirmed what you’re fixing into and chosen the right anchors, you can build a basic floating shelf by mounting a hidden timber cleat (or shelf bracket rod) level on the wall, then sliding a hollow wooden shelf box over it and pinning it in place.
Cut a straight softwood cleat, drill clearance holes, and set it dead level with a spirit level. If you’re using rods, mark centres precisely and keep them parallel.
Build the shelf as a three-sided box from planed timber or MDF, glued and brad-nailed, leaving a snug cavity to fit the cleat. Dry-fit, then ease tight spots with a block plane.
Slide on, check level again, and secure from underneath with countersunk screws. Finish with primer and paint or oil for tidy wall mounted storage and crisp decorative shelving.
Build DIY Bracketed Wooden Shelves (Heavy-Duty)
Although floating shelves look sleek, bracketed shelves give you the strength you need for heavy loads like books, tools, or pantry jars.
Start with shelf material selection: 18–25mm hardwood, quality ply, or scaffold board, then seal it for durability.
Locate studs (or use proper masonry fixings) and level your layout before drilling.
Choose bracket design options based on span and load: larger L-brackets, heavy-duty angle irons, or decorative cast brackets all work when they’re rated and fixed correctly.
- Fix brackets into studs or plug-and-screw into brick
- Keep bracket spacing to 400–600mm for heavy loads
- Use 5–6mm screws and washers to stop pull-through
- Pre-drill the shelf, then screw up through the bracket
DIY Wooden Shelving for Small Entryways (Drop Zone)
Because small entryways collect clutter fast, a compact “drop zone” shelf lets you control keys, post, and bags without losing floor space. Mount a 150–200mm deep timber board at shoulder height so you can empty pockets in one motion. Fix into studs, or use heavy-duty wall plugs suited to your wall type (brick, block, or plasterboard).
Add a short front lip to stop letters sliding, and fit two to three coat pegs beneath for daily jackets. For Entryway organization, pair the shelf with a small labelled tray, plus a key hook strip on the underside.
Keep the finish hard-wearing: Danish oil or water-based polyurethane stands up to wet umbrellas. These small space solutions keep the hall clear.
DIY Wooden Shelving for Kitchens and Pantries
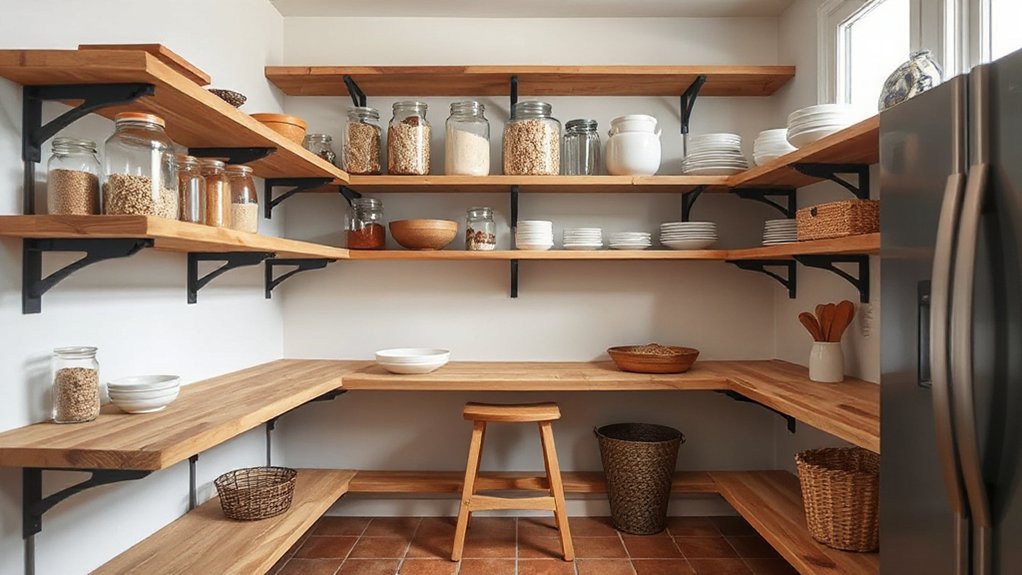
In your kitchen, you can fit floating spice rack shelves between wall units or beside the hob to keep jars visible and within reach without stealing worktop space.
In the pantry, you’ll add slim pantry bin label ledges to the front of shelves so labels sit square, stay readable, and don’t peel off with handling.
You’ll measure for standard UK jar heights and storage bins, then fix everything level and secure into studs or proper wall plugs for a clean, reliable finish.
Floating Spice Rack Shelves
- Fix into studs, or use quality plasterboard anchors rated for the load.
- Add a 20–30mm front lip so jars don’t slide when doors slam.
- Keep shelf depth to 60–80mm to avoid snagging utensils.
- Space tiers 120–140mm apart for standard supermarket jars.
Measure twice, level once, and pre-drill to prevent splitting.
Pantry Bin Label Ledges
When you’re tired of guessing what’s inside each pantry bin, a simple wooden label ledge gives you a consistent, tidy spot for clip-on tags or card labels without sticking anything to plastic.
Cut 12–18mm ply or softwood into 20–25mm strips, sand the arrises, then seal with clear matt varnish so it wipes clean.
Fix each ledge to the shelf front with screws into battens, or use strong mounting tape for rented flats.
Keep the top edge flush so bins slide out without catching.
For pantry organization, space ledges to match your bin heights and standardise label sizes.
For labeling tips, print waterproof cards, use a clear font, and add dates for flour, rice, and pasta rotation.
DIY Wooden Shelving for Bathrooms and Laundry

Although bathrooms and utility rooms tend to be short on space, you can gain a surprising amount of organised storage with well-sealed DIY wooden shelving that stands up to humidity, splashes, and frequent cleaning.
Choose moisture-resistant timber such as exterior-grade plywood or treated softwood, then prime and finish with yacht varnish or a bathroom-rated polyurethane.
Fix into studs or use proper wall plugs for tile and blockwork, and keep shelves clear of splash zones.
- Add a lipped front edge to stop bottles sliding on wet surfaces
- Fit adjustable brackets for flexible Bathroom storage around pipework
- Use slatted shelves for airflow and quicker drying of towels and detergents
- Label baskets to streamline Laundry organization and reduce clutter
DIY Wooden Shelving for Bedrooms and Closets
Bedrooms and closets reward the same tidy-minded approach as bathrooms and utility rooms, but you can prioritise clean lines, adjustability, and a finish that suits your décor.
Start by mapping what you store: folded knits, shoes, bags, or linens, then size shelves accordingly. Use 18mm plywood or planed softwood, and fix to studs or masonry with proper wall plugs; don’t rely on plasterboard alone.
In wardrobes, fit cleats or slotted standards so you can shift heights as seasons change. Add a front lip to stop stacks creeping forward.
Seal timber with water-based varnish for a low-odour bedroom finish.
Use Decorative wall accents sparingly, like a stained edge band or matte black brackets.
Custom shelving designs let you integrate a top shelf for suitcases and shallow cubbies for accessories.
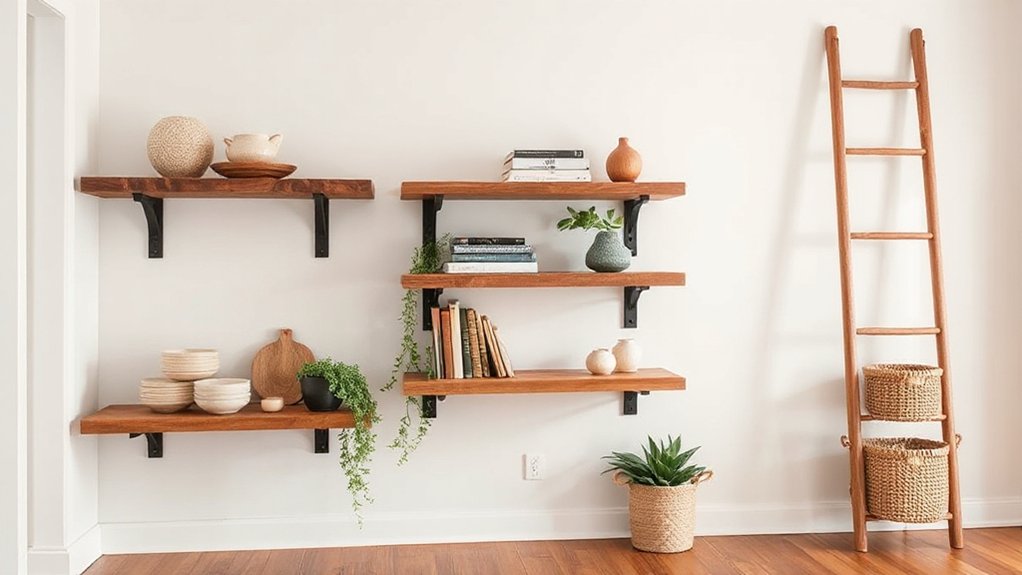
DIY Wooden Shelving for Living Room Wall Displays
For living room wall displays, you’ll get the cleanest look by planning a floating shelf gallery wall with level lines, consistent spacing, and fixings matched to plasterboard or masonry. You’ll mark stud positions where possible, choose a suitable load rating, and keep cable routes and plug sockets clear for a tidy UK finish.
If you prefer a more traditional style, you can fit bracketed shelves and balance frames, books, and plants so the decor mix looks intentional rather than cluttered.
Floating Shelf Gallery Wall
When you want a living room wall display that looks curated rather than cluttered, a floating shelf gallery wall gives you clean lines and flexible styling without bulky brackets. You’ll create purposeful wall decor while adding discreet storage solutions for books, frames, and small plants.
Fix into studs or use heavy-duty plasterboard anchors, then keep shelf depths consistent (18–22 cm suits most UK living rooms). Space shelves 25–35 cm apart so you can layer art without crowding.
Use a spirit level, measure twice, and align to a central datum line for a professional finish.
- Choose matching timber and stain for cohesion
- Stagger lengths to balance visual weight
- Hide cables with paintable trunking behind items
- Add museum putty to stop frames sliding
Bracketed Shelves With Decor Mix
Floating shelves keep the wall light and minimal, but bracketed shelves let you push both load capacity and character in a UK living room display. Choose steel L-brackets or heritage-style cast iron, then fix them into studs or use quality wall plugs suited to plasterboard or masonry.
Set your shelf thickness to match the bracket: 18mm pine looks neat; 25mm oak feels substantial.
For a decor mix that reads intentional, anchor each shelf with one heavier object, then vary height and texture: stacked books, a framed print, a small plant, and one ceramic.
Keep visual balance by repeating one colour (brass, black, or natural wood) across brackets and accents. Leave 30–40% breathing space, and align key items to your sofa sightline, not the ceiling.
DIY Corner Wooden Shelving That Fits Tight Spaces
Although awkward corners often get ignored, you can turn even the tightest nook into practical storage with DIY corner wooden shelving that’s cut to fit your exact space.
Start by measuring both wall runs from the corner and checking for skirting boards, pipes, and sockets so your shelf profile clears them cleanly. Make a simple paper or cardboard template first, then transfer it to timber for accurate cuts and reliable space optimization.
Use studs or solid masonry fixing points; in many UK homes you’ll hit plasterboard over brick, so locate supports before you drill. Keep shelf depths modest to avoid head knocks and improve corner storage in hallways, box rooms, and kitchens.
- Cardboard template for tight angles
- 18mm ply for stiffness
- Stud/masonry fixings, not just plasterboard
- Consistent level lines with a spirit level
Finish and Fix DIY Wooden Shelving (Paint, Seal, Repair)
Your corner shelves should now fit neatly against the wall lines and clear any skirting, pipes, or sockets, so the next job is to lock in a hard-wearing finish and sort the fixings before they see daily use.
Sand to 180–240 grit, vacuum, then wipe with a tack cloth. Prime knots with shellac-based sealer, then choose Wood finish options: water-based satin varnish for speed and low odour, hardwax oil for a natural look, or acrylic eggshell paint for kitchens and kids’ rooms.
Apply two to three thin coats, de-nibbing between.
Check brackets and wall plugs: use appropriate brown/blue plugs, and tighten screws without stripping.
For Shelf repair techniques, fill dents with two-part filler, clamp loose joints with PVA, and replace split battens.
Frequently Asked Questions
Do DIY Wooden Shelves Affect Home Resale Value?
Yes, DIY wooden shelves can affect your home’s resale value: you’ll boost appeal if you use smart shelf material selection and tasteful DIY shelf customization, and you’ll hurt value if they’re wonky, unsafe, or overpersonalised in the UK.
How Do I Childproof Wooden Shelves and Prevent Climbing?
Anchor shelves into studs with anti-tip brackets, fit wall straps, and keep lower shelves empty; 80% of UK furniture tip injuries involve children. Add corner guards, secure cords, and use climbing prevention: wall-mounted design. Child safety matters.
What’s the Best Way to Hide Shelf Cables and Power Strips?
You’ll get the best results by using cable trunking, adhesive clips, and a drilled grommet to route leads. For cable management and power strip concealment, mount the strip under-shelf, use a lidded box, label.
Can I Install Wooden Shelves in a Rental Without Losing My Deposit?
Yes, you can, if you follow renting restrictions and avoid wall damage. Use freestanding or tension options, or fix into studs with approved anchors. Get written landlord consent, keep receipts, and make good holes.
How Do I Match Shelf Wood Tones to Existing Furniture?
Treat tones like a tailored suit: match undertones first. You’ll nail wood stain matching by comparing samples in daylight, then use furniture tone coordination—keep warm with warm, cool with cool, and test finishes.
Conclusion
You’ve now got everything you need to build DIY wooden shelving that looks sharp and performs properly in any room. Choose a style that suits your space, measure carefully, and set sensible spacing so nothing looks cramped. Pick timber that matches your budget, then use the right fixings for plasterboard, brick, or stud walls. Follow no-sag rules and finish with paint or sealant. Done well, your shelves will feel strong enough to hold a small library.


