

You’ll find that the most predictable mistakes surface when you skip planning, right as moisture pops up where you least expect it. Start with the basics—purpose, layout, lighting, and storage—and build from there, factoring in future needs and tight spaces. Prioritize waterproofing, insulation, and sturdy walls, then layer lighting and optimize acoustics for comfort. With safe egress and smart storage under control, you’ll have a solid foundation that guides the rest of the work—but there’s more to take into account before you start.
Define Your Finished-Basement Goals
To define your finished-basement goals, start by identifying how you’ll use the space and what success looks like. You’ll translate needs into a clear plan, avoiding guesswork.
Pin down core functions—living area, home office, gym, or guest suite—and map them to a practical layout.
Set measurable criteria: square footage targets, lighting quality, and storage capacity.
Consider traffic flow, accessibility, and future adaptability to prevent costly redesigns.
Gather design inspiration from reliable sources to refine your vision, then align it with budget and timeline constraints.
Document decisions in a concise brief you can reference during construction, ensuring every choice supports your priorities.
With a defined scope, you’ll approach basement renovation decisively, keeping goals tangible and progress trackable.
Prioritize Foundations: Waterproofing, Insulation, and Drywall
Waterproofing keeps moisture out and protects your investment, so you’ll choose proven materials and a reliable drainage plan from the start.
Then, pick insulation strategies that fit your basement’s conditions and climate to improve comfort without boosting moisture risk.
Finally, guarantee drywall moisture barriers are in place to prevent mold and simplify long-term maintenance.
Waterproofing Essentials
Keeping moisture out of your foundation is non-negotiable when finishing a basement. You’ll install a proven system: exterior drainage to carry water away before it reaches the walls, plus a robust exterior waterproof membrane.
Inspect and seal all joints where the wall meets the slab, then address foundation cracks promptly to prevent unseen seepage.
Choose a drainage plane with proper slope and a sump pit to collect any intrusions, and guarantee your footing drains are clear.
Inside, use vapor barriers on basement humidity-prone surfaces and maintain interior grading away from the structure.
Don’t neglect penetrations; seal pipes and cables with compatible sealants.
Regularly test for damp spots after heavy rain and remediate immediately.
Prioritize proven methods, avoid shortcuts, and document maintenance.
Insulation Strategies
Now that you’ve pinned down moisture control, it’s time to address insulation that protects and saves you energy. Focus on thermal barriers at the foundation and exterior walls, minimizing cold bridges and draft paths.
Choose insulating materials with appropriate R-values for basement conditions, considering moisture resistance and mold resistance. Favor closed-cell spray foam or mineral wool for continuous coverage, plus rigid foam sheathing where needed to reduce thermal leakage.
Guarantee proper air sealing, targeting gaps around rim joists, pipes, and electrical penetrations before finishing.
Install a vented, pressure-balanced basement design when practical, and verify compatibility with any future waterproofing layers.
Prioritize ease of future access for inspections, and document material specs for reliable, long-term performance.
Drywall Moisture Barriers
- Plan joint treatment and vapor gaps to maintain continuous protection.
- Seal penetrations around electrical boxes and plumbing to prevent leaks.
- Use rated, mold-resistant drywall and airtight coatings for added durability.
This approach keeps your finished basement dry, stable, and comfortable, while you focus on precise drywall installation and long-term performance.
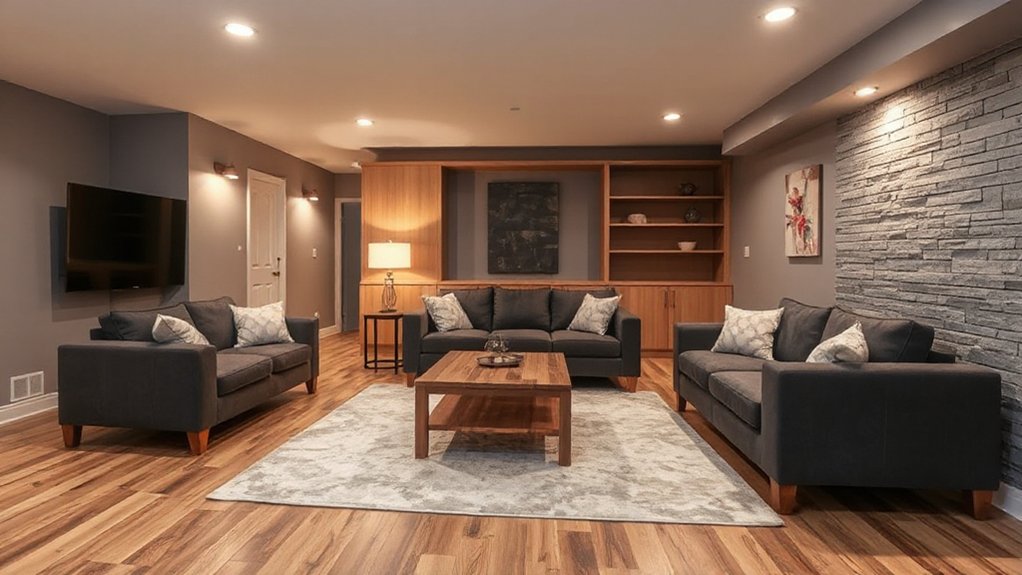
Create Flexible, Comfortable Layouts
Think about flexible zone planning that adapts to how you live, from a cozy media nook to a growing workspace.
Keep comfortable traffic flow by arranging clear pathways and open sightlines between zones.
Start with modular furniture and scalable layouts so your basement easily shifts as needs change.
Flexible Zone Planning
- Create multifunctional zones that combine work, play, and relaxation without wasted square footage.
- Choose adaptable furniture that doubles in purpose—sofas that become beds, coffee tables with storage, and light, movable screens.
- Plan for future needs with scalable layouts and easy-to-access outlets, so you can add gear or rehome functions without remodeling.
Focus on simplicity, clean sightlines, and durable finishes to maintain a polished, practical basement you’ll actually use.
Comfortable Traffic Flow
How can you guarantee comfortable traffic flow in a finished basement? Start with clear paths and logical zoning that prevent bottlenecks. Map traffic patterns before placing furniture, so main walkways stay at least 36 inches wide and doorways remain unobstructed. Choose furniture placement that reinforces circulation, not competition for space.
Use low-profile pieces and corner seating to avoid visual clutter and blocked sightlines. Align seating, entertainment, and work zones with primary routes, keeping high-traffic areas adjacent to entry points. Consider modular layouts that adapt to gatherings, seasonal needs, or future changes.
Use area rugs to define zones without narrowing paths. Assure lighting along pathways is even, and install outlets where devices will be used, not where cords will clutter walkways.
Set Mood With Lighting, Color, and Acoustics
Layering light, color, and acoustics sets the mood in a finished basement, guiding how you feel in every zone without cluttering the space. By combining ambient ambiance with purposeful lighting layers, you create rooms that read as calm or vibrant without overhauling the structure.
Use these practical steps:
- Layer lighting: mix ambient, task, and accent to control depth and focus.
- Calibrate color: cool tones feel expansive; warm tones feel cozy; balance brightness to avoid glare.
- Optimize acoustics: add soft materials and diffusers to reduce echo and improve comfort.
This approach keeps zones cohesive, lets function drive design, and preserves a polished, livable feel.
Plan Storage, Access, and Safe Egress
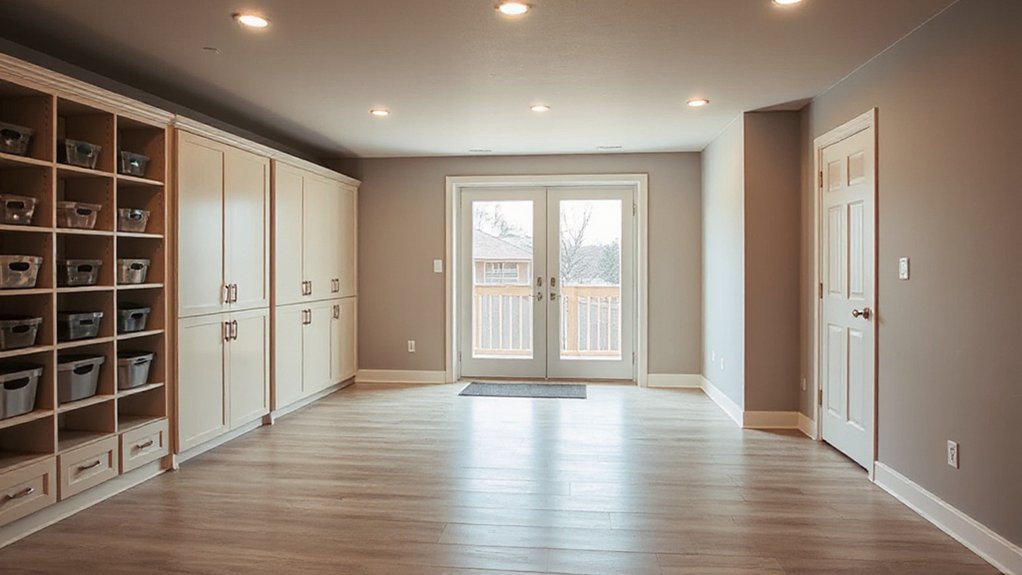
Efficient storage, clear access, and safe egress are foundational to a finished basement you’ll actually use. Plan storage zones by function: high-use items near stairs, seasonal gear in reachable overhead bins, and seldom-used materials in dry, protected cabinets.
Integrate built-ins to minimize clutter and maximize floor space, using labeled containers for quick retrieval. Prioritize accessible pathways, keeping doors and hatches unobstructed and lighting consistent along primary routes.
For egress safety, verify a dedicated exit exists with direct, unobstructed access to the exterior. Confirm the egress window meets code, with a clear opening and unobstructed sill.
Install non-slip flooring near stairs and exits, and mount alarms or sensors where appropriate. Select storage solutions that resist moisture and are easy to maintain, so safety and organization endure.
Budget, Materials, and DIY vs. Pro Help
Here’s how to approach budget, materials, and whether to DIY or hire a pro: start with a clear, itemized plan that captures priorities, anticipated costs, and a realistic timeline. Then compare material options for durability, moisture resistance, and maintenance.
You’ll weigh cost considerations against long-term value and pick material types that suit a basement’s climate. Decide between DIY feasibility and pro expertise based on scope, permits, and warranty.
1) Create a contingency-aligned budget that includes labor, materials, and unexpected fixes.
2) Prioritize material selection for moisture control, mold prevention, and ease of upkeep.
3) Schedule milestones and review a pro estimate vs. DIY cost, balancing quality with your timeline.
Frequently Asked Questions
How Long Does a Finished Basement Project Typically Take From Start to Finish?
A typical finished basement project takes about 6 to 12 weeks, depending on scope and permitting. You’ll spend a couple of weeks on design, framing, and rough-ins.
Then, a few weeks are needed for electrical, plumbing, and insulation.
Another stretch is required for drywall and painting.
You can wrap up with basement lighting and flooring options in the final weeks.
Stay realistic about delays. Plan buffers, coordinate trades, and confirm product lead times early to stay on track.
What Permits Are Required for Basement Finishing in My Area?
You’ll need to check local building codes and obtain the required permits before starting your basement finish.
In most areas, you’ll apply for a building permit, sometimes electrical and plumbing permits, and pass inspections at key milestones.
Make certain the contractor is properly licensed and insured, and verify that their licensing covers basement finishing.
Building codes regulate egress, ceiling height, and ventilation, so secure approvals early to avoid delays.
Can I Finish a Basement if There’s a Musty Smell or Prior Mold?
Yes, you can finish a basement if there’s a musty smell or prior mold, but you must address it first. Start with mold remediation to remove active spores and treat the area.
Then fix moisture sources to prevent recurrence. Implement moisture prevention measures—sealed walls, proper ventilation, and a dehumidifier.
Only proceed after tests confirm remediation success. Document improvements for permits, and maintain ongoing monitoring to protect your new space.
How Do I Ensure Basement Ceilings Are Accessible for Future Repairs?
You should design ceiling access for future repairs by planning ceiling insulation and access panel placement before finishing.
Mark locations for panels in utility areas and above plumbing, HVAC, and wiring runs, so you can reach components without tearing apart finished spaces.
Use removable ceiling tiles or hinged panels where possible.
Make certain access panels are sized for tool clearance, labeled, and protected from moisture to keep maintenance quick and noninvasive.
What Is the Best Way to Finance a Basement Remodel Project?
Smart budgeting first: explore a mix of savings, credit options, and loan programs to fund your basement remodel. You should compare interest rates, terms, and fees, then pick a plan you can comfortably repay.
Consider a home equity loan or line of credit, plus project-specific financing like a contractor loan.
Factor in basement lighting and storage solutions to maximize value.
You’ll secure faster approvals by presenting a clear scope, timeline, and a solid cost estimate.
Conclusion
If you plan with purpose, your finished basement becomes a true extension of home, not a risky afterthought. Prioritize waterproofing, insulation, and flexible layouts, then layer lighting and storage for ease and comfort. Keep safety front and center with up-to-date electricals and clear egress. A practical stat to take into account: homes with well-finished basements tend to increase usable square footage by up to 30%, boosting value and everyday livability. Stay precise, adaptable, and patient, and you’ll reap lasting rewards.


