
If you’re renovating a small UK home on a budget, you’ll want a clear plan that delivers big changes without big costs. Think neutral walls, smart storage, and durable finishes that last. Prioritize high-impact updates like lighting and hardware, seal drafts, and optimize space with vertical and hidden storage. You’ll also weigh cost against value to avoid overcommitting. There’s more to optimize than you’d guess, and the best moves aren’t always obvious—so you’ll want to see what comes next.
Start With a Realistic Budget and Plan for Small UK Homes

Starting with a realistic budget is essential for any small UK renovation. You’ll map costs before a single tile is bought, avoiding scope creep and surprise invoices.
Begin with a practical baseline: determine your total, then allocate by room priorities and impact. Budget planning means separating fixed costs (structural work, permits) from variable ones (finishes, fittings), and including a contingency—typically 10–15%.
When you estimate, stay conservative on labour rates and delivery fees common in the UK market. Material selection should align with both durability and resale value, favouring standard sizes, off-the-shelf fixtures, and local suppliers.
Document decisions in a simple spreadsheet, track commitments, and revise as quotes evolve. Regular reviews keep the project on track and your finances transparent.
Maximise Storage With Vertical Shelving and Hidden Solutions
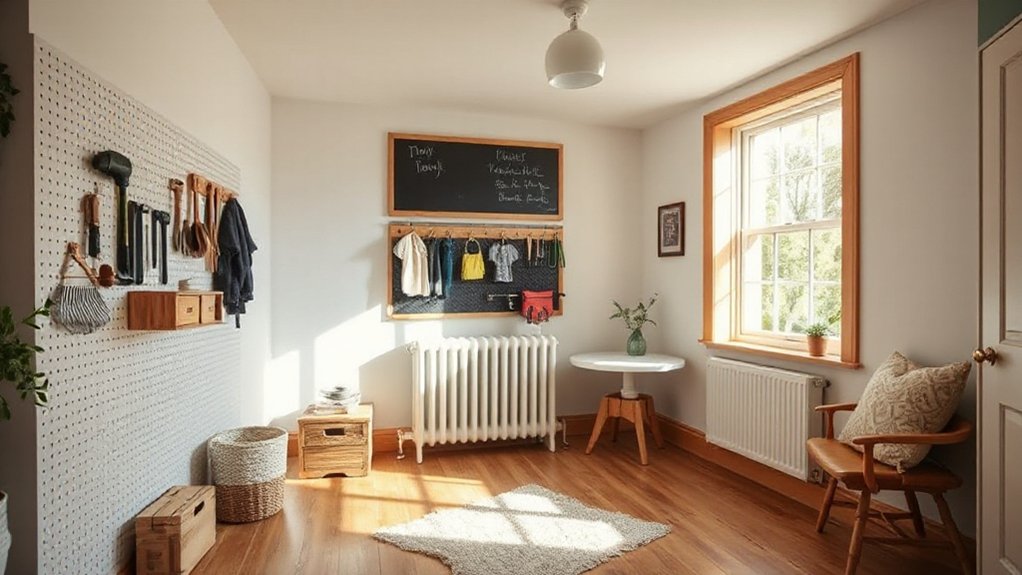
Vertical storage can open floor space without expanding your footprint, using tall units, wall-mounted rails, and adjustable shelves to fit awkward nooks.
Hidden solutions like pull-out podiums, under-stair drawers, and lift-up lids keep clutter out of sight while maximizing every square metre.
Pair compact, multiuse shelving with modular units that adapt to changing needs across rooms and budgets.
Vertical Storage Strategies
To make the most of limited space, vertical storage should be your first consideration when renovating a small UK property. You’ll prioritise wall-to-wall solutions that draw height without widening your footprint, enabling you to reclaim floor area for living.
Start with tall, slender shelving units that extend to the ceiling, using adjustable uprights to adapt to changing storage needs. Implement ceiling mounted racks where codes permit, freeing floor space for freestanding furniture that remains accessible.
Consider integrated magnetic strips, peg rails, and slim hanging capsules to keep daily items within reach. Choose light-coloured or reflective finishes to reduce visual clutter and maintain a sense of openness.
Finally, document load limits, guarantee accessibility, and monitor for dust or murk buildup to sustain performance.
Hidden Solution Innovations
Hidden solution innovations take your vertical approach to the next level by blending concealment with accessible shelving. You’ll exploit tall panels, pull-out tiers, and recessed drawers to keep essential items within arm’s reach while maintaining a clean façade.
Think hidden storage behind bookcases, under stairs, or within folding desks that double as surfaces. Use innovative fixtures like concealed hinges, soft-close guides, and magnetic catches to guarantee smooth, quiet operation.
Prioritise modular components that adapt to changing needs, such as adjustable shelves and removable carcasses for bulky items. Install lighting that highlights storage zones without glare, aiding usability.
Plan zones by function, keeping rarely used items tucked away yet retrievable. This approach maximises space without sacrificing aesthetic cohesion or access.
Compact, Multiuse Shelving
Compact, Multiuse Shelving is about turning every inch of vertical space into workable storage while keeping sightlines clean and surfaces free for use. You’ll prioritise modular furniture that adapts to changing needs, avoiding bulky, fixed units.
Deploy tall, slender shelves with adjustable heights to accommodate books, gadgets, and decorative items without crowding floors. Consider wall-mounted systems that seal gaps around alcoves and under stair voids, preserving floor area for tasks.
Hidden solutions—drawer inserts, pull-out baskets, and concealed panels—minimise visual clutter while boosting accessibility. Choose space saving designs with integrated brackets, led lighting, and color-matched finishes to maintain coherence in tight rooms.
Plan for airflow and dust control, ensuring easy cleaning. This approach keeps rooms usable, organized, and visually calm.
Budget-Boost Kitchen Refreshes That Look High-End
Renovating a small UK kitchen on a budget doesn’t mean compromising on style or function: smart hardware choices, strategic layout tweaks, and cost-conscious materials can deliver a high-end look without the luxury price tag.
You’ll maximize impact with precision details: swap dated handles for brushed nickel or matte black, and install soft-close hinges for a premium feel.
Opt for a quartz or solid-surface worktop that mimics stone without the price tag, and keep cabinetry monochrome with subtle grain.
Add vintage accents through small, well-chosen accessories, avoiding clutter.
Emphasize lighting with statement lighting that doubles as a focal point, while under-cabinet LEDs boost task visibility.
Finally, curate appliances that balance efficiency with sleek lines to maintain a cohesive, upscale impression.
Affordable Bathroom Upgrades That Last
Upgrading a small UK bathroom on a budget doesn’t mean you’re skimping on durability or style; with careful material choices and tight installation, you can achieve lasting, high-quality results.
Focus on compact, efficient layouts and reliable fittings that maximize space without waste. Choose quality sealants and corrosion-resistant fixtures to prevent leaks and costly fixes later.
Eco-friendly fixtures cut long-term running costs and appeal to modern buyers without compromising performance. Cabinetry and vanity units should be moisture-rated and properly vented to avoid warping.
If you lean toward a vintage vibe, select vintage-inspired designs that use modern cores for durability. Prioritize easy-to-clean surfaces, neutral tones, and a few bold accents to create a timeless look that remains practical and money-smart over years.
Durable, Low-Maintenance Materials for Small Homes
When you choose durable surface options, you’ll prioritize materials that resist scratches and staining while keeping costs predictable.
For low-maintenance flooring, consider options that endure foot traffic with minimal sealing or refinishing needs.
Long-lasting wall finishes should balance washability, moisture resistance, and ease of repair to keep small spaces looking fresh.
Durable Surface Choices
Durable, low-maintenance surfaces are the backbone of affordable small-home renovations, so prioritize materials that stand up to daily use without demanding constant upkeep. You’ll want options that resist scratches, stains, and moisture while keeping a clean, cohesive look.
Prioritize surface durability over trend; engineered composites, solid-core laminates, and high-pressure laminates deliver consistency and ease. For counters and work surfaces, consider quartz or compact laminates that mimic natural textures without porous risks.
In walls and splash areas, choose premium vinyl wall panels or finished laminates with sealed edges to minimize maintenance.
Flooring can be durable when you opt for dense vinyl, sealed concrete, or porcelain tile in key zones. Material longevity hinges on proper installation and minimal routine care, not frequent replacements.
Low-Maintenance Flooring
If you’re aiming for floors that withstand daily wear with minimal fuss, start with materials that resist scratches, moisture, and stains. Prioritize low-maintenance options like luxury vinyl, laminates with protective coatings, and ceramic tiles in high-traffic zones. These choices balance durability with affordability and are quick to clean, reducing upkeep time.
For kitchens and baths, sealed porcelain or stone-look tiles offer moisture resistance without the upkeep of natural stone. In living areas, consider wide-plank LVT or high-grade laminate that hides scuffs and cleans easily.
Match practicality with style by selecting textures and tones that read as premium, yet remain budget-conscious. Also weigh eco-friendly options such as recycled-content composites.
Add luxury accents with subtle detailing, and guarantee installation supports long service life.
Long-Lasting Wall Finishes
Choosing wall finishes that stand up to daily life in small UK homes means prioritizing durability, moisture resistance, and easy upkeep without sacrificing look.
For long-lasting wall finishes, opt materials that tolerate humidity and traffic, yet remain affordable. In small spaces, install moisture-safe drywall or plaster with reinforced coats, then seal joints to prevent cracking.
Wallpaper textures can add depth without frequent replacement, but choose vinyl or coated options for washability and scrub resistance.
If you prefer paint, select durable finishes such as scrubbable or matte washable instead of flat, and apply two coats plus a stain-blocking primer to curb staining.
Consider dust and mold prevention by improving ventilation.
Finish with a low-VOC option to keep air quality high while maintaining a crisp, enduring appearance.
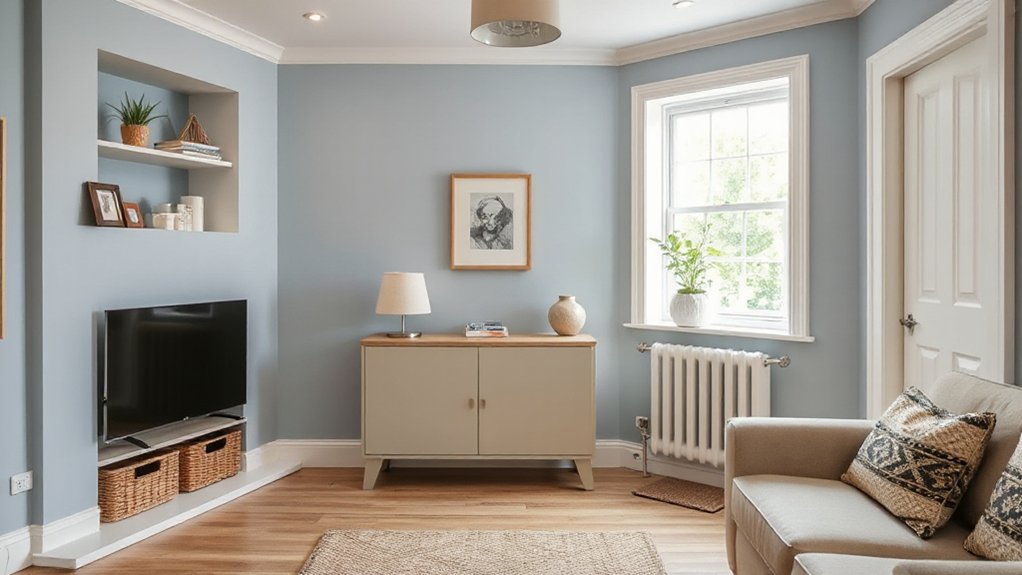
Light and Color Tricks to Make Tiny Rooms Feel Bigger
Natural light can make a compact UK home feel airier, so start by maximizing it: replace heavy curtains with light, translucent fabrics, install slim-profile blinds, and keep window surrounds clean to let daylight flood in.
In small spaces, mirror placement matters: hang one large, strategically positioned mirror opposite a window to bounce natural light deeper.
Choose white or pale gloss finishes to reflect light without glare.
Color psychology matters: cool neutrals create a perceived sense of openness, while a restrained accent on a single feature wall adds depth without shrinking the room.
Prioritize color consistency across floors and cabinets to avoid visual fragmentation.
Avoid heavy, dark textiles; opt for light-weave fabrics and sparse accessories that preserve airiness while maintaining a cohesive, modern feel.
DIY-Friendly Renovations You Can Do This Weekend
You can tackle several DIY-friendly renovations this weekend that deliver real impact in small UK homes. Start with quick, measurable gains: refresh lighting with LED bulbs, seals around doors and windows, and paint a feature wall to alter perceived space. Focus on low-cost, high-visibility improvements first.
For garden landscaping, simple planters, mulch, and tidy edges extend your outdoor living area without major disruption, while tasks like soil prep and container choices boost curb appeal.
Inside, upgrade hardware on cabinets and doors to modernise without a full remodel. Tackle storage optimization with vertical shelving and under-stair solutions to reclaim floor space.
Prioritise energy efficiency by addressing drafts, upgrading thermostat settings, and installing draft excluders where feasible. Plan tasks, timing, and materials to finish efficiently.
Prioritize Value: Which Projects Give the Biggest Return
Biggest returns come from projects that improve daily use and curb appeal at a low cost, so start by mapping tweaks that readers will notice and feel.
You’ll prioritize high-impact updates: fresh paint in neutral tones, hardware swaps, and lighting upgrades that brighten spaces without overhauling layouts.
Focus on durability and daily ergonomics—kitchens and bathrooms with efficient fixtures, powered storage, and smart controls deliver tangible value fast.
Plan beyond aesthetics: good insulation, draft sealing, and efficient hygro-related fixes reduce bills and boost comfort.
For materials, choose eco-friendly materials where possible to align with modern buyer expectations.
When considering style choices, respect historical preservation guidelines if applicable, as tasteful conservation can preserve value.
Track ROI by cost, disruption, and time-to-use, adjusting as data arrives.
Create Your Renovation Roadmap: Planning, Tracking, and Next Steps
Create a renovation roadmap by naming your goals, sequencing tasks, and setting practical milestones. You’ll map every step from concept to completion, aligning budget, time, and quality.
Start with a master plan: define rooms, required improvements, and a realistic timeline.
Break tasks into phases: demolition, systems, finishes, and final touch‑ups, then assign owners and due dates.
Track progress with a simple dashboard—budget spent, tasks done, risks, and decisions.
Build in review points after each milestone to reallocate resources if needed.
Prioritize efficiency and durability using eco-friendly materials where possible, and plan smart lighting early to maximize impact with minimal fuss.
Keep documentation organized: supplier quotes, permits, warranties, and change orders.
End with a clear next‑steps checklist to guide handover and future upgrades.
Frequently Asked Questions
How Can I Fund Renovations With Minimal Debt?
You can fund renovations with minimal debt by prioritising cash flow, using DIY tips, and seeking low-interest loans or grants. Leverage DIY tips, eco friendly upgrades, a phased plan, and strict budgeting to avoid overspending and build savings first.
Which Permits Are Essential for UK Small Homes?
Only essential permit requirements and renovation regulations apply; you’ll typically need building regulations approval, and possibly planning permission for structural changes or changes of use. Stay proactive, verify local authority rules, and document compliance for smooth projects.
How Long Will Typical Small-Renovation Projects Take?
Typical small-renovation projects take a few weeks to a few months, depending on scope. You’ll prioritize interior design details and energy efficiency, schedule trades early, and allow for approvals; you’ll complete with minimal disruption and solid results.
What Are Hidden Costs Not Included in Quotes?
Hidden fees sneak in, surprise charges pop up—don’t blink. You’ll see them after contracts sign. You’ll cover materials, permits, delivery, and labour overruns; stay vigilant, review quotes, and demand explicit line items to avoid shock.
How Do I Prioritize Safety in Budget Projects?
You prioritize safety by scheduling timely safety inspections and securing clear emergency exits first, then budget around those essentials. Inspectors guide critical fixes, document hazards, and you implement corrective actions, ensuring compliant egress routes and ongoing vigilance for every project.
Conclusion
You’ve got this: a tight budget, a sharp eye, and smart solutions. Start small, stay steady, and stack standout upgrades that save money and maximise space. Budget-friendly basics boost value, while clever shelving, hidden storage, and durable, low-maintenance finishes keep upkeep minimal. Light, color, and layout tricks trick tiny rooms into feeling larger. Prioritise practicality, track progress, and push practical projects first. Plan, perform, perfect—progress, not pomp, leads to powerful, pocket-friendly property upgrades.


