
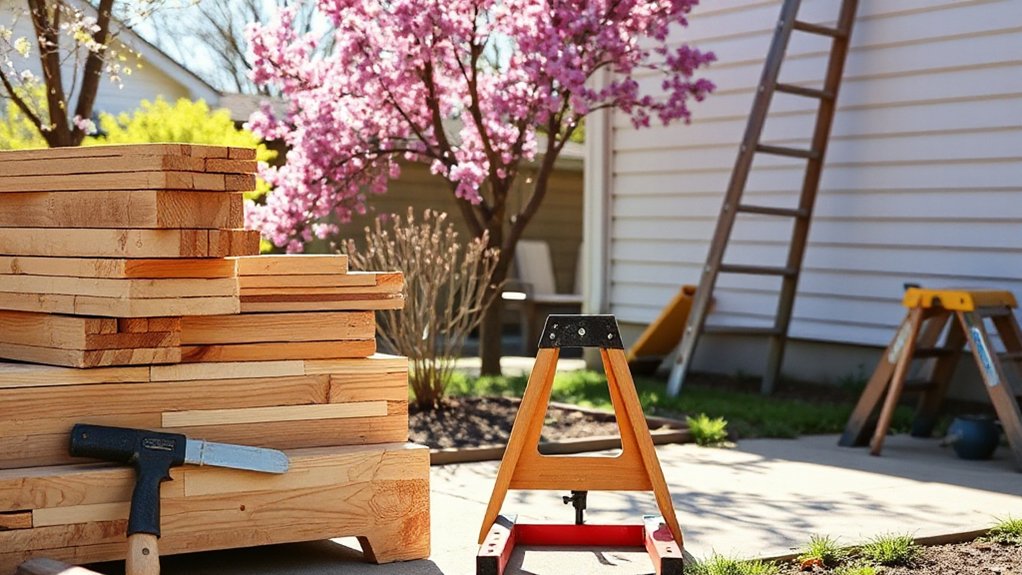
Spring home improvement starts with clear goals, a budget, and a practical timeline. Define high-impact projects like exterior refresh, interior refresh, lighting upgrades, and energy improvements. Prioritize tasks by impact and risk, and map them to measurable outcomes. Tackle quick fixes first—paint doors, seal drafts, clean surfaces—then refresh interiors with durable finishes and new hardware. Plan landscaping for curb appeal and water savings. Stay disciplined with a weekly progress check; more tips await as you continue.
Define Your Spring Improvement Goals and Measurable Outcomes

To start, define what you want to accomplish this spring and how you’ll know you’ve succeeded. You set clear goals that drive action, then map measurable outcomes you can audit weekly.
Pin down concrete targets: add garden furniture to outdoor spaces, optimize pest control, and improve energy efficiency in high-use rooms. Decide metrics you’ll actually track, such as time saved, cost reductions, and resident satisfaction.
Identify milestones you’ll hit, like completing a furniture refresh by mid-spring or reducing pest sightings by 80% within a quarter. Link each goal to a metric and assign accountability.
Keep expectations realistic, with contingency plans for weather or supply delays. Review progress every 7–14 days, adjust tactics, and celebrate tangible wins as you advance your spring improvements.
Set Budget, Timeline, and Priorities for Seasonal Projects
Before you plunge in, pin down your seasonal priorities and set firm budgets, timelines, and success criteria. You’ll map tasks to outcomes, then allocate money and time with discipline.
Start with garden planning: define what’s essential, what can wait, and where you’ll invest for maximum impact. Next, establish a realistic timeline with milestones and buffers for weather or supply delays.
Prioritize projects by impact, risk, and dependency, then rank them from high to low. Assign concrete budgets to each item, and create a single source of truth you’ll monitor weekly.
Build in a review cadence to adjust priorities as conditions change. Finally, embed seasonal cleaning into the plan as a recurring, non-negotiable task that keeps momentum and delivers durable results.
Stay focused and decisive.
Refresh Interiors: Paint Color, Finishes, and Surface Prep
Choosing the right paint color sets the mood, so start with a few swatches and test them in your lighting, furniture, and rug tones.
Understand finishes and sheens to balance durability with the room’s use.
Plan surface prep essentials like cleaning, patching, and priming before you paint. This helps you tackle prep efficiently, avoid touch-ups, and achieve a professional-looking result.
Paint Color Considerations
Colors set the tone for any room, and choosing the right hues starts with understanding how they interact with light, space, and purposes—then testing swatches in your actual rooms.
You assess color schemes by purpose and mood, prioritizing a focal wall or accent tones that support flow. Use color psychology to predict emotional impact, then apply artistic techniques like swatching in different lighting and times of day to confirm consistency.
Start with large swaths in neutral bases, layering with smaller patches for contrast. Consider undertones and temperature shifts that align with furniture and textiles.
Choose durable, washable finishes for busy spaces, and document your decisions with a simple palette map.
Trust your instincts, refine with data, and execute decisively.
Finishes And Sheen Levels
Finishes and sheen levels determine how a paint job looks and lasts, so start by matching the finish to room function and cleaning needs. You control durability by selecting finish options that resist wear in high-traffic areas and splashes in kitchens or baths.
For walls that see daily use, choose an easy-clean option with moderate sheen. In living spaces, a balanced sheen keeps color true while minimizing fingerprints. Higher sheen reflects more light and shows flaws, so reserve it for trim, doors, or accent walls if you want drama without constant touch-ups.
When planning, compare sheen levels side by side, note maintenance, and align with your power standards for a confident, long-lasting result. Finish options and sheen levels determine your project’s real impact.
Surface Prep Essentials
Surface prep is the foundation of a durable, even paint job, so start by cleaning walls, repairing cracks, and sanding rough spots before you pick color or finish. You’ll set the stage for flawless coverage by removing grime, peeling glaze, and loose material.
Power washing can be used on exterior surfaces to blast away dirt, mold, and oils, but test substrates first and protect nearby areas.
For interior prep, wipe with a damp cloth to remove dust, then scrub high-traffic spots with a mild solution. Follow with surface sanding to create a bite for the primer, and vacuum the debris.
Prime where needed, fill holes, and let dries complete before you apply color or sheen.
Control the prep, control the outcome.
Choose Lighting That Brightens Rooms and Sets the Mood

If you want a space that feels brighter and more inviting, start by choosing lighting that complements both function and mood. You control outcomes by layering light sources: ambient, task, and accent.
Prioritize color temperature that matches activities—cooler for work, warmer for relaxation. Implement dimmers to modulate intensity without changing fixtures. Use energy-efficient LEDs and ensure brightness levels meet task needs without glare.
Think about lighting design as a tool for space perception: uplights to add height, wall washes for depth, and spotlights to highlight artwork. Install under-cabinet lighting for kitchens and flexible task lamps at desks.
Select fixtures with clean lines that blend into decor. Mood lighting should feel intentional, not accidental, shaping atmosphere to support focus or calm.
Boost Energy Efficiency With Insulation, Sealing, and Draft Prevention
To keep a home comfortable and costs down, start tightening up the envelope with insulation, sealing, and draft prevention. You’ll block cold spots and reduce heat loss by focusing on attic, walls, and ductwork.
Fill gaps around doors, windows, outlets, and pipes with appropriate sealant and weatherstripping, then add insulation where needed to meet code or better.
Install door sweeps to curb creeping drafts and upgrade old windows or add storm windows if replacement isn’t feasible.
Use window treatments to control solar gain and retention without sacrificing style.
Pair insulation with a smart thermostat so you adjust heating and cooling automatically, maximizing efficiency.
Together, these steps deliver steady comfort, lower utility bills, and empowered control over your home’s energy performance.
Quick Exterior Fixes to Elevate Curb Appeal
Spruce up your home’s curb appeal fast by tackling a few simple exterior fixes that make a big impact. You’ll start with a clean, inviting entry: repaint the door, refresh house numbers, and seal shimmering trim.
Power through quick landscaping tweaks—trim overgrown shrubbery, mulch evenly, and plant seasonal color to create instant contrast against your facade.
For structural polish, pressure-wash siding, gutters, and sidewalks, removing grime that dulls first impressions. Inspect the roof for loose shingles and flashing, then schedule roof inspections to prevent surprises.
Fix visible gaps around windows and doors with weatherstripping, preventing drafts and water intrusion. Finally, replace worn hardware and outdoor lighting for safe, inviting nighttime curb appeal.
Monitor garden pests and address early signs to maintain pristine results.
Design Outdoor Living: Patios, Decks, and Green Spaces
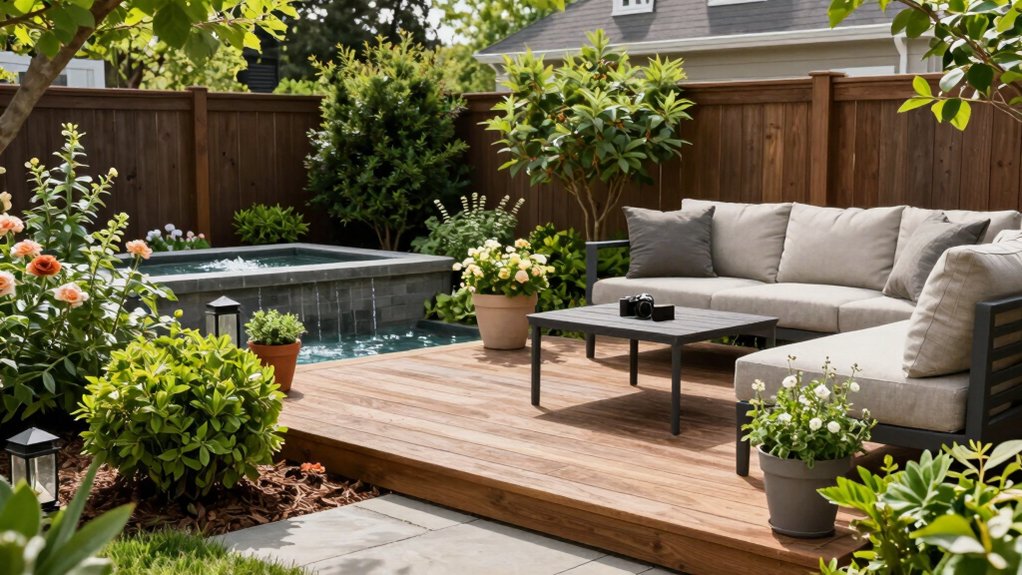
Design your outdoor living space by prioritizing outdoor living essentials like seating, lighting, and weatherproof surfaces. Think about creating green spaces that are easy to maintain and visually inviting, with zones for dining, lounging, and play.
Start with a simple plan that maps paths, plants, and storage to keep everything practical and ready for spring gatherings.
Outdoor Living Essentials
Ready to transform your yard into a functional outdoor retreat? Start with a solid layout: designate zones for dining, lounging, and grilling, then map traffic flow.
Choose durable outdoor furniture that suits your space and climate, prioritizing ergonomic comfort and weather resistance. For longevity, select cushions with mildew-resistant covers and sunproof fabrics.
Install garden lighting along key pathways and focal points to extend usability after sunset; use warm white bulbs to create inviting ambience without glare.
Add a weatherproof dining set, a compact grill station, and modular seating to adapt to gatherings.
Ground cover or pavers define zones without clutter, while a simple shade solution—awnings or pergola—boosts comfort.
Maintain clean lines, minimal decor, and scalable features for future upgrades.
Green Space Design
How can you seamlessly blend green space into your outdoor living plan? You design with intent, choosing native planting and water conservation as your core moves. You’ll create a cohesive, low-maintenance canvas that amplifies shade, texture, and color while supporting local ecosystems.
- Map sun, wind, and drainage; place drought-tolerant natives where they’ll thrive with minimal irrigation.
- Layer plant heights for year-round interest, using evergreen structure and seasonal blooms.
- Choose permeable surfaces and smart irrigation to curb runoff and conserve water.
- Integrate seating and hardscape flows that invite movement between patios, decks, and plantings.
Refresh Kitchens and Bathrooms on a Budget
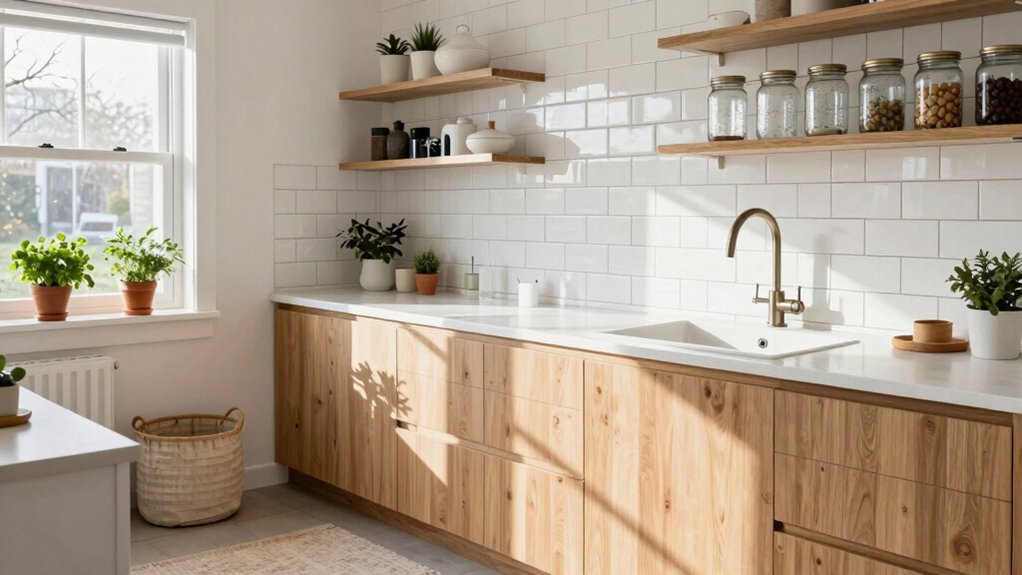
If you’re tackling a kitchen or bathroom refresh on a budget, you can transform the space without breaking the bank by focusing on paint, hardware, and smart storage.
Start with a fresh coat of durable paint in a neutral tone to brighten walls and cabinets without a full replacement.
Swap out under-sink hardware and cabinet pulls for high-contrast metals to refresh the hardware palette instantly.
Choose modular storage solutions that maximize vertical space and keep essentials accessible, reducing clutter and visual noise.
Upgrade lighting with targeted garden lighting accents near entry points and task zones to boost brightness where you need it most.
Add window treatments that filter light while maintaining privacy and cohesiveness with your new look.
Simple DIY Repairs to Prevent Bigger Problems
Small, proactive DIY repairs can prevent big headaches later, so start by inspecting high‑traffic areas for wear and leaks. You take control by addressing issues before they escalate, keeping your home strong and efficient. Use quick wins to sharpen your power stance and protect your assets.
- Check seals around doors and windows; replace cracked weatherstripping to stop drafts and moisture.
- Tighten loose cabinet hinges and door latches to prevent warp‑inducing sagging.
- Patch minor drywall dents and cracks to avert bigger structural costs.
- Inspect indoor plants and garden pests, removing affected leaves and isolating infected specimens to defend plant health and indoor air quality.
Small-Scale Landscaping That Adds Value
Turn your yard into an inviting backdrop with a few well-chosen, scalable landscaping tweaks. You’ll boost appeal fast by prioritizing structure and upkeep.
Begin with garden pathways that guide movement and reduce wear on turf—compact, durable pavers or crushed gravel work best, laid in straight lines or gentle curves to invite strolls.
Next, refine flower bed design to create focal points and seasonal color without overcomplication; keep edges clean, mulch evenly, and select natives for low maintenance.
Add a smart, low-cost focal point—evergreen shrub, small tree, or a container garden near entry—and ensure sightlines from the curb are tidy.
Finally, schedule regular maintenance: trim, weed, and mulch a little each month to preserve value and curb appeal.
Create Your Spring Schedule: Step-by-Step Planning Guide
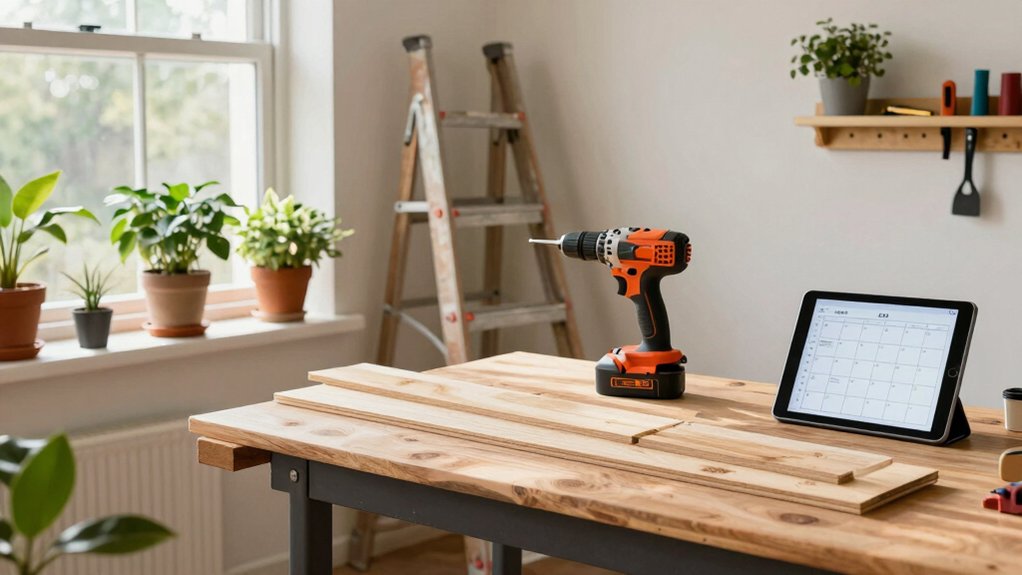
Start by planning your timeline so you can see when each task should start and finish. Prioritize tasks early, so high-impact chores get done first and you stay on track.
Gather your tools and materials now, so you have everything you need as you clock in time on your plan.
Plan Your Timeline
To plan a solid spring schedule, start by mapping your project list to realistic timeframes, then block out dates on a calendar so you can prioritize tasks that depend on weather, materials, and contractor availability. You’ll gain control by sequencing steps, aligning garden layout decisions with seasonal planting windows, and building buffer days for delays. Purposeful planning keeps momentum.
- List every task, estimate duration, and link dependencies so you can see the critical path.
- Allocate shifts for weather-sensitive activities, like soil prep or transplanting, to avoid setbacks.
- Reserve contingency slots for materials or contractor delays, ensuring steady progress.
- Schedule review checkpoints to adjust timelines as conditions change.
Stay decisive; this approach sustains momentum and delivers crisp, powerful results.
Prioritize Tasks Early
Prioritize tasks early by separating must-do items from nice-to-haves and locking in the critical path first. You’ll map milestones, assign dates, and force decisions that prevent scope creep.
Start with a high-impact sweep of spring projects, then categorize each item by urgency and impact on garden planning and storage solutions. Identify dependencies, estimate effort, and establish a realistic sequence that minimizes backtracking.
Lock in a concrete schedule you can defend: which tasks must occur before others, which require weather windows, and which depend on supplier lead times. Allocate buffers for delays, review weekly, and adjust only with solid data.
With this approach, you gain control, clarity, and momentum—you’ll execute decisively and keep the project tightly aligned to goals.
Gather Tools, Materials
Gather what you’ll need before you pick a project pace: inventory everything you already have, estimate what’s missing, and plan around those gaps. You’ll move fast when you know your baseline, so gather tools, materials, and safety gear with purpose.
This step powers your schedule for garden landscaping and home security upgrades, ensuring you don’t stall mid-project.
- List essential tools you already own and mark gaps in each category
- Catalogue materials by quantity, cost, and lead time
- Secure tools and supplies in a ready-to-access spot
- Verify safety gear, protective eyewear, gloves, and first-aid kit
With a solid pile of essentials, you command momentum, minimize trips, and keep your spring plan strict, focused, and effective.
Build a Maintenance Routine to Protect Your Investments
A simple maintenance routine protects your investments and keeps your home running smoothly year round. You establish a clear schedule, then stick to it. Check your systems monthly: plumbing, HVAC, electrical, and seals. Replace filters, weather-strip doors, and inspect insulation to prevent waste.
Tidy outdoor spaces with deliberate garden upkeep, pruning when needed and clearing debris to deter pests. Schedule seasonal decor reversions at the same times each year so transition feels intentional, not reactive.
Document tasks, deadlines, and results, then adjust based on performance. Invest in smart reminders and durable tools. Limit downtime by pairing tasks; tackle three quick fixes this weekend, two more next month.
You’ll protect value, reduce emergencies, and keep your home resilient and ready.
Conclusion
Spring is your window of opportunity to refresh, protect, and add value with practical fixes. Define goals, set a budget, and map a simple schedule, then tackle paint, lighting, insulation, and small repairs in bite‑size steps. A little consistency now prevents big headaches later. Remember: Rome wasn’t built in a day, but steady forward motion turns a season into lasting improvements. Stay focused, stay practical, and enjoy the tangible payoff of your hard work.


