Like a quiet gate waiting to be opened, a basement home office sits at the edge of potential. You’ll weigh space, permits, and moisture control before you ever pick finishes, because each choice echoes in cost and comfort. With insulation, electrical setups, and HVAC in the mix, you’ll find the budget shaping your options and timing. The more you plan now, the more you’ll protect your work environment—and your wallet—as you move forward.
Assessing Basement Space and Layout
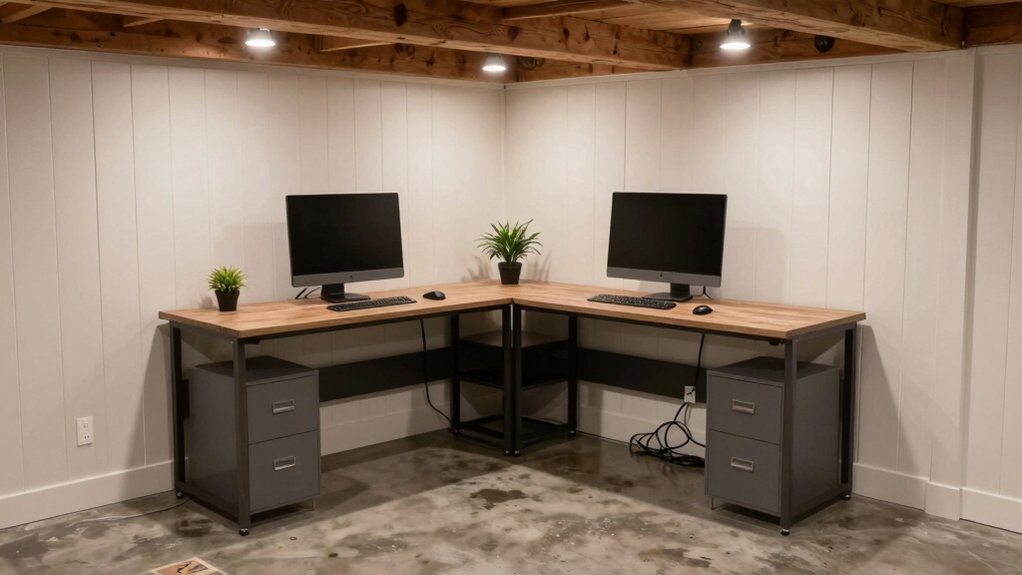
Evaluating basement space and layout begins with a clear map of what you have and what you need. You’ll sketch existing dimensions, ceiling height, plumbing lines, and egress points, then identify usable zones.
Prioritize a dedicated work area away from high-traffic or mechanical noise. Consider daylight sources or effective artificial lighting to minimize fatigue.
Plan for a recreational area if you want a break space, ensuring it doesn’t impinge on essential work zones. Measure doorways and stair width to confirm furniture fits without obstructing pathways.
Allocate a laundry space if plumbing exists, or confirm feasibility of adding hookups without major disruption. Map storage needs, taking into account shelves, filing, and equipment access.
Finalize a layout that balances function, safety, and future flexibility.
Understanding Building Codes and Permits
Managing building codes and permits can be the most concrete hurdle in adding a basement home office, but it’s manageable when you start with the basics: know which authorities regulate your project, what permit types you’ll need, and the minimum standards that apply to egress, fire safety, electrical, and plumbing.
You’ll confirm whether your municipality or county issues permits and if underground work or retrofits trigger additional reviews. Next, map the permit application process: gather drawings, specifications, and contractor licenses, then submit for review, respond to feedback, and secure approvals before work begins.
Expect inspections at key milestones to verify compliance. Prioritize building code compliance to avoid rework; a clear plan saves time and reduces risk.
Budgeting for Insulation and Moisture Control
You’ll start by sizing insulation to your basement’s climate and anticipated use, balancing cost with R-values and radiant heat needs.
I’ll flag moisture control as a shared priority, outlining vapor barriers, proper drainage, and dehumidification options to prevent mold and wood rot.
We’ll align budget terms with long-term durability, highlighting essential vs. optional upgrades and phased improvements.
Insulation Needs
Insulation is a core cost driver for a basement home office, so start by evaluating both temperature control and moisture risk before you price materials.
You’ll want a precise plan that lines up with your framing, HVAC, and electrical layout, then estimate batt or spray insulation, air barriers, and vapor retarders accordingly.
Focus on achieving steady indoor temperatures with minimal heat loss or gain, and select materials that suit basement conditions, including occasional humidity swings.
Consider soundproofing materials to reduce noise transfer between spaces without adding excessive thickness.
Review insulation installation methods for accuracy: proper air sealing at penetrations, tight studs, and seamless gaps around windows and doors.
Prioritize durable, code-compliant choices, and document expected R-values per zone for a clear budget baseline.
Moisture Management
Moisture management is your next budget hurdle, because basement moisture can undermine insulation performance and long-term comfort. You’ll want a clear plan for ventilation strategies and humidity control that fits your budget without overcomplicating the build.
Start by evaluating the latent sources of moisture: groundwater, pile-up from living spaces above, and seasonal changes. Choose a balanced approach: include a dedicated exhaust and intake path, along with a passive or powered venting option that suits your climate.
Pair this with a humidity control method—like a dehumidifier sized for the space or a smart humidity sensor linked to a ventilation controller. Document expected maintenance costs, replacement intervals, and energy impacts so you can compare options and avoid surprises later.
Budget Considerations
Budgeting for insulation and moisture control requires a clear plan that aligns with your overall basement renovation costs. You’ll prioritize predictable upfront expenses and avoid surprise overruns.
Start with a solid envelope—proper vapor barriers, air sealing, and insulation R-values suitable for your climate—then factor in moisture-control measures like a dehumidifier, sump pump, and proper drainage.
Budget for professional checks, especially for electrical and ventilation upgrades, to ensure code compliance.
Plan for material waste and delivery delays, and set aside a contingency of 10–15 percent.
When arranging furniture, consider seating and desk placement that minimizes heat loss and maximizes comfort without overworking systems.
Factor in decor choices that won’t cause moisture traps or clutter, keeping airflow unobstructed.
This disciplined approach safeguards investment and usability alike.
Electrical and Lighting Considerations
Electrical work for a basement home office isn’t optional—it’s vital for safety, reliability, and long-term use. You’ll plan a lighting layout that reduces glare and shadows on screens, using a mix of ambient, task, and accent options. Guarantee outlets are positioned for a workstation, with at least one GFCI in damp areas and floor-level convenience where needed.
Subpanel labeling, proper bonding, and code-compliant sheathing protect wiring long-term. Choose energy-efficient LEDs and dimmable fixtures to adjust mood and focus. Also account for ceiling height and wall insulation when routing cables and installing ceiling mounts; low ceilings may need compact fixtures.
Verify switches are accessible from the door, and use surge protection for electronics. Schedule a final inspection to confirm all electrical work passes.
Plumbing and HVAC Implications
You’ll want to assess humidity and ventilation, since damp basements can trigger mold and affect comfort.
Plan for drainage and plumbing changes needed to support a workspace, including venting and water supply adjustments.
Finally, size and position your heating and cooling so the space stays comfortable without overworking systems.
Humidité Et Ventilation
Humidity and ventilation are critical when you add a basement home office because improper moisture control can lead to mold, musty odors, and expensive repairs. You’ll want a practical plan that targets both ventilation strategies and humidity control.
Begin with a dedicated intake for fresh air and a balanced exhaust to avoid negative pressure, which can pull damp air into the workspace. Use a programmable dehumidifier or a HVAC accessory that maintains relative humidity around 40–60%. Seal gaps around windows and penetrations to reduce condensation, then verify that vapor barriers extend to walls and floors.
Install a bathroom-style exhaust if you have high humidity sources nearby, and route ducts away from the office to prevent humidity transfer. Regularly monitor humidity readings and adjust settings as seasons change.
Drainage Et Plomberie
Drainage Et Plomberie: Even a small basement office demands careful plumbing and HVAC layout to prevent leaks and humidity-driven issues. You’ll plan drainage paths first, avoiding cross-traffic under the workspace and coordinating with the exterior grading.
Install a reliable sump or interior drain, plus a cleanout accessible for maintenance. Use proper slope and trap sizing to minimize evaporative loss and sewer gas risks.
When selecting drainage solutions, prioritize a system that handles both routine spills and occasional storm surge without backing up into the room. For plumbing fixtures, choose compact, code-compliant options with accessibility in mind, such as a floor-mounted or wall-hung sink and a quiet, appropriately vented toilet if required.
Ensure shutoffs are clearly labeled and reachable for emergencies.
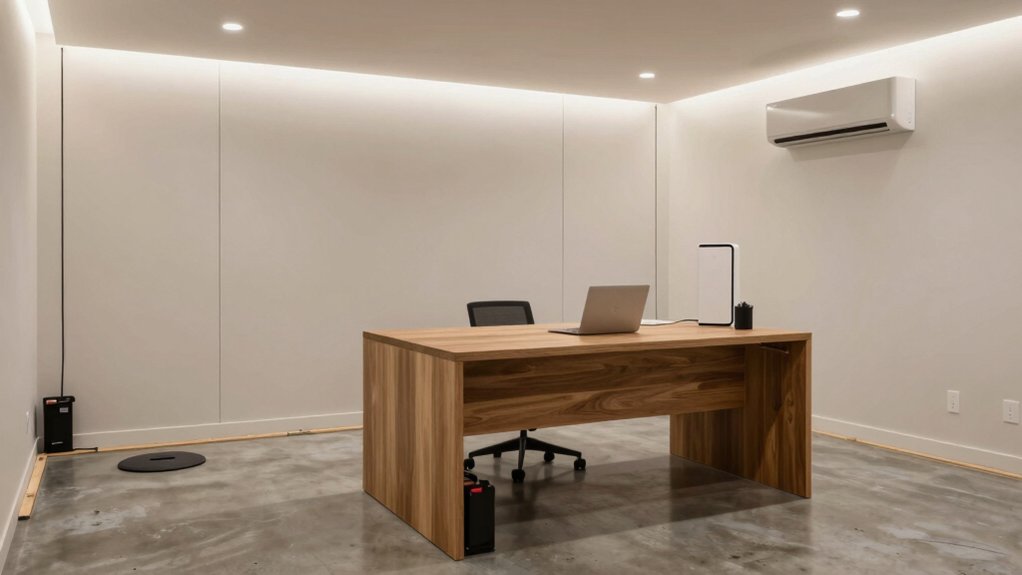
Chaleur Et Climatisation
Is a basement office comfortable year-round without careful HVAC planning? You’ll want a resilient system that handles temperature swings and humidity, plus quiet operation.
Start with insulation and air sealing to reduce load; then select a heat source appropriate for your climate and basement layout. If you’re building or retrofitting, consider a minisplit or ducted system with zoning to separate the office from living spaces.
Pair it with a dehumidifier if dampness persists, and install smart controls for schedules and notifications. Plan power for future upgrades: solar panels can offset HVAC draw, and outdoor lighting improves safety and monitoring near any exterior units.
Budget for proper drainage, accessible service panels, and periodic maintenance to sustain comfort year-round.
Soundproofing and Acoustics
Soundproofing and acoustics matter more in a basement home office than you might think, because the right materials and layout reduce noise transfer from the rest of the house and keep drafts and echoes at bay.
You’ll choose resilient channels and decoupled drywall to minimize vibration. Implement sealants around doors and windows to block drafts without compromising access.
For soundproofing techniques, mount sturdy shelves or cabinets to dampen room modes and absorb mid-frequency noise. Use acoustic treatments like mineral wool boards or foam panels on walls that face noisy areas, placed strategically to avoid dead corners.
Treat the space with a balanced mix of absorption and reflection to improve speech clarity and focus all day.
Regularly reassess gaps, fasteners, and door sweeps for ongoing performance.
Finishing Walls, Floors, and Ceilings
When you finish walls, floors, and ceilings, you’re tackling both durability and comfort for a basement office.
Start with wall finishing essentials that resist moisture and provide a clean surface for painting or paneling. Then choose floor and ceiling treatments that balance noise control with ease of maintenance.
We’ll cover cost ranges, material options, and installation considerations so you can plan effectively.
Wall Finishing Essentials
Finishing a basement wall sets the tone for durability, comfort, and usability, so start with proper framing, moisture control, and material choices that suit both the space and climate.
You’ll prioritize solid framing, vapor barriers, and mineral wool or fiberglass insulation for thermal efficiency and mold resistance. Select moisture-resistant drywall or tile backing in splash zones, plus sealed joints to prevent leaks.
For finish, choose a semi-gloss or satin on walls to repel dirt and enable easy cleaning, then apply decorative paint in a low-VOC formula for indoor air quality.
Consider wall art pieces that complement scale without crowded textures.
Finally, ensure consistent ceiling height awareness and electrical access before mounting fixtures, keeping pathways clear and future reconfigurations simple.
Floor/Ceiling Treatments
To finish floors, ceilings, and walls in a basement remodel, start with a rigid plan for moisture control, thermal performance, and future access. You’ll choose materials that resist dampness, like sealed concrete, vapor barriers, or insulated panels, then align underfloor gaps with proper drainage and mold inhibition.
For ceilings, consider removable panels or low-profile joist covers to simplify access for ductwork and wiring.
Floors should balance warmth and durability; options include moisture-tolerant carpet tiles, vinyl plank, or radiant-heat-ready concrete coatings.
Decorative paint can refresh walls, but pick paints with mold resistance and low odor for a basement.
Think about furniture placement early, mapping traffic flow and electrical outlets.
Keep finish layers accessible, reversible, and coordinated with light sources to avoid clutter.
Flooring Options for Basements
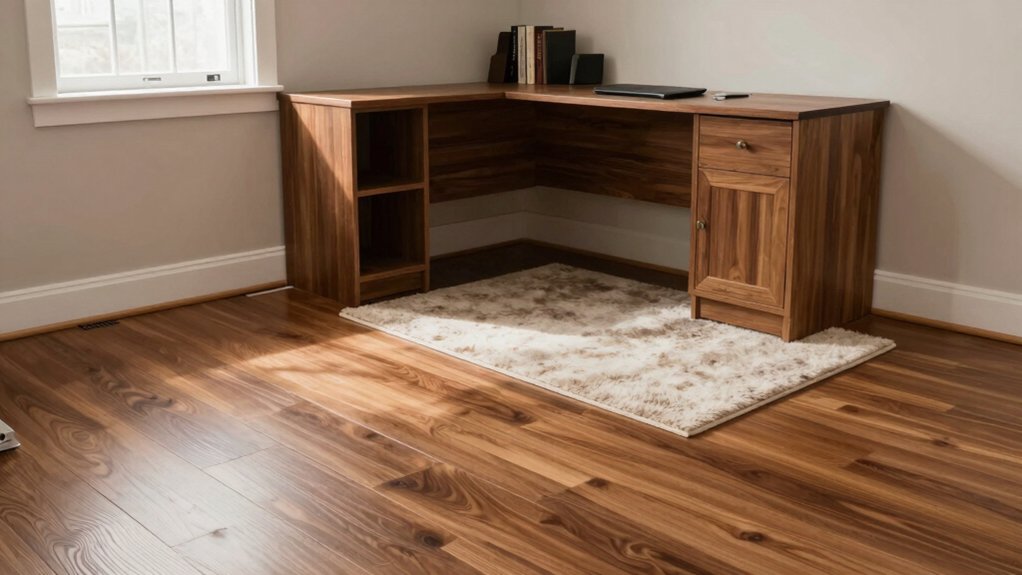
Flooring in a basement must handle moisture, temperature swings, and potential flooding, so start with materials that resist dampness and keep floors firm underfoot. You’ll prioritize moisture-rated subflooring, like gamma-rated foam or rigid core boards, then pair with a water-resistant surface such as vinyl planks or ceramic tile.
Avoid carpet where mold risk is higher unless specifically engineered for basements. Subfloor underlayment should be breathable yet sealed to reduce humidity transfer. Consider a moisture barrier, proper slope for drainage, and a dehumidifier to stabilize conditions.
For a home office, select flooring that tolerates rolling chairs and heavier equipment without scuffing. Integrate storage and cable routes beneath runnels. Pair the setup with home office furniture and ergonomic accessories for a productive, durable workspace.
Lighting Design for Productivity
Lighting design for productivity starts with aligning amount and quality of light to tasks and the basement environment you’ve set up. You’ll map work zones (computer, drafting, paperwork) and assign lighting fixtures that match each activity’s needs.
Use a mix of ambient, task, and accent lighting to eliminate shadows and reduce eye strain. For desks, choose adjustable task lighting with color temperatures around 3500K to 4000K for clear contrast without glare. Install dimmers to adapt brightness during different tasks and times of day.
Ensure ceiling fixtures provide even coverage, avoiding hotspots. Place wall-mounted sconces to soften corners and reduce contrast. Test light levels with a lux meter if available, targeting 300–500 lux for general work and 500–1000 lux for detailed tasks.
Prioritize consistency, energy efficiency, and ease of maintenance when selecting lighting fixtures and task lighting.
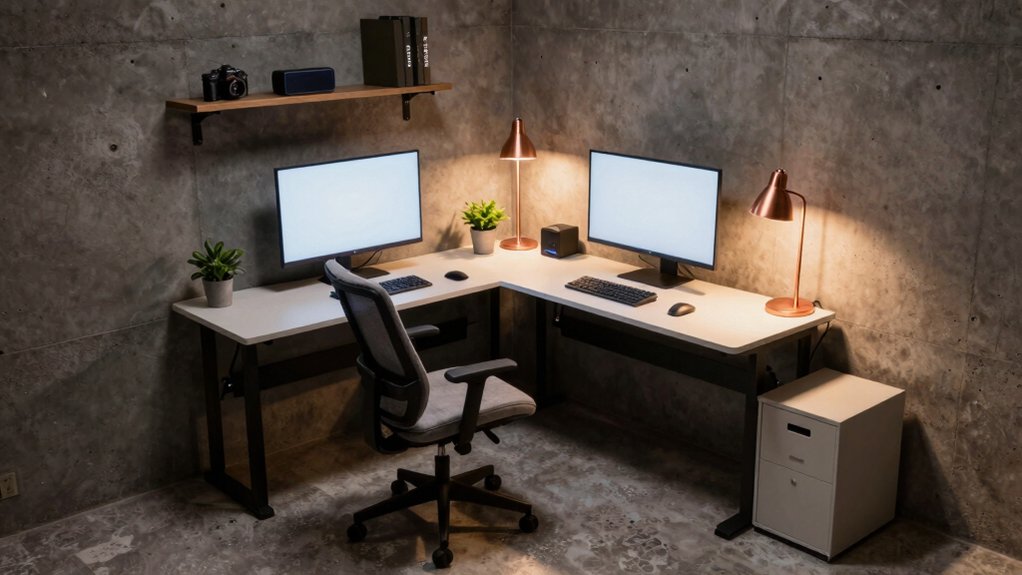
Ergonomic Workspace Setup
Ergonomic workspace setup starts with a proper desk and chair that fit your body and the basement’s layout, because comfort directly affects focus and productivity. You’ll balance desk height with chair adjustability to keep wrists neutral and eyes level with the monitor.
Position the screen about an arm’s length away and use a document holder to reduce neck strain. Choose a chair with lumbar support and breathable fabric; add a footrest if you can’t plant feet flat.
Plan furniture placement to create a clear primary workflow, keeping frequently used items within easy reach. Integrate decorative accents for visual interest without clutter.
Maintain clean sightlines around windows and doors, and ensure ample task lighting at the desk.
Storage Solutions in Low Ceilings
Low ceilings demand compact, accessible storage that doesn’t steal headroom, so start with low-profile furniture and overflow solutions that stay out of the traffic path.
Consider space-saving cabinet layouts that maximize every inch and wall-hung or recessed options to keep floors clear while still holding essentials.
We’ll explore specific ideas for low-ceiling storage, including practical layouts and installation tips that fit the three main themes: low-ceiling storage ideas, space-saving cabinet layouts, and wall-hung and recessed solutions.
Low-Ceiling Storage Ideas
Need clever storage when ceiling height isn’t on your side? Start with vertical solutions that maximize wall space and keep floor clearance intact. Choose low-profile furniture and wall-mounted systems to preserve headroom while maintaining practicality.
Decorative shelving offers visual interest without crowding the room; install open units along unused strip walls or above cabinetry to store books, bins, and tools.
Opt for shallow, pull-out organizers in closets to access small items without bending over. Consider magnetic or pegboard panels for lightweight gear, letting you reconfigure quickly as needs shift.
Lighting fixtures should be placed to avoid glare and to brighten corners, enhancing perceived height.
Use labeled containers and a consistent color scheme to reduce clutter and improve workflow.
Space-Saving Cabinet Layouts
When spaces are tight, choose cabinet layouts that maximize storage without crowding the room. Opt for tall, shallow units that run full wall height, reducing footprint while increasing capacity. Use corner shelves and L-shaped designs to eliminate dead zones and improve reach.
Depth matters: 12–15 inches for most base cabinets, with slim glass-front doors to visually expand the space. Consider drawer stacks with built-in dividers for documents, cords, and office supplies, and pair them with adjustable shelves for flexibility.
Keep visual weight light by selecting cabinets in neutral colors and adding decorative accents via hardware, trims, or a subtle glass panel. Tie the scheme together with a cohesive color schemes approach for a calm, organized work environment.
Wall-Hung and Recessed Solutions
If ceiling height is an issue, wall-hung and recessed storage can free floor space while keeping function intact. You’ll pair wall mounted desks with slim, sturdy brackets to maintain depth for legs and cables, avoiding toe-stub hazards.
Choose wall-mounted shelving a few inches from the wall to reduce dust gathering and to allow baseboard access for vaunted hidden wiring. Recessed storage cabinets tuck into alcoves, leaving room for chair movement and legroom without sacrificing capacity.
Optimize with adjustable-height rails and modular dividers so you can reconfigure for projects or meetings. Integrate recessed lighting above work zones to prevent glare and shadows.
Finish with a neutral palette and matte textures to minimize clutter perception, ensuring durability and easy maintenance in a basement environment.
Electrical Safety and GFCI Requirements
Electrical safety starts with proper GFCI protection and clear clearances. You’ll install GFCI outlets in any basement workspace where moisture or damp conditions exist, and you’ll test them before use.
Verify that receptacles are at least 12 inches above the floor and 6 feet apart in work areas, with dedicated circuits for high‑draw loads.
When you’re using cordless tools, keep chargers off the floor and away from liquids, and store batteries in a cool, dry location.
Plan project scheduling to stagger electrical work with other trades, preventing overlaps that could cause wiring damage.
Label circuits clearly, document outlet locations, and maintain accessible panels.
Use arc-fault breakers where required by code to add protection, and routinely inspect extension cords for wear.
Smart Technology and Connectivity
Smart technology and connectivity in a basement workspace require a thoughtful layout that supports reliable performance and safe operation. You’ll want a centralized network hub placed above flood zones, with protected power and surge safeguards.
Prioritize a dedicated wireless network segment for work devices, separating it from guest and smart-home traffic to reduce interference. Choose a router with strong dual-band or tri-band capabilities and consider a mesh system to cover thick basement walls.
For smart security, position cameras and sensors where they monitor entry points without creating blind spots. Ensure camera power or PoE options align with your existing cabling.
Cable management matters: label runs, keep fireproof sleeves, and route near outlets to minimize clutter and trip hazards. Verify firmware updates consistently.
Hiring Contractors vs. DIY Costs
Hiring a basement home-office build can be quicker and cleaner with a licensed contractor, but it costs more upfront than DIY—and you’ll pay for expertise, permits, and faster timelines.
When you weigh contractor vs. DIY costs, quantify labor hours, material waste, and scheduling risk. A pro handles code compliance, insulation, vapor barriers, and electrical safety, reducing rework.
DIY lowers upfront cash outlay but shifts logistics, permit pulls, and potential mistakes to you.
Compare quotes that itemize tasks, timelines, and contingencies, then add a buffer for delays.
Consider furniture arrangement and décor themes as design inputs, not afterthoughts, to prevent costly redesigns.
If you’re time-constrained or unsure about wiring and moisture control, hiring a contractor often yields cost certainty and faster project closure.
You’ll save later by avoiding avoidable mistakes.
Long-Term Maintenance and Resale Value
Long-term maintenance for a basement home office hinges on solid moisture control, durable finishes, and accessible systems. You’ll want a preventive plan: monitor humidity, run dehumidifiers, and fix leaks promptly to protect walls and floors.
Choose resilient materials that resist spills and casual wear, and ensure electrical panels, sump pumps, and HVAC are easily reachable for service. Regular inspections help you catch cracks, and you should document updates for resale.
Renting considerations matter: prospective tenants will weigh upkeep costs and seasonal comfort, so keep a maintenance log and service receipts.
Insurance implications arise from moisture, mold, and water damage risk; disclose upgrades and install proper water barriers. When resale time comes, a well-documented, low-maintenance space adds value and narrows negotiation gaps.
Frequently Asked Questions
How Long Does a Basement Home Office Project Typically Take From Start to Finish?
A basement home office project typically takes several weeks to a couple of months, depending on scope. You’ll schedule basement waterproofing and electrical wiring early, then framing, insulation, drywall, and finishes, with inspections shaping your timeline. Expect potential weather delays.
Which Mortgage or Financing Options Best Cover Basement Renovations?
You should explore renovation grants and home equity options to finance basement renovations; compare terms, rates, and eligibility, calculating how grants reduce costs and how tapping home equity(max loan-to-value) funds remaining improvements efficiently.
Can I Claim Tax Deductions for a Home Office in a Basement?
Yes, you can, but it hinges on strict criteria. You qualify for tax deductions if you use a dedicated space regularly and exclusively for business, making your home office eligible for certain deductions and proportional home expenses.
What Is the Typical Return on Investment for Basement Office Renovations?
ROI insights for basement office renovations vary, but you’ll likely see a modest to strong gain if you optimize space and efficiency. Compare renovation costs to resale value, energy savings, and productivity, then track ROI insights over time.
How Will Basement Renovation Affect Home Insurance Premiums?
Basement renovation can raise insurance premiums modestly, depending on added risks and coverage. You’ll likely see an overall renovation impact, with premium adjustments reflecting updated liability and dwelling limits, plus required safety upgrades for dampness, electrical, and fire protection.
Conclusion
You’ll weigh budgets against comfort, framing a space that’s affordable on paper yet inviting in daily use. Costs fluctuate like a ceiling height—high end for lavish finishes, low end with DIY tweaks. The contrast matters: permits and moisture control protect you, while smart connectivity and lighting boost productivity. In the end, meticulous planning and practical trades create harmony between investment and function, so your basement office isn’t just space—it’s you, working with confidence, year after year.