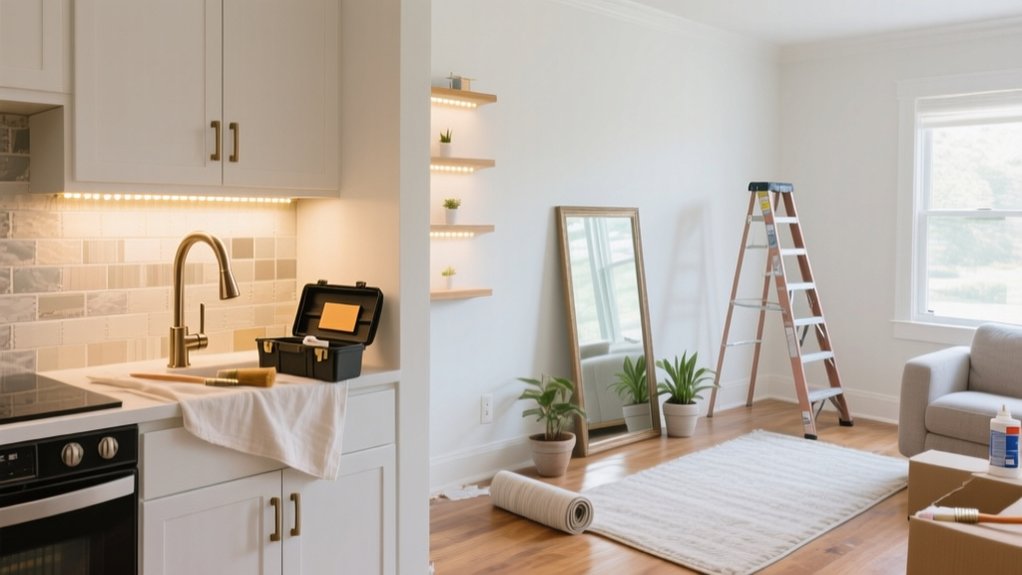
You can transform your home in a weekend with budget upgrades: paint an accent wall or trim after patching and taping, swap to LED bulbs (2700K–4000K) and clean shades, change cabinet knobs by matching hole spacing, stick up a peel-and-stick backsplash and caulk edges, install a compatible smart thermostat with schedules, replace a dated faucet, update outlet covers and switches with power off, add shelves, hooks, and rails into studs, then weatherstrip drafty doors and windows. Keep going for step-by-step tips.
Refresh a Room Fast With Budget Paint
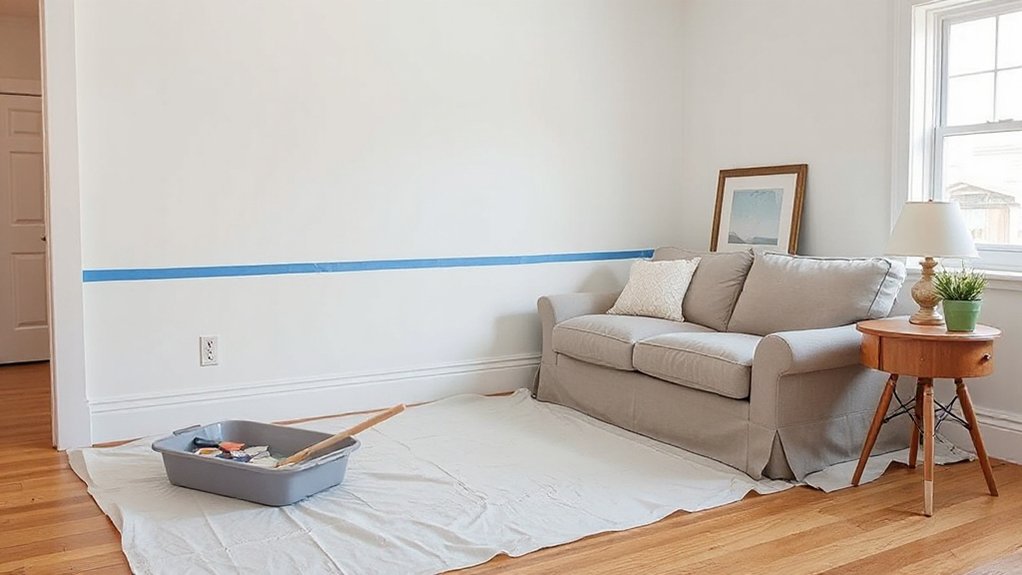
If you want a high-impact upgrade without blowing your weekend or your budget, start with paint. Choose one wall for an accent color or refresh all trim in a clean satin white. Buy only what you need: measure square footage, use a paint-and-primer combo, and grab sample pots to test in morning and evening.
Prep saves money—patch holes, sand rough spots, wash grease, and tape edges tightly. Cut in first, then roll in a “W” pattern to avoid streaks.
While it dries, do quick furniture rearrangement to open traffic paths and center the focal wall.
Finish with simple DIY wall art using leftover paint on canvas or poster board for a cohesive look.
Swap In Brighter Lighting on a Budget
While paint changes what you see, brighter lighting changes how the whole room feels—and you can upgrade it fast without spending much. Start by swapping outdated bulbs for LEDs; choose 2700K for warm, 3000–3500K for neutral, and 4000K+ for crisp task areas. Check lumens, not watts: aim for 800–1100 lumens in lamps and 1600+ in ceiling fixtures.
Next, clean or replace yellowed shades and covers; a $10 diffuser can boost output. If a room feels dim, add plug-in sconces or an inexpensive floor lamp instead of rewiring.
When you do replace Lighting fixtures, stick to standard sizes and reuse existing boxes. Compare bulb types—A19, BR30, and candelabra—so everything fits your sockets.
Upgrade Cabinet Hardware for a Quick Win
Even when you don’t change the cabinets themselves, new knobs and pulls can make the whole kitchen or bath look updated in under an hour. Start by matching Cabinet style: sleek bars suit modern doors, while cup pulls fit shaker or farmhouse fronts. Measure your existing hole spacing (center-to-center) so replacements line up, or budget extra time to fill and re-drill.
Shop multi-packs online to cut per-piece cost, and stick to one of the common hardware finishes for a cohesive look.
- Count doors and drawers and buy 10% extra
- Bring a sample door to compare scale
- Use a cardboard template to drill straight
- Tighten by hand to avoid stripping screws
Add a Peel-and-Stick Backsplash in a Day
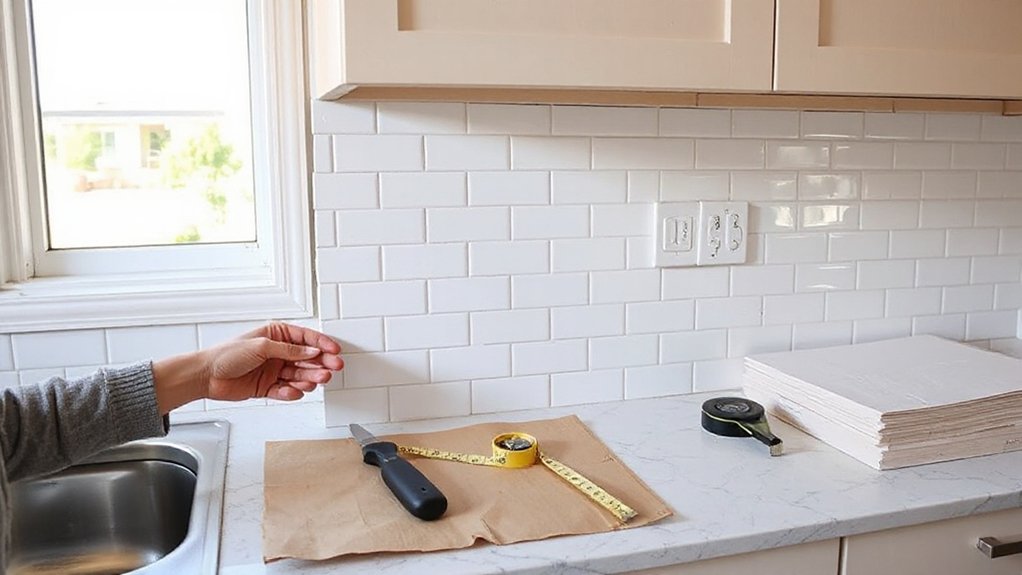
You can refresh your kitchen fast with a peel-and-stick backsplash that looks custom without the contractor price tag. Start by choosing a material and pattern that matches your counters.
Then prep the wall by cleaning, drying, and marking level guide lines.
Apply the sheets carefully—working from a straight reference point and pressing out bubbles—and finish with a simple bead of caulk to seal edges against moisture.
Choose Materials And Pattern
Where should you start with a peel-and-stick backsplash: the material or the pattern? Start with material first, because Material durability decides how well it handles heat, splashes, and daily wiping.
Vinyl is cheapest, but it can warp near ranges; gel or PVC composites cost a bit more yet hold up better. Then lock in pattern coordination so the new look fits your counters, cabinets, and hardware without fighting your room’s tones.
- Match finish to fixtures: brushed nickel, brass, or matte black
- Keep grout lines small for a cleaner, modern read
- Use light patterns to brighten dark kitchens; bold ones for focal walls
- Buy 10–15% extra for cuts, mistakes, and future patching
Prep, Apply, And Seal
Once you’ve picked a material that can take the heat and a pattern that works with your finishes, set yourself up for a clean, long-lasting install by prepping the wall, laying out your sheets, and sealing the edges.
Degrease with a mild cleaner, rinse, and let it dry; peel-and-stick won’t bond to residue. Fill dents, sand flat, and wipe dust.
Snap a level line, dry-fit sheets, and stagger seams to avoid repeating edges. Cut around outlets with a sharp utility knife and turn off power first for basic home security.
Peel backing gradually, press from center out, and use a roller for tight adhesion. Finish with color-matched caulk at counters and corners; it blocks moisture, improves energy efficiency, and prevents peeling.
Install a Smart Thermostat to Cut Energy Bills
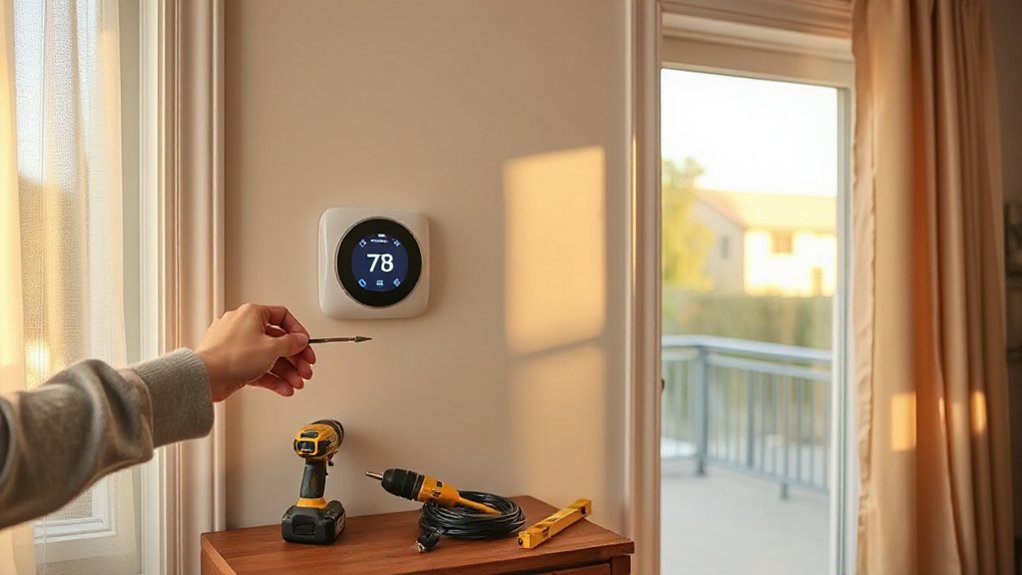
If energy bills keep creeping up, a smart thermostat offers one of the fastest weekend upgrades with a clear payoff. You’ll typically finish in under an hour with just a screwdriver, your phone, and the HVAC power shut off at the breaker. Check compatibility first (C-wire or adapter), then label wires before removing the old unit to avoid mistakes.
- Set weekday schedules and sleep setbacks for consistent energy savings
- Use geofencing to reduce heating/cooling when you’re away
- Enable utility rebates and eco modes to lower upfront cost
- Review monthly reports and fine-tune thermostat settings
After install, run a heat/cool test cycle, confirm the app shows correct equipment, and tighten the wall plate for a clean seal.
Boost Curb Appeal With Simple Weekend Landscaping
Lower your bills indoors with a smart thermostat, then make the outside look just as dialed-in with a few low-cost landscaping fixes you can knock out in a weekend.
Start by edging beds and the driveway with a flat spade; crisp lines instantly read “maintained.” Lay 2–3 inches of mulch to suppress weeds and unify mismatched plantings—buy in bulk bags on sale.
For fast color, plan flower planting in groups of three or five, and repeat the same varieties along the walk for a clean rhythm. Patch bare spots with a cheap sun/shade seed mix and keep it damp for a week.
Finish with solar garden lighting along the path and steps for safer, brighter nights. Clean gutters and trim shrubs to window height.
Replace a Dated Faucet for an Instant Refresh
Because a faucet sits front-and-center in your kitchen or bath, swapping a dated one gives you an immediate “new room” feeling without touching cabinets or tile. Measure your existing holes (one, two, or three) and choose among faucet types like single-handle, widespread, or pull-down to match your sink and budget.
Shut off the supply valves, open the tap to relieve pressure, and place a towel under connections. Use basic plumbing tools to loosen nuts, clean the deck, and set the new gasket.
- Match hole spacing and spout reach before you buy
- Reuse supply lines only if they’re corrosion-free
- Apply plumber’s tape to threaded fittings as needed
- Check for leaks, then retighten after 24 hours
Swap Outlet Covers and Switches for a Clean Finish
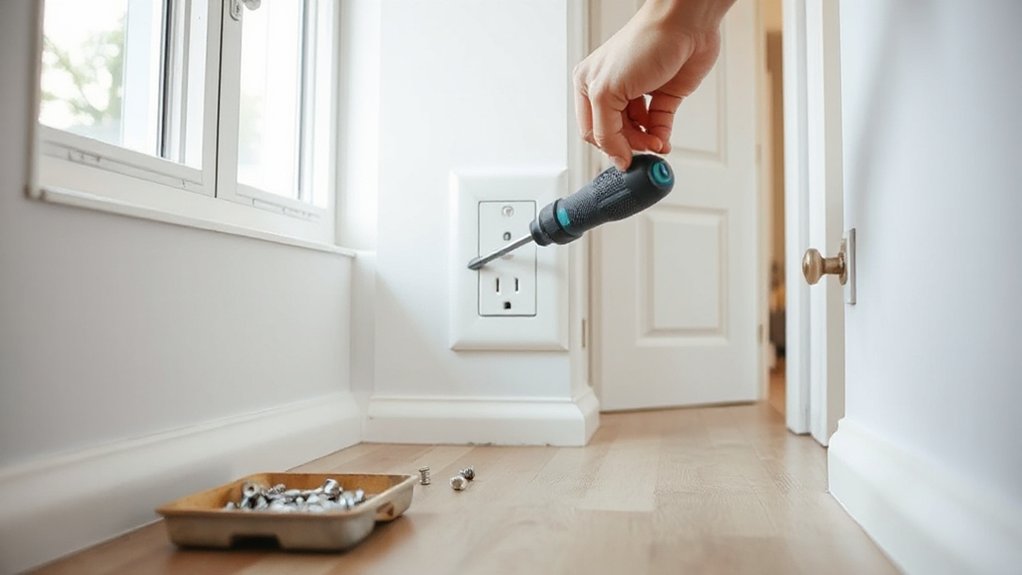
Although they’re small parts, fresh outlet covers and updated switches make a room look cleaner and more current for just a few dollars per plate.
Start by turning off power at the breaker and confirming with a tester. Remove old plates, then check for paint buildup, cracks, or mismatched screws.
If the device is yellowed or loose, swap the switch or receptacle too; stick with standard white for the cheapest reset, or choose decorative outlet covers for a subtle upgrade.
Match finishes across the room and pick switch plate styles that fit your trim—square for modern, beveled for traditional.
Tighten screws evenly so plates sit flat, and don’t overtighten or you’ll crack them.
Wipe fingerprints, flip power back on, and you’re done.
Add Weekend Storage With Shelves, Hooks, and Rails
When you need a fast, affordable way to tame clutter, add storage where you already have empty wall space with a few shelves, hooks, or a simple rail system. Measure first, mark studs, and use anchors only when you must.
Keep your layout tight: store daily-use items at arm height and rarely used items higher.
For Creative storage, mix open shelving with hooks so you can see what you own and grab it quickly, creating an organized space without pricey cabinetry.
- Install a 24–36″ shelf over a desk or laundry area
- Mount a hook strip by the entry for bags, keys, and leashes
- Add a kitchen rail for utensils, mugs, and small pans
- Use garage wall hooks for bikes, cords, and yard tools
Seal Drafty Doors and Windows With Weatherstripping
Start by finding drafty trouble spots around door jambs, window sashes, and thresholds using your hand or a lit incense stick.
Pick weatherstripping that fits the gap and the surface—foam tape for small cracks, V-strip for sliding edges, and door sweeps for the bottom—so you don’t waste money on the wrong type.
Clean and dry the area, measure and cut carefully, then press or fasten it in place so it compresses evenly for a tight seal.
Identify Drafty Trouble Spots
Before you buy weatherstripping, track down exactly where the cold air’s sneaking in so you don’t waste time sealing the wrong spots. Start on a windy day, then move room to room and feel for air leakage around doors, windows, and trim. Hold a lit incense stick or tissue near edges; smoke drift or fluttering flags a gap.
At night, shine a flashlight from outside while someone watches indoors—any glow marks a leak. Check that existing insulation barriers haven’t shifted, especially at casings and sill plates, where tiny cracks add up fast.
Focus your efforts here:
- Door bottoms and threshold corners
- Window sashes and meeting rails
- Around locksets, strike plates, and hinges
- Baseboards under exterior windows
Mark leaks with painter’s tape so you can seal them efficiently later.
Choose The Right Weatherstripping
Those painter’s-tape marks tell you exactly where to seal, so pick weatherstripping that matches each gap and surface instead of buying a one-size-fits-all roll.
For door jambs and window stops with tight, even gaps, choose adhesive foam (closed-cell lasts longer).
For sliding windows or sashes that rub, pick felt or pile for low friction.
For big, irregular gaps at an exterior door bottom, look at a door sweep or threshold kit, not thin tape.
Compare durability: EPDM rubber beats cheap vinyl in sun and cold.
Check paintability if you’ll trim later.
Keep costs down by measuring each run and buying only what you need; match insulation materials to moisture exposure and traffic.
Review weatherstripping types before checkout.
Install For A Tight Seal
Once you’ve picked the right weatherstripping, installation is what makes it actually stop drafts, so take a few extra minutes to prep and place it carefully. Clean the surface with rubbing alcohol, let it dry, then measure twice before you cut. Close the door or window as you test-fit so you don’t compress the material too much—tight, not crushed, gives better door insulation and window sealing.
Press adhesive-backed strips firmly, working in short sections, and use a putty knife to set edges into corners. For nail-on types, pre-drill to prevent splitting and keep fasteners flush. Check your seal with a flashlight at night; any light needs another pass.
- Clean and dry surfaces
- Cut square ends
- Avoid gaps at corners
- Recheck after 24 hours
Frequently Asked Questions
Do I Need Permits for Weekend Home Upgrades in My Area?
Yes, you might—about 60% of homeowners underestimate permit needs. Check your city/county site for permit requirements and local regulations; electrical, plumbing, structural, and exterior work often triggers permits. Call inspections to avoid fines and rework.
Which Upgrades Increase Resale Value the Most on a Small Budget?
You’ll boost resale most with a fresh Kitchen backsplash, updated Energy efficient fixtures, modern cabinet pulls, and neutral paint. You can DIY, keep materials midrange, and prioritize visible, low-risk swaps buyers notice instantly and appreciate.
How Do I Choose Tools if I Don’T Own Any Yet?
When Maya started tool-free, she chose an 18V combo kit plus a basic manual set. You should prioritize Hand tool essentials first, then compare Power tool options by batteries, warranties, and used deals.
What Safety Gear Should I Use for Common DIY Weekend Projects?
You should use safety equipment and protective gear: ANSI-rated safety glasses, hearing protection, N95/respirator for dust, snug work gloves, closed-toe shoes, and knee pads. Add a basic first-aid kit and clamp materials. Buy multipacks.
How Can Renters Make Weekend Upgrades Without Damaging Walls?
You can make renter friendly upgrades without wall damage prevention hassles, even if you fear losing your deposit: use Command strips, removable hooks, peel-and-stick wallpaper, tension rods, and furniture-mounted shelving; patch tiny holes with spackle.
Conclusion
You don’t need a big budget to make your home feel new. Tackle one upgrade at a time—paint a wall, brighten a fixture, swap hardware, stick on a backsplash, or seal drafts—and you’ll see results fast. Each project costs little, uses basic tools, and fits into a weekend window. Like flipping a light switch, small changes can transform the whole mood. Plan, measure twice, and keep leftovers for touch-ups.