Start by mapping shadows at the basin, shower, and loo at night, switching circuits to spot weak fittings. Upgrade to LED lamps with CRI 90+ and 3000–4000K for accurate skin tones. Fit side sconces either side of the mirror at face height for even, glare-free task light, or swap to a correctly sized vanity bar. Add an IP44 backlit mirror, a wide-beam ceiling light, and IP65 shower downlights, plus an LED-compatible dimmer. Next, you’ll see how to boost light bounce with mirrors and high-LRV paint.
Diagnose Your Bathroom’s Shadows and Dark Zones
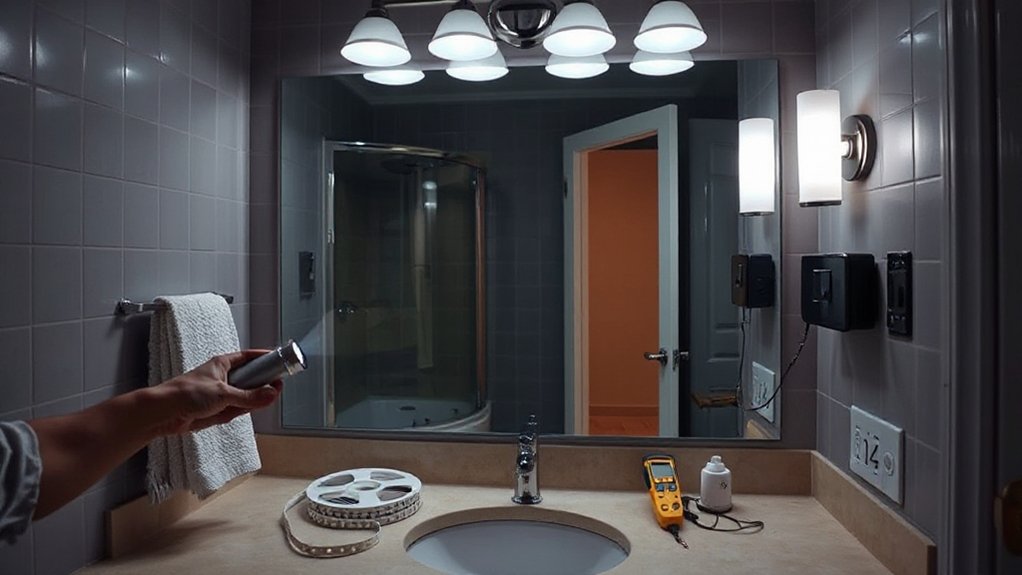
Before you buy new fittings, map where your current light actually falls: stand at the basin, in the shower, and by the loo, then note any harsh shadows on your face, dark corners, and glare off mirrors or glossy tiles.
Switch on each circuit separately to isolate what each fitting contributes, including the extractor’s light if it has one.
At night, shut the door and repeat, as daylight masks problems.
Use your phone’s torch at head height to mimic task lighting and mark where it improves shadow correction.
For dark zone identification, sketch a quick plan and shade areas where you can’t see grout lines or shaving edges clearly.
Check mirror position: top-down light often creates eye sockets.
Measure ceiling height and fitting offsets for later placement.
Pick the Right LED Bulbs (CRI and Kelvin)
Once you’ve spotted where shadows land, choose LED bulbs that render skin tones accurately and match the mood you want by focusing on CRI and colour temperature (Kelvin).
In UK bathrooms, aim for strong Color rendering so makeup, shaving, and cleaning look true-to-life. Look for CRI (Ra) 90+ on the box; 80 is common but can make colours look flat.
Then pick a Color temperature that suits your routine: cooler reads brighter, warmer feels calmer.
Keep fittings IP-rated for bathroom zones, but the bulb spec still drives the visual result and glare.
- CRI (Ra) 90+ for accurate colour and less “grey” skin
- 3000K for warm, 4000K for neutral task lighting
- Choose dimmable LEDs only with compatible UK dimmers
Add Vanity Light on Both Sides of the Mirror
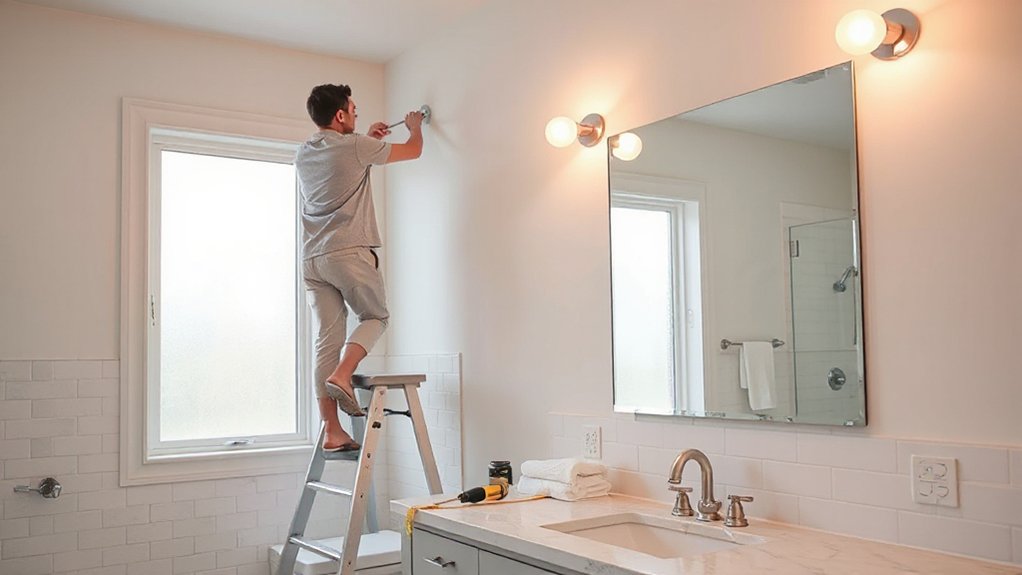
With your CRI and Kelvin nailed down, focus next on where the light comes from: mount vanity lights on both sides of the mirror to cut harsh under-eye and chin shadows that overhead spots create.
Aim for lighting symmetry by placing fittings at equal height and distance from the mirror edge, centred on your face when you stand at the basin.
For mirror placement, keep the mirror centred on the tap and align both lights to the mirror’s vertical midline, not the wall’s quirks.
Use IP44-rated bathroom wall lights in splash zones and follow UK zones guidance (BS 7671).
Run twin-and-earth in safe routes, isolate at the consumer unit, and fit suitable back boxes.
You’ll get flatter, more even skin tones for shaving and makeup.
Swap the Vanity Bar Fixture (Size and Height)
When you swap a vanity bar fixture, you need to size it to your mirror or basin so the light spreads evenly without overshooting the edges.
As a rule, you’ll get better balance when the bar sits roughly 50–75% of the mirror’s width.
Mount it at the right height—typically just above eye level or above the mirror line—so you minimise glare and keep shadows off your face.
Proper Fixture Width
How wide should your vanity bar fixture be to light the mirror evenly without overhanging the basin? Start with a precise width measurement of the mirror or vanity, then choose a fixture size that sits comfortably within those edges.
In most UK bathrooms, you’ll get balanced facial lighting when the bar spans about 70–90% of the mirror width, centred on the basin. If you’ve got a double vanity, either fit two shorter bars or select one long bar that stays inside both outer mirror lines.
Keep proportions tight so glare doesn’t spill into the room and the fitting looks intentional.
- Measure mirror width in mm; don’t guess
- Aim for 70–90% coverage for even spread
- Match bar length to basin run, not wall span
Ideal Mounting Height
Where should you mount a vanity bar so it lights your face cleanly without throwing harsh shadows under your eyes and chin? Aim for the light’s centreline at roughly eye level: about 1,500–1,650mm from the finished floor for most UK adults.
If you’re mounting above a mirror, keep the bar 75–150mm above the mirror top, but don’t exceed 1,900mm overall or you’ll light the forehead and miss the jawline.
Check fixture placement against your basin: the beam should hit your face, not the tap.
For tall users, prioritise eye level over mirror edge.
If the mirror’s narrow, consider wall sconces at 1,500–1,700mm, spaced either side to reduce shadows.
Install a Backlit Mirror for Even, Soft Light
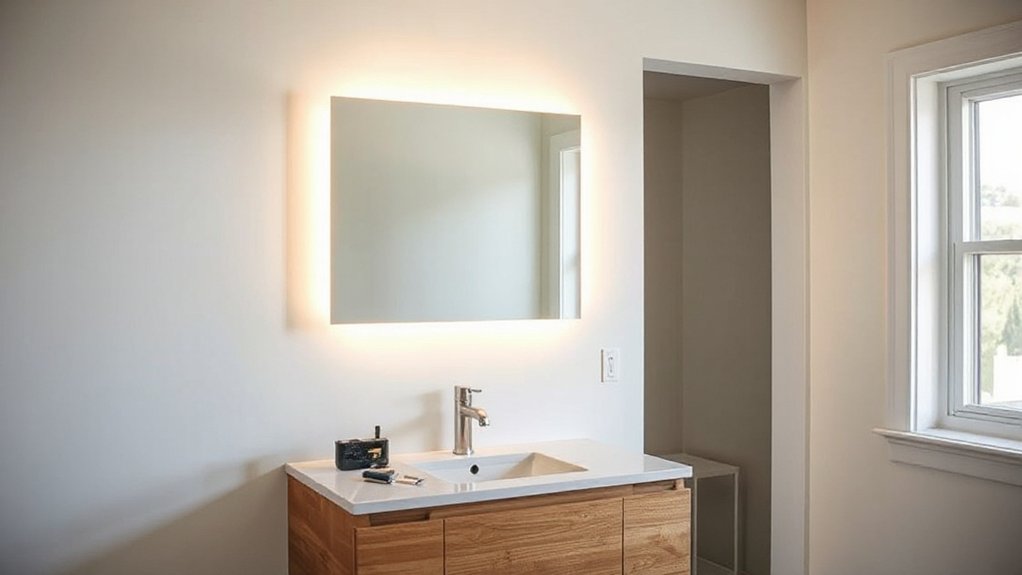
Although overhead fittings can cast harsh shadows, a backlit mirror gives you even, soft illumination right at face level, which makes shaving, skincare, and makeup far more accurate.
Backlit mirrors spread soft lighting across your face, reducing glare on chrome taps and glossy tiles. Pick an IP44-rated unit for bathroom Zones 2/3, and check it’s CE/UKCA marked.
Mount it to a solid wall or use suitable cavity fixings, then feed from the existing lighting circuit via a fused spur (typically 3A) with an isolator outside Zone 1. Keep cable runs in permitted safe zones and RCD-protect the circuit.
Prioritise these specs:
- 3000–4000K CCT for neutral skin tones
- Dimmable driver with trailing-edge compatibility
- Demister pad to prevent condensation haze
Add a Ceiling Light for Overall Brightness
When you add a ceiling light, you lift the whole room’s ambient level so you’re not relying on task lighting alone. Choose a Ceiling fixture with a wide beam angle and an opal diffuser to cut glare on tiles and mirrors while giving even Overhead illumination.
For most UK bathrooms, a 10–15W LED (around 1,000–1,500 lumens) suits small to mid-sized rooms; scale up if you’ve got a larger footprint or dark finishes. Aim for 3000–4000K so colour looks natural without feeling stark.
Swap in a dimmable driver and a trailing-edge dimmer so you can drop levels for night use. Always isolate the circuit at the consumer unit and verify dead before you start.
Add Damp/Wet-Rated Shower Lighting Safely
Because the shower area combines water spray, steam, and metal pipework, you need a fitting that’s specifically rated for the zone you’re installing in—typically an IP65 recessed downlight (or better) for inside the shower or directly above it in Zone 1 under UK bathroom zoning guidance.
Choose waterproof fixtures with a sealed bezel and compatible gaskets, and keep all terminations in an accessible, dry location. You’ll improve electrical safety by supplying the circuit via a 30mA RCD and using appropriately rated cable and accessories.
If you’re replacing an existing fitting, isolate at the consumer unit and prove dead before opening any connections. Check the manufacturer’s instructions for minimum ceiling void and clearance.
- IP rating and Zone suitability
- RCD protection and isolation
- Correct earthing and bonding checks
Add a Dimmer That Works With LED Bulbs
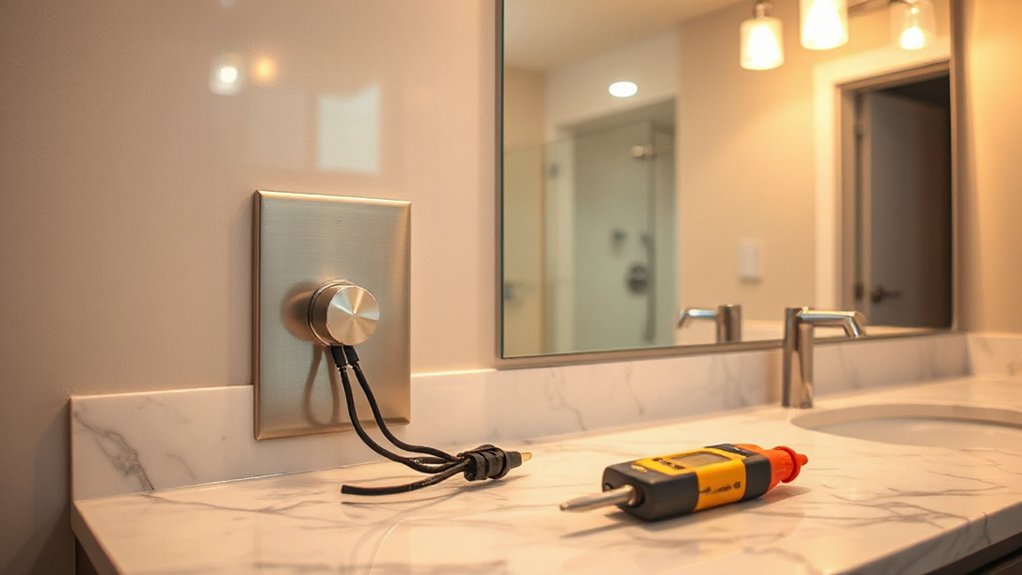
Once you’ve got the right IP-rated shower fitting in place, you can add dimming for better comfort and lower running costs—but only if the dimmer and lamps are genuinely LED-compatible.
Check the lamp box for “dimmable” and match it to a trailing-edge (RC) dimmer, which suits most UK LED drivers and reduces buzz and flicker. Confirm dimmer compatibility by comparing minimum/maximum wattage (often 5–150W LED) and the number of lamps on the circuit.
If you’ve got GU10 mains LEDs, pick a dimmer rated for LED loads; if you’ve got 12V spots, ensure the transformer/driver is dimmable too.
Isolate power at the consumer unit, swap the switch, then set any trim pots for stable lighting control.
Bounce Light With Mirrors and Lighter Paint
Although you can’t always add more fittings without extra wiring, you can make the light you already have work harder by bouncing it off mirrors and high-reflectance finishes.
Start with Mirror placement: hang a large mirror opposite the window or primary fitting to reflect both daylight and lamp output back into the room. If that’s not possible, angle a mirrored cabinet door to throw light onto the basin and shaving zone.
Next, upgrade wall color. Choose a durable bathroom matt or soft-sheen in a light neutral (LRV 80+), and paint the ceiling too to reduce contrast.
- Fit a full-height mirror panel behind the basin
- Use light tiles or glossy splashbacks near the light source
- Keep trims, doors, and ceiling bright for higher reflectance
Frequently Asked Questions
Do I Need a Permit to Add New Bathroom Lighting Circuits?
Yes, you often do. In the UK, Bathroom regulations mean new bathroom lighting circuits usually require electrical permits/Building Control notification under Part P. You’ll need an electrician or self-certify via a competent person scheme.
What’s the Best Way to Run Wiring Without Opening Drywall?
Like a tidy loft rewire, you’ll fish cable through joists using existing voids, floorboards, and back boxes, or surface-trunk it. Consider Wireless switches and Smart bulbs instead. You’ll still follow UK zones and Part P.
How Can I Reduce Glare on Glasses While Applying Makeup?
Angle lights to 45° and use diffused vertical fittings beside the mirror to cut glare on glasses. Choose 3500–4000K light color temperature, adjust mirror reflection with a matte surround, and fit a dimmer.
Are Battery-Powered Vanity Lights Reliable for Long-Term Use?
Yes, they’re reliable short-term, but long-term you’ll manage Battery longevity and Lighting durability limits. Like a steady metronome, choose branded LEDs, use alkaline or lithium cells, avoid damp zones, and expect frequent battery swaps.
How Do I Fix Flickering LEDS Caused by Older Bathroom Wiring?
Check loose neutrals and earths at the switch and ceiling rose, then replace the dimmer with a trailing-edge unit rated for LED dimming. If wiring’s degraded, you’ll need wiring upgrades by a Part P electrician.
Conclusion
Sort your bathroom lighting by finding shadows, choosing high-CRI LEDs, and matching Kelvin to the task. Frame your face by fitting vanity lights either side, modernise output by sizing and setting the bar correctly, and smooth glare by adding a backlit mirror. Lift overall lux with a ceiling fitting, protect zones with IP-rated shower lights, and fine-tune mood with an LED-compatible dimmer. Finally, reflect more by hanging mirrors and using lighter paint.