You’ll transform your yard with a DIY garden border that starts with a clean layout: mark curves with a hose or paint, check corners with the 3-4-5 method, and keep arcs wide for mower clearance. Cut turf neatly, then trench 2–3 inches deep with vertical walls and a flat bottom. Add 1–2 inches of compacted gravel or decomposed granite so edging won’t rock or heave. Choose timber, steel, brick, wattle, or living plants, and you’ll pick up pro tricks next.
DIY Garden Border Ideas by Yard Goal
Whether you’re trying to sharpen curb appeal, keep mulch from washing out, or stop grass from creeping into beds, the right DIY garden border starts with a clear yard goal.
For crisp lines, set steel or aluminum edging flush with grade, then backfill and tamp to prevent heaving.
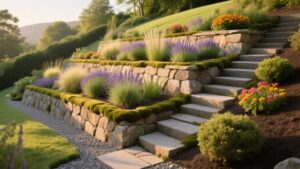
To retain mulch on slopes, stack interlocking pavers or rot-resistant timbers with landscape fabric behind them to reduce erosion.
To block turf runners, trench 6–8 inches and install rigid plastic or composite edging with a top lip you can string-trim.
For low-maintenance garden border design, use river rock over fabric with a defined mow strip.
If you rotate seasonal planting, choose modular bricks or stones you can lift and reset quickly each spring.
Plan Your Garden Border Layout and Curves
Before you buy edging or start digging, lock in your border layout on the ground so the curves read cleanly from the street and stay easy to mow. Mark lines with a hose, rope, or marking paint, then step back to check sightlines from key views.
Use border design principles: repeat radii, avoid tight zigzags, and keep arcs wide enough for your mower deck. Aim for smooth passages at corners and driveway edges so you won’t scalp turf.
Set bed widths to match plant mature spread and maintenance reach, typically 24–48 inches. Confirm drainage flow and keep borders off low spots that puddle.
Finally, choose Garden border materials that match your curve geometry; flexible options follow arcs best, rigid pieces need straighter runs.
Cost, Tools, and Time by Border Type
Next, you’ll match border materials to your budget by comparing per-foot costs for options like steel edging, brick, stone, pavers, and treated timber.
You’ll also plan the required tools—spade, edging tool, level, mallet, landscape fabric pins, and a cutoff saw or grinder where needed.
Finally, you’ll estimate install time by border type, factoring in excavation depth, base prep, cutting, and alignment so you can schedule the work accurately.
Material Cost By Type
Four factors drive border cost more than anything else: the material itself, the edge prep (trenching and base), the tools you’ll need, and the time it takes to cut, set, and anchor each section.
For materials, pressure-treated timber and composite edging typically land in the midrange; they suit curving lines around Garden plantings without premium pricing.
Steel edging costs more per linear foot but stays crisp and resists heaving, lowering replacement risk.
Aluminum often prices slightly below steel, while plastic is cheapest upfront yet can warp and fade.
Brick, concrete pavers, and natural stone run higher because you buy more mass per foot plus base aggregate; they also reduce seasonal maintenance by holding soil and mulch in place.
Reclaimed materials can cut costs if you source locally.
Tools And Time Needed
Because labor and tooling swing total spend as much as the edging itself, you’ll get a more accurate budget by matching each border type to the tools it demands and the hours it realistically takes to install.
Metal edging needs a trench spade, rubber mallet, and stakes; plan 1–2 hours per 20 feet plus a string line.
Plastic edging installs faster with a half-moon edger and pins; expect 45–90 minutes per 20 feet, but allow extra time for tight curves.
Brick or stone demands a tamper, level, masonry chisel, and base gravel; budget 3–6 hours per 20 feet.
Poured concrete requires forms, rebar, mixer, and curing time; add 1–2 days.
Coordinate Garden lighting conduits before backfill and align work with planting schedules.
Dig a Clean Trench and Level the Edge
Before you set any edging in place, cut a crisp trench that gives the border a stable seat and a straight visual line. Mark the route with string, paint, or a hose, then slice the turf with a half-moon edger or sharp spade. Dig to a consistent depth so the finished border sits evenly; check every few feet with a torpedo level laid on a straight board.
Keep trench walls vertical and the bottom flat, scraping high spots instead of over-digging. Sort excavated soil: save topsoil for plant care, and pull out stones and roots that impede soil improvement. If your line curves, take shorter bites with the spade to prevent scallops.
Recheck alignment from multiple angles before you proceed.
Add a Base Layer So Borders Don’t Shift
With your trench cut clean and level, lock that work in by laying a compacted base that resists frost heave, foot traffic, and runoff. Skip the garden border myths that borders “settle in” on their own; they don’t without support.
Spread 1–2 inches of decomposed granite or 3/8-inch minus gravel, mist lightly, then tamp until it feels rigid underfoot. Check grade with a straightedge so your edging units sit fully supported and don’t rock.
Keep the base consistent around curves, where shifting starts first, and re-tamp after setting the first few pieces.
Pair this with border planting techniques by preserving soil depth inside the bed, not stealing it for leveling.
For accuracy, follow:
- Material selection
- Compaction passes
- Final grade check
Borders That Block Grass and Weeds
Although a crisp edge looks finished, it only stays low-maintenance when you build it as a root barrier that stops turf rhizomes and weed runners from crossing into the bed.
Choose Garden edging rated for below-grade use, then trench 6–8 inches deep along the line. Set the edging so 1/2 inch remains above soil to deflect creeping stems, and backfill firmly to eliminate gaps roots exploit.
In problem areas, staple weed barriers to the bed side of the edging, overlapping seams by 6 inches and keeping fabric below mulch to prevent UV breakdown.
Don’t wrap fabric around plants; leave collars so water infiltrates.
Inspect twice a season, cut intruding runners, and re-tamp any loosened sections after heavy rain or freeze-thaw cycles.
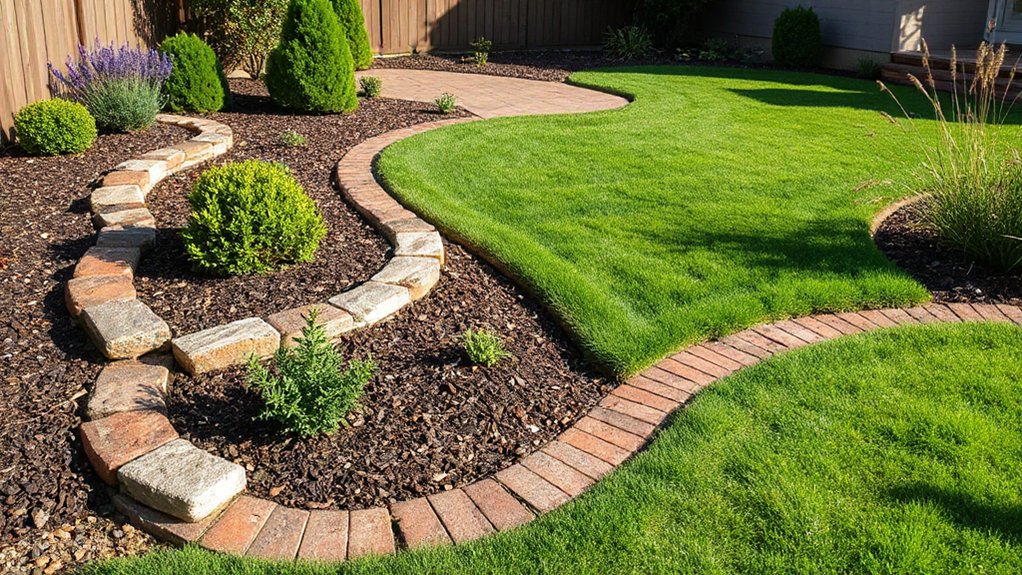
Brick Borders for Clean, Straight Lines
For a crisp brick border, you’ll start by selecting bricks rated for outdoor freeze-thaw and sized to match your bed’s scale.
You’ll then snap a tight string line or chalk line and check it with a level so your edge stays perfectly straight.
With a compacted base in place, you’ll set each brick firmly, maintain consistent joints, and lock the course for long-term stability.
Choosing The Right Bricks
How do you choose bricks that’ll keep a garden border crisp and perfectly straight year after year? Start by treating bricks as precision Garden border materials, not leftovers. Specify fired clay pavers rated for freeze-thaw, or concrete edging units with low water absorption to reduce heaving. Match dimensions tightly; mixed lots create cumulative offsets. Select a face texture that sheds soil and resists chipping under string trimmers, and confirm colorfastness if you’ll use deicers nearby.
For yard design tips, pick tones that echo hardscapes and scale brick height to bed depth.
- Durability rating: freeze-thaw, compressive strength, absorption.
- Dimensional tolerance: consistent length, squareness, uniform edges.
- Edge profile: crisp arris for clean lines, or chamfer to hide chips.
Setting Straight Reference Lines
Before you set a single brick, lock in a straight reference line that won’t drift as you dig and tamp. Drive sturdy stakes at both ends of the run, then pull a mason’s line tight and level. Measure from fixed features (house corner, patio edge) to confirm the line stays parallel, and snap a second line if you need consistent offsets.
For long borders, add intermediate stakes every 4–6 feet so tension stays true. Check alignment with a straight edge laid against the string path, not the soil, and correct any bowing immediately.
Mark the line on turf with marking paint or sand so you can reestablish it after moving tools. Recheck square at corners with the 3-4-5 method.
Laying Bricks For Stability
Once your reference line’s locked in, start laying bricks on a compacted base so the border can’t creep or tilt over time. Excavate a shallow trench, then add 2–3 inches of crushed stone and compact it hard; this step defines foundation importance and drives long-term Brick stability.
Screed a thin bedding layer of sand, set each brick tight to the line, and tap it level with a rubber mallet. Keep faces flush, and correct deviations immediately—small errors multiply fast. Finish by locking joints so traffic and freeze-thaw cycles don’t shift the run.
- Check grade every 3–4 bricks with a level and string line.
- Stagger joints to reduce continuous shear planes.
- Sweep polymeric sand, mist lightly, and let it cure fully.
Paver Borders for Paths and Patios
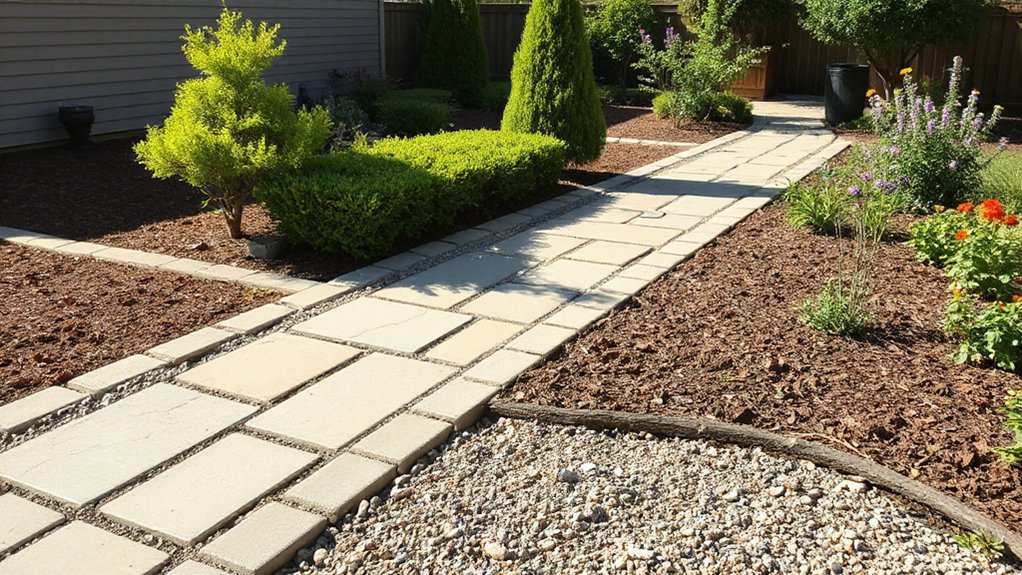
Although a path or patio can look finished on its own, a properly installed paver border locks the surface in place by resisting lateral spread, edge settlement, and frost heave. You’ll set a rigid edge restraint on compacted base, then spike it into the subgrade so traffic can’t push pavers outward.
Excavate to full depth, add 4–6 inches of dense-graded aggregate, compact in lifts, and screed 1 inch of bedding sand. Keep the border tight to the pavers, maintaining consistent elevation and slope for drainage.
Sweep polymeric sand into joints and activate it to reduce washout. Use the crisp edge to frame seasonal planting pockets and align garden art without encroaching on the walking surface. Recheck spikes after freeze-thaw.
Stone Borders for a Natural Look
For a natural stone border, you’ll get the best results by matching stone type to site conditions—use fieldstone for irregular, rustic edges and cut stone for tighter lines and consistent height.
Set each stone on a compacted gravel base, seat it firmly, and stagger joints so the border resists shifting.
Lock the run in place with soil backfill and targeted pinning or mortar where needed, especially at curves and grade changes.
Choosing Stone Types
How do you choose the right stone for a border that looks natural and still holds its line? Start by matching geology to site conditions: freeze-thaw cycles, foot traffic, irrigation overspray, and soil acidity all influence performance. Prioritize Stone durability over color alone, and compare Quarry locations to reduce transport cost and to keep the palette regionally authentic.
Aim for consistent thickness so your edge reads intentional, even when pieces vary in face texture.
- Granite or basalt: highest compressive strength, crisp edges, minimal spalling in cold climates.
- Limestone or sandstone: softer, easier to shape, warmer tones, but check porosity and layering.
- Fieldstone mix: irregular forms, naturalistic look, select for similar size range and weathering.
Laying Stones Securely
The stone you pick only performs as well as the base and lock you build under it, so treat installation as a structural task, not just a styling choice.
Excavate to firm soil, then add 3–4 inches of compacted crushed stone topped with 1 inch of leveling sand.
Set a taut stringline to control height and alignment, and seat each stone with a rubber mallet until it’s fully supported.
Stagger joints, and keep faces plumb to resist frost heave and mower impacts.
For dry-stack borders, sweep polymeric sand into joints and mist to bind.
For permanent edges, use mortar application on the hidden back side, not the front, to preserve a natural look.
After curing, apply stone sealing to reduce staining and water intrusion.
Recheck level after rain cycles.
River Rock Borders for Drainage
Where does all that runoff go after a heavy rain—into your beds or away from them? A river rock border steers water while keeping a clean edge, and it delivers river rock aesthetics without trapping moisture. You’ll improve drainage efficiency by building a shallow, permeable channel at the bed line and letting water infiltrate instead of pooling.
- Excavate a 4–6 in. trench, slope it 1–2% away from stems, and compact the subgrade.
- Lay nonwoven landscape fabric, then add 1–2 in. of washed gravel as a leveling and filtration layer.
- Place rounded river rock (1–3 in.), lock it with edging stakes if needed, and top-dress after storms.
Keep rocks clear of crowns, and periodically rinse silt to maintain flow rates.
Pour-in-Place Concrete Borders (DIY Forms)
For pour-in-place concrete borders, you’ll start by building simple, straight or curved formwork with stakes and flexible boards. Then confirm line, level, and width.
You’ll mix concrete to a workable consistency and pour it continuously, rodding or tapping the forms to consolidate and reduce voids.
You’ll finish the top and edges with a trowel or edging tool, then keep the concrete damp and protected while it cures for strength and crack resistance.
Build Simple Formwork
Once you’ve laid out the border path, build simple formwork to control the pour, lock in clean lines, and keep the concrete at a consistent height. Use straight 1x lumber for runs and thin plywood or flexible hardboard for curves, then stake every 18–24 inches so the forms can’t bow.
Set the top edge with a stringline and level, and brace low spots with extra stakes.
- Assemble and align: Pre-drill screws, clamp corners, and check radius consistency on bends.
- Anchor and seal: Drive stakes outside the form, add spreaders where needed, and tape seams to prevent leaks.
- Plan for release: Apply form oil, choose reusable molds where possible, and prioritize Formwork safety with stable footing and gloves.
Mix And Pour Concrete
With the formwork straight, braced, and sealed, you’re ready to mix and pour concrete to lock that border profile in place. Measure water precisely and mix in a wheelbarrow or mixer until you hit a workable, plastic consistency that holds shape without slumping. This concrete mixing control reduces shrinkage and improves border stability.
Dampen the trench and forms lightly so the mix doesn’t flash-dry on contact. Shovel or chute concrete into the form in lifts, pushing it into corners and along the base.
Tap the form faces with a hammer and rod the mix to release trapped air and eliminate voids. Keep the fill level slightly proud, then strike it down to the form height with a straight board, checking grade as you go.
Finish Edges And Cure
A few careful finishing passes right after the pour will lock in crisp edges and a clean top line before the mix starts to set. Use a margin trowel to finish edges inside the form, then run an edger along the top to prevent chipping. Keep your tool face damp, and make long, continuous strokes so you don’t tear the paste.
Once the sheen fades, float lightly to close pores without overworking. Then switch immediately to the Cure process: protect strength by controlling moisture and temperature.
- Cover with plastic for 24–48 hours to prevent rapid drying.
- Mist daily for 5–7 days, especially in heat or wind.
- Strip forms after 24 hours, but avoid impacts for a week.
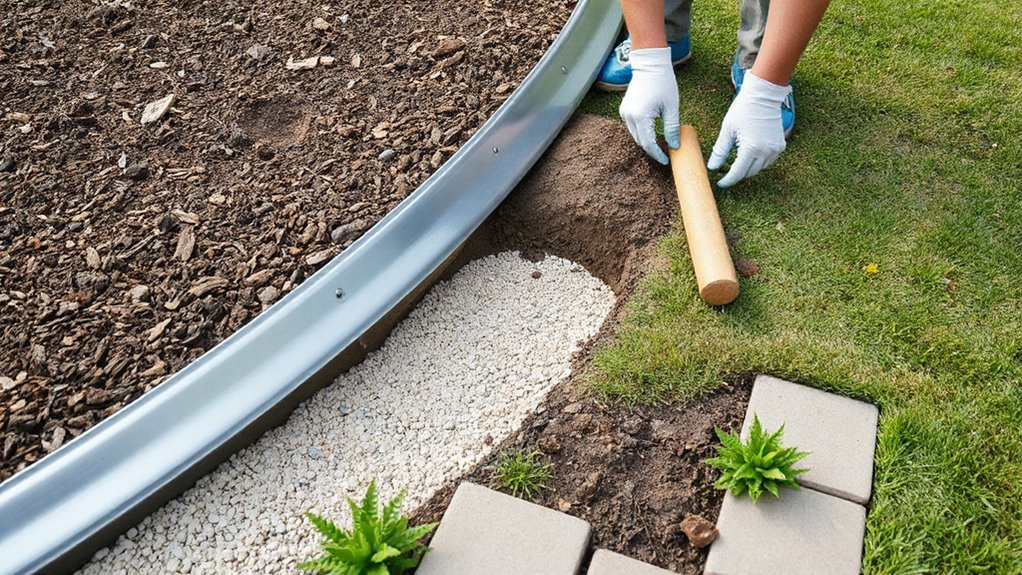
Metal Edging for Modern, Thin Lines
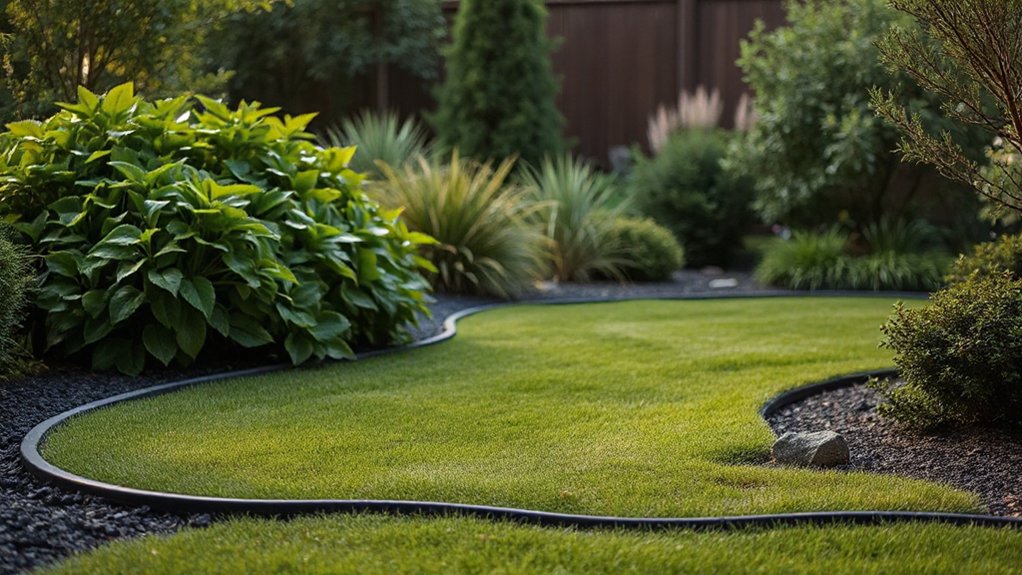
If you want a crisp, contemporary border that nearly disappears from view, metal edging delivers clean, thin lines while still locking mulch, gravel, and soil in place.
For modern design, choose powder-coated steel or aluminum; steel resists heave and holds straighter runs, while aluminum bends easier for curves.
Lay out your line with string, then cut a narrow trench 2–3 inches deep so the top lip sits just above grade.
Drive stakes every 18–24 inches, tightening fasteners as you go to prevent waviness.
For corners, use factory connectors or miter cuts with a metal blade.
Backfill and tamp firmly on both sides, then top-dress to hide hardware.
Check level as you set each section.
Reclaimed Wood Borders on a Budget
Metal edging nails the ultra-clean look, but reclaimed wood gives you a warmer border for far less cash—often free—while still holding back soil and mulch. Source boards from pallets, fencing, or demo scraps, then de-nail, plane splinters, and cut consistent lengths.
Set pieces against a compacted trench so the top edge stays level, and pin them with rebar stakes or exterior screws into hidden backing stakes. Keep wood off constant moisture: leave a 1/2-inch gravel bed and slope soil away.
- Select rot-resistant stock: cedar offcuts or heat-treated pallet boards.
- Seal smartly: use exterior oil on faces only, not buried edges.
- Fasten for movement: predrill, allow gaps, and use budget friendly materials.
Log and Timber Borders for Cottage Style
Because you’re working with round, irregular stock, log and timber borders reward careful layout: choose straight(ish) pieces 4–8 inches in diameter (or squared landscape timbers), peel bark to slow insect and moisture damage, and set them in a shallow trench so at least one-third of the height sits below grade for stability.
Drive 18–24-inch rebar pins through predrilled holes every 3–4 feet, and stagger joints like brickwork to prevent heave.
For curves, cut short “cookies” from logs and stand them on end, or notch timbers for tighter radii.
Cap ends with a borate treatment or exterior wood preservative, then backfill with compacted gravel for drainage.
This rustic edge boosts Garden aesthetics while creating nooks that support wildlife habitats without turning into a pesty woodpile.
Woven Wattle Borders From Branches
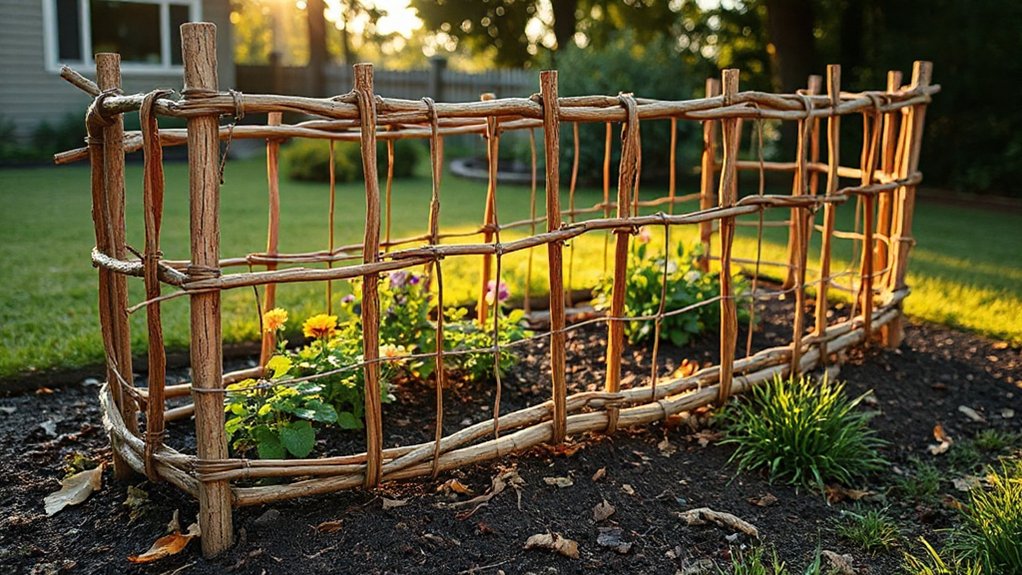
Wattle borders give you the same cottage-garden warmth as log edging, but you’ll build them from flexible branches woven between stakes instead of heavy timbers. Set a taut line, drive stakes 8–12 inches apart, and keep them plumb for a crisp edge. Use green willow, hazel, or dogwood; soak dry rods overnight to prevent cracking during branch weaving. Weave in alternating directions, pull each course tight, and tamp down to lock the lattice.
- Stake layout: corner stakes first, then infill, leaving 2–3 inches buried beyond frost heave depth.
- Weave technique: start thick-to-thin, stagger joints, and trim flush for clean reveals.
- Longevity: add a gravel trench for drainage and treat stakes with eco oil; this natural fencing holds shape for seasons.
Living Borders With Low, Tidy Plants
If you want an edge that looks crisp year-round and still moves naturally with the garden, plant a low, tight-growing “living” border that defines the bed without hard materials. Choose compact, shear-tolerant plants such as dwarf boxwood, lavender, thyme, sedum, or mondo grass, matched to your light and moisture. Set plants 6–12 inches apart for fast closure, and run a straight planting line with a taut string.
For plant maintenance, trim twice yearly to keep a uniform height and prevent spillover onto paths. Mulch lightly to suppress weeds without smothering crowns, and irrigate at the base to reduce foliar disease.
For pest control, scout weekly for aphids, mites, and fungal spotting, then remove damaged tips and apply targeted, least-toxic treatments as needed.
Fix Sinking, Gaps, and Frost Heave in Borders
Living borders stay crisp with regular trimming, but hard-edged borders can lose that clean line when sections sink, joints open up, or frost heave kicks stones and bricks out of plane. Fix it by resetting the base, tightening joints, and improving drainage so soil erosion doesn’t undermine your work.
- Regrade and rebuild the bed: Pull the loose units, excavate to firm subsoil, then add 2–3 in. of compacted crushed stone and a 1 in. leveling layer of sand or screenings.
- Lock alignment: Use a stringline, tap pieces flush with a mallet, and backfill with angular gravel to resist lateral creep.
- Control frost heave: Add a drain trench or perforated pipe where water pools, and keep joints filled. This border maintenance prevents repeat movement.
Frequently Asked Questions
Do I Need HOA Approval Before Installing a New Garden Border?
Yes, you usually need HOA approval before installing a new garden border. Review your HOA regulations and border permit requirements, then submit drawings, materials, and placement details. Don’t start until you’ve received written confirmation.
How Do I Keep Garden Borders Safe for Kids and Pets?
Like a seatbelt, you keep garden borders safe by choosing pet safe materials, avoiding sharp edges, and anchoring sections firmly. Add child proof fencing where needed, seal treated wood, and inspect weekly for loosening.
What Border Options Work Best Around Tree Roots Without Harming Them?
Choose flexible edging that won’t compress soil: steel, recycled plastic, or rubber. For Tree root protection, keep borders shallow and outside the dripline. Prioritize Border material selection that’s permeable, and avoid deep trenching.
Can I Install Garden Borders Over Existing Mulch or Landscape Fabric?
Yes—you can install borders over mulch or landscape fabric; 3–4 inches of mulch can suppress weeds by about 80%. For Mulch maintenance and border durability, scrape to soil, anchor deeply, overlap fabric, and compact edges.
How Do I Prevent Borders From Staining Nearby Concrete or Siding?
Prevent staining by keeping borders off hard surfaces, adding a gravel drip line, and ensuring drainage. Use staining prevention via border sealing: apply exterior-grade sealer, cap ends, and recoat annually. Wipe spills promptly.
Conclusion
You’ve now got the tools to border your beds with purpose: plan clean curves, trench to a consistent depth, and set a stable base so edges don’t creep. Choose logs or timber for structure, wattle for flexible lines, or living plants for a soft, maintained finish. When settling or frost heave shows up, re-level, backfill, and tamp to restore alignment. Ready to lock in crisp edges that make your whole yard look intentional?