You can refresh a rented place without wrecking walls by treating everything as “return-to-original”. Clean surfaces with sugar soap, then use Command strips, removable putty, or pinhole picture hangers matched to the wall type and weight rating. Test paint first with low-tack tape, and avoid flaky or freshly painted emulsion. Add peel-and-stick wallpaper on fully cured matte paint, plus tension rods for curtains and storage. Keep going for removal steps that protect your deposit.
Rules to Avoid Wall Damage (and Lost Deposits)
Before you pick up a drill or a tin of paint, check your tenancy agreement and treat every wall as “return-to-original” territory. Use removable hooks, tension poles, and freestanding shelves so you don’t leave fixings behind. If you must hang something, choose one small, well-placed fixing and keep the original screw and rawlplug for reinstatement.
Avoid puncturing external walls where Wall insulation or vapour barriers may sit; even a small hole can create draughts and landlord headaches. Mask edges carefully, keep rollers light, and test colour on card first to avoid surprise repaints.
Plan Paint touch ups: store a jam-jar of the exact paint, note the brand and finish, and feather repairs with a mini roller. Photograph the wall before and after, keep receipts, and you’ll protect your deposit.
Wall Types That Change What You Can Use
Before you pick hooks, strips, or fixings, you’ve got to identify your wall type because drywall (plasterboard) behaves very differently to solid plaster.
Brick, tile, and concrete often need masonry fixings and can crack or spall if you use the wrong drill bit or adhesive.
Once you know what you’re working with, you can choose renter-safe options that hold well and still protect your deposit.
Drywall Vs. Plaster Limits
Although many rental walls look the same once they’re painted, drywall and traditional plaster behave very differently when you fix, hang, or stick anything to them, and that difference should guide what you use.
In many UK flats, drywall (plasterboard) dents easily, so light frames suit removable strips, but you must clean with sugar soap and avoid textured paint that reduces grip and changes Wall texture.
Plaster over lath or solid backing feels harder yet crumbles around drill holes and can crack with aggressive adhesives. Use low-tack hooks, spread loads with picture rails where available, and pre-drill gently if permitted.
For quick Drywall repair, fill small dings with lightweight filler; on plaster, use fine surface filler and sand lightly to match the finish. Test in a hidden spot first always.
Brick, Tile, And Concrete
Drywall and plaster already demand different fixes, but brick, tile, and concrete change the rules again because they’re hard, often sealed, and far less forgiving if you pick the wrong fastener.
Before you drill, check your tenancy agreement and locate pipes and cables; UK flats often hide services in bathroom and kitchen walls.
On glazed tile, use suction hooks or removable adhesive strips rated for humid rooms, then test on an inconspicuous area.
For bricks, avoid nails and standard pins; they’ll crumble mortar and leave obvious scars. If you must hang something heavier, use existing holes, picture rails, or freestanding solutions.
On concrete, stick to lightweight items with high-tack, residue-free pads, or clamp-on shelving that doesn’t touch the wall.
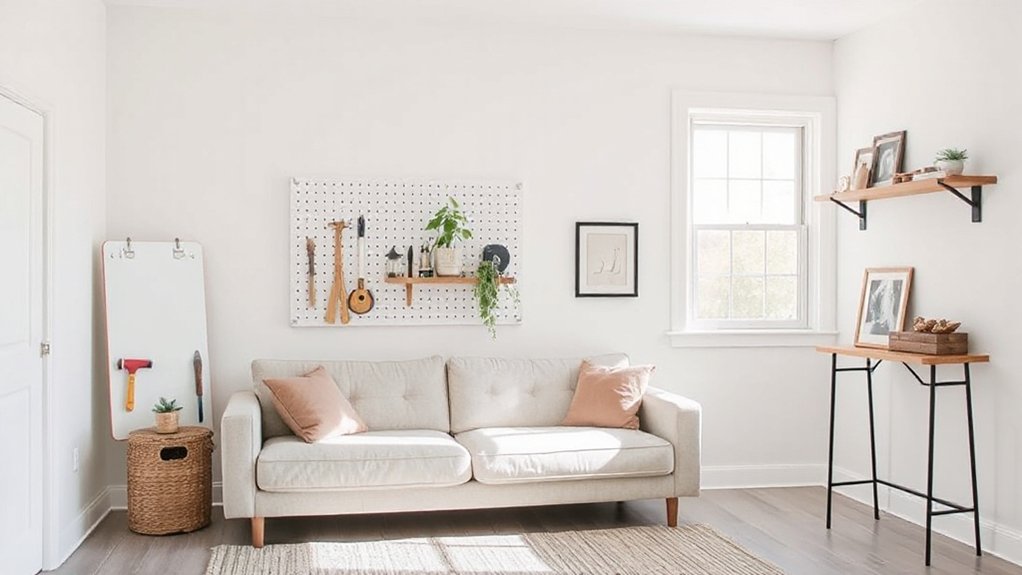
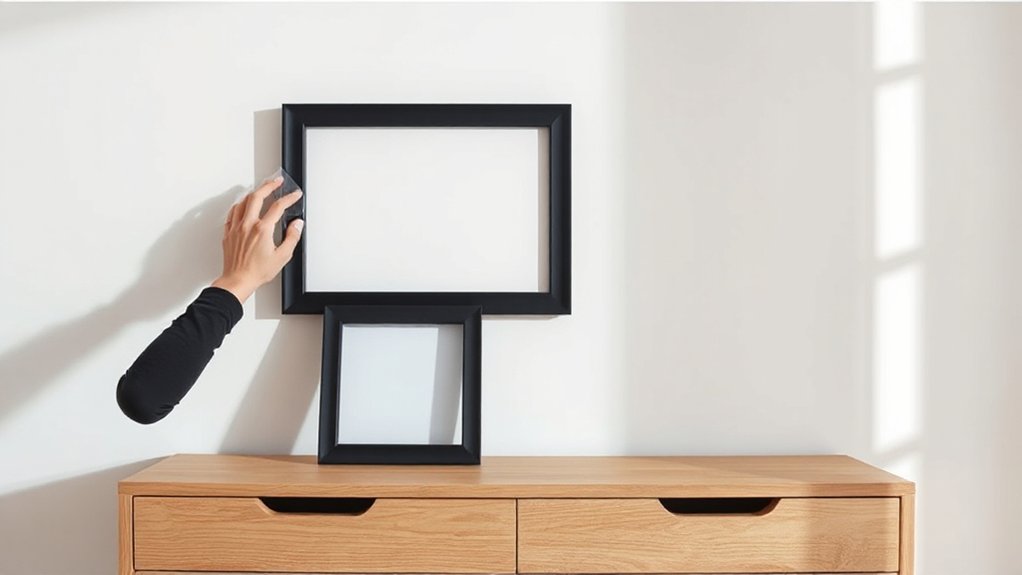
No-Drill Toolkit: Strips, Putty, and Hangers
If you can’t drill, you can still hang and organise confidently with Command strips and hooks—just match the weight rating and clean the surface first.
Keep removable mounting putty on hand for lightweight frames, cables, and small decor where you need quick repositioning without marks.
For heavier pictures on plasterboard, use damage-free picture hangers designed to spread the load and leave only tiny pinholes you can fill at checkout.
Command Strips And Hooks
When you want to hang art, organise cables, or add storage without risking your deposit, Command™ strips and hooks give you a reliable no-drill option that works in most UK rentals. Match the strip to the load rating, and don’t guess—most packs list kilos and surface types.
Your wall texture matters: smooth, painted plaster takes adhesives better than textured wallpaper, flaky paint, or freshly painted walls. To maximise adhesive strength, clean with isopropyl alcohol, let it dry, press firmly for 30 seconds, then wait an hour before loading.
Use wire hooks for frames, broom grips for mops, and cord clips for chargers.
For removal, pull the tab straight down slowly to release cleanly. Replace strips after each move.
Removable Mounting Putty Uses
Command strips handle heavier jobs, but removable mounting putty fills the gaps where hooks look bulky or adhesives won’t grip—think lightweight décor on tricky surfaces. Use it on painted walls, laminate, tiles, and even glass, as long as the surface is clean and dry.
Roll pea-sized balls, press for 10 seconds, and spread load across corners to stop curling. Smart removable mounting putty uses include fixing postcards, kids’ art, paper bunting, lightweight LED fairy lights, and cable tacks without leaving holes.
It’s also one of the easiest wall decor alternatives in UK rentals, because you can reposition items repeatedly. To remove, twist gently, then dab with a fresh blob to lift residue. Avoid porous wallpaper and freshly painted surfaces.
Damage-Free Picture Hangers
Ever wondered how to hang framed prints in a UK rental without a drill, rawlplugs, or a stern checkout report? Start with a no-drill toolkit: Command-style picture hanging strips for smooth, painted walls; reusable mounting putty for lightweight frames; and adhesive hooks or micro-hooks for awkward spots.
Clean the wall with isopropyl alcohol, let it dry, then press firmly for 30 seconds and wait an hour before loading.
Match the hanger to the job: use strips for heavier frames, putty for small prints, and hooks for keys or gallery strings.
Plan your furniture arrangement first so art lines up with sofas and sightlines.
Coordinate heights with window treatments to avoid snagging curtains.
To remove, pull tabs straight down, slowly.
Test First: How to Spot Paint-Peel Risk
Before you commit to any renter-friendly paint or peel-and-stick makeover, test the surface so you don’t end up lifting the landlord’s finish along with your DIY. Start with paint preparation: clean a small patch with sugar soap, let it dry, then assess wall texture and coating strength.
- Press low-tack masking tape on, burnish lightly, and peel back fast.
- Look for flaky edges, chalky residue, or colour transfer onto the tape.
- Scratch gently with a fingernail; powdering suggests weak emulsion.
- Check sheen: very matt, porous paint tends to grab and tear more easily.
- Test in a hidden spot (behind a radiator or wardrobe) first.
If you see peel or dusting, stop and switch to lighter-touch options, or ask your landlord about repainting.
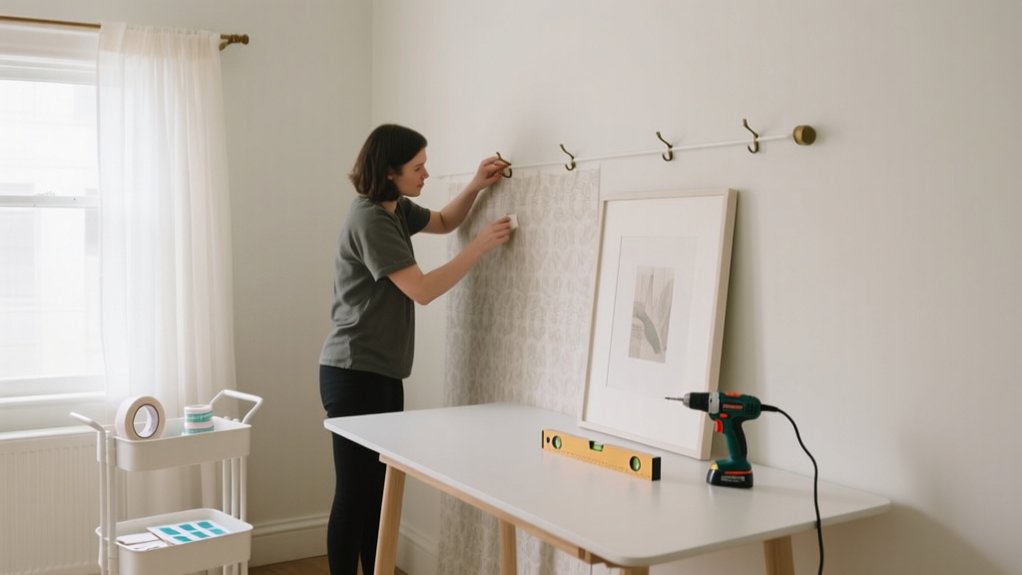
Peel-and-Stick Wallpaper That Removes Cleanly
Choose a true removable, PVC-free peel-and-stick wallpaper with a low-tack adhesive, and check it’s rated for painted plaster (common in UK rentals) before you buy.
Prep matters: clean the wall with sugar soap, let it dry fully, then apply using a felt-edged squeegee with light pressure so you don’t pull paint or trap bubbles.
Start on a discreet edge, keep seams minimal, and you’ll get a crisp finish now and a clean lift-off at checkout.
Choosing Removable Wallpaper
While paint might be off-limits in your tenancy, peel-and-stick wallpaper lets you add pattern fast and remove it cleanly when you move out. Choose papers sold as “removable” rather than “repositionable”, and check they’re PVC-free if you’re decorating a nursery or small flat. Order samples first; UK light changes colour temperature, so test morning and evening.
Match scale to your room: bold geometrics suit open-plan spaces, while small prints complement vintage furniture and indoor plants without visual clutter. Budget for extra rolls from the same batch to avoid shade variation.
- Look for “removes cleanly” and water-based adhesive
- Prefer matte finishes to hide bumps
- Check suitability for painted plasterboard
- Choose wipeable surfaces for kitchens
- Buy from UK retailers with clear returns
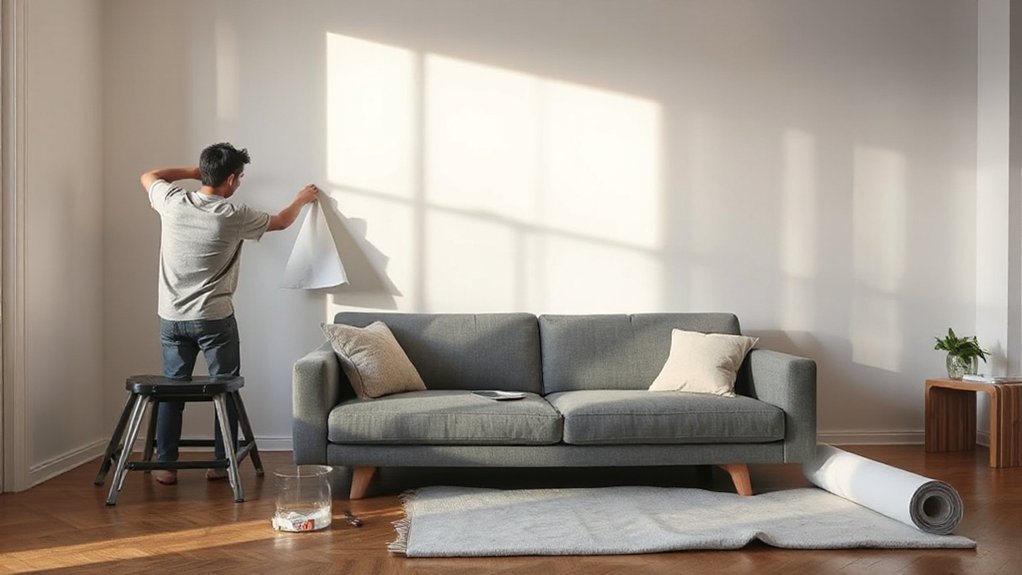
Applying Without Wall Damage
Because most wall damage happens at the edges and on poor prep, you’ll get a clean removal if you treat peel-and-stick wallpaper like a precise install rather than a quick cover-up.
Start by cleaning with sugar soap, then let the wall dry fully.
Check paint compatibility: matte, fully cured emulsion (at least 4 weeks old) holds best; flaking or fresh paint will lift.
Consider wall texture too—heavy orange peel or blown plaster reduces contact and encourages peeling.
Mark a plumb line with a pencil, not masking tape.
Peel back 20–30cm of backing, smooth with a plastic squeegee, and work top to bottom, pushing air outwards.
Trim with a sharp snap-off blade.
Seal edges lightly with a microfibre cloth, not extra adhesive.
Removable Decals for Instant Personality
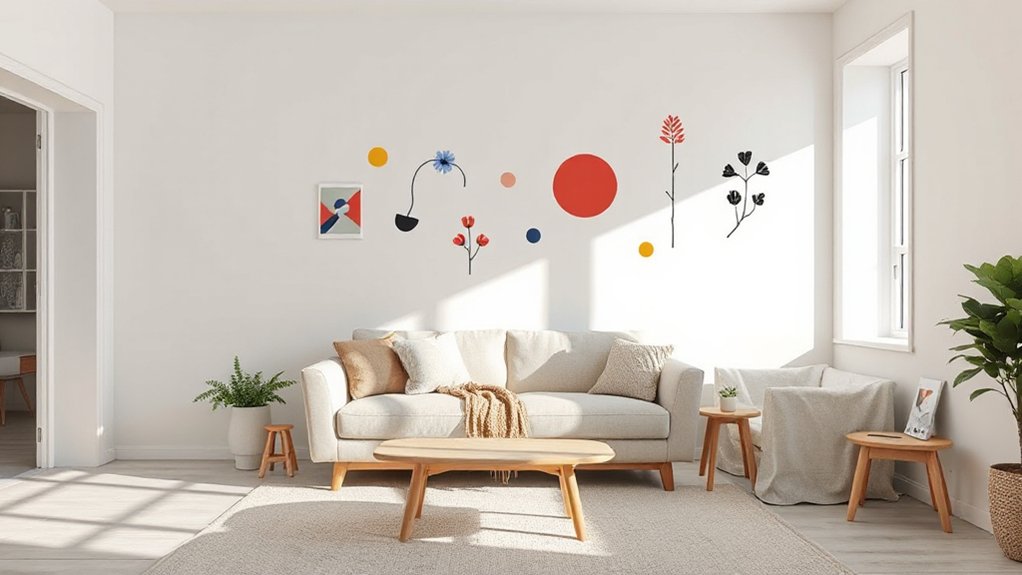
Want a fast, no-drama way to add personality to a rental? Removable decals deliver impact without risking your deposit. Choose matt vinyl rated “removable” and stick to clean, fully cured paint; wipe with sugar soap, then dry.
For UK rentals, avoid freshly painted walls, as you’ll invite lifting and need Paint touch ups. You can mimic Wall murals by combining large botanical decals or geometric sets, then step back and align with a spirit level for a pro finish.
When it’s time to move, warm the decal with a hairdryer and peel slowly at a low angle.
- Check landlord rules and your inventory photos
- Test a small corner first
- Avoid textured or flaky surfaces
- Use a level for straight lines
- Store backing sheets for reuse
Washi-Tape Borders and Patterns That Peel Off
Choose low-tack, removable washi tape that’s labelled safe for painted walls, and test a small strip for 24 hours on your emulsion before you commit.
Use it to frame skirting boards, window reveals, shelves, or mirror edges, or to fake a slim “picture rail” trim without nails.
Plan your pattern with light pencil marks and a spirit level, then build repeats (stripes, chevrons, grids) from a central reference line so everything peels off cleanly when you move out.
Choosing Removable Washi Tape
- Test a 10cm strip on painted plaster for 24 hours
- Choose low-tack paper tape for matte emulsion walls
- Avoid high-humidity areas like bathrooms and near kettles
- Go wider (15–30mm) for straighter runs with fewer joins
- Store rolls cool and dry so adhesive stays consistent
Border And Trim Ideas
Once you’ve picked the right low-tack tape, you can use it to fake built-in detail with peel-off borders and trims that sharpen a room without risking your deposit.
Run a slim band along skirting boards to “refresh” scuffed paint, or add a neat line under picture rails to echo period Decorative molding without nails. Frame a doorway with two vertical strips for a cleaner, taller look, or edge open shelving to give it a finished, joinery-style outline.
In kitchens, add a wipeable border above the worktop as a splashback accent; stick it to tiles, not grout, for easier removal. If you want graphics, pair tape borders with Wall decals for a layered feature that still peels away.
Burnish lightly with a bank card to seal.
Pattern Layout Techniques
Those clean border lines look even sharper when you plan the layout like a pattern rather than a single strip. Start by measuring your wall section and marking light pencil dots (use a soft 2B) so your washi tape lands true and peels off cleanly.
For pattern repetition, choose one simple module—dash, chevron, or block—and repeat it at a fixed interval using a ruler and a small set square.
- Test tape on a hidden spot for paint lift
- Keep to two or three colours for colour coordination
- Mirror the pattern at corners for symmetry
- Burnish lightly with a plastic card, not your fingernail
- Remove slowly at a 45° angle to protect emulsion
Buy low-tack washi from UK craft shops; avoid bargain rolls with aggressive adhesive.
Removable Hooks: Picking the Right Weight Rating
Before you stick up any removable hook, check its weight rating and choose one that comfortably exceeds what you’ll hang, because “max load” assumes ideal conditions you mightn’t have in a UK rental.
Steam from showers, cold external walls, and fresh paint can all reduce adhesion, so treat weight ratings as optimistic. Weigh items (kitchen scales work) and include the pull of cords or bags that’ll swing.
For coats, pick a higher-rated hook or use multiple hooks to share the load, spaced a hand’s width apart.
During hook installation, clean with isopropyl alcohol, dry fully, press hard for 30 seconds, then wait the full cure time (often 1 hour, sometimes 24).
Avoid textured wallpaper; use tiles or sealed paint instead.
Hang Frames Straight With Zero Nail Holes
Weight ratings keep your removable hooks on the wall; the next trick is getting frames level without a single nail hole. Start by cleaning the spot with isopropyl alcohol, then let it dry—grease defeats adhesives, especially on tricky Wall textures and delicate paint finishes.
Mark your intended top edge with low-tack masking tape, then use a spirit level (or a level app) to draw a light guide line on the tape. Fit felt bumpers on the frame’s lower corners so it won’t twist. Hang, step back, and micro-adjust before the adhesive fully cures.
- Measure hook spacing from the frame’s hanging points
- Use two hooks for wide or heavy frames
- Press hooks firmly for 30 seconds each
- Wait 1 hour before loading (24 hours ideal)
- Avoid fresh paint (under 28 days)
Gallery Walls With Command Strips (Layout Tips)
If you plan the layout on the floor first, you’ll get a gallery wall that looks intentional—and you’ll use fewer Command Strips fixing wonky gaps later. Trace each frame on kraft paper, label it, then tape the templates to the wall with low-tack masking tape to test spacing at eye level (about 145cm to centre, UK standard).
Keep gaps consistent: 4–6cm works in most flats.
Before sticking, check wall texture and paint finishes. Command adhesives grip best on smooth, sealed emulsion; flaky matte or textured plaster needs a gentle wipe with sugar soap and a dry cloth.
Use the correct strip size for the frame weight, press firmly for 30 seconds, then wait an hour before hanging.
Remove by pulling tabs straight down, slowly.
Leaning Art Ledges and Picture Rails (No Screws)
Want the look of a built-in picture rail without drilling a single hole? Use leaning art ledges on the floor or a low sideboard, then layer frames so you can swap prints seasonally.
For higher placement, choose lightweight picture-rail mouldings designed for wall mounting with adhesive solutions; in UK rentals, check your paint type first, as matt emulsions can lift.
- Clean and dry the wall with sugar soap wipes
- Use a spirit level and painter’s tape to mark the line
- Pick high-tack strips rated above the ledge’s total load
- Press firmly for 30–60 seconds and wait 1 hour before loading
- Keep frames light; add blu-tack to stop sliding
When you move out, warm strips with a hairdryer and peel slowly.
Tension-Rod Shelving and Shower Storage Hacks
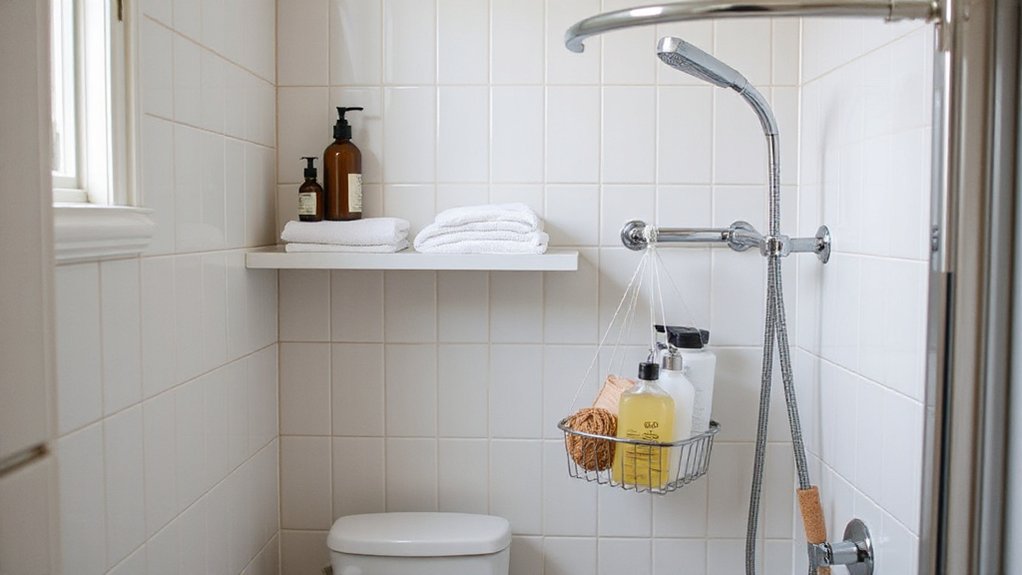
Once you’ve maxed out adhesive picture rails for display, tension rods give you the same no-drill freedom for storage—especially in bathrooms where tiles and painted walls don’t always play nicely with strips.
Fit a stainless rod between shower walls, then hang S-hooks for loofahs, razors, and caddies. Add a second rod lower down as a ledge: rest a small tray or wire basket across it for shampoo and cleanser.
For smart storage in a narrow airing cupboard or under-sink void, brace a rod side-to-side and clip on lightweight organisers for cloths and sponges. You’ll get quick space optimization without landlord grief.
Measure the gap, choose a rod rated for damp rooms, tighten firmly, and recheck weekly so it won’t slip.
Curtains Without Drilling: Tension Rods + Clip Rings
Because most tenancy agreements treat new curtain poles as “alterations,” a tension rod paired with clip rings gives you proper curtains with zero drilling and a clean removal at check-out. Measure the inside recess of your uPVC window or alcove, then buy an adjustable rod with rubber ends for grip.
Clip rings let you hang lightweight curtains, throws, or even tea towels as Curtain alternatives, and you can slide them smoothly for privacy. Keep fabrics modest in weight so the rod doesn’t creep, especially on painted reveals.
If you’ve already used adhesive hooks for Wall mounted planters, keep this setup separate so you don’t overload one surface.
- Degrease the recess first
- Choose the widest rod range
- Use 12–16 clips per drop
- Steam creases before hanging
- Test hold for 24 hours
Plug-In Lighting Upgrades (No Hardwiring Required)
If your rental’s lighting feels dim or dated, you can upgrade it quickly with plug-in options that don’t touch the fixed wiring. Start with a plug-in pendant or swag light: hang it from an existing ceiling hook or a freestanding floor lamp frame, then run the flex neatly to nearby power outlets.
For task lighting, add under-cabinet LED bars with plug-in drivers, ideal for UK kitchens with limited ceiling fittings. Choose warm white (2700–3000K) for cosy rooms, or neutral white (3500–4000K) for worktops.
Smart lighting makes it easier: use plug-in smart bulbs, smart plugs, or a dimmable plug-in floor lamp so you can schedule scenes without rewiring. Always check the plug’s fuse rating and keep cables clear of heat and traffic.
How Do You Remove Everything Without Damage?
Three habits make removal day stress-free: work in reverse order, use the right release method for each fixing, and protect the surface as you go.
Start with a photo record for deposit disputes, then lift items slowly, keeping tension low so paint doesn’t peel.
Warm adhesive pads with a hairdryer on low, then pull tabs downwards, parallel to the wall.
For hooks screwed into plasterboard, back them out gently and keep the raw hole clean for Wall repair.
Finish with a light clean, then do Paint touch up only after filler cures.
- Photograph every wall before you start
- Use a plastic scraper, not metal
- Apply low heat to soften adhesives
- Pull Command-style tabs straight down
- Fill, sand, and spot-prime small holes
Frequently Asked Questions
What Renter-Friendly DIY Projects Can Reduce Noise From Neighbors Without Construction?
You can cut neighbour noise by hanging Soundproof curtains, laying thick rugs with underlay, sealing gaps with draught excluders, and adding bookcases. Use Removable wall decals as acoustic panels, and place soft furnishings strategically.
Can I Safely Mount a TV Without Drilling Into Studs or Drywall?
You can, but only with a lightweight TV and proper kit; otherwise don’t risk it. Use Removable wall hooks or Adhesive tape solutions rated for weight, clean surfaces, and follow UK safety guidance.
How Can I Childproof a Rental Without Permanent Anchors or Holes?
You can childproof a rental using Temporary adhesives and Removable hooks for stair gates, corner guards, and cable covers. Add fridge and cupboard locks, door pinch guards, and window restrictors; remove cleanly at checkout.
What Are the Best Ways to Hide Cables Without Damaging Paint?
Conceal cables cleverly with cable covers, Cable organizers, and Adhesive hooks rated for painted plaster. Route leads along skirting boards, tuck them behind furniture, and use removable trunking—then warm adhesive before removal to protect paint.
Which Non-Permanent Options Work Best for Covering Ugly Flooring?
You’ll get the best results with peel and stick rugs for quick coverage and comfort, plus removable floor decals for pattern and scuff hiding. Choose UK-safe adhesives, test a corner, and lift cleanly.
Conclusion
You’ve upgraded your rental without a single drill hole—but the real test comes at move‑out. Start now: photograph walls, note paint condition, and keep spare strips, putty, and a plastic scraper. When it’s time, warm adhesive tabs with a hairdryer, pull them down slowly, and patch only with renter‑safe filler. Tension rods lift away in seconds, peel‑and‑stick comes off at a shallow angle. Do it right, and your deposit stays yours.