In coastal towns like Brighton, prioritize extensions that resist salt, wind, and damp while maximizing sun and cross-ventilation. Choose corrosion-resistant materials, screen walls, and dune-inspired landscaping to cut wind and capillary rise. Plan indoor–outdoor zones with durable surfaces, clear sightlines, and cohesive finishes that link spaces to the sea. Include mudrooms and splash zones with water-resistant floors, plus smart storage to curb clutter. Budget for contingency and permits, and work with coastal-savvy architects to guarantee resilience as you expand. If you keep exploring, you’ll uncover more practical steps.
How Coastal Conditions Shape Your Extension Choices
Coastal conditions directly influence every extension decision. You’ll plan for salt air, wind load, and sun exposure, tailoring structure and layout to protect value and comfort.
Begin with maritime landscaping—plantings and buffers that curb wind and deter salt spray while framing views. Choose materials and detailing that resist corrosion and minimize maintenance, aligning with a coastal decor vibe that feels inviting, not utilitarian.
Orient rooms to maximize natural light without inviting glare, and locate living spaces to benefit from sheltered outdoor areas.
Consider sensible flood and drainage planning, elevating critical spaces where necessary.
Install low-profile, durable fencing and verandas that blend with the sea-scene and invite outdoor living.
Your extension should feel anchored, cohesive, and welcoming to every guest.
Materials That Resist Salt, Wind, and Damp
To stand up to salt, wind, and damp, choose materials that resist corrosion and weathering from the first plan. You’ll want metals with protective coatings, like powder-coated steel, and treated timber that resists moisture and rot.
Opt for low-porosity surfaces such as fiber cement, brick, and sealed concrete to minimize salt penetration.
For joinery, use stainless steel or corrosion-resistant alloys, and seal all gaps to deter damp ingress.
Guarantee finishes that don’t peel in salty air, and keep maintenance simple with easy-access surfaces.
Consider Seaside flora as a cue for color and texture that endure.
Align choices with Coastal architecture by integrating natural, breathable elements, and ascertain moisture barriers are continuous around extensions to preserve structure and sense of belonging.
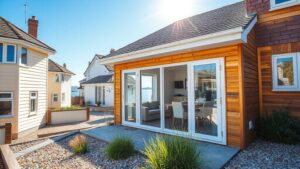
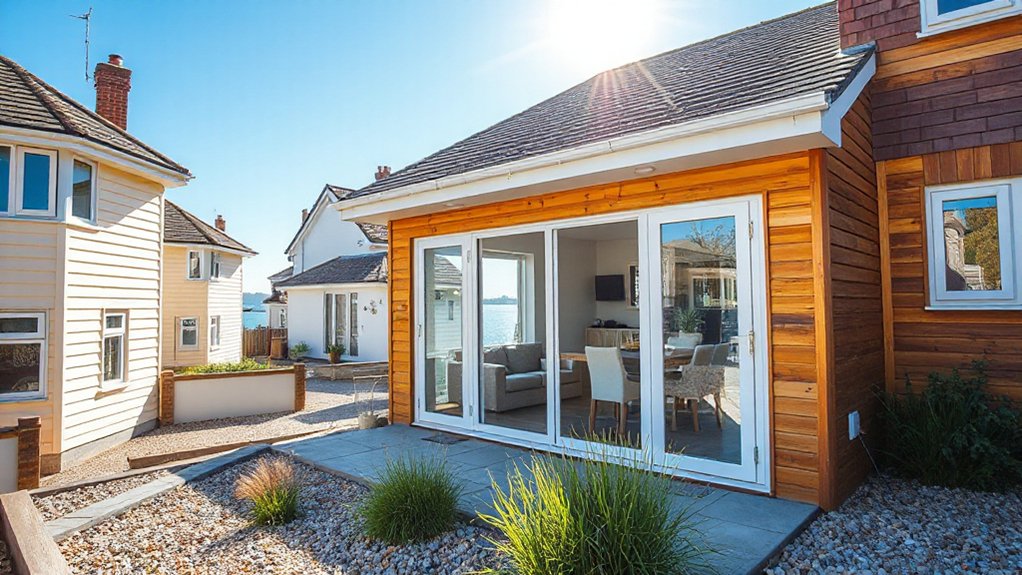
Sunrooms and Lounges for Bright, Energy-Efficient Living
You can maximize Sunlit Energy Savings by choosing high-performance glazing and strategic shading that lets in daylight while cutting heat.
Arrange Coastal Breeze Layouts to capture prevailing winds without creating glare, placing seating to invite gentle cross-ventilation.
For Year-Round Comfort Tips, prioritize insulation, radiant floors, and ceiling fans so bright sun stays pleasant in winter and cool corners stay comfy in summer.
Sunlit Energy Savings
Sunlit sunrooms and lounges turn natural light into energy savings by leveraging large windows, thermal glazing, and intentional shading. You’ll maximize daylight while minimizing heat gain through well-placed overhangs and reflective flooring.
Integrate solar panels on nearby roofs or awnings to offset power needs with clean energy, and align outlets to capture peak sun hours for charging devices.
For true efficiency, pair the space with an annual energy audit to identify gaps and opportunities. Use airtight seals around doors and operable vents to control drafts without sacrificing comfort.
Choose light, breathable furnishings that stay cool in summer and warm in winter. This approach invites inclusive, practical living where every family member contributes to a lower bill and brighter home.
Coastal Breeze Layouts
Ever considered a coastal breeze layout that blends bright interiors with energy efficiency? Your sunroom or lounge should invite you in with big windows, capped by slender frames that minimize heat gain.
Use Seaside flora patterns in fabrics and rugs to echo the coast, while selecting Coastal art as focal points to ground the space.
Prioritize thermal breaks, low-E glass, and shading that tucks away glare without darkening the room.
Choose light, breathable materials that resist humidity and reflect daylight to amplify brightness.
Position seating to capture views, keeping traffic flows open and inclusive for gatherings.
Integrate compact, energy-saving HVAC or radiant panels behind furniture.
Finish with a crisp, washable palette to maintain a welcoming, belonging-filled vibe.
Year-Round Comfort Tips
To keep sunrooms and lounges comfortable year-round, use adjustable shading, proper insulation, and smart HVAC zoning that respond to sun angles and occupancy.
In practice, choose operable blinds or shade screens that track sun paths, reducing glare and heat gain. Seal joints, install underlayment, and add lightweight yet effective insulation to walls and ceilings.
Pair this with a programmable thermostat and zones that prioritize the sunlit spaces during the day and shade them when rooms cool.
Introduce low-maintenance indoor plants to stabilize humidity and improve air quality without clutter.
Add acoustic insulation in partitions to minimize outdoor noise intrusion.
Finish with energy-efficient LEDs and quiet ceiling fans to maintain a calm, inviting lounge feel that strengthens your sense of belonging.
Designing Indoor–Outdoor Zones for Seaside Entertaining
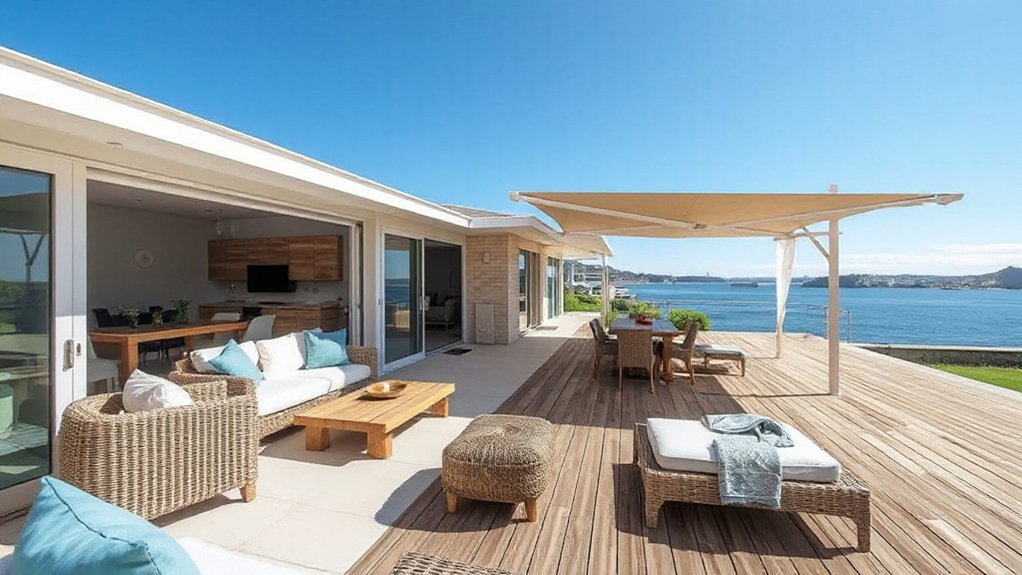
Designing seamless indoor–outdoor zones starts with a clear flow: define where guests enter, eat, relax, and gather. Then extend those functions outside with durable surfaces, weatherproof seating, and a simple passageway.
You’ll create zones that feel like one room, connected by sightlines and materials. Choose indoor decor elements that translate outdoors—rug textures, cushions, and a cohesive color palette—so guests feel at home from doorway to deck.
Plan outdoor lighting that flatters faces, highlights key areas, and reduces glare near seating and steps. Use weatherproof, easy-clean finishes for tables and benches.
Keep a simple layout: dining, lounge, and prep nook within easy reach of the kitchen. This approach invites belonging, comfort, and effortless seaside entertaining.
Compact Extensions That Feel Spacious
Compact extensions can feel surprisingly spacious when you maximize vertical space, light, and sightlines. You’ll prioritize open floorplans that connect key living zones without crowding them, so traffic flows naturally from entry to seating to dining.
Use tall windows, glass doors, and lighter wall tones to draw the eye outward, making the room feel larger inside.
Integrate smart storage that tucks away clutter—hidden drawers under benches, built-in shelving with deep alcoves, and wall niches for daily essentials.
Choose multipurpose pieces: a dining table that doubles as a work surface, a sofa with chaise storage, and pedestalled plants to free floor space.
Align finishes with coastal textures—weathered wood, linen, and soft whites—to reinforce belonging and calm coastal living.
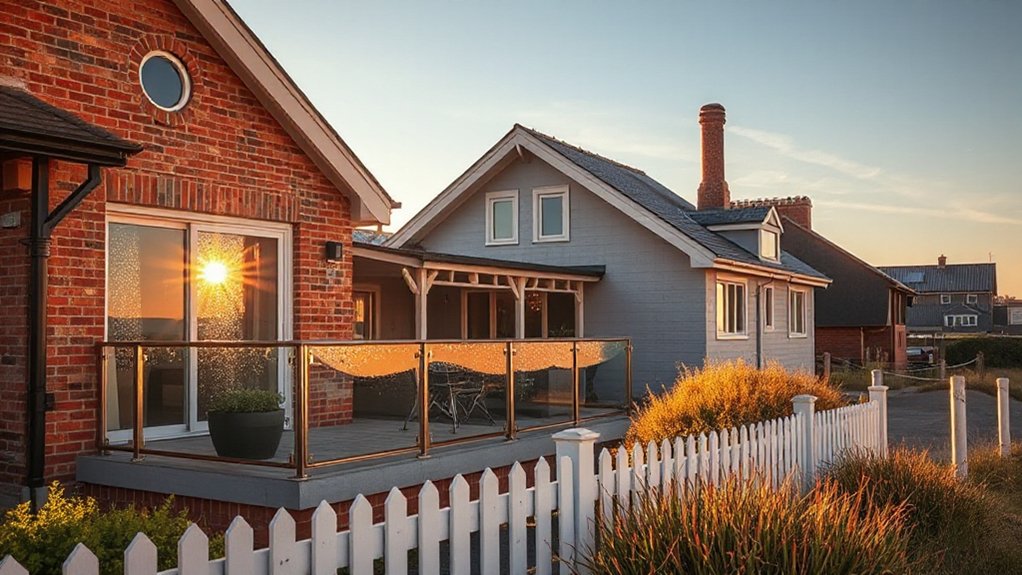
Ground-Level vs Upper-Floor Additions in Coastal Sites
Ground-level additions offer immediate accessibility and simpler integration with coastal terrain, but weigh pros like cost, maintenance, and site drainage against limits such as flood risk and privacy.
Upper-floor options deliver expansive views and better protection from splash zones, yet they come with higher costs, structural complexity, and height restrictions tied to local codes.
As you compare, consider how coastal climate influences materials, corrosion resistance, and ongoing comfort, and map these factors to your site, budget, and long-term resilience.
Ground-Level Pros and Cons
Coastal sites pose unique trade‑offs for ground-level additions: they’re often easier and cheaper to build, but exposure to flooding, waves, and high winds can threaten durability.
You’ll gain quick access to outdoor space and a seamless indoor–outdoor flow, which supports landscape integration and social gathering. Yet you’ll face moisture, debris, and potential foundation challenges that demand rigorous drainage, corrosion resistance, and elevated detailing.
Consider siting to maximize natural protection, like low-profile footprints and berms, to reduce wind loads.
Privacy solutions matter: screen walls, strategic plantings, and fencing can maintain openness while shielding your daily routines.
Budget for durable materials and ongoing maintenance, and plan for smart ventilation to avoid damp interiors.
Ground-level can excel with careful detailing and realistic safety margins.
Upper-Floor Views and Limits
Upper-floor additions in coastal contexts trade lower-level convenience for expanded views and greater wind and flood exposure. You’ll gain panoramic sightlines, but you’ll also face higher maintenance, stronger glare, and stair access that can feel vertical isolation during storms.
Plan balcony privacy thoughtfully; screen taller balustrades or planting to create intimate corners without sacrificing openness. Consider sightline management from interior rooms to balance daylight with glare control.
Roofline aesthetics matter: align new volumes with existing eaves to preserve townscape character while maximizing daylight penetration. Structural checks should confirm lateral resistance to coastal winds and flood resilience.
Choose durable materials, corrosion-resistant fasteners, and embedded drainage to minimize maintenance. Finally, integrate outdoor spaces with interior living zones so you feel connected, not segregated, from the sea’s horizon.
Coastal Climate Considerations
Even when you’re weighing ground-level versus upper-floor additions, start with climate first: coastal winds, salt spray, and flood risk should drive layout, materials, and detailing before you finalize any design moves.
You’ll choose form and placement that reduce wind exposure and capillary rise, then align your plan with Seaside architecture principles.
Ground-level extensions can shelter living spaces behind dunes or landscaping, while upper-floor options gain views without amplifying flood risk if setbacks and weatherproofing are tight.
Use corrosion-resistant metals, treated timber, and rot-resistant cladding to weather Coastal flora influences, from salt-tolerant plant screens to dune-hugging buffers.
Prioritize operable openings, flood doors, and ventilation that keep interiors comfortable.
Finalise details with a cohesive, belonging-driven mood that resonates with the local coastline community.
Mudrooms and Splash Zones: Smart Coastal Storage
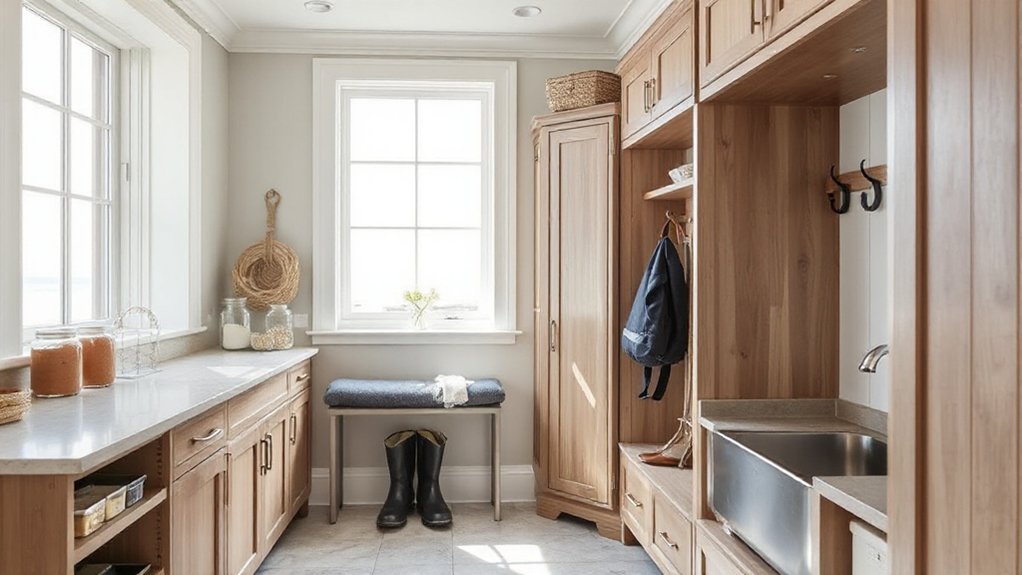
Mudrooms and splash zones aren’t afterthought spaces on a coastal home—they’re utilities hubs that keep sand, salt, and wet gear under control. You’ll optimize footprint with a dedicated bench, hooks, and cubbies so muddy boots don’t drift into living areas.
Prioritize water-resistant flooring—slip-resistant, easy to hose down—and a washable mat that traps grit at the door.
Use vertical storage to maximize tiny entryways: a wall-mounted organizer, key tray, and a tall coat rack keep essentials in sight and reachable.
For Mudroom organization, label bins by item type for quick rehoming after trips to the shore.
Splash zone durability hinges on resilient materials and good drainage; seal joints, choose watertight storage, and keep a mop handy for near-daily cleanups.
Belonging starts with welcoming, organized spaces.
Budgeting Coastal Extensions: Prioritizing Must-Haves
Start with a clear budget baseline and map it to your must-have coastal features, so you know what’s essential versus optional.
Prioritize items that save money long-term—weatherproofing, energy efficiency, and water resistance—then pencil in allowances for contingencies.
Track costs in real time and adjust as needed to keep your coastal extension practical, durable, and within reach.
Essential Budget Bumps
Planning your budget for coastal extensions starts with clear must-haves and strict priorities. You’ll classify essentials into three tiers: structural integrity, weather resilience, and trusted trades.
Prioritize waterproof membranes, anti-corrosion fittings, and high-performance insulation to weather sea salt and humidity. Assign a fixed contingency—typically 10–15%—for unforeseen coastal conditions.
When selecting finishes, lean into low-maintenance options that endure salt air and wind without frequent repairs. Budget for permits and surveys early, then lock in warranties for critical components.
Consider coastal flora-inspired landscape buffers to soften exposure while preserving views of seaside architecture. Track costs in a simple spreadsheet, updating as quotes arrive.
You’ll feel grounded knowing your spend aligns with practical, durable choices that foster belonging and long-term comfort.
Must-Have Coastal Features
To guarantee your coastal extension bites into value, start with must-have features that withstand salt air and shifting humidity: waterproof membranes, corrosion-resistant fittings, and high-performance insulation top the list, followed by durable, low-maintenance finishes and leak-proof glazing.
You’ll choose materials that resist rust and rot, then layer in ventilation that controls humidity without drafts.
Prioritize waterproof detailing around joints and balconies, plus seals that survive seasonal tides.
Plan for shielding against wind-driven sand, so seaside flora in planters thrives without compromising structure.
Align design with Coastal architecture sensibilities: clean lines, light tones, and texture for warmth.
This approach fosters belonging, inviting neighborhood walks and shared spaces.
Your addition respects the shoreline, curates views, and grows with the community.
Permits and Weather Resilience: Planning for Brighton Rainfall and Tides
Permits and weather resilience go hand in hand when you plan for Brighton’s rainfall and tidal exposure: secure the right authorizations early, and design choices align with local codes, floodplain rules, and coastal setbacks. You’ll map out permit timing with the council, stormwater requirements, and flood risk assessments, then thread these into your design brief.
Prioritize elevations, permeable surfaces, and floodable utility placement to minimize delays. Build with materials that tolerate salt spray and humidity, and plan for resilient drainage that avoids pooling near foundations.
Sourcing locally mindful of seaside flora and coastal wildlife helps you stay compliant and community-friendly. Collaborate with a coastal planner or architect who understands Brighton’s climate nuances, so your extension remains safe, legible, and welcoming to neighbors.
Quick-Start Checklist to Design a Brighton-Style Extension
Start with a have-this-ready quick-start: a Brighton-style extension should be practical from day one, so grab the essentials and lock them in early.
You’ll map a practical layout first, aligning living spaces with daylight and seaside views.
Choose Seaside landscaping elements that resist salt and wind—slatted screens, hardy natives, low-water plantings, and rain gardens to manage runoff.
Prioritize durable materials: untreated timber with marine-grade finishes, UV-stable cladding, and weatherproof doors.
Plan coastal decor that feels welcoming yet restrained: soft blues, warm woods, and tactile textiles.
Size the footprint to match your daily routines, not trends, and build in flexible zones for dining, lounging, or work.
Finally, budget for future-proofing: drainage, shading, and maintenance access so your extension ages gracefully.
Frequently Asked Questions
How Long Does a Coastal Extension Project Typically Take in Brighton?
A coastal extension in Brighton typically takes 12–20 weeks, depending on scale and approvals. You’ll plan around Seaside aesthetics and Coastal materials, coordinating permits early, sourcing durable textures, and scheduling trades to keep your project feeling like home.
What Are the Hidden Costs Beyond the Initial Quote?
Careful cost estimation reveals hidden fees like permits, site prep, and project management, so you’re not surprised later; select a reputable contractor, ask detailed breakdowns, and document allowances to feel confident, connected, and supported throughout the process.
Can I Build Above a Historic or Listed Seaside Property?
Yes, you can, but it requires consent from the historic preservation office and strict adherence to building regulations, plus potential constraints on height, materials, and visual intrusion to preserve seaside character and your sense of belonging.
How Often Should Coastal Timber Be Inspected for Maintenance?
Inspection every 12–24 months, or after severe storms; neglect invites rot. You’ll weatherproofing strategies with vigilant checks, then apply timber treatment methods promptly, maintaining joints and coatings. You belong in a resilient home, confidently facing coastal elements.
What Financing Options Suit Coastal Extension Projects?
You should consider financing options like equity release, green mortgages, and phased draws for coastal extension projects. Seek lenders offering luxury finishes and eco friendly materials, with flexible repayment, favorable terms, and clear contingency planning for unpredictable coastal weather.
Conclusion
In Brighton, your extension should handle salt, wind, and damp without drama. Choose resilient materials, seal joints well, and plan indoor–outdoor zones for year‑round living. Prioritize waterproofing, ventilation, and easy-clean surfaces. A sunroom acts like a battery—storing light and heat when the tide’s high. I once saw a compact extension feel expansive simply by tall glazing and a sunny corner; you can replicate that. Start with a must-have list, then add smarter storage and weather-ready details.