Top-rated laser levels for home improvement mix cross-line models and rotary units to fit your project scope, from hanging cabinets to tile layouts and ceiling alignments. Look for accuracy within a few tenths of an inch, sufficient range for room height, and bright, adjustable beams for indoor visibility. Consider durability, tripod compatibility, and easy calibration. Decide between cross-line for quick, single-plane tasks or rotary for 360° guidance in larger spaces. If you want more precision, you’ll want to keep going.
Why a Laser Level Transforms DIY Projects

A laser level dramatically improves accuracy and efficiency in DIY projects by providing a single, visible reference line across a room. You’ll see how laser level accuracy sharpens alignment, reduces guesswork, and minimizes mistakes that derail schedules.
In project planning, this tool forces you to quantify wall placements, cabinet heights, and tile layouts before cutting or drilling, saving rework later. You’ll move from vague intuition to precise measurements, which accelerates decision-making and accountability.
The device streamlines multi-step tasks, letting you sequence operations with confidence and document progress for stakeholders or future renovations. Be mindful of calibration needs, surface reflectivity, and potential line drift.
When used correctly, it becomes an essential control point for disciplined, high-quality results.
Cross-Line vs. Rotary: Pick the Right Tool for Your Projects
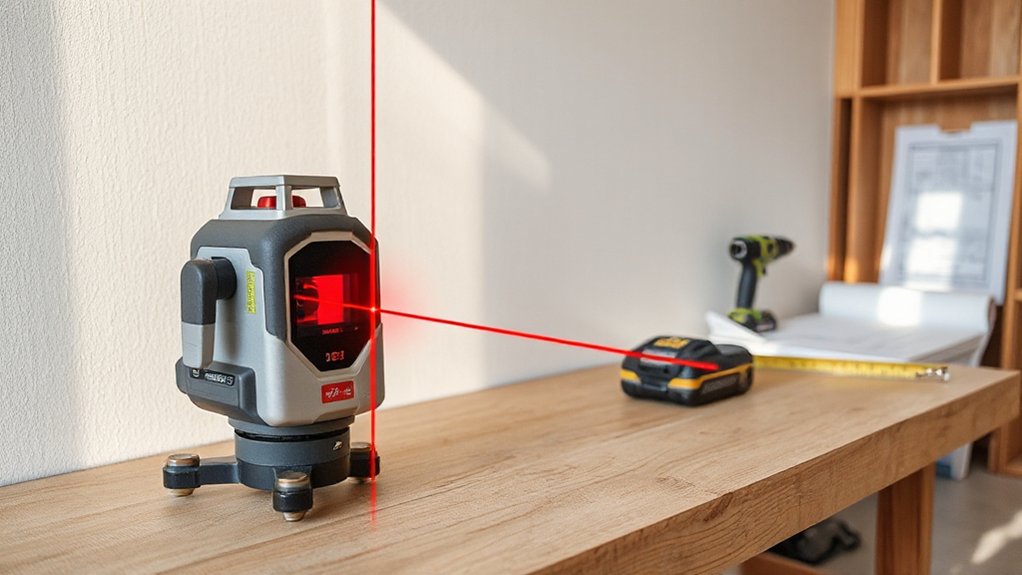
Cross-line and rotary laser levels each have strengths that suit different tasks, so the choice hinges on project scope and accuracy needs. If you’re aligning cabinets, tiles, or wall panels on a single plane, a cross-line unit offers quick, consistent reference lines with minimal setup. It excels in tasks demanding speed and directional guidance, delivering solid precision accuracy for straightforward layouts.
However, when you face large rooms, multi-plane layouts, or vertical alignment across distances, a rotary laser’s 360-degree guide engrains true geometry and repeatable marks, increasing tool versatility. Consider line visibility, working height, and battery life, then weigh cost against durability.
How to Choose: Key Specs (Accuracy, Range, Visibility) Before You Buy
When you’re choosing a laser level, start by weighing Accuracy Essentials to guarantee your lines align consistently across tasks.
Next, assess Range Considerations so you don’t overbuy a model that won’t reach tall ceilings or distant work surfaces.
Finally, consider Visibility Factors to pick readings you can see clearly in your workspace, in all lighting conditions.
Accuracy Essentials
Accuracy essentials are the foundation of reliable laser leveling, so you should scrutinize key specs—accuracy, range, and visibility—before you buy.
You’ll focus on measurement accuracy as the core test, verifying tolerance claims against real-world setups. Examine how the device performs across its stated range, noting any drift or halo that degrades alignment at distance.
Visibility matters too: neon-green lines in bright rooms demand stronger brightness with stable projection. Demand precise calibration techniques from the manufacturer, and assess whether the unit supports easy user calibration and traceable results.
Challenge specs with independent tests if possible. Prefer models offering documented calibration procedures, repeatable results, and warranty-backed tolerances.
Precision selection reduces rework, saves time, and delivers dependable layout outcomes for serious projects.
Range Considerations
Range is a pivotal factor because it defines how far a laser line remains usable without re-positioning or additional equipment. When you evaluate range, distinguish nominal range from practical range—typical conditions, surface reflectivity, and ambient light affect performance.
Consider distance measurement requirements: do you need full-room coverage or long corridors? Higher-end models offer extended ranges with multiple beams or rotating heads, but you pay in battery life and maintenance. Check accuracy over distance and how line visibility degrades with distance.
Assess warranty, calibration intervals, and ease of field adjustment. Don’t overlook laser safety: verify class ratings, eye protection compatibility, and safe operating procedures for extended use.
A solid range metric supports efficient workflows and minimizes interruptions to your build schedule.
Visibility Factors
Visibility is the linchpin of practical use, so scrutinize how well a laser line holds up under real-world lighting and surface conditions. When evaluating visibility factors, check both laser visibility and beam brightness across typical work environments.
A device may excel in a dim shop yet vanish in bright daylight; test at varying ambient levels and with common materials (painted walls, concrete, glossy tile). Look for uniform line consistency, minimal drift, and reliable horizontal and vertical alignment without excessive warm-up.
Consider target contrast and the ability to maintain visibility at extended distances. Be wary of weak brightness in low-contrast surfaces.
Prioritize models offering adjustable brightness, calibrated accuracy, and documented performance specs to guarantee you can trust readings when the project demands precision and speed.
Quick-Start Setup: Read the Manual in Minutes
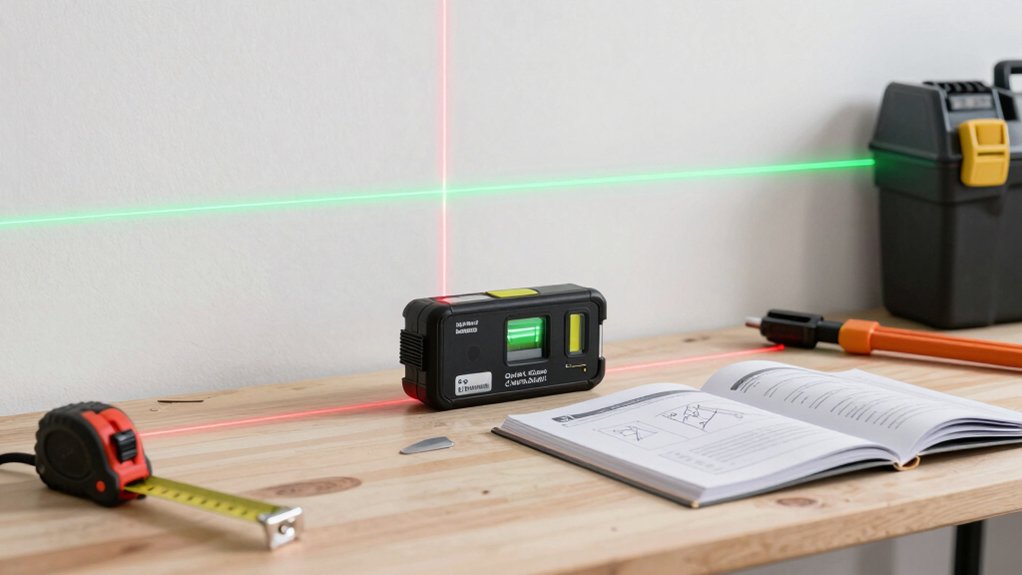
You’ll skim the manual to confirm the quick-start steps and map out your first setup in minutes. A quick manual scan should highlight essential profiles, mounting tips, and initial alignment checks to save setup time without sacrificing accuracy.
Use this early read to verify that you’re following manufacturer guidance and not skipping critical safety or calibration steps.
Quick Manual Scan
A quick manual scan can save time when you’re starting a project, but it should be focused and purposeful rather than a blanket read. You’ll skim for critical specs, setup prerequisites, and safety notes that directly affect your immediate tasks.
Prioritize sections on laser level calibration procedures, nuisance errors, and return-to-self checks that confirm accuracy after transport or bumps. Note any guarantees about warranty triggers tied to calibration routines and whether a formal pro calibration is recommended periodically.
Assess battery life management guidance: how to maximize run time, indicator reliability, and safe replacement intervals. Be skeptical of marketing buzz and verify claimed ranges against real tests.
This scan should arm you with practical, actionable steps to begin work with confidence, not chase unnecessary features.
Setup Time Saver
Getting up to speed quickly with a laser level means you can start work without wading through the full manual. A true Setup Time Saver focuses on essential steps: quick power-up, accurate initial level, and fast reference setup. Follow a concise checklist rather than broad explanations to reduce downtime.
Validate horizontal and vertical alignment with one-person operation, and rely on built-in self-calibration features when available, resisting unnecessary recalibration. Prioritize laser level calibration routines that are truly time-efficient, avoiding overcomplication.
Consider battery life tips that prevent mid-project interruptions—use fresh batteries, avoid extreme temperatures, and switch off when idle. Document baseline readings for future tasks, and reuse common mounting positions to streamline repeated jobs.
This approach balances speed, accuracy, and durability without sacrificing reliability.
Indoor Lighting Tips to See Bright Laser Lines
Indoor lighting is essential for clearly seeing laser lines without distortion, so position lamps and ceiling fixtures to minimize glare and shadows that wash out the reference marks.
You’ll optimize contrast by controlling ambient brightness, using a dimmable layer to prevent hot spots that drown laser line brightness.
Favor cool, neutral tones on walls and ceilings to reduce color bleed that masks alignment cues.
Avoid direct glare by angling fixtures away from the beam path and employing diffusers where possible.
Calibrate room lighting to create a consistent field; inconsistent brightness ruins reference accuracy.
Use task lighting sparingly near the target area, reserving main illumination for peripheral checks.
In all cases, maintain consistent Indoor lighting conditions to preserve Laser line brightness and measurement fidelity.
Attachments You’ll Want: Tripods, Mounts, and Receivers
Start with tripod stability essentials to make certain your laser level stays level and accurate on uneven surfaces. Then consider receiver compatibility tips to confirm you can read the laser clearly at the distances you work and with your existing hardware.
This quick check helps you choose mounts and receivers that won’t introduce flex or lag, keeping your measurements reliable.
Tripod Stability Essentials
Tripod stability is essential for accurate laser leveling, and choosing the right attachments makes a noticeable difference. You’ll tighten control by selecting solid tripods and correct mounts, then verify vertical alignment before operation.
Precision rests on stable contact points; leveling feet should distribute weight evenly and resist sinking on soft surfaces. Ensure screw threads are clean, and use locking knobs to prevent drift during use.
Avoid overextension; extend only to the minimum height that preserves plumb and line-of-sight integrity. Test tolerance by applying light lateral pressure and watching for movement in the laser plane.
A robust setup reduces rework, increases consistency, and enhances efficiency on site. Prioritize sturdy feet, firm mounts, and secure receivers to maintain tripod stability throughout accuracy-critical tasks.
Receiver Compatibility Tips
Receiver compatibility matters because even a high-quality laser level loses accuracy when paired with the wrong receiver. To maximize performance, verify receiver compatibility with your model and accessories before buying. Poor matching leads to slow readings, missed plumb lines, and wasted time on-site.
Focus on calibration procedures and consistent contact between device and receiver to ensure laser signals translate into exact measurements. Prioritize receivers that support the level’s modulation, range, and battery type, and confirm compatibility with future upgrades.
Regular laser receiver calibration keeps accuracy intact under load, temperature shifts, and vibration. Choose robust mounting options that maintain alignment, and store calibrated presets for recurrent jobs.
- Verify model-to-receiver compatibility
- Confirm modulation and range support
- Check battery and power standards
- Ensure stable mounting interfaces
- Schedule regular laser receiver calibration
Budget Ranges and Value: What You Get at Each Tier
Budget ranges for laser levels vary widely, but you generally get a predictable spread: entry-level kits focus on basic visibility and durability, mid-range models add better self-leveling, longer range, and easier calibration, while premium options offer higher accuracy, multi-line or rotating beams, environmental sealing, and smart features.
You evaluate value for money by weighing build quality, warranty, and calibration ease against price. Entry kits deliver reliability for simple tasks but lag on consistency and range, making budget considerations vital if you need repeatable results.
Mid-range devices improve setup speed and accuracy with better sensors and interfaces, justifying cost for ongoing projects.
Premium tiers deliver top performance, rugged seals, and advanced modes, yet require careful return on investment against your needs.
Best Laser Levels for Hanging Shelves and Cabinets
If you’re hanging shelves or cabinets, a laser level that delivers both horizontal and vertical references with consistent accuracy is essential for a flush, plumb install. You want precision accuracy and dependable battery life to avoid rechecks mid-work. Look for bright, self-leveling beams, durable housings, and intuitive controls that don’t slow progress.
- Measures in multiple planes with quick reference marks
- Long-lasting battery life under heavy use
- Clear visibility in bright environments
- Rugged build for classroom, shop, and jobsite docking
- Accurate crosshair alignment for exact spacing
In practice, evaluate alcance, calibration stability, and ease of mounting. Favor models that maintain alignment after bumps and deliver repeatable results. Avoid gimmicks; demand proven performance for cabinetry and shelving installs.
Best Laser Levels for Tile Work and Wall Alignment
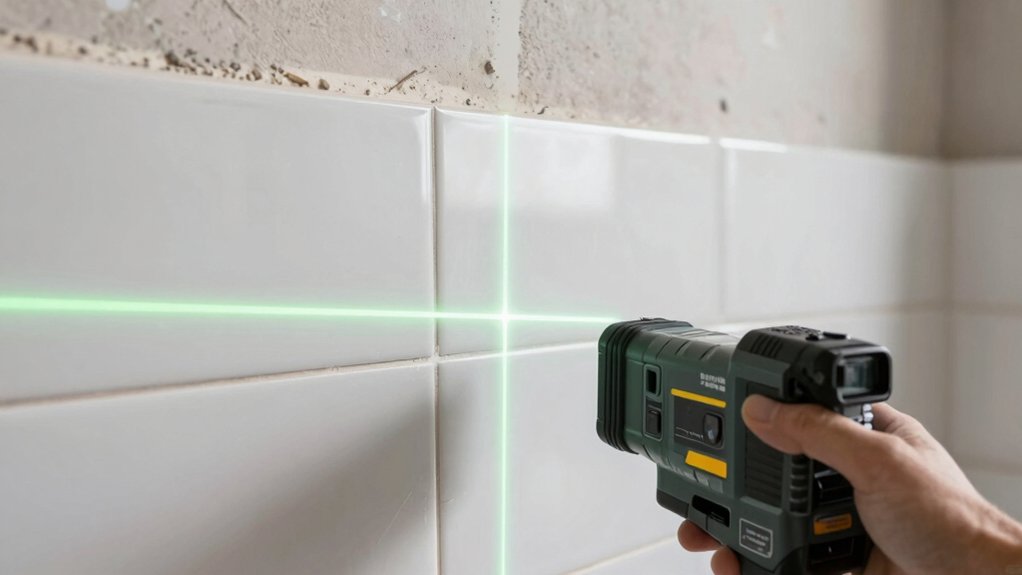
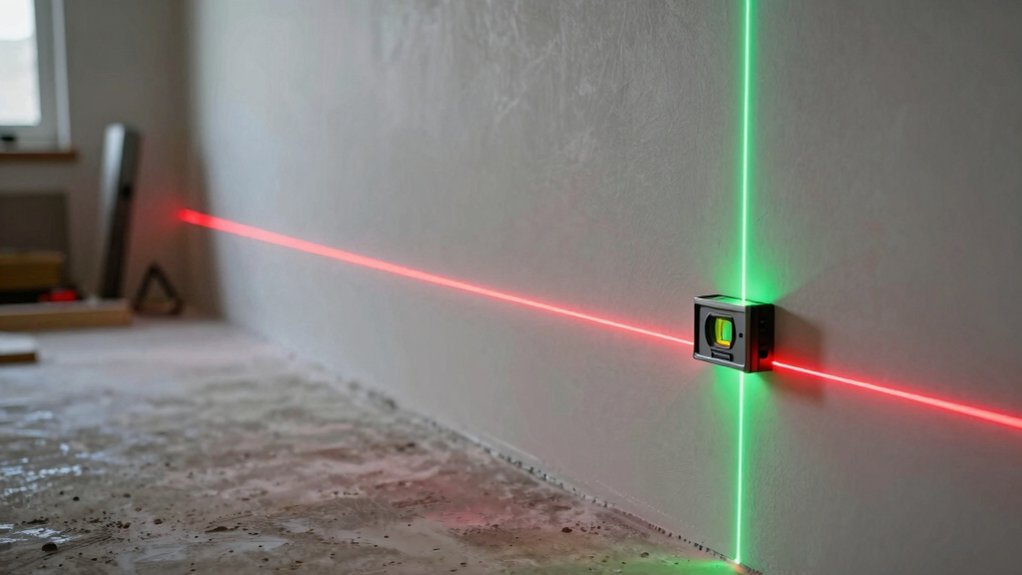
For tile work and wall alignment, a laser level that delivers precise horizontal and vertical references with stable calibration is essential to guarantee straight grout lines, level shelves, and plumb walls. You’ll prioritize measurement accuracy and consistent performance in challenging rooms, where glare and uneven surfaces test robustness.
Look for models offering clear crosshair lines, lockable pendulums, and quick self-leveling to minimize rework. Critical features include durable housings, IP ratings for dust and water exposure, and rechargeable batteries that hold power through long sessions.
Evaluate tool durability under real-site stress, including drops and vibrations, as well as accessory compatibility like magnetic mounts and rotation mounts. Some units pair external monitors for enhanced visibility, but beware trade-offs with weight and balance when overhead tiling.
Best Laser Levels for Ceiling and Countertop Installations
When you’re selecting levels for ceiling work, prioritize ceiling alignment accuracy to guarantee overhead lines and fixtures sit true to plumb.
For countertop installations, apply solid leveling tips to keep surfaces flat and evenly supported, avoiding subtle slopes that become noticeable after finishing.
In bright environments, assess beam visibility under true working conditions, since clear visibility can determine accuracy and reduce rework.
Ceiling Alignment Accuracy
Ceiling alignment accuracy hinges on choosing a laser level that remains plumb and level over long runs, with clear horizontal and vertical references for both ceiling lines and attached fixtures. You demand consistent beam accuracy to avoid back-and-forth recalibration, ensuring tight ceiling precision across spans.
Evaluate how well the device handles beam drift, line visibility, and stability on uneven ceilings, since subtle variances magnify at height. Critical performance factors include self-leveling speed, tilt resistance, and repeatable reference points that translate into predictable fixture placement.
Reliability matters more than brief readings, so prioritize build quality and warranty. A tool that fails mid-installation undermines confidence and wastes time.
- Beam stability under load
- Long-span reference consistency
- Self-leveling reliability
- Tilt and vibration resistance
- Repeatable fixture alignment
Countertop Leveling Tips
Countertop leveling demands the same reliability as ceiling work, but with the added constraint of workspace portability and longer runs along cabinet faces or island edges. To succeed, you’ll rely on laser alignment with tight tolerances and minimal drift over extended distances.
Prioritize instruments that maintain steady line tools without frequent recalibration, and verify mounting stability on portable stands for edge-to-edge consistency. When selecting devices, weigh power sources and battery life against continuous use in a workshop environment; a unit that drains quickly undermines precision during long setups.
In practice, ensure Laser safety protocols are followed, including eye protection and proper enclosure of beams in active work zones. Confirm power sources are compatible with your setup, and plan for uninterrupted operation during critical installations.
Beam Visibility In Brightness
Beam visibility under bright site conditions can make or break installation accuracy, especially for ceilings and countertops where long lines and precise cross-checks matter. You evaluate beam contrast and brightness enhancement to judge reliability.
In practical terms, a laser that cuts through glare saves minutes and reduces error, delivering true alignment without guesswork. Look for models that maintain legibility at distance, resist washout from ambient light, and offer consistent crosshair clarity across orientations.
- beam contrast under harsh lighting
- brightness enhancement features in control menus
- improved line definition at distance
- auto-calibration for repeatable results
- outdoor-ready visibility options and off-axis accuracy
Outdoor Use: Visibility and Ruggedness for Real-World Sites
Outdoor use tests reveal how well laser levels remain visible and endure real-site conditions, where sunlight, dust, and weather complicate accurate readings. You evaluate brightness consistency, beam sharpness, and target contrast under bright conditions. Then push the unit through wind, rain, and temperature swings.
Durability concerns arise with housing seals, battery life, and tripod compatibility, all influencing uptime on exterior projects. Weather resistance matters as you assess ingress protection, lens coatings, and shock tolerance when dropped or bumped on uneven terrain.
You’ll notice that ruggedized models often trade compactness for reinforced housings and programmable modes that compensate for ambient glare. In real work, the most capable devices offer predictable performance, minimal drift, and reliable calibration after exposure to sun, dust, and seasonal humidity.
Maintenance Tips to Extend Laser Level Life
Regular maintenance is essential to keep laser levels accurate and reliable across projects. You’ll protect precision by addressing core routines, not gimmicks, and you’ll implement disciplined cycles for Laser maintenance and calibration procedures.
Prioritize clean storage, gentle handling, and timely part checks to prevent drift and component wear. Verify battery integrity and seal integrity after each job, and test once per week when in active use. Document every calibration and fault, then compare results across sessions to detect subtle shifts.
- Clean optics with approved microfiber and solvent per spec
- Check bubble and pendulum alignment for off-axis drift
- Inspect housing seals for moisture ingress
- Calibrate with certified targets on a level surface
- Log calibration procedures and outcomes for trend analysis
Common Mistakes DIYers Make and How to Avoid Them
Common mistakes DIYers make with laser levels often boil down to skipped setup steps, improper maintenance, and assumptions about self-calibration.
You drive projects with precision only when you verify setup, lock mounts, and check reference planes before you cut. Measurement mistakes happen when you ignore line accuracy, misread rotational angles, or rush alignment to finish faster.
Don’t skip battery checks or stray from manufacturer guidelines; a dying or uneven unit sabotages entire sessions. Protect accuracy by dedicated tool storage that keeps calibration-related components together and prevents impacts, dust, and moisture from creeping in.
Develop a disciplined workflow: plan, level, mark, verify, and document results. Avoid shortcuts, and you’ll preserve reliability, minimize rework, and maximize time-on-task efficiency.
How to Calibrate Your Laser Level at Home
Calibrating a laser level at home is a practical, high-precision task that you should approach methodically. You demand accuracy, so follow a strict calibration process to ensure laser alignment is flawless before any project.
- Verify surface stability and level anchor points
- Mark reference lines with a calibrated, known-good reference
- Power on, allow warm-up, and test at multiple distances
- Adjust screws or knobs with deliberate, equal increments
- Recheck measurements and document results for future use
The procedure should remain objective and critical: question any drift, log deviations, and confirm repeatability. Don’t rush—consistency trumps speed. If repeatability falters, revisit mounting, batteries, and environmental interference.
A precise calibration process yields reliable plumb, level, and alignment, accelerating your work and reducing rework. Keep logs, and perform periodic recalibration to maintain laser alignment over time.
Quick-Checklist for Solo Projects: Ready, Set, Go
Ready to tackle solo projects efficiently? You’ll follow a tight, practical checklist that keeps momentum without sacrificing precision. Begin with a quick site assessment: confirm surface stability, lighting, and access to power.
Set up your laser level so the beam aligns with your target reference line, then verify measurement accuracy with a trusted secondary measure at two or more points. Lock all adjustments firmly to prevent drift during work.
Prepare essential PPE and a clear workspace to honor safety precautions; keep cords and clutter away from the beam path. Plan your steps in sequence, checking each result against the baseline before advancing.
Maintain discipline about documenting deviations, so you retain control, avoid rework, and deliver predictable, professional results.
Top-Rated Models Comparison: At-a-Glance Buyer’s Guide
You’ll get straight to the point with a clear, at-a-glance comparison of top-rated laser levels. This guide prioritizes practical performance, not hype, focusing on build quality, accuracy, and value.
Expect concise verdicts on core features, laser visibility, and ease of use. Weigh the impact of battery life on field work and assess each model’s laser level accessories compatibility before you commit.
Below, you’ll find a quick, decisive snapshot to power your purchasing choice.
- Accuracy range and calibration ease
- Visibility under bright conditions and mounting options
- Battery life and recharge time
- Laser level accessories compatibility and accessory quality
- Durability, warranty, and service support
Conclusion
You’ve learned the lay of laser-level land, where precision meets practicality. This quick, critical close-up highlights how consistency, clarity, and cost shape choices. Consider calibration, range, and visibility, then weigh cross-line versus rotary options for your space. Do demo, document results, and decide decisively. Don’t skip safety, setup speed, or battery life. Buy smart, budget wisely, and benchmark basics before blasting ahead. Sound, solid, simmering concise—savvy selections spark spectacular, snag-free sewing of spaces.