You can make your home look newer fast by swapping dated cabinet pulls, door levers, and switch plates for one cohesive finish, then tightening details like fresh caulk and straightened doors. Paint trim in satin or semi-gloss for crisp edges, or add one accent wall that anchors furniture. Upgrade lighting with warm LEDs (2700–3000K), under-cabinet strips, and dimmers. Build a tight entry drop zone with a bench and hooks. Next, you’ll see the best weekend order.
Start With the Highest-Impact, Low-Cost Updates
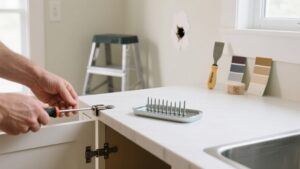
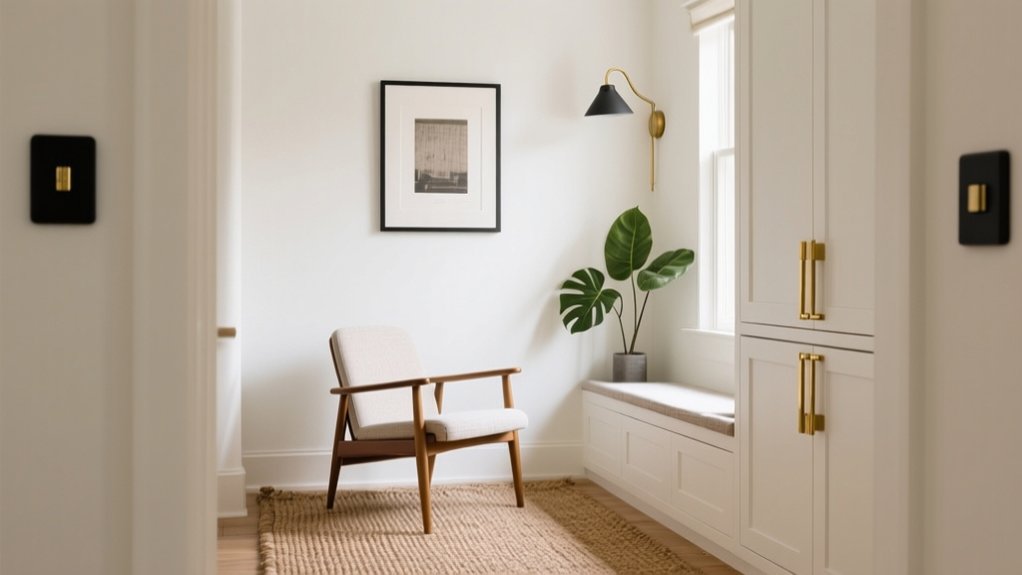
If you want the biggest visual payoff without blowing your budget, start with updates that change what you see and touch every day. Swap dated cabinet pulls, door levers, and bath accessories for cohesive finishes, and replace yellowed switch plates with fresh, oversized ones.
Upgrade lighting where it matters: a simple flush mount in halls, brighter vanity bulbs, or under-cabinet LED strips for task areas.
Refresh your entry with a new doormat, hooks, and a slim shoe cabinet to reduce clutter instantly.
Tighten details: recaulk sinks and tubs, replace warped outlet covers, and adjust misaligned doors.
These moves are Budget friendly, and most are weekend-ready DIY tips requiring only a screwdriver, level, and patience.
Paint an Accent Wall (or Just the Trim)
Pick the wall that naturally draws your eye—behind the bed, the sofa, or the fireplace—so the accent looks intentional, not random.
If you’d rather keep it subtle, paint just the trim in a contrasting sheen or shade to sharpen edges and highlight architecture.
You’ll get crisp, professional lines by cleaning, patching, sanding, taping carefully, and cutting in with a quality angled brush before you roll.
Choose The Right Wall
Before you crack open a paint can, decide which wall (or trim line) will actually earn the spotlight by shaping how the room feels and functions. Pick the surface your eyes land on first when you enter, or the one that anchors key furniture like the bed, sofa, or dining table.
Use color psychology: cooler tones recede and calm, while warmer tones advance and energize, so match the effect to the room’s purpose.
Avoid walls chopped up by too many doors or tiny windows; broken planes dilute impact.
Check wall texture in daylight and lamplight—heavy orange peel, patchwork repairs, or raking light can telegraph flaws. Choose a smooth, uninterrupted plane to maximize depth and polish.
Trim Painting For Contrast
Once you’ve chosen the wall that deserves attention, use trim paint to sharpen the look and make the color feel intentional rather than random. Pick a finish that contrasts on purpose: satin or semi-gloss on trim reflects light and frames matte wall paint cleanly.
For color coordination, pull a shade from nearby elements—floor tones, upholstery, or art—then deepen or lighten it by one to two steps for the trim. If you don’t want a full accent wall, paint only the trim to redefine the room’s edges with minimal effort.
Match the approach to your trim styles: chunky baseboards can handle darker color; delicate casing reads best in lighter, crisp neutrals. Keep hardware and switch plates consistent so the contrast looks designed.
Prep For Clean Lines
Where do crisp edges actually come from when you paint an accent wall or just the trim? They’re built before the first stroke, with control and protection. Start by locking in furniture arrangement so you can cut in without bumping corners, and confirm color coordination under your actual lighting.
- Patch dings, sand smooth, then vacuum dust from baseboards and corners.
- Degloss glossy trim, then wipe with a damp cloth and let it dry.
- Caulk gaps, feather excess, and spot-prime repairs to prevent flashing.
- Use quality painter’s tape, burnish edges, and remove it while paint’s tacky.
- Cut in with an angled sash brush, then roll/coat in one direction.
You’ll get cleaner lines, fewer touch-ups, and a finish that looks professionally planned.
Upgrade Lighting Fixtures and Bulb Temperature
Upgrade your lighting by swapping in one statement fixture—like a pendant or chandelier—that fits the room’s scale and ceiling height.
Layer your lighting with ambient for overall glow, task lighting where you work, and accent lights to highlight art, shelving, or textures.
Then set the mood by choosing bulb temperature: warm (2700–3000K) for cozy living spaces, neutral (3500K) for balanced light, and cool (4000–5000K) for kitchens, baths, and utility areas.
Swap Statement Light Fixtures
Ever notice how a room can feel dated even after you’ve painted and decluttered? Swap in statement fixtures and you’ll reset the entire mood fast. Good lighting design treats the fixture as functional hardware and visual focal point, so choose a scale that matches the room and table height.
Then dial in bulb temperature so finishes look intentional, not sickly or harsh. Use this quick checklist before you buy and install:
- Measure ceiling height and hanging clearance
- Match finish to existing metals, don’t mix randomly
- Pick an appropriate lumen output for the space
- Choose 2700K–3000K for warm, livable light
- Add a dimmer and confirm LED compatibility
You’ll get a cleaner ceiling line, better color rendering, and a more current look instantly.
Layer Ambient Task Accent
Even if you install a beautiful statement fixture, the room can still feel flat if you rely on a single light source. Build lighting ambiance by layering three zones: ambient, task, and accent.
Start with overhead or recessed lights on a dimmer for even coverage. Then add task lighting where you work—under-cabinet strips in kitchens, a swing-arm sconce by the bed, or a focused desk lamp.
Finish with accent light to shape the space: picture lights, uplights behind plants, or LED tape in shelving. Keep sightlines clean by hiding drivers and using slim profiles.
Tie it together with matching finishes so decorative accents look intentional, not scattered. Use separate switches.
Choose Warm Or Cool Bulbs
Because bulb temperature changes how every finish reads, choose warm or cool light before you swap fixtures or add more lamps. Warm (2700–3000K) flatters wood tones and makes rooms feel relaxed; cool (3500–5000K) sharpens contrast for kitchens, baths, and work zones. Keep temperatures consistent within a sightline to avoid a patchy lighting ambiance.
When you upgrade fixtures, match beam spread to the task and pick LEDs with high CRI (90+) so paint and textiles stay true. For bulb longevity, choose quality drivers, adequate ventilation, and dimmers rated for LEDs.
- 2700K: cozy bedrooms, living rooms
- 3000K: warm-but-clean dining, halls
- 3500K: neutral offices, kitchens
- 4000–5000K: crisp baths, garages
One Kelvin per room: intentional, cohesive look
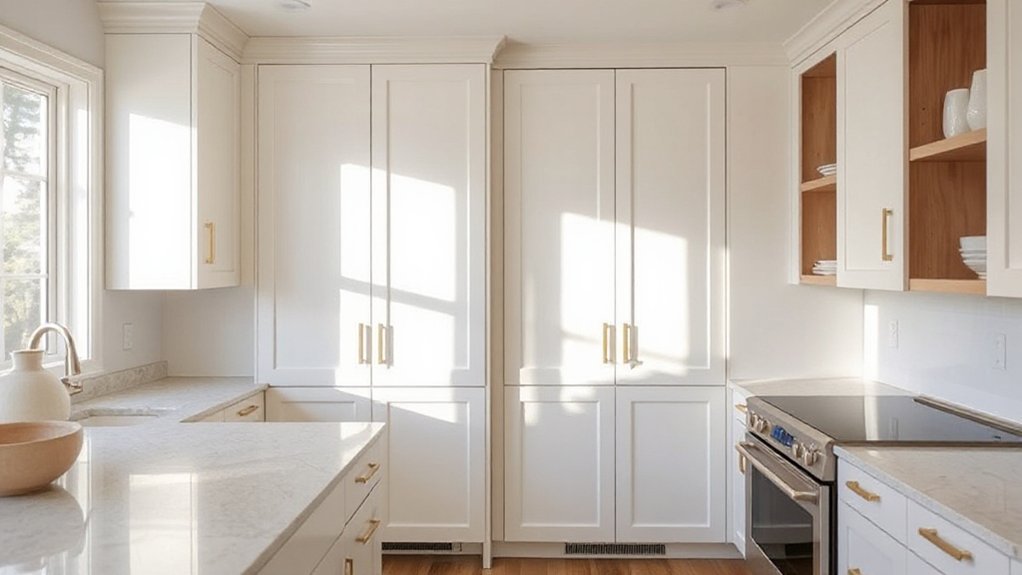
Swap Cabinet Pulls and Door Handles
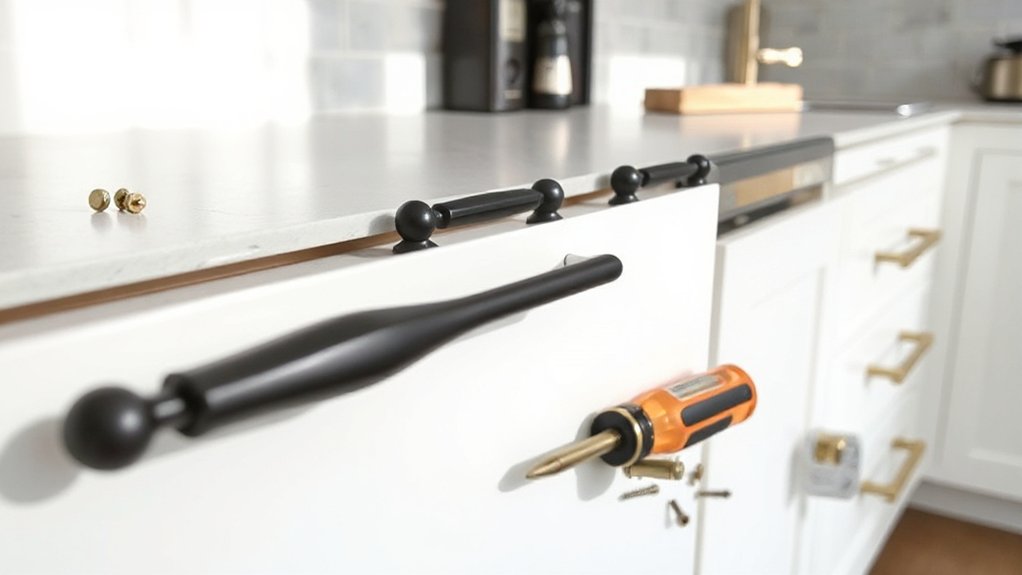
If your cabinets feel dated but the boxes and doors still look solid, swapping cabinet pulls and door handles delivers a fast, high-impact upgrade with minimal cost and mess.
Start by counting every door and drawer, then buy one extra pull for mistakes. Match the new finish to your lighting and appliances for Modern updates, or choose unlacquered brass, bin pulls, or glass knobs for Vintage charm.
Measure hole-to-hole spacing on existing pulls; don’t assume they’re standard. If you’re changing sizes, use a drilling template and fill old holes with wood filler before you paint or touch up.
Install with a hand screwdriver to avoid stripping, and align everything with painter’s tape as a guide.
Clean hardware with mild soap, not abrasives.
Replace a Kitchen Faucet in Under an Hour
Pick a faucet that matches your sink’s hole count and reach, and confirm the supply-line size so you won’t lose time on adapters.
Stage what you’ll need—basin wrench, adjustable wrench, plumber’s tape, bucket, towel, and the new lines—then shut off the valves and clear out the cabinet.
Swap the old unit, snug the fittings, turn water back on, and test both hot and cold for steady flow and zero leaks.
Choose The Right Faucet
When your kitchen feels dated, swapping the faucet delivers a fast upgrade you’ll notice every day, and you can usually finish the job in under an hour.
Choose a model that matches your sink’s hole count and reach, so the stream lands near the drain without splashing.
Favor durable finishes that resist fingerprints and coordinate with nearby Bathroom fixtures for a cohesive look.
- Match hole configuration (single, 3-hole, or with deck plate)
- Pick spout height/reach for your sink depth and basin size
- Choose a valve type you’ll like daily (single-handle, touch, pull-down)
- Look for WaterSense flow rates to support Water conservation
- Verify spray modes, swivel range, and warranty length
Gather Tools And Supplies
Before you crawl under the sink, gather every tool and supply you’ll need so the swap stays on a one-hour track. Set a towel or shallow pan to catch drips, plus a headlamp for visibility. Bring an adjustable wrench, basin wrench, channel-lock pliers, and a screwdriver that matches your mounting hardware. Keep plumber’s tape, a small wire brush, and silicone caulk (only if your faucet requires it) within reach.
For tool safety, wear nitrile gloves and eye protection, and unplug any nearby disposals or hot-water devices you might bump. Practice supply organization: stage parts in a tray, group fasteners in a cup, and keep the manual open to the parts diagram. Add a marker and zip bag for labeling removed hardware.
Install And Test Quickly
With your tools staged and parts laid out, start the install by dry-fitting the new faucet and verifying the gasket or putty plate seats flat on the sink deck. Thread the shank(s) through, center the body, then snug the mounting hardware by hand before a final quarter-turn with a basin wrench—no more.
- Tighten the mounting nut evenly so the faucet doesn’t twist.
- Connect supply lines finger-tight, then wrench-tighten 1/4 turn.
- Reattach the sprayer/weight and confirm smooth hose travel.
- Open shutoff valves slowly and purge air at full cold, then hot.
- Inspect every joint with a dry paper towel for fast testing.
For quick installation, keep lines untangled and avoid cross-threading. You’ll finish under an hour and prevent call-backs.
Add a Backsplash for Instant Kitchen Style
Even if you don’t touch the cabinets or countertops, a new backsplash can immediately sharpen your kitchen’s look and make the whole space feel more finished. Choose a tile backsplash that matches your room’s undertones: warm whites with brass, cool grays with chrome, or earthy neutrals with wood.
Measure the run, add 10% for cuts, and plan your layout so full tiles land at focal points like behind the range.
Prep matters: degrease walls, patch dips, and mark a level reference line. Use the right thinset for your tile, keep grout joints consistent with spacers, and wipe haze early. Seal grout if required.
This kitchen upgrade delivers durability, easier cleanup, and a high-end finish fast.
Reface Cabinets: New Doors, Same Boxes
A crisp backsplash can carry a kitchen far, but tired cabinet fronts still date the room—refacing fixes that fast by keeping the existing boxes and swapping in new doors, drawer fronts, and matching veneer on exposed frames. You’ll get a near-new look with less mess and downtime than a full replacement.
Start by confirming boxes are square and solid, then choose a door style and durable finish that suits daily use. Upgrade cabinet hardware at the same time so pulls align with the new proportions and feel consistent.
- Measure openings and note hinge type (overlay or inset)
- Replace hinges, slides, and bumpers for smoother action
- Add a pull-out tray or divider to improve cabinet organization
- Specify edge-banding and veneer grain direction for a seamless match
- Inspect reveal gaps so doors hang even and true
Try Peel-and-Stick Flooring (Prep + Durability)
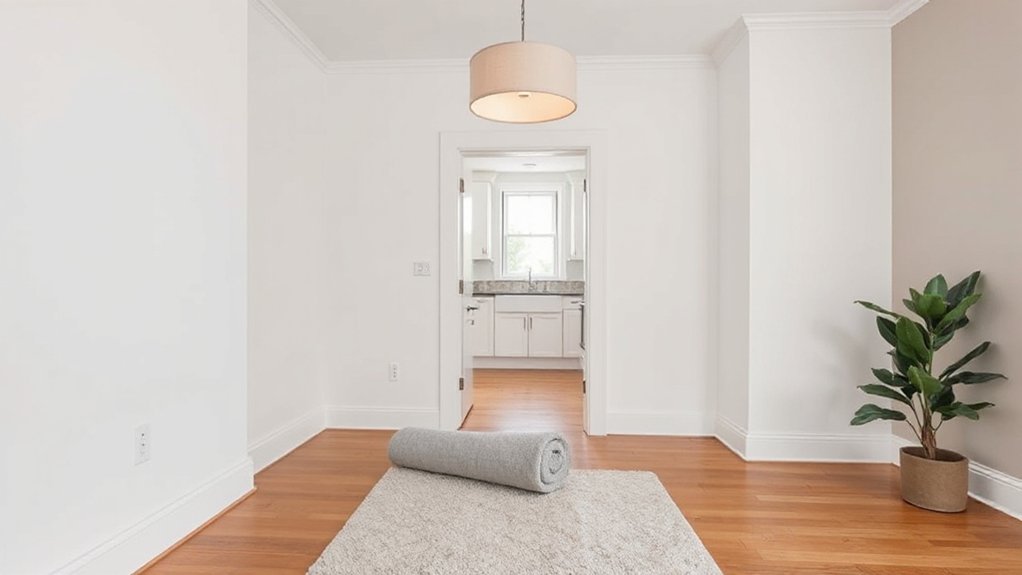
Before you lay peel-and-stick flooring, you’ve got to prep the surface: remove baseboards, scrape off residue, fix low spots, and verify the subfloor is clean, dry, flat, and fully bonded.
For durability, stagger seams, roll the tiles firmly, and keep heavy traffic and wet mopping off the floor for the first 24–48 hours so the adhesive can set.
After that, you’ll extend its life by using felt pads, doormats, and gentle cleaners, and by wiping up spills fast to prevent edge lift.
Surface Prep Checklist
Where peel-and-stick flooring succeeds—or fails—comes down to surface prep, so start with a quick checklist: confirm the subfloor is flat (no ridges, soft spots, or lifted seams), clean (vacuum, then degrease so no dust or residue remains), and completely dry. Then repair cracks and holes with a patching compound and sand smooth.
For reliable surface preparation, also control temperature and layout before you expose adhesive. Use this quick run-through:
- Remove baseboards, then label and save fasteners.
- Check for moisture with a plastic-sheet test overnight.
- Spot-scrape old glue, then feather edges with 120-grit.
- Plan seams and cuts; dry-fit tiles from a centerline.
- If your manufacturer calls for it, do primer application and let it cure fully.
Durability And Care Tips
Once the tiles are down, you’ll get the longest life out of peel-and-stick flooring by treating it like a resilient surface—not an indestructible one.
Start with smart Material selection: choose thicker wear layers, beveled edges, and moisture-rated products for kitchens or basements.
Protect seams by rolling them again 24 hours after install and keeping heavy traffic off for a full day.
Add felt pads, use wide furniture glides, and avoid dragging appliances; a sheet of plywood works as a runway.
For Cleaning routines, sweep daily grit, damp-mop weekly with a pH-neutral cleaner, and skip steam, wax, and abrasive powders.
Wipe spills fast, place mats at doors, and control humidity to reduce edge lift and keep adhesive stable.
Add Storage With Shelves, Hooks, and Organizers
Although you mightn’t have room to add cabinets, you can dramatically boost everyday function by installing shelves, hooks, and purpose-built organizers in the dead zones you already have—behind doors, above toilets, inside closets, and along narrow wall strips. Treat this as Creative storage and Space optimization: you’re reclaiming vertical and hidden surfaces without shrinking walkways.
Anchor everything into studs or use rated toggles, then set heights to match how you reach and store.
- Add a slim picture-ledge shelf for keys, mail, and chargers.
- Mount double-prong hooks behind doors for towels, bags, and robes.
- Install stackable closet bins with clear fronts for quick visibility.
- Use under-sink pull-out trays to stop item “piling.”
- Add a wall-mounted rail system to reconfigure baskets and hooks.
Refresh Interior Doors and Baseboards Fast
If your rooms feel tired even after you’ve cleaned and decluttered, refresh interior doors and baseboards first—they occupy a huge visual footprint and show scuffs fast.
Start by washing with a degreasing cleaner, then sand glossy spots so paint bonds.
Caulk gaps at door framing and along baseboard tops for crisp shadow lines.
Spot-prime stains and knots, then roll doors with a foam roller and “tip off” with a brush to erase stipple.
Use a durable semi-gloss enamel for wipeable protection.
Paint baseboards last, using a short sash brush and a wide putty knife as a shield against flooring.
Upgrade door hardware after paint cures; matching finishes instantly tightens the whole look, room to room.
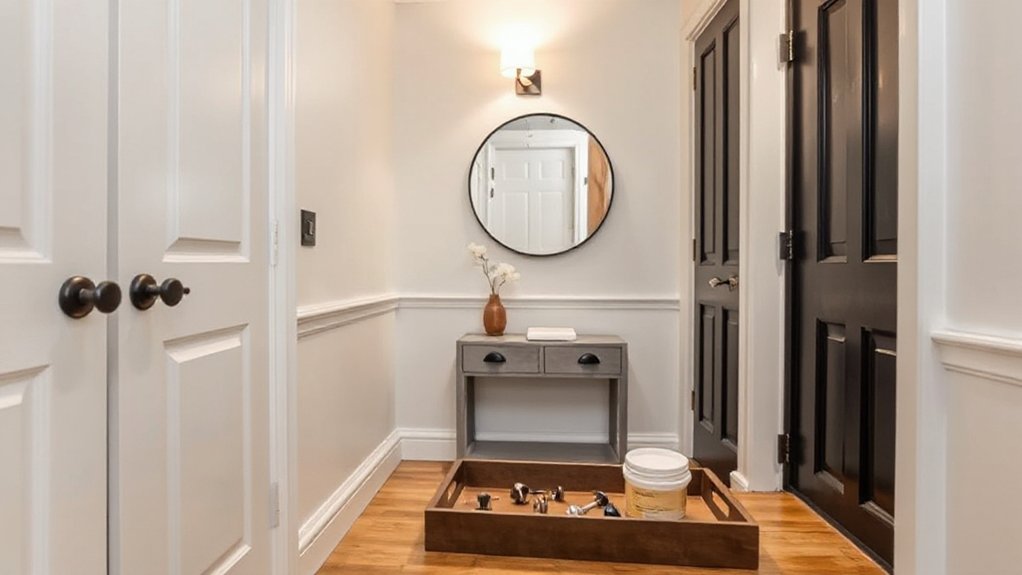
Build a Simple Entry Drop Zone (Bench + Hooks)
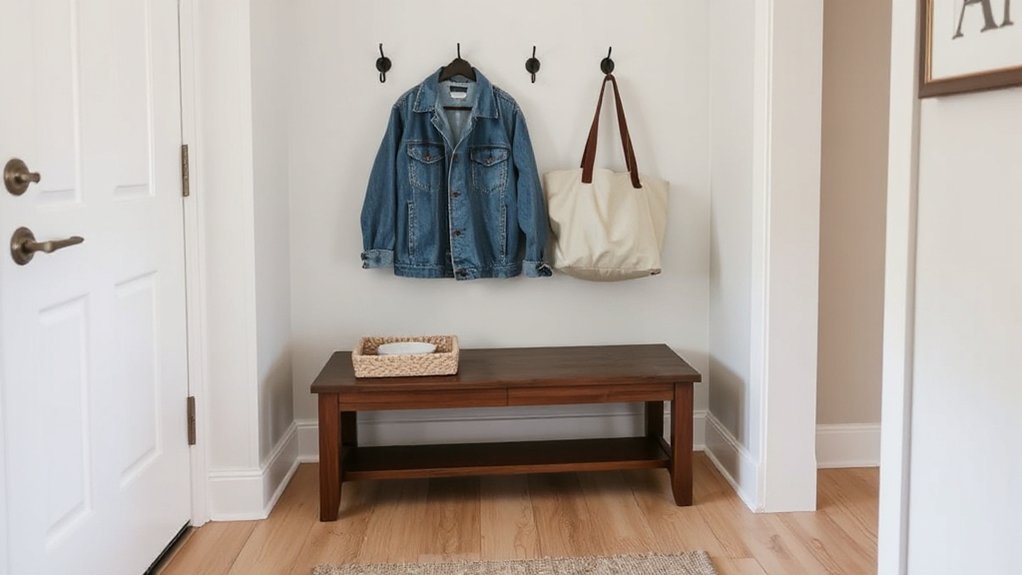
Fresh doors and crisp baseboards make the whole house feel sharper, so give the entry the same attention by building a simple drop zone that stops shoes, bags, and coats from spreading past the front door. Anchor it with a sturdy bench (48–60 inches wide) and mount hooks 60–66 inches high so kids and adults can reach. Keep the footprint tight—12–16 inches deep—and fasten everything into studs.
- Add a shoe tray under the bench to catch grit.
- Install a narrow shelf above hooks for keys and mail.
- Use labeled bins as Entryway accessories for hats and gloves.
- Swap in seasonal decorations on the shelf, not the floor.
- Hang a mirror beside the zone to check before you go.
Seal wood, use washable paint, and you’ll keep the entry orderly year-round.
Upgrade Bathroom Hardware, Mirror, and Showerhead
When you want the bathroom to feel updated without tearing out tile, swap the small touchpoints you use every day: hardware, mirror, and showerhead.
Choose one finish (matte black, brushed nickel, or brass) and match the faucet, towel bar, toilet lever, and cabinet pulls for cohesive bathroom decor.
Measure existing hole spacing before you buy pulls, and use a template so new bars mount level.
Replace a builder-grade mirror with a framed or backlit model sized to the vanity; center it on the sink, not the wall.
For plumbing upgrades, install a WaterSense showerhead with a handheld option.
Use plumber’s tape on threads, check for leaks, and confirm your water pressure supports the spray pattern you want.
Weekend Curb Appeal: Paint, Plants, and Numbers
Small swaps inside set the tone, but the fastest visual payoff often starts at the front door. In a single weekend, you can sharpen your entry with paint, plants, and crisp numbering that reads from the street.
Choose one cohesive color family and repeat it across finishes so everything looks intentional, not piecemeal.
- Paint the door and trim in a durable satin; prep, patch, and sand first.
- Add a large, high-contrast house-number plaque; align it to eye level.
- Place two identical planters to frame the stoop; use evergreen structure.
- Refresh beds with mulch and edged lines to signal clean landscape design.
- Upgrade outdoor lighting with warm LEDs aimed at the path and numbers.
Stand back, check symmetry, then adjust spacing for balance.
Small Renovation Mistakes That Waste Money
Even if you’re only updating one room, a few common missteps can burn through your budget faster than the work itself. The biggest Common renovation pitfalls start with skipping a plan: you’ll change your mind midstream, reorder materials, and pay twice for labor. You also waste money when you chase trends instead of fixing fundamentals like lighting, storage, and durability. Don’t buy finishes before you confirm measurements, lead times, and return policies.
Next, stop underestimating prep. Poor surface prep, ignored moisture, and rushed demolition create repairs that erase Cost effective upgrades.
Get at least three bids, compare scope line-by-line, and insist on permits where required.
Finally, don’t DIY complex plumbing or electrical; one mistake can trigger inspections, rework, and damage.
Frequently Asked Questions
What Renovations Increase Home Value Most for Resale?
You’ll boost resale value most with kitchen and bath updates, Exterior upgrades (fresh siding, doors), and Energy efficiency improvements (insulation, windows, HVAC). You’ll also raise buyer appeal by improving curb appeal, lighting, and clean flooring.
Do I Need Permits for Minor Interior Upgrades?
You might need permits for minor Interior upgrades; it depends on local Permit requirements. Skip permits for paint and flooring, but get them for electrical, plumbing, structural changes, or new walls. Call your building department.
How Do I Estimate Total Renovation Costs Accurately?
HomeAdvisor reports homeowners underestimate costs by 20%—you won’t if you itemize labor, materials, permits, and contingencies. Use Budget planning with line-item quotes, compare bids for contractor selection, then add 10–15% buffer.
Which Projects Are Safest for Beginners Versus Professionals?
You’re safest starting with painting, caulking, hardware swaps, and simple trim if your DIY safety and tool proficiency are solid. Hire professionals for electrical, plumbing, structural changes, gas lines, roofing, and major tile work.
How Can I Renovate While Living in the Home?
Stage smartly, stay steady: you’ll renovate while living there by sealing zones, scheduling noisy work, and setting a temporary kitchen. Follow DIY tips, prioritize dust control, and do Budget planning for contingencies and phased finishes.
Conclusion
You don’t need a full remodel to get a dramatic upgrade—you just need to spend where it shows. Start with paint, lighting color temperature, and touchpoints like pulls, faucets, and showerheads. For example, a renter-friendly condo in Austin refreshed its entry with a $90 bench, $25 hooks, and warmer 3000K bulbs; guests assumed the place was “recently renovated.” Avoid wasting money on trendy finishes you can’t maintain or mismatched hardware.