For a sloped backyard, choose timber sleepers sized to match soil cut and fill, using durable, rot‑resistant lumber or composites. Plan a stable base with deep-anchored posts, graded to promote drainage, and maintain consistent gaps between panels. Use corrosion‑resistant fasteners and cap edges to reduce splintering. Integrate built‑in seating or planters with waterproof joints and discreet lighting for night use. Expect layered drainage, soil stabilization, and careful grading—details that will reveal more benefits as you continue.
Timber Sleeper Options for Sloped Yards
Timber sleeper options for sloped yards offer practical, load-bearing solutions that adapt to grade changes while maintaining usability. You assess slope and drainage first, then select treated softwood, hardwood, or composite sleepers sized to match soil cut and fill.
Install alongside a stable trench, with geotextile barrier to prevent soil intrusion and weed growth. Align sleepers to a uniform batter or stepped profile, ensuring consistent setback for walkway access.
Fasten with corrosion-resistant fixings, using metal brackets or timber screws, and cap edges to reduce splintering. Incorporate garden lighting along paths and at key progressions to improve night visibility without compromising structure.
Plan privacy screens where sightlines cross the wall, using lattice or dense timber panels that breathe and resist weather. Document load ratings and maintenance intervals for ongoing safety.
Modern Vs Rustic Wood Wall Looks
You’ll compare Modern Rustic Fusion to identify when a natural, weathered feel meets refined finish. We’ll contrast Natural versus Refined looks to show how material choices, cuts, and treatments shift tone and performance.
This discussion sets criteria for selecting wood wall aesthetics that balance durability, texture, and visual impact.
Modern Rustic Fusion
Modern Rustic Fusion combines the warmth of timber with the clean lines of modern design, creating walls that balance texture and simplicity. You’ll implement this look by selecting timber panels with uniform profiles and tight joints, paired with minimal hardware and restrained finishes. Structure is paramount: align boards in precise runs, ensure consistent grain direction, and maintain square corners at posts to achieve a disciplined silhouette.
Function guides form: incorporate garden lighting along the wall’s edge to emphasize grain and shadow without glare, and design discreet privacy screens that blend into the timber texture rather than disrupt it. Finishes should be UV-stable and weather-resistant, applied in thin, even coats to preserve natural tonal variation.
Finally, document installation tolerances for drainage, cap alignment, and board spacing to sustain long-term precision.
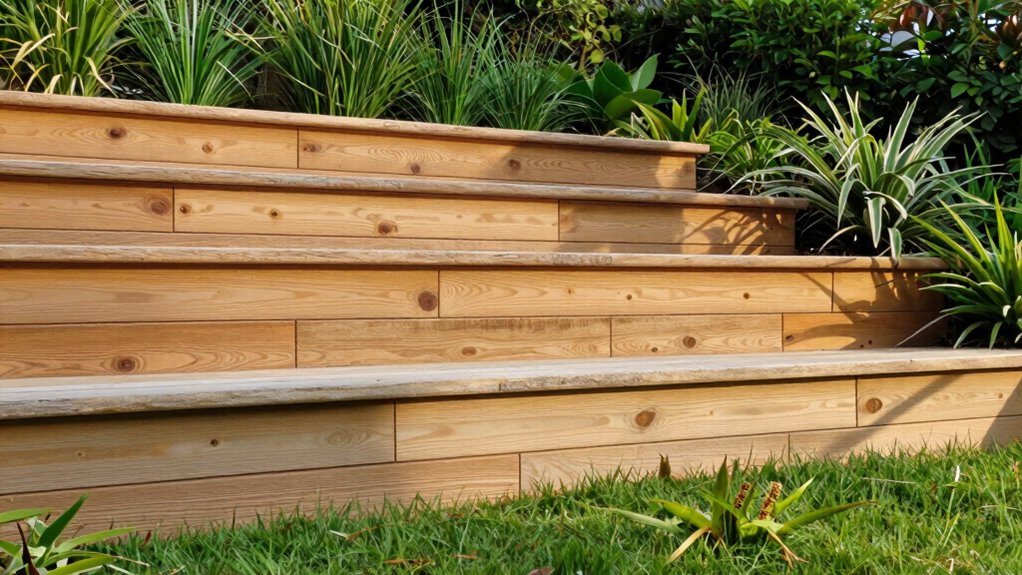
Natural Vs Refined Look
Natural and refined wall looks present a spectrum between texture-rich rusticity and streamlined modernity. You compare wood tones, grain depth, and joint detailing to determine suitability for your sloped backyard.
The natural end emphasizes hand-hewn textures, uneven surfaces, and exposed fasteners that enhance character in garden pathways. The refined end favors smooth planes, precise miters, and concealed hardware for a cleaner silhouette.
Your choice affects light interaction: outdoor lighting casts shadows differently on rugged boards versus uniform faces.
Durability considerations hinge on species selection, moisture exposure, and finishes that preserve color without obscuring grain.
For mixed schemes, pair rustic boards with slim, recessed lighting and handmade features to bridge both aesthetics.
Document installation sequencing, drainage, and maintenance to sustain the intended balance.
Built-In Seating and Planter Combos
Integrated seating planters combine vertical and horizontal space to maximize curb appeal and function. Terrain-savvy benches with built-in planters stabilize soil, reduce erosion, and create microhabitats along the wall.
Consider how modular components support maintenance access and future plant substitutions.
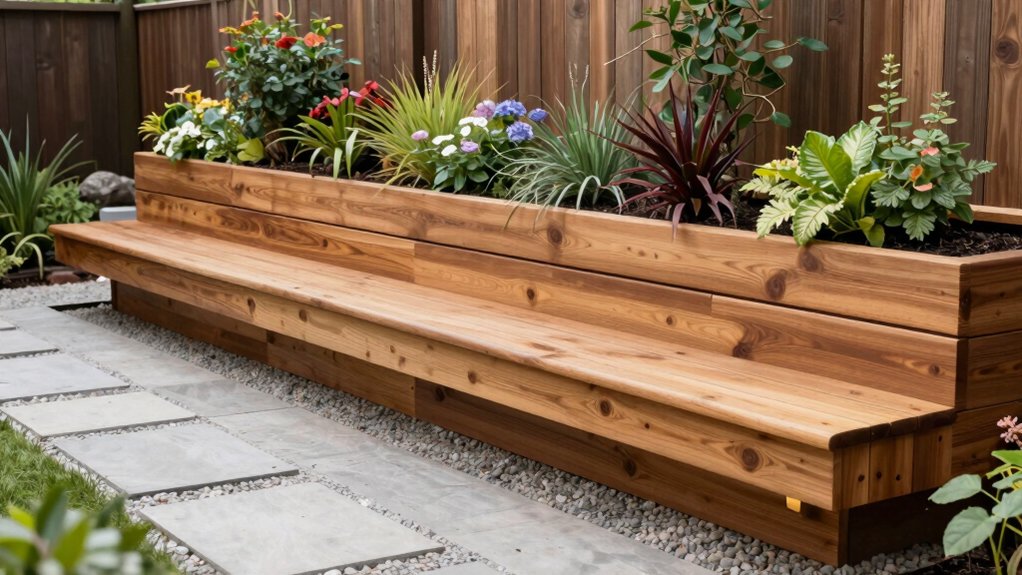
Integrated Seating Planters
Integrated seating planters combine seating and planting into a single, compact unit that saves space and simplifies maintenance. You design these elements as modular modules with built-in seats, planter troughs, and waterproof joints.
Use durable, rot-resistant lumber or fiber-cement composites rated for exterior exposure, ensuring seat height aligns with standard comfort ranges.
Structural integrity relies on a concealed framing system anchored to the wall; integrate drainage channels to prevent waterlogging and soil saturation.
Planters should accommodate root clearance and plant type selection suitable for sun exposure along the wall.
For illumination, specify discreet garden lighting or landscape lighting fixtures that avoid glare and enhance safety without compromising plant health.
Confirm weatherproof wiring, GFCI protection, and accessible service paths during installation.
Regular maintenance focuses on debris removal and seasonal pruning.
Terrain-Savvy Benches Planters
Terrain-Savvy benches and planters blend built-in seating with planter troughs to create multifunctional landscape edges that respond to site grade, drainage, and user flow. You design these elements as integrated units, aligning seat heights with adjacent paths and adjacent wall steps for cohesive circulation.
Benches offer durable, weather-resistant materials, while planters use soil volumes sized to support selected shrubs or perennials without compromising drainage.
On sloped terrain, staggered tiers preserve sightlines and reduce erosion, with gravity-fed drainage to prevent standing water.
Consider garden lighting integrated into seat backs or planter edges to illuminate progressions and enhance safety after dusk.
Privacy screens can be woven into the bench planters, providing visual shelter without bulk, while maintaining air movement and landscape rhythm.
Drainage and Soil Stabilization Tactics
Proper drainage and soil stabilization are essential to prevent hydrostatic pressure and slope movement behind a retaining wall. You implement a layered approach: collect, convey, and discharge water while reinforcing soil mass to resist lateral forces.
Begin with a calibrated drainage plane behind the wall, using perforated pipe or gravel aggregate to reduce pore pressures. Place a geotextile barrier to separate backfill from subsoil, then compact in lifts to minimize settlement differentials.
For soil stabilization, select native or amended fill with appropriate shear strength, and integrate reinforcement like gravel cushions and fabric-reinforced backfill to limit erosion.
Manage surface water with swales or grading to reduce water runoff toward joints. Regularly inspect joints for cracks that could permit seepage and address soil erosion promptly.
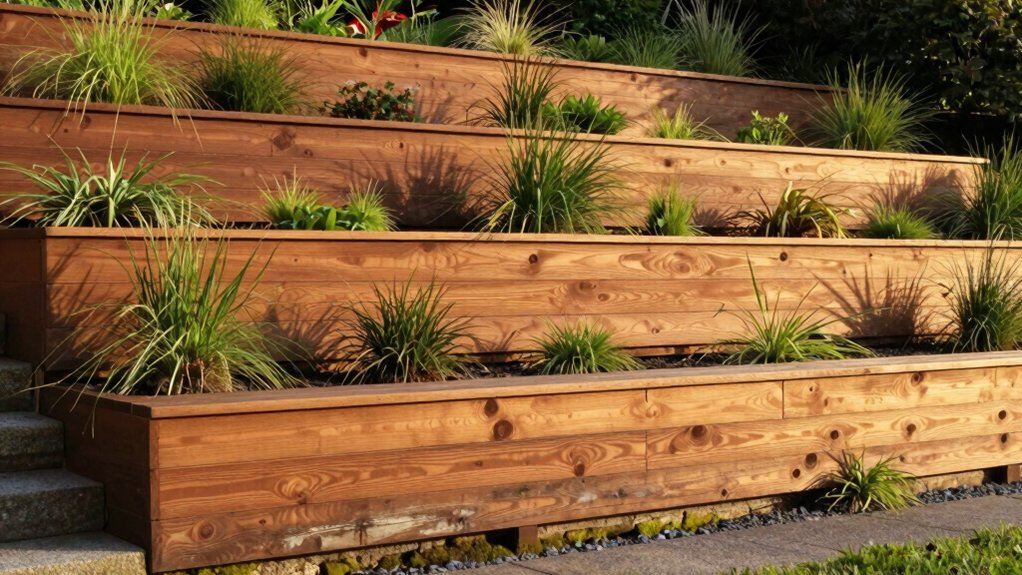
Terracing With Edge Details and Finishes
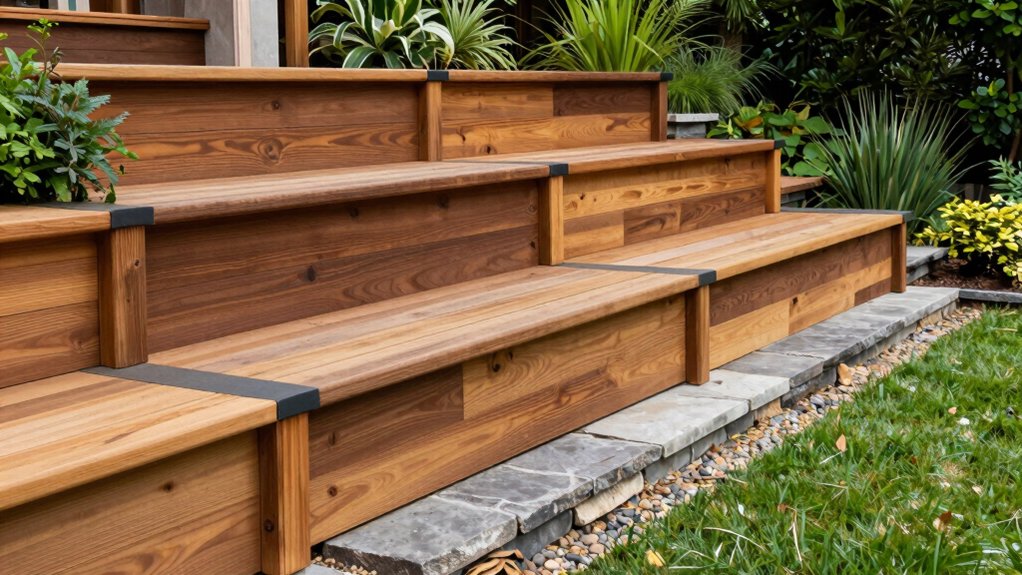
Terracing with edge details and finishes requires precise alignment of each tier, ensuring that edge treatments control erosion, define shifts between levels, and create durable visual boundaries.
You plan trenches, compaction, and sleeper placement to achieve consistent setback and runoff direction, then install continuous edgings that resist splitting and weathering. Use tight-grain boards or treated timbers for clean lines and minimal warping, and cap edges to reduce splintering.
Integrate garden lighting to illuminate steps without glare, and position low-profile luminaires along the upper edges for safety and ambiance.
Finishes should contrast with planting zones to enhance depth perception while reducing soil splash. Privacy screens can be incorporated on select tiers, using lattice or slatted panels that harmonize with the wood tone and maintain airflow.
Verify alignment with stakes and string lines at every tier.
Durable Wood Species for Outdoor Use
Durable wood for outdoor use must withstand moisture, temperature fluctuations, and UV exposure while maintaining structural integrity and aesthetic clarity. You’ll prioritize species with decay resistance, stable dimensions, and long-life performance.
Western red cedar ends naturally resistant to rot, accepts fasteners cleanly, and weathers to a pleasant patina, though it’s moderate in strength for high-load walls.
Species like tropical hardwoods (ipe, Cumaru) offer superior durability and dimensional stability, yet require careful sourcing and maintenance consideration.
Northern white cedar provides low maintenance and workability, while treated lumber improves longevity where budget limits apply.
For garden privacy, choose species with predictable color retention and minimal warp.
If wildlife habitat matters, select finishes and spacing that reduce surface habitat disruption.
Plan for proper venting, drainage, and inspection intervals to preserve structural integrity over time.
Installation Steps for DIY Wood Walls
To install DIY wood walls, start with a clear plan: verify site conditions, confirm structural requirements, and choose the framing method that matches your wall type.
Begin by laying out exact dimensions, ensuring level reference lines, and marking post locations with accuracy to avoid misalignment.
Erect a sturdy base frame, anchor posts deeply, and install grade stakes for drill alignment.
Use treated lumber or rot-resistant framing to resist soil contact.
Fasten wall panels with weatherproof screws, maintaining consistent gaps for drainage.
Seal joints and apply exterior-grade finish after assembly.
Integrate garden lighting along the wall edge to illuminate access paths and highlight structure features.
Install privacy screens where required, ensuring airflow and code compliance.
Inspect for warping, verify plumb, and test load distribution before final soil backfill.
Maintenance and Longevity Tips
Regular inspection and timely upkeep are essential to extend a retaining wall’s life and performance. You should schedule seasonal assessments focusing on fasteners, joints, and timber condition.
Check for against-gravity shifts, rot, or splitting, and verify proper drainage around the base to prevent erosion. Clean debris from weep holes and ensure adjacent soil remains stable after heavy rain.
When you spot moisture retention or surface staining, use eco-friendly materials and timber-preserving treatments compatible with the wood species and local climate.
Maintain consistent grading behind the wall to promote drainage and reduce hydrostatic pressure, and replace damaged boards promptly to avoid structural compromise.
Plan landscaping integration thoughtfully, ensuring plant roots don’t impair the wall’s integrity, and select durable, low-maintenance landscaping elements for long-term performance.
Conclusion
There’s no need to fear wood walls for a sloped yard. With proper timber selection, drainage, and secure fastenings, you’ll build durable terraces that resist decay and erosion. If cost or maintenance worries you, opt for durable species and finish with long-lasting sealants. Even if you prefer concrete or steel, timber walls can be integrated as planters or seating to soften lines. Plan, execute, and you’ll enjoy reliable performance and enhanced outdoor living for years.