
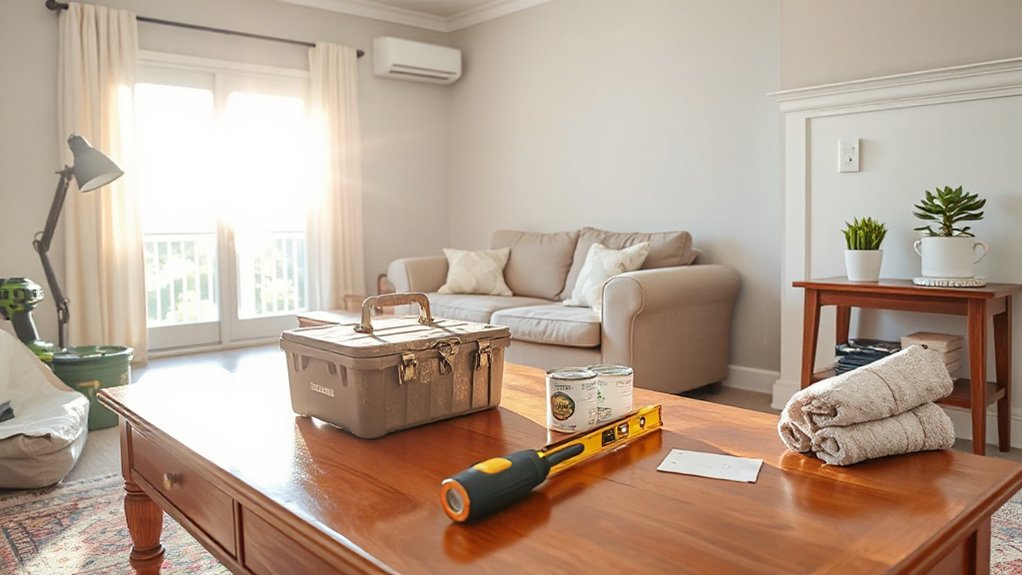
If you want a high-impact upgrade in a single day, start with a clear goal, tight 8-hour plan, and a ready-to-go materials list. Gather power tools, safety gear, and fasteners, then map a simple layout for your space. Tackle lighting first, swap in quick fixtures, and apply an accent wall or fresh sealant for instant payoff. Keep it tidy, document decisions, and stay on schedule. Curious how to optimize every step? You’ll find more tips below.
Plan Your One-Day Renovation: Goals, Budget, and a Realistic 8-Hour Schedule
Planning a one-day renovation starts with clear goals, a realistic budget, and an 8-hour schedule you can actually follow. You set priorities first: decide the room’s core function, the look you want, and the must-have changes.
Establish a precise budget, allocate a contingency, and track every dollar in real time. Define milestones for each hour, from teardown to final touch-ups, so you stay on track and avoid drift.
Choose a color palette that supports your goal, then map furniture placement to maximize flow and function. Keep decisions tight: no scope creep, no scope drift.
Build in breaks for quick adjustments, and document decisions for rapid execution. With discipline, you gain momentum, control, and a finished space that matches your power-driven plan.
Gather Tools, Materials, and Safety Gear for a Fast Day
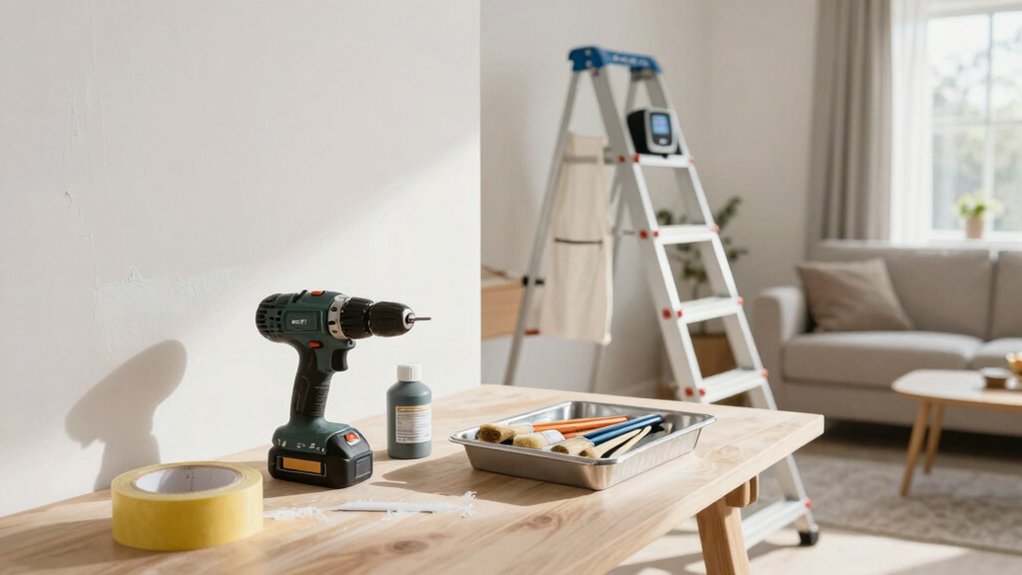
You’ll set a fast pace by gathering the right tools, materials, and safety gear before you start. Check you have the core tools, replace worn bits, and stock what you’ll actually use to avoid backtracking.
Keep PPE on hand and plan a quick-access spot so you stay safe and efficient all day.
Tools You Need
Having the right tools, materials, and safety gear on hand speeds up any project, so gather essentials now and keep them within arm’s reach for a fast, smooth day. You’ll want reliable power tools that deliver clean cuts, precise screws, and quick demolition when needed. Pair them with sharp bits, blades, and a sturdy drill bit set, plus a versatile multi-tool for tight spaces.
Keep a tape measure, level, square, and a sharp utility knife ready to roll. Wear safety glasses to protect vision, and have hearing protection for loud tasks. Organize a centralized wrench kit, fasteners, clamps, and a magnetic tray to prevent drops.
Stay focused, coordinate transitions, and work in a clean, lit area to maximize speed and accuracy.
Materials On Hand
What materials and safety gear should you have on hand to keep a day moving quickly? You grab a clear, complete kit: essential hand tools, fasteners, quick-dry patches, and reliable fasteners. Stock DIY basics like tape, glue, caulk, sealant, markers, and a multi-tool. Include spare blades, drill bits, sandpaper, and a compact level for precision.
For materials, pull in durable lumber or sheet goods, adhesive, caulk, and grout if needed. Organize by task: demolition, surface prep, installation, finishing. Have a trash bag or bin for quick cleanups.
Safety basics stay in the mix: goggles, gloves, dust mask, and a first-aid kit within reach. Plan sourcing ahead, choosing quality over cheap. Focus on material sourcing that minimizes trips, keeps momentum, and delivers consistent results.
Safety Gear Essentials
Start with a solid safety kit and the essentials you’ll actually use: safety goggles, work gloves, a dust mask or respirator, hearing protection, and a well-stocked first-aid kit. You’ll move fast, so prep efficient protective equipment that fits you well and stays put during tasks.
Before you start, check PPE quality, replace worn straps, and test a respirator seal. Safety gear isn’t optional—it’s your first line of defense against debris, sparks, and irritants.
Wear gloves with grip for control, and choose hearing protection that blocks loud work without fatigue. Store gear within reach, labeled and dry, so you don’t waste time searching.
Use a dedicated toolkit bag for quick access to protective equipment, hand tools, and essentials. This mindset keeps momentum while minimizing risk.
One-Day Lighting Makeover: Choose Fixtures and Install Efficiently
When you choose fixtures, weigh style with brightness to match each room’s use.
We’ll cover efficient lighting options and quick install tips so you can finish in a day without guesswork.
Start by narrowing styles, compare lumens per watt, and plan a fast, safe swap with minimal wiring changes.
Fixture Style Selection
Choosing the right fixture style sets the tone for a one-day lighting makeover, so start by matching fixtures to your room’s function and existing décor. You’ll pick a cohesive look that enhances flow, not chaos. Assess ceiling height, room use, and color palette, then select lighting fixtures that align with those anchors.
For kitchens, go with bright task fixtures; for living spaces, choose warm, inviting tones. In hallways, slim profiles keep sightlines clean. Keep hardware finishes consistent—metal, matte, or wood accents should mirror your pulls and taps. Consider dimmable options to adjust mood quickly.
Avoid overly ornate pieces that overpower the space. Finalize with a quick layout sketch, ensuring scale and clearance work with sconces, pendants, and ceiling cans for immediate impact. fixture style, lighting fixtures.
Efficient Lighting Options
After picking a cohesive fixture style, it’s time to pick efficient lighting options and plan a one-day install that saves you time and energy. You’ll maximize energy efficiency by choosing LED fixtures, high-CRI bulbs, and warm-to-neutral color temps that keep spaces usable without waste.
Prioritize ambient lighting first to set mood and uniformity, then layer task and accent lighting for focus and impact. Select dimmable LEDs and compatible switches to reclaim control and reduce consumption.
Calculate wattage and lumen output to meet room needs without overlighting. Use quick-install components: screw-in LEDs, snap-in track heads, and plug-in fixtures for speed.
Keep wiring clean, label circuits, and test all connections before sealing. You’ll finish with bright, efficient rooms that feel powerful yet economical.
Quick Install Tips
Smart quick-install tips make a one-day lighting makeover feasible: start by selecting compatible, plug-in or screw-in LED fixtures that match your existing style and don’t require extra wiring. You’ll maximize impact with measured swaps, not renovations.
Inventory your space, note ceiling heights, and pick dimmable options for mood control. Use basic tools, a ladder, and a voltage tester to verify outlets before you disconnect anything. Keep firmware and bulbs consistent to avoid mismatches across rooms.
Plan a quick sequence: swap fixtures, test, and adjust color temperature for cohesion. Expect DIY shortcuts like plug-and-play kits and tethered adapters to save time.
When encountering design dilemmas, choose fixtures that pull together the palette while delivering bright, efficient light. You’ll finish fast, with a sharper, more powerful ambiance.
Refresh an Accent Wall Today: Quick Color Choices and Technique

If you want to refresh an accent wall fast, choose a bold color that complements your room’s existing tones and lighting. You’ll gain punch without overthinking color psychology or mood shifts.
Pick a paint finish that suits traffic and sheen needs—matte hides flaws; satin reads modern; eggshell balances. Then apply with confident strokes, cutting in cleanly at edges.
- Select a bold hue with high contrast to the other walls
- Test a swatch in natural light before committing
- Use painter’s tape for crisp edges and minimal touch-ups
- Apply two even coats for lasting depth
- Finish with a light, cross-true topcoat for durability
This approach delivers quick, powerful transformation, with practical steps and sharp results.
Quick Kitchen Updates That Shine in Hours
You can lift your kitchen’s look in just hours with practical updates that don’t require a full remodel. You’ll target impact with fast, doable actions that fit a busy schedule. Start by decluttering counters, then swap out tired accents for bold, durable pieces.
Focus on surfaces: a fresh coat of sealant on cabinets or a high-contrast countertop stripe can instantly read as updated. Install under-cabinet lighting to boost task visibility and ambience without major work.
If you’re craving a bigger change, rehang open shelving and showcase curated items to create depth. While you plan, consider garden planning-inspired greenery or herbs for a lively touch that’s easy to maintain.
For furniture assembly, choose compact, modular pieces that amplify storage without crowding.
Swap Hardware for Instant Impact
Swap old pulls and knobs for fresh hardware to transform cabinets in minutes. You take control, swap in bold or refined options, and instantly upgrade the room’s vibe. Choose hardware that matches your style—sleek lines for modern, vintage for charm, matte finishes for drama.
Focus on decorative accents that pull the look together, then lock in color coordination across drawers, doors, and nearby fixtures.
- Pick a unifying finish across pieces
- Align knobs and pulls with cabinet style
- Test scale: 1 inch or 1.5 inches for visibility
- Consider contrasting accents for impact
- Match screws to finish for seamless cohesion
Your move is decisive, fast, and measurable—power through this upgrade with precision and purpose.
Smart Storage Hacks for a Busy Schedule

Smart storage is your time saver, starting with quick wardrobe organization to keep outfits ready in minutes.
Use modular shelving tricks to adapt as needs change, and implement a time-saving label system so you can find what you want without wasting seconds.
Start small today, so your busy schedule stays on track with simple, scalable efficiency.
Quick Wardrobe Organization
Ever feel slammed for time when you’re trying to get dressed? You can reclaim minutes with a tight, powerful wardrobe system designed for a busy schedule. Start with a two-zone closet: daily wear and reserve.
Clip outfits together in 5-minute bundles and remove clutter that slows you down. Prioritize clothing maintenance and wardrobe budgeting to keep your options sharp without overspending.
- Quick color-coordinated outfits
- Pre-assembled daily bundles
- 10-item seasonal cap
- Durable, high-impact hangers
- Weekly 5-minute purge
Concisely, zone, bundle, purge. Use these habits to cut decision fatigue, streamline mornings, and preserve energy for the rest of your day. Your closet should serve your momentum, not hinder it.
Modular Shelving Tricks
Modular shelving is your secret weapon for fast, adaptive storage in a busy life. You’ll set up a flexible system in minutes, not hours, with floating shelves that snap into a clean silhouette. Choose a modular design that scales: start small, add units as needs shift, and maintain a tight footprint on any wall.
Mount low, high, and mid-height sections to create zones for books, decor, and tools, then mix widths for a dynamic grid. Use clear labeling on a slim spine to keep items accessible without clutter. Balance weight with wall studs and use anti-tip hardware for safety.
Keep finishes cohesive—matte neutrals or bold contrasts—so the setup feels intentional, not chaotic. Your space stays organized, efficient, and ready for action.
Time-Saving Label Systems
Time-saving label systems glide into any busy home, turning clutter chaos into quick to-find organization in minutes. You implement a clear scheme that reinforces label organization while accelerating project prioritization, so you stay ahead of deadlines and never search again.
Use durable labels, choose bold fonts, and color-code by category to command attention and action. Maintain consistency, update as tasks shift, and routinely audit to keep flow uninterrupted. When you label once, you save time every day, turning routine chores into fast, confident moves.
- Define categories for high-traffic zones
- Color-code by priority and frequency
- Use durable, readable labels on containers
- Create a master label map for quick reference
- Schedule quarterly audits to maintain accuracy
Bathroom Facelift: Hardware, Accessories, and Layout Tweaks
If you’re updating your bathroom, start with the small, high-impact changes: swap in sturdy hardware, add coordinating accessories, and tweak the layout to improve flow.
Begin with shower fixtures that boost efficiency and style, then replace vanity hardware with bold, cohesive finishes. Choose a matte chrome or brushed brass that matches faucet tones for a unified look.
Keep accessories minimal but purposeful: a single towel bar, shelf, and hook set in the same finish create visual continuity.
Reposition mirrors to widen the perceived space, and mount a compact vanity light for task clarity.
Test door swing and clearances to avoid crowding.
Finish with a simple, non-slip rug and a functional soap dispenser to cap the upgrade.
Your bathroom gains impact without a full remodel.
Minor Flooring Refreshes You Can Do Today
You don’t need a full remodel to refresh your floors. You can lift the room’s energy with quick, practical moves that make a measurable impact. Choose confident actions, then lock in results with simple maintenance tips and smart flooring options that fit your pace and budget.
- Swap in a bold area rug to anchor the space
- Tackle scuffs with a quick, specialized cleaner
- Refinish or seal high-traffic zones for durable shine
- Add edge trim or connection strips for a clean line
- Install underlayment for improved sound and comfort
These steps are action-first, time-efficient, and low-risk.
For lasting impact, pair each choice with straightforward maintenance tips: wipe spills immediately, vacuum regularly, and re-seal where needed. Your floor, your authority.
Paint Tactics That Save Time and Stress
Prep like a pro by laying out your workspace, brushes, and rollers first. Then tackle the project in manageable sections. Use quick-win tools and time-saving techniques to cut steps without sacrificing finish. Keep the pace steady with a clear plan.
After you’re done, follow clean-up aftercare tricks to minimize mess and downtime. This way, you’re ready for the next project.
Prep Like Pro
Ready to cut prep time without sacrificing results? You’re about to own the paint process with sharp, decisive prep tactics. Start by scoping decorative accents and DIY pitfalls so you don’t chase surprises later. Prep fast, protect always, finish strong.
- Mask edges with painter’s tape along trim and outlets
- Lightly scuff glossy surfaces to improve adhesion
- Clean with a quick, lint-free wipe to remove dust
- Use a mini-roller for tight areas, save time
- Label each can for quick color recall and touch-ups
Focus on clean lines, consistent coats, and drying windows. Plan your workflow so you move in a single, purposeful pass. Skip filler fluff; target problem spots now to prevent rework.
When you respect prep, you gain speed, precision, and a pro-level finish—no regret, just power.
Tools For Quick Wins
Tools for Quick Wins: Paint tactics that save time and stress start with the right setup and fast-working gear. You prioritize speed without sacrificing quality, so pick purpose-built tools and smart accessories.
Power tools accelerate prep, edge cutting, and coverage, letting you finish projects before lunch. Choose a reliable drill with a quick-change bit system, a high-quality roller that lays even coats, and an edger attachment for clean lines along trim.
Keep sandpaper and a dust-free work surface on hand to minimize cleanup time. Use a multitool for tweaks mid-project, and a cordless setup to move freely between rooms.
For DIY projects, plan a tight workflow: prep, mask, prime, paint, and inspect. Your efficiency compounds with each deliberate, well-powered move.
Clean-Up Aftercare Tricks
Cleanup aftercare is all about fast, tidy finishes that keep tomorrow’s projects moving. You push through clean lines and smart habits, so paint touch ups become a quick repair, not a headache. You seal edges, wipe drips, and label cans for the next round, turning cleanup into a power move. You protect decorative accents and prep surfaces for flawless reuse, lowering rework and elevating every room.
- Quick-dry technique tips to minimize downtime
- Smart masking and tool cleanup for sharp edges
- Immediate touch-up methods that preserve color and texture
- How to store leftovers for decorative accents reuse
- Final inspection checklist to prevent missed spots and smears
Window Treatments: Fast, Functional Upgrades
If you want fast, functional window upgrades, start with simple treatments that boost light control and privacy without a full remodel. You gain immediate impact by choosing cordless blinds for clean lines and child safety, plus custom drapery to tailor shade, color, and texture to your room.
Measure precisely, then install mounting brackets at standard heights for a snug fit. Pick neutral fabrics or bold pops that match your palette and mood, then pair blackout options with sheer layers for daytime versatility.
Keep cords out of reach and use motorized options where you crave hands-off control. Finally, test operation, confirm alignment, and trim excess length.
You’ll enjoy sharper light management, enhanced privacy, and a polished, powerful look in under a day.
Organize to Increase Usable Space
Organizing your space starts with a clear plan: assess what you actually use and remove what you don’t. You’ll unlock real flow by prioritizing high-impact storage, then layering in aesthetic enhancements that don’t waste square footage.
- Identify choke points and optimize with vertical storage
- Consolidate similar items into labeled zones
- Use double-duty furniture to gain surface and hidden storage
- Install adjustable shelving for flexible configurations
- Integrate concealment with baskets and bins for a clean look
With the plan in place, implement storage solutions that eliminate clutter and boost usability. Keep rules tight: purge aggressively, stack strategically, and label boldly.
You’ll create more usable space fast, and the room will feel calmer, more powerful, and ready for action.
Outdoor Refreshes You Can Do Today

Turn your outdoor space into a functional retreat with quick, actionable refreshes you can tackle today. You’ll start by surveying sun, shade, and seating.
Elevate garden decor with bold cushions, planters, and a simple focal point—like a centerpiece lantern or sculpture—that draws the eye. Swap out worn cushions for weatherproof equivalents, then wipe down outdoor furniture to restore color and grip.
Create defined zones: a seating area, a dining corner, and a compact herb patch. Add lighting that lasts—string lights, solar lamps, or lanterns—so evenings feel intentional. Install a potent scent with fresh herbs or flowers near entryways.
Refresh with a low-maintenance groundcover or mulch to crisp, clean edges. You’ll enjoy a ready-to-use outdoor space that commands attention and stays durable.
Budget-Smart Upgrades That Don’t Break the Bank
You don’t need a big budget to upgrade your space. With smart choices, you reclaim control and noticeably elevate rooms in a single day. Focus on impact over quantity, plan tightly, and execute fast.
- Prioritize high-visibility upgrades with minimal install time
- Leverage budget planning to map costs, timelines, and ROI
- Optimize material sourcing for quality at low cost
- Reuse existing fixtures where possible to maximize value
- Tackle lighting and color to transform mood instantly
Skip frivolous purchases; invest in durable, repeatable upgrades that scale. Nail measurements, source reliable suppliers, and confirm returnable options.
Keep garden-variety tools ready and pre-arrange workflows for efficiency. You’ll finish with a sharper look, tighter budget, and newfound authority over your space—and you’ll know exactly where every dollar went.
Troubleshooting Common One-Day Projects: Fixes Before You Finish
One-day projects can go from quick win to quick setback if you don’t plan for common glitches. You spot the snag, you fix it now, you press ahead. Start with a tight scope, list every step, and own the sequence.
If a tool fails, switch to a backup fast—don’t chase perfection. Expect trim gaps, paint drips, and mismatched seams; have decorative accents ready for quick touch-ups, and seasonal maintenance checks to deter rust or warping.
If measurements don’t align, remeasure twice, cut once, seal connections, and test fit before fastening. Keep a minimal, portable toolkit on hand and document adjustments.
Move with purpose, stay aligned to your finish line, and you’ll finish strong without backtracking.
How to Plan a True 8–Hour Makeover Schedule
Want to map out a true eight-hour makeover without guesswork? You can, by drafting a tight, time-bound plan that accounts for signaling tasks, buffers, and tool access. Start with a clear objective, then lock a realistic sequence, so you move confidently from one step to the next.
You’ll optimize energy, reduce delays, and keep distractions to a minimum.
- Prioritize tasks by impact and footprint
- Allocate fixed blocks for garden maintenance and quick plumbing repairs
- Build in 10–15 minute buffers between steps
- Prep tools and materials the night before
- Review progress at the halfway mark and adjust
Keep communication crisp with helpers, maintain momentum, and document lessons for your next eight-hour makeover. You’ll finish stronger, with professional polish.
Conclusion
Grab your list, grab your drill, and trust the timing. You’ll notice how small, well-timed actions align like clockwork—a shortcut here, a fresh coat there, a quick swap of light that suddenly brightens the room. Coincidences line up: the exact shade you grab matches the mood, the tool you grab mirrors your pace, and the hour slips into place. You finish knowing this fast plan didn’t cut corners—it fit your day, your budget, your space.


