
You’ll want to take a cautious approach here, as a less-than-ideal substrate can cause problems. If the existing slab is sound, clean, and properly prepared, pouring over it can be acceptable, but you must evaluate cracks, moisture, and laitance first. You’ll need thorough surface prep, appropriate bonding agents, and a matching Portland cement mix to guarantee a durable bond. Skipping steps invites failures that complicate future work, so there’s more to weigh before you proceed.
Assessing When Patching Over Existing Concrete Is Appropriate
Evaluating when patching over existing concrete is appropriate requires evaluating the substrate’s condition, the nature of the defect, and the intended service life of the repaired slab.
You should quantify residual strength, bond potential, and substrate integrity, focusing on delamination, cracking patterns, and moisture status.
Determine if surface irregularities will impede load transfer or create reflective cracking, and assess whether the patch material’s modulus, curing regime, and bond mechanism align with the base concrete.
Consider exposure environment, traffic type, and anticipated chemical interactions to gauge long-term performance.
If the substrate shows extensive cracking, ongoing movement, or moisture problems that can’t be mitigated, patching may be inappropriate.
Documentation of findings, conservative acceptance criteria, and a clear remediation plan should precede any decision to proceed with a patch.
Surface Preparation Steps for Pouring Over Concrete
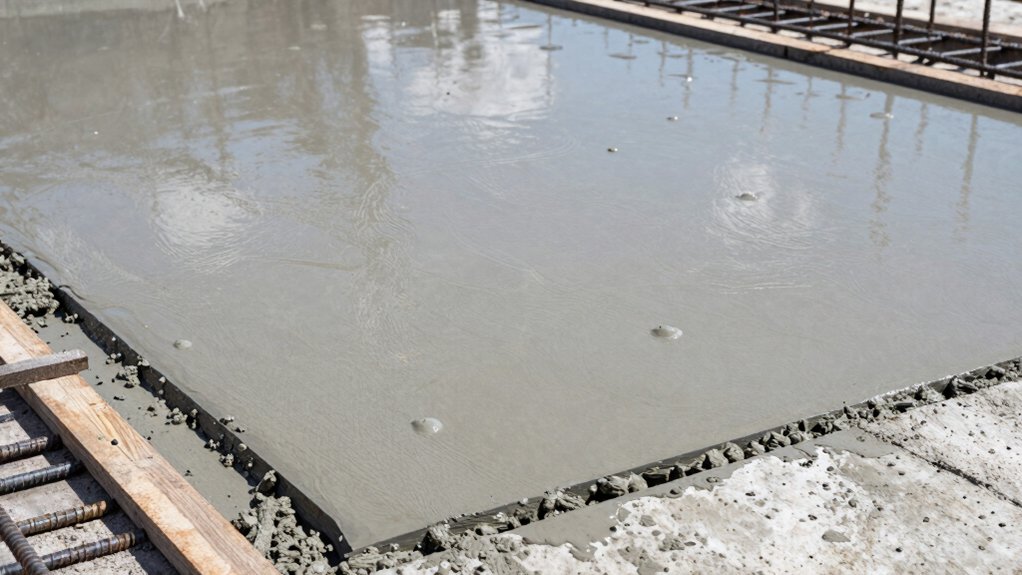
Before you pour over existing concrete, make certain the surface is prepared to receive a new layer. Begin with a thorough assessment: verify structural integrity, remove loose material, and identify cracks wider than 1/8 inch.
Clean the substrate with a stiff brush, mechanical grinder, or shot blasting to achieve a clean, dust-free profile. Eliminate contaminants—oil, paint, curing compounds—with approved cleaners and degreasers, then rinse and dry completely.
Roughen the surface to create a mechanical key, achieving a surface profile matching the adhesive system’s requirements. If any delamination or scaling is present, repair or substitute sections prior to overlay.
Apply a suitable bonding agent according to manufacturer specifications, ensuring proper curing conditions. Protect surrounding areas from overspray and schedule pours to avoid temperature extremes or precipitation during cure.
Confirm readiness before proceeding.
Choosing the Right Concrete Mix and Additives
Choosing the right concrete mix and additives starts with selecting a batch that matches your load and exposure. Then, adjust water-cement ratios and aggregate size to achieve the target strength and workability.
Consider how mix ratios influence bleed, curing, and finishability. Choose additives like plasticizers or accelerators only when they address a measured need.
You’ll want clear guidelines for compatibility with existing concrete and for selecting dosages that maintain long-term durability.
Mix Ratios to Use
Selecting the right concrete mix and additives hinges on the project requirements, performance demands, and environmental conditions. For resurfacing or topping, choose a mix with a higher paste content and reduced air entrainment to improve bond and surface finish.
Use a Portland cement-based product compatible with existing concrete, and follow slump recommendations that yield workability without segregation. Typical ratios vary by system, but a common topping mix targets about 3 to 5 inches of aggregate-free paste, with a water-cement ratio around 0.40 to 0.50.
If you need rapid strength gain, specify a fast-setting or high-early-strength formulation, accounting for curing temperature. Include a bonding agent per manufacturer guidance to optimize adhesion.
Avoid over water addition, which weakens the hardened layer and compromises durability.
Additive Selection Tips
When selecting additives, prioritize compatibility with the base concrete and the environmental conditions of your project. Choose plasticizers to improve workability without increasing water demand, and verify they stay effective under your curing temperature and humidity range.
Use شرح? No—keep precise: guarantee early stiffening or retardation aligns with placement windows and formwork timing.
Incorporate air-entraining agents for freeze-thaw resistance where deicing salts are a concern, confirming bubble structure remains stable at pour thicknesses.
Consider set-control admixtures if you require rapid early strength or extended workability for large slabs.
For sulfate-rich soils or wastewater interfaces, select corrosion-inhibiting or mineral admixtures proven compatible with your cement type.
Always follow manufacturers’ dosages, compatibility charts, and local code requirements, and document mix test results for quality control and future troubleshooting.
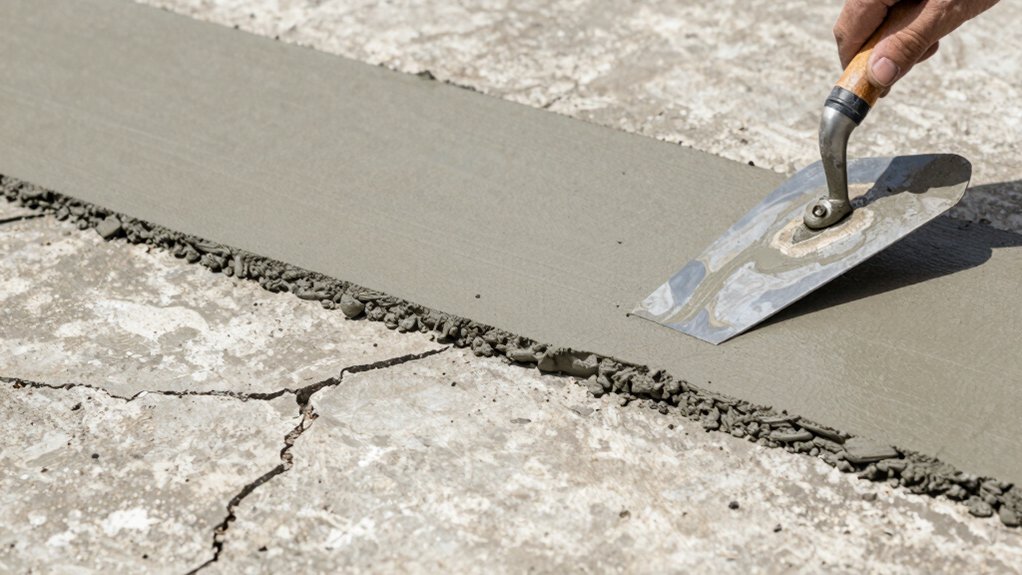
Achieving a Strong Bond: Techniques and Tips
To guarantee a strong bond when pouring concrete over existing material, you must prioritize surface preparation, including cleaning, profiling, and moisture control.
Key bonding methods should be selected based on materials and load expectations, with mechanical keying or adhesive primers used where appropriate.
Finally, implement proper curing and verify bond integrity through targeted tests to confirm long-term performance.
Surface Preparation
Surface preparation is essential for a durable bond between existing concrete and new overlays. Start by cleaning the surface to remove dust, oils, and loose material. Then inspect for cracks, spalling, or laitance that could hinder adhesion.
You must mechanically profile the substrate to create a clean, open surface profile. This can be assessed by a pull-off or sandpaper test. Remove contaminants that could impede bonding agents.
Use appropriate methods: chemical cleaners for oils, mechanical grinding or shot blasting for laitance and weak layers, and vacuum debris collection to prevent encapsulation.
Confirm moisture content is appropriate for the chosen overlay system. Verify substrate temperature compatibility with curing and bonding primers.
Document surface condition after treatment and prior to material application to confirm adherence potential and responsible workmanship.
Key Bonding Methods
Key bonding methods are essential for a durable overlay and require selecting the right system for the substrate, applying it correctly, and ensuring a consistent bond through proper surface activation.
You’ll prioritize mechanical or chemical adhesion strategies based on substrate porosity, moisture, and contamination. For mechanical bonding, you’ll prepare profiles on concrete surfaces via light profiling, then use compatible primers and bonding agents that cure to a rigid shear transfer.
Chemical bonding involves primers or activators formulated for cementitious mixes, enabling rapid tack and bond strength. You’ll verify compatibility, follow exact coverage rates, and monitor cure times to prevent delamination.
Control contamination, dust, and laitance before application, and align your system with substrate conditions.
Document substrate type, preparation steps, product batch numbers, and cure expectations for repeatability and performance.
Curing and Testing
Curing and testing are critical to guarantee a durable bond between overlay and substrate. You guarantee proper curing by maintaining moisture, temperature, and wrap-time recommendations during the first 7 days, or per the mix design. Avoid rapid drying, which can induce shrinkage and microcracking that compromise adhesion.
Use approved curing compounds or moist curing methods, then continue monitoring for the full specified cure period before load exposure. Conduct adhesion tests (pull-off, shear, or lap tests) at acceptance intervals aligned with your project spec, documenting surface prep integrity, moisture, and temperature.
Track substrate strength, overlay consistency, and cure progression to predict long-term performance. Record readings, compare to standards, and adjust future pours to sustain reliable bonds.
Common Pitfalls and Safety Considerations
Pouring concrete over existing concrete introduces several risk factors that you must manage to guarantee a solid bond and long-term performance. You should verify substrate condition, moisture, and surface profile before placement because contaminants and weak prep can cause delamination or voids.
Confirm proper surface cleaning, etching, and roughening to promote mechanical interlock. Additionally, verify compatible mixes, slump, and air content.
Control curing conditions, evaporation, and temperature to prevent curl, thermal cracking, or differential settlement.
Implement containment, form work, and proper joint detailing to minimize uncontrolled movement.
Use appropriate base reinforcement and bonding agents only when specified by the material supplier.
Maintain PPE, dust control, and safe handling of admixtures.
Document procedures, inspection criteria, and nonconformities for traceability and future maintenance.
Signs It’s Time to Remove and Replace the Slab
Signs that your slab should be removed and replaced appear when multiple critical performance criteria are breached. You’ll notice structural distress that compromises load transfer, such as pronounced cracking spanning joints, wide random cracks, or differential settlement that creates trip hazards.
Flatness and levelness degrade beyond acceptance, causing equipment or foot traffic instability. Persistent moisture intrusion, unusual efflorescence, or persistent popping and hollow sounds when tapped indicate internal voids or debonded layers.
Deterioration of reinforcing steel, corrosion, or extensive spalling exposes the substrate to further damage and undermines capacity. Surface defects like crazing or component delamination reduce wear resistance and increase maintenance costs.
When deterioration surpasses repair practicality, replacement becomes the most economical option to restore performance, safety, and service life. Proceed with a design professional’s evaluation and documented criteria before removal.
Conclusion
You can pour over sound, clean, and well-prepared concrete, but don’t skip essential prep or moisture checks. If cracks, signs of movement, or delamination appear, remove and replace. Use a bonding agent and proper surface roughening to guarantee a mechanical key, then control curing and environment for best results. Think of the substrate as the foundation of your repair—the stronger the base, the longer the overlay lasts. In short, preparation is everything.


