Infrared bathroom heaters deliver fast, targeted warmth by emitting infrared waves that heat people and surfaces directly, not the surrounding air. They’re energy-efficient, reduce drafts, and stay safer in damp spaces thanks to sealed elements and moisture-rated hardware. Choose wattage based on bathroom size and insulation, and consider safety features like IP ratings and GFCI outlets. Installation matters—opt for proper placement to maximize comfort and minimize heat loss. If you keep exploring, you’ll uncover practical setup tips and model comparisons.
What Are Infrared Bathroom Heaters and How They Work
Infrared bathroom heaters generate heat by emitting infrared radiation that directly warms people and objects in the room, rather than heating the air first. You operate them by converting electrical energy into infrared waves, usually via carbon, quartz, or ceramic elements.
When powered, these elements radiate energy outward; nearby surfaces absorb it, then transfer heat to you through contact or convection. Unlike traditional heaters, they don’t rely on ambient air warming, which minimizes drafts and heat loss.
In bathrooms, placement matters: aim for unobstructed line of sight to occupants and avoid exposing sensitive materials. Control options vary from simple on/off switches to thermostatic or timer-based systems, enabling targeted comfort.
Safety features include sealed enclosures, cool-to-touch surfaces, and ground fault protection. Understanding their core mechanism helps you assess suitability for your space.
Benefits Over Traditional Heaters in Bathrooms
Infrared heaters deliver heat quickly to bathroom targets, offering faster warmth than many traditional options. They heat people and surfaces directly, which can improve comfort without overheating the air.
Their design is also safer for wet areas, reducing electrical exposure risk while maintaining consistent performance.
Faster Heat Delivery
Because infrared bathroom heaters deliver heat directly to objects and persons in the room, you’ll feel warmth sooner than with traditional heaters. This faster heat delivery arises from radiant energy transferring efficiently to surfaces, rather than warming air that must convect and circulate.
You’ll notice rapid warmth at skin contact and on tiles, enabling comfortable thresholds in minutes rather than longer cycles. By targeting occupants and fixtures, the system reduces wasted energy heating unused volumes.
Immediate warmth enables maintainable lower setpoints, lowering overall consumption without sacrificing comfort. The design minimizes heat loss through doors and vents, since energy concentrates where people linger.
In practice, response times provide actionable control feedback, improving perceived efficiency while preserving consistent temperature gradients across the bathroom.
Safe For Wet Areas
In bathrooms, moisture and splashes introduce safety concerns that traditional heaters often struggle to meet. Infrared units stay efficient by design, delivering heat without emitting hot surfaces or flames you must monitor. You’ll encounter lower risk of ignition since elements stay sealed and are isolated from damp zones.
They operate at safer surface temperatures while warming objects and people directly, reducing prolonged exposure to circulating air. Certifications for IP ratings and electrical protections translate to consistent performance in wet areas, not just dry rooms.
You’ll appreciate rapid warm-up without melting cords or overheating sockets. Maintenance remains straightforward: wipe-down surfaces and inspect seals periodically. Overall, infrared systems combine targeted warmth with robust wet-area safety, outperforming conventional heaters in moisture-prone bathrooms.
Safety Features That Matter in Damp Spaces
Damp environments pose unique electrical and safety risks for bathroom heaters, so choosing models with robust protection features is essential. You evaluate Safety Features That Matter in Damp Spaces by prioritizing ingress protection, ground fault protection, and moisture-resistant enclosures.
Look for IP ratings appropriate to bathrooms, such as IP44 or higher, and verify that internal components are sealed against humidity. Ground-fault circuit interrupter (GFCI) compatibility minimizes shock hazards when contact occurs with water or damp surfaces.
Overheat protection prevents temperatures from exceeding safe limits, while automatic shutoff and thermal cutouts provide redundancy. Consider humidity-aware thermostats that adjust operation to room conditions without cycling excessively.
Finally, ensure mounting and cable glands maintain enclosure integrity. These features collectively reduce risk, enabling reliable infrared warmth in moist environments.
Choosing the Right Wattage for Your Bathroom Size
To size your heater, determine the room’s dimensions and ceiling height to estimate the volume you need to heat.
Use wattage guidelines matched to typical bathroom sizes so you can compare models accurately.
This creates a clear starting point for selecting a unit that delivers consistent warmth without oversizing.
Determine Room Size Range
Selecting the right wattage for your bathroom depends mainly on the room’s size and ceiling height; you’ll typically need more power for larger spaces and higher ceilings. To determine a practical range, measure length, width, and ceiling height, then compute volume and surface area affected by heat.
Consider whether the space has insulated walls, windows, and ventilation, as these factors reduce heat retention. Small baths (≤60 sq ft) generally benefit from 300–900 watts, while medium rooms (60–100 sq ft) may require 900–1500 watts, and larger or high-ceiling baths exceed 1500 watts.
If you frequently use the space with doors open or tolerate quicker warm-up, plan for the upper end of your range. Use a linear scan of thermal load, then validate with real-use observations.
Wattage Guidelines Matched
When sizing your bathroom heater, use the ranges established earlier as a baseline and map them directly to your room’s measured volume and surface area. Wattage should align with these metrics, not guesswork.
For small bathrooms under 40 cubic feet, a 300–600-watt unit typically suffices, balancing quick surface warmth with energy efficiency.
Medium rooms, roughly 40–100 cubic feet, benefit from 600–1000 watts to maintain comfortable surface temperatures without overshoot.
Large bathrooms exceeding 100 cubic feet may require 1000–1500 watts to achieve uniform heat distribution, especially if ceilings rise above standard heights.
Consider insulation quality, window exposure, and border areas near sinks or tubs.
Verify manufacturer guidance for recommended wattage ranges per volume, then select a unit that minimizes peak wattage while sustaining steady infrared warmth.
Monitoring Humidity and Electrical Requirements
Humidity and electrical requirements are critical when installing infrared bathroom heaters, so you should verify that the unit operates within a safe, climate-controlled range and aligns with your electrical system’s capacity.
You’ll assess humidity tolerance by checking the heater’s IP rating and ambient operating range, ensuring it won’t degrade performance or shorten life in typical bathroom moisture levels.
Electrical considerations require confirming circuit ampacity, voltage, and breaker type match the heater’s specifications, plus guarding against shared-load interference.
Look for built-in protection features, such as overcurrent and thermal cutoffs, and verify proper grounding.
Documentation should specify installation clearances from water sources and compliant wiring schemes.
Finally, cross-check manufacturer guidelines with local codes, as deviations risk nuisance tripping, warranty voids, or safety hazards.
Installation Options: Plug-In vs. Hardwired
Plug-in and hardwired installs each have distinct implications for bathroom infrared heaters, especially given the humidity and electrical requirements discussed earlier. Plug-in units offer flexibility and simplicity, letting you place portable heaters where you need instant warmth. They rely on standard outlets and short, manageable wiring runs, minimizing code complexity but increasing exposure to moisture if not properly protected.
Hardwired installations demand dedicated circuits, grounding, and professional routing to meet luminance and outlet standards, reducing cord clutter and trip hazards while enforcing stricter safety reviews. From an efficiency standpoint, both options deliver comparable infrared performance, but your choice affects long-term maintenance and retrofit potential.
Assess room layout, access to outlets, and local code constraints to determine which path aligns with safety, convenience, and energy goals.
Quick Install Tips for Renter-Friendly Setups
Renter-friendly install tips strike a balance between quick warmth and apartment safety, focusing on minimal changes to walls, doors, or fixtures. You’ll prioritize noninvasive options and verify appliance compatibility with existing outlets and space.
Start with plug-in infrared models that sit on the counter or a stable shelf, avoiding wall mounting unless lease terms permit. Use surge-protected outlets and check circuit capacity to prevent tripping.
Position the heater so airflow isn’t obstructed and maintain a clear path for moisture exposure. Secure cords away from doors and in-door thresholds to reduce snag risk.
When possible, employ temporary mounting solutions with removable adhesive strips that won’t leave residue. Document dimensions and clearance requirements before purchase to guarantee safe operation within bathroom zones.
Energy Efficiency: How Infrared Saves You Money
Infrared heaters reduce heat loss by focusing warmth where you need it, so rooms reach comfort faster with less wasted energy.
You’ll feel immediate warmth and respond more efficiently, since infrared transfers heat directly to bodies and objects rather than cooling air.
Over time, this targeted approach supports lower energy use and measurable long-term savings.
Lower Heat Loss
One key advantage of infrared bathroom heaters is their lower heat loss compared to conventional models, thanks to targeted heating that warms people and objects rather than the surrounding air. This focus reduces energy wasted heating empty space, which improves overall system efficiency.
You’ll notice faster comfort because heat is delivered directly where it’s needed, not diffusely dispersed. Infrared emits radiant energy that travels without depending on air circulation, minimizing convection losses typical of traditional radiators.
In practical terms, insulation and placement amplify this benefit: well-insulated walls and ceiling reduce heat exchange, preserving the radiant warmth.
Maintenance remains straightforward, with fewer moving parts than forced-air systems, preventing inefficiencies from fan wear.
Instant Warmth Efficiency
Instant warmth efficiency hinges on how quickly the heater translates electrical input into usable comfort. You measure this by response time, surface temperature, and target accuracy. Infrared emits energy that directly warms objects and people, not ambient air, so quick heat onset minimizes standby losses and avoids overcooling.
You’ll observe short warm-up cycles with precise control, thanks to modern sensors and feedback loops. The effectiveness claim rests on direct energy transfer rather than circulating hot air, reducing wasted energy from drafts and heat stratification.
You should compare wattage, emission spectra, and infrared wavelength for ideal skin-safe warmth. Real-world performance aligns with rated power only if installation, mounting angle, and spot coverage are correct.
Long-Term Energy Savings
Long-Term Energy Savings with infrared bathroom heaters hinge on sustained efficiency rather than initial performance. You’ll notice that long-run costs depend on continual heat delivery, not peak outputs.
Infrared elements convert electricity directly into warming rays, reducing air volume cycling and standby losses common with convection systems. When you heat bodies and surfaces rather than air, you minimize wasted energy from warm rooms and drafts.
Your savings accrue as you maintain comfort at lower ambient temperatures, because targeted warmth reduces thermostat delta and lowers overall consumption. To maximize savings, size the heater to the space, use zone heating, and prefer models with efficient controls and durable reflectors.
Over time, consistent use of infrared heating supports predictable bills and steadier comfort.
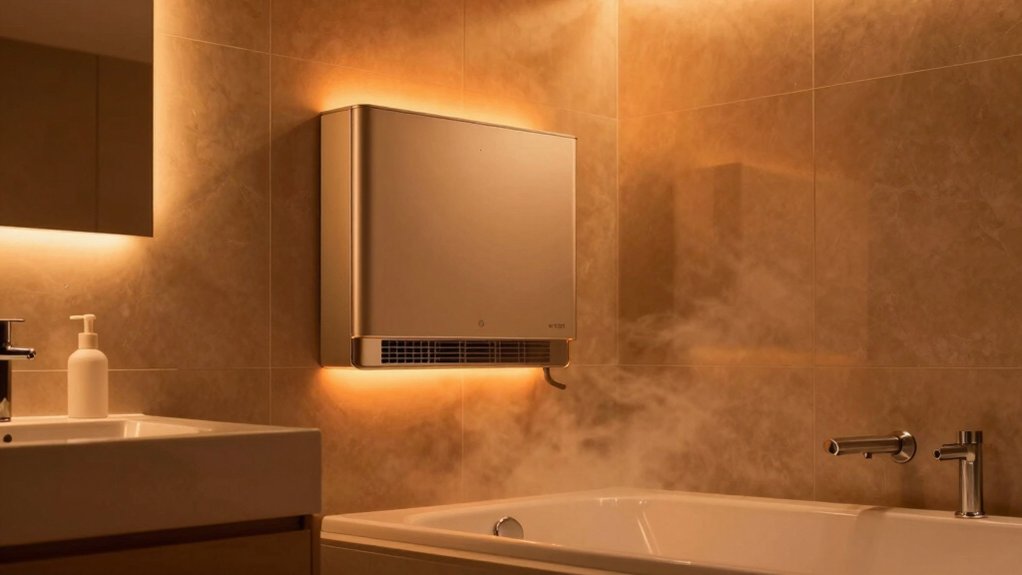
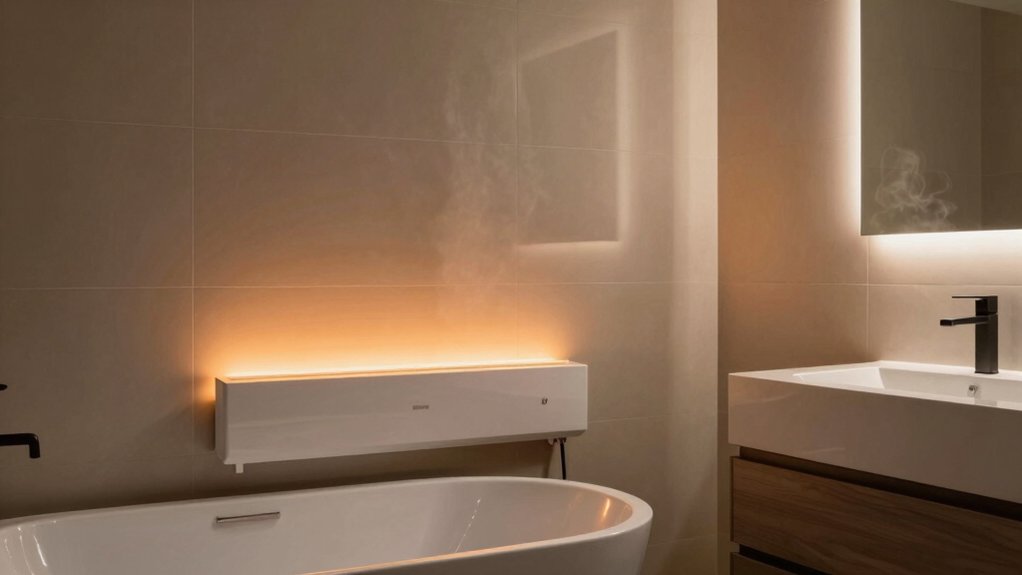
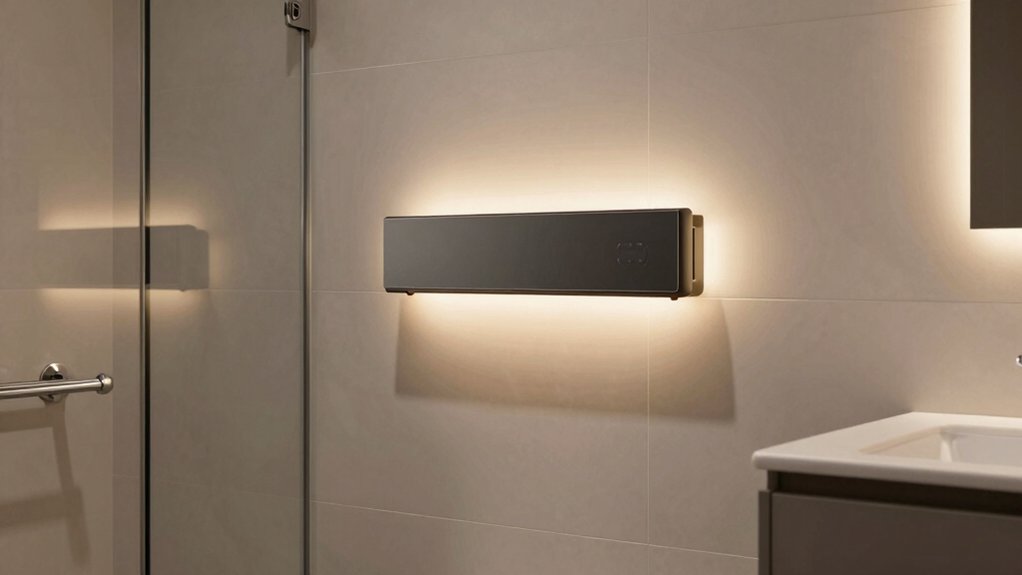
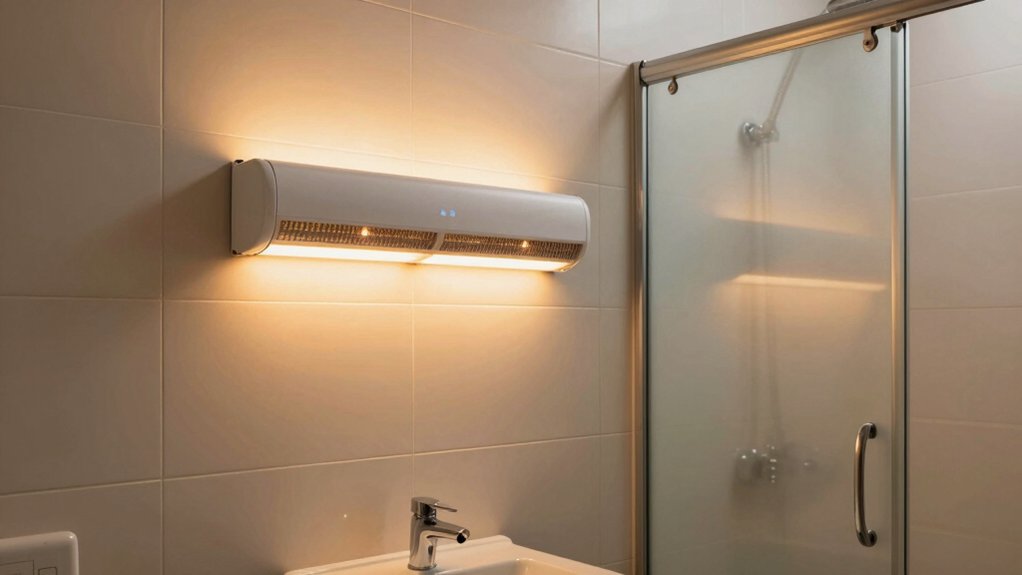
Placement Strategies for Optimal Warmth
To maximize effectiveness, place infrared bathroom heaters where heat loss is greatest and human presence is frequent, such as above the vanity mirror or near the shower entrance. You should assess walls with poor insulation and frequent users, then align heaters to target occupied zones without creating glare or direct eye exposure.
Positioners must allow safe clearance from water sources, vents, and mirrors to prevent condensation issues and fogging. Choose ceiling or high wall mounting to exploit convection flow, reducing cold spots while minimizing glare.
Consider duty cycles and local code limits, selecting models with integrated thermostats and overheat protection. Verify run-time expectations by measuring ambient temperature rise in occupied, routine-use intervals, and adjust placement to balance comfort, safety, and energy efficiency.
Regularly inspect seals and mounting integrity for sustained performance.
Common Bathroom Layouts and Heater Positioning
Common bathroom layouts present distinct opportunities and constraints for heater placement. You’ll assess walls, ceilings, and fixtures to minimize heat loss and maximize IR effectiveness.
In small en-suites, mount near zones of frequent use but away from moisture-prone surfaces to reduce corrosion risk; consider vertical clearance for safety and airflow.
In larger baths, space heating can rely on higher output units or multiple emitters, positioned to cover both vanity and tub areas without creating glare.
Corner installations can leverage reflected energy, yet require guard considerations and draft awareness.
Standard layouts benefit from ceiling or wall-melted panels that avoid direct water spray.
Always align the heater with typical user pathways, ensuring reachability for control and maintenance while preserving clearance from mirrors and cabinetry.
Features to Look For: Timers, Anti-Frost, IP Ratings
Timers, anti-frost functionality, and IP ratings are essential for reliable infrared bathroom heaters. You evaluate timers to understand whether you’ll heat efficiently without leaving devices running unnecessarily. A precise timer helps you schedule heat during preheating windows and post-use cooldowns, reducing energy waste.
Anti-frost features matter if you have unheated or rarely used bathrooms; they prevent condensation-related issues and protect wiring in cooler months. IP ratings indicate moisture and dust exposure tolerance, guiding you toward models suitable for humid environments; higher ratings correlate with better ingress protection.
You weigh demarcations like IP54 versus IP44 in relation to splash zones and venting exposure. Finally, confirm build quality, quick-release covers, and safety interlocks to ensure dependable, user-friendly operation.
Maintenance and Cleaning You Can Do Yourself
Maintaining an infrared bathroom heater yourself is straightforward if you follow a simple, methodical routine. Begin with power off and unplug before any handling. Wipe the exterior with a damp microfiber cloth; avoid abrasive cleaners that could scratch the finish.
For removable filters or grills, disconnect and brush loose dust, then reinstall securely. Inspect mounting hardware for signs of loosening and retighten as needed. Check the cord and plug for wear, replacing damaged components promptly.
Periodically verify the air vents are clear of lint, hair, or soap residue, preventing heat buildup. Don’t immerse any electrical components in water.
Schedule a light quarterly inspection of seals and gaskets; replace degraded parts per manufacturer guidance. Document maintenance dates to track intervals and maintain ideal efficiency.
Troubleshooting: What to Check If It Underperforms
If your heater underperforms, start by confirming the power supply is stable and matches the unit’s requirements.
Next, check sensor accuracy to ensure the thermostat reads correct room temperature, and verify the heat output against the rated specification.
This helps isolate whether the issue is electrical, sensor-related, or a mismatch in expected heat delivery.
Check Power Supply
Before you diagnose other issues, verify the power supply feeding your infrared bathroom heater. Start with the outlet: test that it provides the correct voltage and isn’t controlled by a switch or GFCI that’s tripped.
Next, inspect the circuit for loose connections, damaged cords, or corrosion at terminals; these flaws raise resistance and reduce available current. Check the circuit rating against the heater’s wattage; an undersized circuit or shared load can trigger voltage drop.
Measure actual voltage at the unit when it runs; a drop indicates upstream wiring or a poor connection. Assess the plug and cord for wear or grounding issues, replacing damaged components before proceeding.
Ensure the breaker remains stable under load, resetting if needed, and re-test performance.
Inspect Sensor Accuracy
How well does your infrared bathroom heater respond to temperature changes? Start by verifying sensor placement and grounding. Misalignment or loose connections can skew readings, causing delayed or exaggerated heating. Check the ambient sensor, ensuring it’s not next to vents, mirrors, or heat sources that distort input.
Inspect wiring for corrosion, fraying, or disconnected pins; secure any loose connectors and replace damaged leads. Calibrate if your model supports it, following the manufacturer’s instructions to set a reference room temperature.
Consider firmware updates or reinitialization cycles, which can correct drift. Compare sensor reports with a calibrated thermometer at multiple points in the bathroom to detect offset.
If discrepancies persist, document readings, then proceed to diagnostics for the control board or sensor module rather than altering heat output.
Verify Heat Output
To verify heat output when an infrared bathroom heater underperforms, start by confirming the unit actually receives power and starts a heating cycle.
Next, measure the emitted heat at a representative distance using an infrared thermometer or a calibrated surface thermometer, noting ambient conditions.
Compare readings to the manufacturer’s stated output range for the selected mode and duty cycle; if readings fall outside spec, document exact values.
Inspect the heating element for visible damage, corrosion, or thermal coating degradation, and verify insulation integrity around the unit to prevent heat loss.
Check the thermostat or control board for accuracy, ensuring settings align with the intended output.
Rule out obstructed vents, dirty reflectors, or improper installation.
If discrepancies persist, consult serviceable components or professional support for diagnosis.
Budgeting: Cost Ranges and Long-Term Value
Room-by-room costs vary, but you should start with a clear plan: estimate the upfront price of the heater unit, installation, and any electrical work, then compare these to long-term operating expenses.
You’ll assess purchase price, warranty duration, and potential rebates, then model yearly energy use based on your bathroom size and insulation.
Infrared heaters typically show cost advantages when used as a supplement rather than a primary heat source, so quantify frequency, run-time, and thermostat control savings.
Include maintenance, filter replacements, and possible service fees.
Consider amperage draw, circuit integrity, and electrical upgrades required to meet safety standards.
Translate these factors into a total cost of ownership over 3–5 years, then extend to a decade.
Document uncertainty ranges to inform risk-aware decision-making.
How to Compare Top Infrared Bathroom Heater Models
When comparing top infrared bathroom heater models, start by aligning features with your original cost-and-value framework: upfront price, warranty, and potential rebates, then assess ongoing energy use.
Compare wattage against room size and insulation, noting efficiency ratings and heat distribution patterns. Examine installation options—recessed versus surface mount—and how each affects reach and safety.
Prioritize controls that suit your routine: adjustable temperature, timer, and thermostat accuracy. Check build quality, mounting hardware, and IP ratings for moisture exposure.
Review warranty length, coverage specifics, and customer service reputation. Consider maintenance needs, such as element replacement availability and filter requirements.
Assess long-term operating costs by calculating annual energy use for typical sessions. Weigh rebates eligibility, installation costs, and payback horizon to determine the best overall value for your bathroom.
Frequently Asked Questions
Do Infrared Heaters Warm Instantly or Slowly?
Infrared heaters warm you quickly rather than gradually; you’ll feel warmth within seconds as radiant heat transfers to your skin. Their response is fast, though room temp rises more slowly than air-only heaters, depending on size and insulation.
Are There Risks of Burns With Infrared Panels?
Yes, infrared panels can cause burns if touched directly; they heat unevenly and may scorch skin. Use proper distance, enclosure, and safety controls, and avoid prolonged contact or installing near wet surfaces to mitigate burn risks.
Can Infrared Heaters Reduce Overall Bathroom Humidity?
Breath like a steady tide: infrared heaters don’t reduce humidity; they heat air, not moisture. You’ll feel drier skin, yet moisture remains. Analyze system placement, ventilation, and bathroom seals to balance comfort and humidity control.
Do They Emit Visible Light or Color Heat?
Yes, they emit some visible light from the heating elements, but the primary output is infrared heat; you’ll notice a faint glow while the device delivers warmth, not vivid color-based heating.
How Long Do Infrared Bathroom Heaters Last?
Infrared bathroom heaters last about 5 to 15 years, depending on usage and model. You’ll likely replace elements or units due to wear first, while routine maintenance extends life modestly; with careful use, you’ll enjoy consistent heat longer.
Conclusion
Infrared bathroom heaters offer efficient, targeted warmth with steady performance in damp spaces. You’ll nearly eliminate radiant heat loss while boosting comfort quickly, like a steady sunbeam through frosted glass. Analyze wattage relative to bath size, verify safety and humidity ratings, and compare models for long-term reliability and energy use. With careful selection and regular maintenance, you’ll achieve consistent warmth, lower running costs, and safer operation, turning bathroom comfort into a practical, measurable advantage.