
Your kitchen is a blank canvas waiting for a careful touch, like a face-lade of potential behind a familiar mask. You’ll start with thorough cleaning and light deglazing, then restore edges with a quick sand and seal, so surfaces look fresh without a full overhaul. Upgrading hardware and a durable paint or stain can transform the vibe, while budget-friendly countertops and smart storage pull the space together. Ready to weigh the steps that balance cost with lasting impact?
Assessing Your Kitchen: What Can Be Refurbished Without Replacing Units
Evaluating your kitchen starts with a clear inventory of what’s worth refurbishing. You’ll map components by function, noting condition, age, and remaining life.
Prioritize items that deliver the biggest returns in reliability and efficiency. For plumbing upgrades, inspect supply lines, traps, and shutoffs; upgrade fittings only where leaks or corrosion exist, and plan for minimal disruption to drainage.
Assess appliance replacements that fit existing cavities; keep non-permitted modifications in the past, and verify electrical compatibility before any swap.
Distinguish between cosmetic fixes and structural refinements, reserving substantial refurbishments for parts with wear, such as drawers, hinges, and soft-close mechanisms.
Document costs, timelines, and potential resale value to guide decisions. This disciplined approach helps you rebuild performance without replacing entire units.
Quick Cosmetic Upgrades: Painting Cabinets and Walls
If you’ve mapped what’s worth refurbishing, a quick cosmetic refresh can lower risk while delivering a noticeable lift: painting cabinets and walls. You’ll start with a clean surface—deglaze, light sanding, and dust removal—then seal edges to prevent bleed-through.
Choose a durable, washable finish in a low-VOC formula to reduce fumes and cure time. Apply even coats, using a high-quality brush or roller to minimize lap marks, and let each layer dry fully before the next.
For walls, mend small imperfections with lightweight filler and sand flush. Consider color psychology to influence perceived space and light.
While you’re revitalizing, plan compatible appliance upgrades and plumbing updates to avoid rework or mismatched tones, ensuring a cohesive, long-lasting result without heavy disruption.
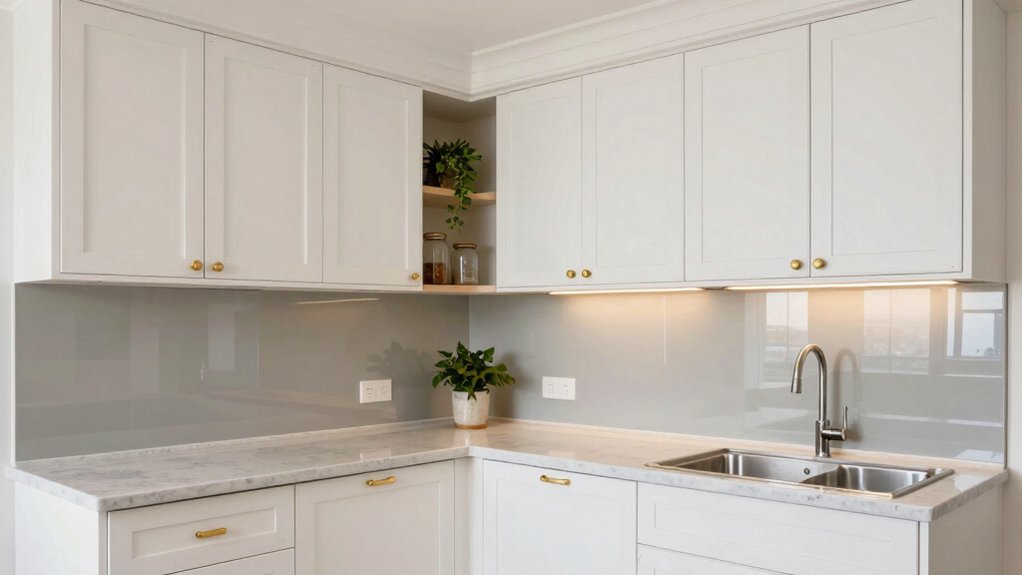
Hardware Makeover: Handles, Hinges, and Knobs That Transform
You’ll start by selecting fresh hardware that complements your cabinet style and ergonomics. Pair these choices with finishes that resist wear and coordinate with your countertops and handles. Then assess how hinges and knobs impact door alignment and usage.
This hardware makeover focuses on practical improvements: better access, subtle aesthetics, and durable, easy-care components.
Fresh Hardware Choices
When you refresh your kitchen hardware, choosing the right handles, hinges, and knobs can transform the look and feel without replacing cabinets. Start with a cohesive style: match metal tones to existing fixtures, and balance scale with cabinet doors.
For function, pick soft-close hinges to reduce wear and noise, and consider push-to-open mechanisms for a sleek, handle-free grade. Select knobs or pulls sized to your drawer depth and hand reach; avoid oversized hardware on small doors.
Prioritize durability—stainless steel, brass, or coated zinc resist wear and fingerprints. Consider accessibility: reachable mounting heights and ample grip area aid daily use.
Plan around furniture arrangements and appliance upgrades, ensuring progressions feel deliberate rather than incidental. Document screws and align patterns for precision installation and a polished, lasting finish.
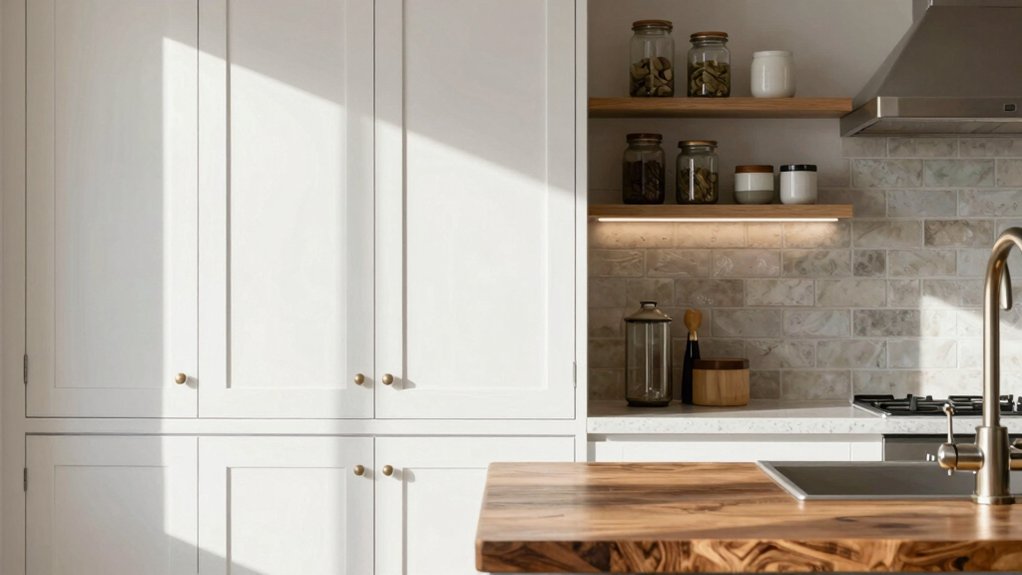
Update With Finishes
Finishes can redefine a kitchen’s personality without changing a single cabinet. You’ll approach this with precise selection and informed application.
Start by evaluating cabinet finishes and how they interact with your existing hardware. Choose surface treatments—matte, satin, or gloss—that align with door profiles and lighting.
For metal hardware, consider contrast or matching tones to the hinges and pulls you already have. Sanding lightly between coats ensures an even, durable layer.
When you recoat, use a compatible sealant to resist fingerprints and wear. Document steps for touch-ups, detailing prep, product brands, and cure times.
Test a sample on a concealed panel to verify color and sheen before full commitment. Finish with a protective topcoat and allow proper curing to preserve long-term performance.
Functional Accessory Makeover
Updating hardware is a quick, high-impact way to refresh a kitchen without altering the cabinets. You’ll evaluate existing handles, hinges, and knobs for wear, alignment, and scale. Choose a cohesive set that matches your space: satin nickel, matte black, or brushed brass can modernize without replacing frames.
Consider soft-close hinges to reduce slams and improve longevity, and match screw sizes for a clean install. If you want a bolder statement, mix materials strategically within rail and door components.
For custom cabinet designs, prioritize uniform mounting heights and edge profiles to avoid misalignment. Appliance concealment is worth integrating, using louvered panels or hardware covers where visible units interrupt flow.
Document measurements, test openings, and label hardware to streamline reassembly after updates.
Countertop Revamps on a Budget: Surfaces That Look Upscaled
If you’re aiming for a high-end look without the cost, think surface upgrades that transform your kitchen instead of a full remodel. You’ll optimize budget and impact by selecting countertop revamps that pair durability with visual appeal.
Options include resurfacing existing counters with epoxy or solid-surface overlays, which create seamless, concrete, or stone aesthetics without demolition. Choose color, edge profiles, and texture to mirror premium materials while maintaining resilience against heat and spills.
Complement the surface with precise edge details to elevate polish. Consider compatible upgrades like appliance upgrades or thoughtful window treatments that frame the workspace and reflect light.
Plan for proper ventilation and surface prep, verify substrate compatibility, and allow for cure times. These steps deliver a refreshed, upscale look without invasive changes.
Smart Storage Tips to Free Up Space and Improve Flow
Smart storage is the practical next step after achieving a refreshed surface, because how you organize matters as much as what you’ve upgraded. You’ll optimize kitchen layout by grouping items by function and frequency, placing everyday essentials within arm’s reach and seasonal tools in high cabinets or trays.
Use vertical space with pull-out shelving, labeled bins, and clear fronts so you can see contents at a glance. Integrate appliances where possible to reduce clutter, selecting compact, multi-use units and toe-kick drawers for small devices.
Create dedicated zones: prep, cooking, cleaning, and overflow. Install adjustable shelves to adapt to tall containers, and employ drawer dividers to separate utensils. Finally, cap layouts with accessible corner solutions to maintain free-flowing movement.
Lighting Ideas to Brighten and Modernize the Space
You’ll start with layered lighting to balance task, ambient, and accent needs without overhauling your cabinets.
Consider installing modern fixtures that align with your existing style while boosting energy efficiency and control.
This sets the foundation for bright, practical upgrades that feel cohesive and contemporary.
Layered Lighting Ideas
Layered lighting combines task, ambient, and accent layers to transform a kitchen without replacing cabinets. You’ll balance function and mood by pairing bright task lighting with soft ambient glow, then highlight features using subtle accents.
For kitchen task, place adjustable under-cabinet LEDs beneath upper boxes to illuminate counters without glare. Use dimmable fixtures so you can reduce brightness for meals or increase it when chopping.
Consider zoned controls: separate switches or smart scenes for work zones, dining bites, and entryways.
Color temperature matters: 2700–3000K feels warm for dining, 3500–4000K suits prep areas, and higher temps edge toward clarity.
Avoid shadows on work surfaces by angling light or using frosted diffusers.
Finish with an unobtrusive ceiling layer to unify the space.
Modern Light Fixtures
Modern light fixtures can instantly refresh a kitchen without altering the layout, combining efficiency with a contemporary vibe. You’ll want fixtures that balance task lighting with ambience, prioritizing glare control and color rendering. Choose LED options for long life and consistent output, then match color temperature to your cabinets and countertops.
For a cohesive look, pair minimalist pendants with clean lines and metallic or matte finishes. Consider vintage appliances as focal accents; their tone should harmonize with the fixture palette to avoid clutter. If you favor rustic decor, select fixtures with subtle, textured details that echo wood grains rather than overpowering the space.
Install dimmers on key zones, such as the island and workspace, to tailor brightness for cooking and entertaining.
Flooring and Backsplash Tweaks for a Cohesive Look
To create a cohesive look, start by selecting flooring and a backsplash that share a common undertone or texture, then align grout color and seam patterns to maintain visual continuity.
You’ll want to compare tile patterns against your selected backsplash to ensure rhythm, not competition, between surfaces. Choose grout colors that bridge both materials instead of matching one perfectly; a midtone often smooths contrast and hides inevitable seams.
Consider layout: run continuous lines across the floor and backsplash to emphasize alignment, and plan progressions where they meet cabinetry. Use a single, durable sealant on both surfaces to reduce upkeep.
Test samples in both daylight and artificial light to confirm the perceived texture. Finally, document your choices for future updates.
Cost Guide and Common Pitfalls to Avoid
If you’re refurbishing without replacing cabinets, a clear cost framework helps you keep projects on track and on budget. Begin with a transparent scope: note which cabinet faces, drawers, and hardware will be refreshed, and estimate finishes and labor separately.
Create a line-item budget that includes appliance upgrades, fixtures, and surface treatments, plus contingency for unexpected fixes. Identify critical risks early—plumbing repairs, electrical upgrades, and ventilation adjustments can spike costs if rushed.
Favor upfront measurements and phased ordering to reduce waste. Compare materials by life cycle cost, not just sticker price, and document warranties.
Schedule work to prevent overlap and delays, aligning procurement with installer timelines. Track variances weekly, and adjust plans before commitments.
Maintain clarity with contractors, and record any changes to avoid creeping costs.
Frequently Asked Questions
How Long Does a Cabinet Refinish Typically Last?
A cabinet refinish typically lasts 5 to 15 years, depending on use and prep. You’ll maximize cabinet durability and refinishing longevity by thorough cleaning, proper sanding, quality primer, durable topcoat, and careful routine maintenance.
Can I Repaint Stained Wood Cabinets Successfully?
Yes, you can paint stained wood cabinets successfully. Use proper cabinet paint techniques and remove the wood stain thoroughly before priming, then finish with durable enamel. Make certain surface is clean, smooth, and dry for lasting results.
Do Veneer Countertops Hold up After Painting?
Yes, veneer countertops can hold up, but you’ll need strict veneer maintenance. They’re as durable as you treat them, so monitor moisture, seal edges, and avoid heat. With proper care, countertop durability improves and longevity becomes practical.
Is Spraying Cabinet Doors Better Than Brushing?
Spraying cabinet doors gives a smoother, more even finish than brushing. You’ll achieve a consistent spray finish, avoiding brush marks, while brush application can work for edges or tight corners. Choose technique by surface area and equipment you own.
Are DIY Lighting Upgrades Code-Compliant in Kitchens?
Yes, diy lighting upgrades can be code-compliant if you follow lighting regulations and prioritize electrical safety. Like a lighthouse keeper’s routine, you’ll plan, measure, and verify. You’ll install GFCI-protected outlets and compliant fixtures, testing thoroughly.
Conclusion
If you’re skeptical that a facelift won’t fix worn cabinets, you’re halfway there—refurbishing can transform perception as much as reality. By deglazing, sealing edges, swapping hardware, and choosing durable paints or overlays, you create a kitchen that feels bigger, brighter, and newer. When you layer lighting, practical storage, and cohesive backsplashes, the space reads as unified, not patched. The theory that small changes can yield big impact is true, if you plan carefully and execute with precision.


