
Reducing heat loss in a refurbishment starts with sealing up drafts and leaks around doors, windows, and penetrations, then layering insulation where it counts. You’ll want to upgrade glazing to low-E, inert-gas filled units and make certain of continuous insulation across walls, roofs, and floors. Add airtight ventilation and smart controls to keep temps steady without wasting energy. Focus on practical gains first, but the best moves often reveal the next step you should take to close the remaining gaps.
Assessing Your Home’s Heat Loss Baseline
Evaluating your home’s heat loss baseline starts with a clear picture of where energy is escaping. You’ll map major hotspots, then quantify losses to set a realistic target.
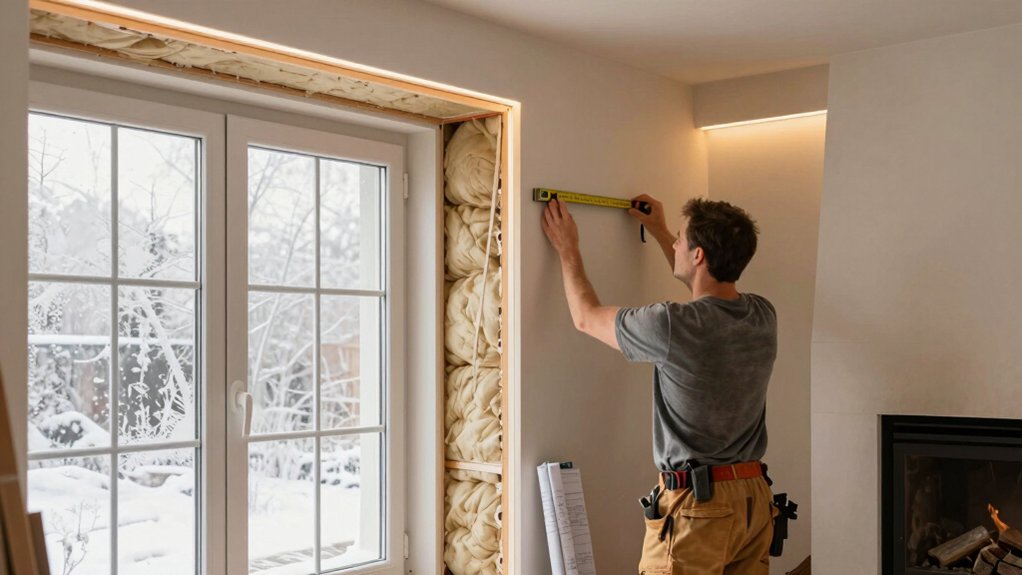
Start with a physical inspection: note drafts around doors and windows, air leakage at penetrations, and insulation thickness in walls, attic, and floors. Use a thermometer and a simple blower-door test if available to gauge overall airtightness.
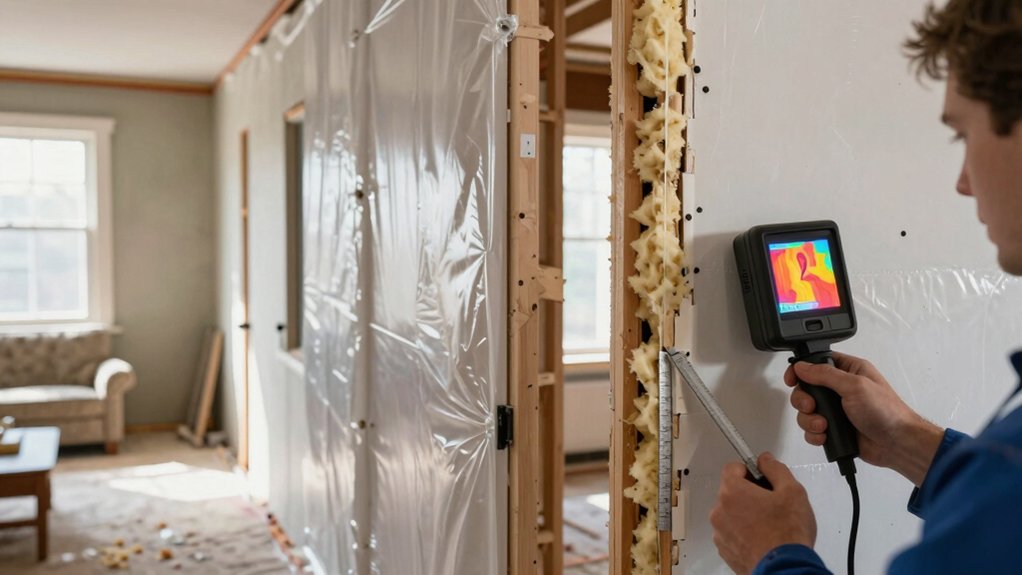
For precise identification, employ thermal imaging to reveal cold spots and hidden gaps you might miss visually. Record measurements, align them with your building envelope layout, and convert findings into a baseline energy index.
This baseline guides prioritization, informs retrofit scope, and helps you track improvements as you upgrade for comfort and efficiency.
Prioritizing Upgrades for Quick Wins
Start with quick-win upgrades that cut the most heat loss for the least effort. Focus on high-impact fixes you can implement fast, like sealing leaks and upgrading a single door or window pane.
Prioritize actions that deliver noticeable comfort gains and a clear return on effort, so you can build momentum without slowing down.
Quick-win Upgrades
Quick-win upgrades focus on fixes that deliver noticeable heat-loss reductions fast, with minimal disruption and cost. You’ll target areas that visibly improve comfort without overhauling systems.
Start with sealing leaks around doors and windows using draft excluders and foam; it’s quick, cheap, and effective. Improve airtightness at penetrations, like pipes and cables, with flexible sealants.
Add radiator reflectors behind heaters to minimize wall losses, increasing heat output efficiency. Upgrade curtains or blinds to heavy, insulating window treatments that reduce nighttime heat loss; consider layering for seasonal control.
Use solar shading where appropriate to cut summertime heat gain, easing cooling loads. Prioritize fixes you can complete in days, document savings, and re-check measurements to verify improvements.
Reassess after a week for any additional small, high-impact tweaks.
Prioritize High-Impact Fixes
To get the most bang for your buck, zero in on fixes that yield the largest heat-loss reductions with the least effort. You’ll want quick, measurable wins that don’t disrupt your renovation schedule.
Prioritize fixes that address thermal bridging first, since gaps in structure pull heat like a magnet. Focus on practical actions you can implement now: seal gaps around doors and windows, install door sweeps, and upgrade attic access insulation.
Evaluate insulation types for where they’ll matter most—dense-packed cellulose or spray foams in cavities, rigid boards in exterior walls, and attic insulation with a high R-value.
Don’t chase marginal gains; target opportunities that compound over time, such as continuous insulation under siding or improved sill plates, to curb long-term heat loss efficiently.
Sealing Gaps and Drafts Efficiently
Sealing gaps and drafts efficiently starts with a quick audit: feel for chilly air around doors, windows, outlets, and attic hatches, then tackle each spot methodically. Begin with obvious openings: weatherstripping at moving doors, door bottoms, and window sashes. Use appropriate weatherstripping techniques, matching material to the gap size and movement, then recheck for air leaks.
Seal attic hatch edges and electrical box penetrations with foam or caulk, keeping fire-safe materials in mind. Apply draft proofing methods around recessed lighting and plumbing penetrations to minimize convection loops.
Maintain a simple, iterative process: test, seal, retest, and adjust. Prioritize airtight integrity over cosmetic fixes, and document locations for future maintenance.
Finish with a final inspection to ensure steady, uniform indoor temperatures and reduced heat loss.
Upgrading Windows for Better Insulation
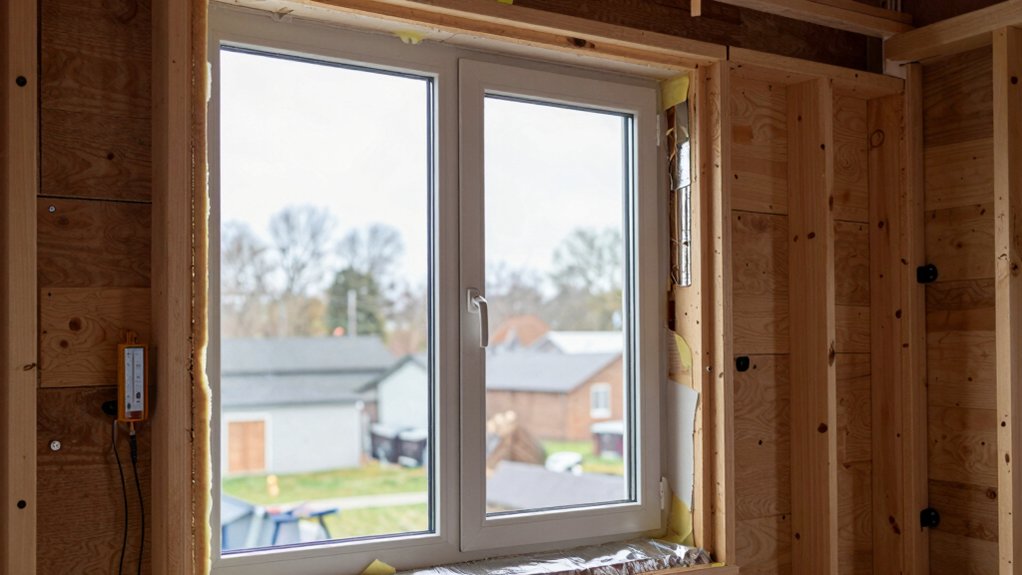
Consider how window U-values, frame materials, and glazing/ seal options affect heat retention. You’ll compare U-values to pick efficient panes.
Choose frame options like timber, PVC, or aluminum for insulation and durability.
Evaluate glazing types and sealer methods to minimize drafts. This discussion sets the practical steps to upgrade windows without overhauling your whole home.
Window U-Values Explained
If you’re upgrading windows for better insulation, understanding U-values helps you compare performance quickly. U-values measure heat transfer through a window assembly, lower numbers mean tighter insulation.
Look at whole-window U-values, not just glass, since frames and spacers affect performance too. A typical modern double-glazed unit with low-emissivity coating can achieve about 1.8–3.0 W/m²K, depending on design.
In colder climates, aim for the lower end; in milder climates, you might tolerate a slightly higher value if cost savings matter.
Check labeling and test standards like EN 673 for glass, EN 1026 for air leakage, and whole-unit ratings.
When evaluating options, compare glazing options and how frame choices influence overall heat loss, ensuring compatibility with existing building details.
Frame Material Choices
Frame material matters as much as the design for insulation: the right choice reduces heat loss beyond what glass alone can achieve. You’ll compare frames by thermal performance, durability, and compatibility with your building’s envelope.
Aluminum frames offer slim sightlines but conduct heat more readily unless insulated; consider thermal breaks and higher performance variants.
Vinyl frames resist weathering and cost less, yet long-term durability varies by climate.
Timber frames provide natural insulation but require maintenance and timber treatment, especially near exterior cladding.
Composite options blend materials for improved stability and reduced thermal bridging.
Confirm choices align with interior finishes and exterior cladding to avoid moisture or incompatibility.
Prioritize airtight installation details, including flashing and sealants, to maximize the frame’s insulating benefit.
Glazing and Seals Options
Glazing choices and seals directly impact heat loss, so upgrading windows goes beyond lenses and frames to the panes, coatings, and how the sashes seal.
You should prioritize glazing that minimizes thermal bridging, prefers low-E coatings, and uses inert gas fills to reduce conductivity.
Double glazing remains a reliable baseline; consider three or even quad glazing for high-stress climates, but weigh added weight and cost against gains.
Seek tight spacers and well-sealed units to prevent drafts at edges.
Inspect window seals for compression and wear, replacing them when gaps appear.
Opt for airtight frame designs and weatherstripping that resists crushing in both summer and winter.
Finally, verify certification standards and get professional guidance to match your climate and home readiness goals.
Insulating Walls: Which Materials Work Best
In walls, the key to reducing heat loss is choosing insulation with the right R-value, thickness, and placement. You should prioritize materials with high thermal resistance per thickness and low moisture risk.
Consider mineral wool for fire safety and sound control, rigid foam boards for continuous envelopes, and mineral wool or cellulose for DIY permeance balance.
For retrofits, injectables like closed-cell spray foams seal irregularities, but beware potential moisture traps in wall cavities. Guarantee correct gaps around electrical boxes and pipes to minimize thermal bridging.
Favor products with low global warming potential and proven long-term performance. Match material choice to wall construction, climate, and budget, aiming for a continuous, well-sealed cavity.
In all cases, plan for a practical installation sequence and verify with a professional.
Roof and Attic Tightening Strategies
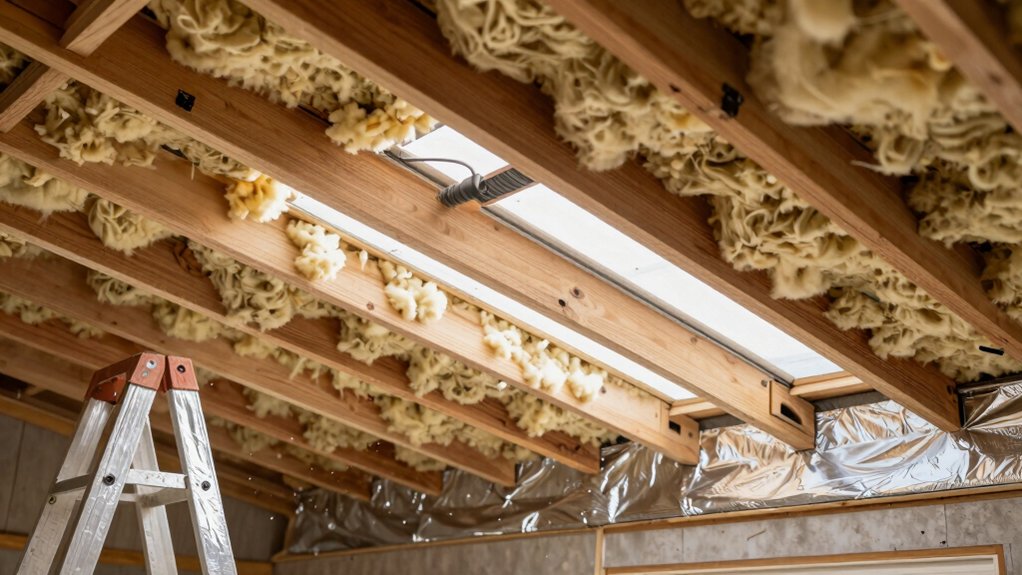
Why waste heat through an attic when a few targeted changes can stop it at the source? Start with tight sealing around penetrations—pipes, wires, and chimneys—using spray foam or backer rods as appropriate. Then seal attic hatches with a gasket or weatherstrip.
Prioritize attic insulation to achieve a continuous layer without gaps, avoiding compression near joists.
Check for air leaks around recessed lighting and switch boxes, and retrofit airtight boxes where feasible.
Inspect roof venting to ensure balanced ventilation without creating cold drafts; install baffles to keep insulation above the eave and prevent compression.
Use a clear, compact air barrier at the attic floor to reduce convective heat loss.
Finally, audit for moisture risk, upgrading ventilation paths only when necessary.
Insulating the Floor and Crawl Spaces
If you’re insulating the floor, focus on adding solid floor insulation and airtight junctions to cut heat loss and boost comfort.
For crawl spaces, address moisture control first—seal vents, manage humidity, and install vapor barriers to prevent cold drafts and mold risk.
Together, these moves improve thermal performance and support long-term durability of your floor system.
Floor Insulation Strategies
Floor insulation is one of the most effective ways to cut heat loss from your home, especially in unheated spaces like crawl spaces and under-floor areas. You’ll choose insulation that fits your floor type and budget, then install with minimal disruption.
Start by sealing gaps and ducts to prevent drafts before laying insulation. In joist cavities, use responsibly sourced materials that compress evenly and won’t sag over time. For raised floors, consider breathable, moisture-resistant options and proper underfloor ventilation to avoid condensation.
If you’re retrofitting, comparison shop for R-values appropriate to your climate and ensure the vapor barrier faces the warm side. Prioritize sustainable materials and eco-friendly insulation, aiming for long-term performance, ease of install, and lower embodied energy.
Regular checks keep gaps from reappearing and heat loss down.
Crawl Space Moisture Control
Crawl space moisture control starts with stopping water and humidity from entering the area, then sealing and insulating to keep the warm, dry air in. You’ll want a proven sequence: identify and fix exterior leaks, improve drainage, and install a vapor barrier across the ground to reduce moisture diffusion.
Next, seal rim joists and penetrations with airtight caulk or foam, preventing drafts that carry humidity into living spaces. Choose moisture barriers designed for crawl spaces, and lay them with a continuous, overlaps-free layer.
Ventilation strategies should balance airflow to remove excess humidity without cooling the space excessively. Install an appropriate venting plan or dehumidification if needed, ensuring code compliance.
Finally, verify performance with a moisture meter and recheck after rainfall or heavy condensation.
Air Leakage Testing and Blower Door Use
Air leakage testing uses a blower door to measure how much outside air flows into your home through cracks and gaps. You’ll seal off large openings, run the test, and observe a pressure difference that reveals leakage sites.
Use the results to prioritize fixes, starting with air sealing at doors, windows, penetrations, and framing joints. Blower door testing helps quantify improvements after each fix, so you know when you’ve reached your targeted air leakage reduction.
Plan for a controlled test weather window to minimize wind effects and avoid false readings. For best precision, repeat testing after sealing and before finishing, ensuring penetrations around electrical boxes and plumbing are addressed.
Keep notes of leakage paths and measure progress toward a tighter envelope.
Smarter Heating Controls and Zonal Heating
Smart heating controls and zonal heating let you tailor warmth to when and where it’s needed, cutting waste and improving comfort. You’ll benefit by isolating rooms you don’t use often and pairing heat delivery with occupancy patterns.
Zonal heating enables separate temperature zones, so bedrooms stay cooler during day, while living areas rise in the evening. Use smart thermostats to automate schedules, account for weather shifts, and learn your routines; they adapt without manual tweaks.
Confirm radiators or underfloor zones are correctly balanced to avoid hot spots. Simple scene setups can switch between “home,” “away,” and “sleep” modes, reducing heat loss without sacrificing convenience.
Verify compatibility with your boiler and insulation quality, then monitor energy readouts to validate savings over time.
Selecting Efficient Heating Equipment
When selecting efficient heating equipment, start by matching the unit’s output to your space size and insulation quality to avoid over- or under-heating.
Choose equipment rated for your climate and typical occupancy, and prefer models with high annual fuel utilization efficiency (AFUE) or seasonal energy efficiency ratio (SEER) ratings.
Consider combi systems for small spaces or heat pumps for moderate climates, and factor in heat recovery options where possible.
Plan for integration with solar panels to offset running costs, and ensure compatibility with existing controls.
Pair your choice with smart thermostats to optimize runtimes and setback schedules without user intervention.
Prioritize reliable brands, straightforward maintenance access, and clear warranty terms to minimize long-term costs and maximize performance.
Ductwork Health and Efficiency Checks
Ductwork health directly affects comfort and energy use, so start with a quick audit: listen for leaks, feel for drafts, and check that all runs are properly supported and sealed. You’ll inspect accessible ducts for loose connections, worn insulation, and obvious gaps.
Prioritize areas near the furnace, attic, and crawlspaces where losses spike. If you hear rushing air or feel cold spots, mark them for attention.
Improve performance with targeted air duct sealing to stop air migration without overhauling the system. Check insulation around ducts exposed to unconditioned spaces; enhance where temperature swings happen.
Ensure flexible ducts aren’t kinked or crushed, and that junctions have proper clamps.
Document findings, plan fixes, and re-test after repairs for measurable improvement in efficiency.
Optimizing Ventilation Without Drafts
To optimize ventilation without drafts, start by balancing airflow and sealing paths that let conditioned air escape or unwanted air enter. You’ll reduce heat loss and maintain comfort by targeting pressure differences between rooms and outdoors.
Use controlled ventilation points: install mechanical extract or supply where needed, and cap unintended leaks with sealant or weatherstripping. Prioritize airtight high-traffic zones but keep access for maintenance clear.
Pair this with clean filtration to protect indoor air quality and minimize pollutant buildup. When natural ventilation is feasible, leverage short, directional openings during milder conditions, ensuring cross-ventilation that doesn’t pull warm air out of rooms.
Monitor humidity and odors; if drafts persist, revisit sealing and balancing adjustments. Consistent checks preserve efficiency and comfort without sacrificing indoor air quality.
Thermal Mass and Passive Strategies
Thermal mass stores heat and releases it slowly, smoothing temperature swings and reducing load on heating and cooling systems. You’ll use it by selecting materials that store heat during the day and give it back at night, stabilizing indoor temperatures without extra energy. Think concrete, masonry, brick, or stone, placed where sun heats the interior or where mass participates in cycles with adjacent walls.
Pair this with passive strategies like orientation, shading, and insulation to maximize effectiveness. To implement, avoid unnecessary partitions that interrupt heat flow, and ensure continuous paths for heat to travel through the mass.
Monitor surface temperatures to prevent overheating or comfort gaps, and seal gaps around windows and doors to preserve the mass’s stabilizing effect. This approach lowers energy use and enhances comfort.
Budgeting and Phasing Your Improvements
Budgeting and phasing your improvements starts with a realistic cost picture and a clear plan for sequence. You’ll map out costs for high-impact, low-cost options first, then layer in deeper measures as funds allow.
Start with a detailed budget that separates essential renovations from nice-to-haves, so you can gauge urgency and risk. Consider phased planning to keep disruption manageable and cash flow predictable.
Set measurable milestones, assign owners, and schedule work during favorable weather or off-peak periods to save on labor. Build in contingencies for overruns and material price shifts.
Prioritize airtightness, insulation, and efficient systems early, then defer cosmetic updates if needed. Communicate regularly with stakeholders, document decisions, and adjust the plan as budgets tighten or expand.
Maintenance Habits to Sustain Comfort
Regular maintenance keeps comfort steady and energy use predictable. To sustain warmth after a refurbishment, you commit to simple, repeatable checks.
Schedule seasonal maintenance for heating systems, insulation integrity, and airtightness, and log results so trends stand out.
Clean filters, vents, and dampers monthly, and replace worn seals before drafts sneak in.
Monitor thermostat performance, ensuring you’re not overheating or overcooling spaces.
Inspect windows and doors for glazing gaps after seasonal changes, resealing as needed.
Run energy audits periodically to identify hidden losses and confirm improvements hold.
Keep a maintenance notebook, noting dates, actions, and observed comfort levels.
Your proactive habits prevent sudden cold snaps, reduce bills, and preserve the gains from your project.
Frequently Asked Questions
How Long Does a Typical Heat Loss Baseline Assessment Take?
A typical heat loss baseline assessment takes about 1–2 days, depending on property size and complexity. You’ll perform heat loss measurement tasks, data logging, and analysis, with assessment duration influenced by access, weather, and insulation findings.
Can Small DIY Fixes Outperform Professional Upgrades in Some Cases?
Yes, in some cases DIY fixes outperform professional upgrades, but beware DIY pitfalls; you’ll save upfront, yet risk higher losses later. Rely on professional expertise where complexity or safety matters, and proceed with careful planning.
What Is the Typical Cost per Square Meter for Insulation Upgrades?
The typical cost per square meter for insulation upgrades varies, but you’ll pay roughly £20–£60 depending on materials and thickness. Compare cost vs. durability with a clear cost comparison, and evaluate insulation materials for long-term savings.
Do Smart Thermostats Significantly Reduce Heat Loss on Their Own?
Smart thermostats help with heat regulation, but they don’t alone prevent heat loss; you still need insulation, sealing, and proper zoning. Use them to optimize timing and temperature, reducing wasted energy and improving comfort.
How Often Should I Re-Check Air Leaks After Sealing?
You should re-check air leaks every 2–4 weeks after sealing; 90% of leaks are found within the first checks. Use air leak detection, then adjust sealing frequency as needed to maintain tight envelopes and energy savings.
Conclusion
You’ll close the gaps, seal every corner, and drop heat leaks to almost nothing. But the last details—the door weatherstrips, the window upgrades, the ducts—will decide how snug you really get. As you finish a flawless seal, a whisper of warmth lingers, and you sense the savings—but you won’t see the full picture until the cold returns. Stay vigilant, tune controls, and watch the comfort grow. The next cold snap could reveal your quiet triumph.


