
To fit skirting boards, start by measuring each wall twice and plan for 2–3 mm expansion at joins. Choose a profile that suits your room, then prep a clean workspace and gather cuts, nails, adhesive, a level, and a saw. Mark top edges, cut mitre joints cleanly, and dry-fit before fixing. Secure with screws into studs or floor joists, add a thin bead of adhesive, and seal gaps with caulk. With careful steps, you’ll uncover more tips as you continue.
Measuring for Accurate Fit

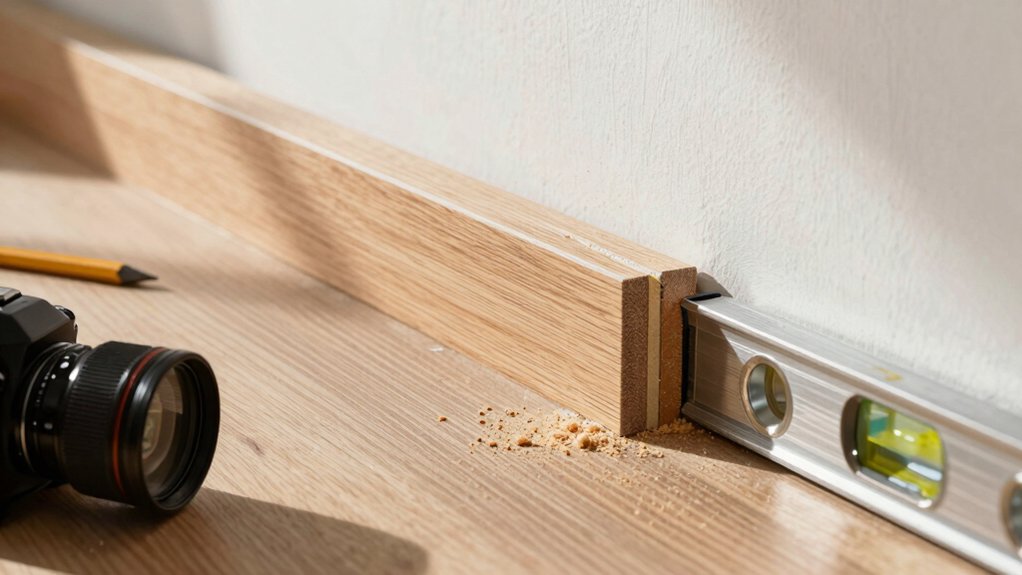
To get a precise fit, start by measuring both lengths of each wall where the skirting will sit. You’ll want two measurements per wall: ceiling to floor along the left edge, and ceiling to floor along the right edge, noting any slight dips or bumps.
Record door reveals and window recesses, and include a small allowance for expansion, typically 2–3 mm per join. Use a reliable tape measure, and verify with a second measurer or a third check on-site.
Transfer figures to your cutting plan, labeling walls clearly. Consider skirting board materials and how they’ll respond to moisture and temperature changes in your space.
Be mindful of historical styles when planning spacing, so alignment remains consistent with the room’s character. Precision prevents gaps and cupping.
Choosing Skirting Board Profiles
Choosing skirting board profiles comes down to style and fit: consider the profile styles that suit your room’s character and how they affect clean lines and concealment of gaps.
Think about how each profile sits with door frames, flooring, and base details, and weigh how the fitment options influence ease of installation.
We’ll explore practical choices now, focusing on how profile shapes and proper fitment impact both finish and durability.
Profile Styles Explored
Profile styles set the tone of a room as much as the paint color does. In this section, you’ll compare common profiles and how they read in practice. You’ll consider clean, minimalist edges for a contemporary look, and more ornate profiles for decorative trims that add character without overpowering other features.
Think about height, projection, and the way each profile shadows along the wall and floor. A simple bead or chamfer can soften junctures, while an ovolo or OG edge creates classic emphasis. Your choice should align with existing mouldings, flooring, and ceiling height.
Document the practicality: installation ease, paint grip, and durability. Ultimately, select a profile that matches your room’s scale and your preferred styling direction.
Fitment Considerations
When selecting skirting board profiles, consider how fitment affects installation, durability, and finish. You pick profiles that match wall height and stay consistent with room style, so gaps aren’t obvious and coatings sit cleanly.
A shallow bead or simple squared edge is easier to inset against plaster, while a deeper decorative profile can highlight architectural intent but may require careful mitre work. Assess door reveals, radiator tops, and coving alignment to avoid clashes.
Think about expansion gaps and paintable surfaces; profile should allow even paint coverage without excess filler. In high-traffic rooms, choose solid timber or lacquered MDF for resilience.
In home offices or lounges, a refined profile complements furniture and lighting. Balance aesthetics with practical fitment to ensure a lasting, cohesive finish.
Preparing the Workspace and Tools
You gather essential tools and lay them out so you can reach what you need without hunting.
Clear the workspace area, remove clutter, and protect surfaces to keep cuts accurate and clean.
Check workspace safety—knee pads, eye protection, and stable lighting—before you start.
Gather Essential Tools
To begin, gather the essential tools and organize them within easy reach: a tape measure, a straight edge, a pencil, a sharp utility knife, a miter saw or handsaw, a coping saw for internal corners, a drill or impact driver with bits, a level, a stud finder, and a clamp or two.
Keep power tools ready but isolated when not in use, with blades secured and guards in place. Lay out safety gear—eye protection, hearing protection, and gloves—within arm’s reach. Check batteries, blades, and bits for sharpness and suitability.
Confirm your workspace lighting and ventilation meet needs. If you’ll cut outdoors, bring a stable work surface and a dust bag or vacuum connection. Prepare a small, organized toolbox for quick changes without losing focus.
Clear Workspace Area
Clear the area around your work surface to prevent miscuts and accidents. You’ll set up a clean, stable base to measure, cut, and fit skirting boards accurately.
Clear any clutter from the bench, floor, and surrounding area, and lay down a protective mat or scrap material to catch dust and offcuts.
Organize tools within easy reach: saw, chisel, tape measure, and clamps, plus a sharp pencil for marking. Keep spare blades and nails in a labeled container.
Prepare your decorative accents and chosen profile before you start, ensuring you have the correct material selection for the room’s style.
Maintain good lighting to ensure accuracy, and check that your work area is dry and level, reducing variances during fitting.
Check Workspace Safety
Before you start, inspect the workspace for hazards and guarantee all tools are in good condition. You should clear obstructions, secure ladders, and verify power cords are undamaged.
Identify trip risks, proper lighting, and stable surfaces to work on. Perform hazard identification by scanning for loose flooring, nails, or splinters, then address them before cutting or fitting.
Gather PPE requirements before proceeding: safety glasses, hearing protection, gloves, and a dust mask if you’re sanding or sawing. Check ventilation and eliminate fumes from adhesives or sealants.
Keep a dedicated offcut bin to reduce clutter. Confirm clamps and straightedges are within reach and calibrated. Maintain a clean, organized zone so accidental slips don’t delay the project.
Marking and Cutting Internal Corners
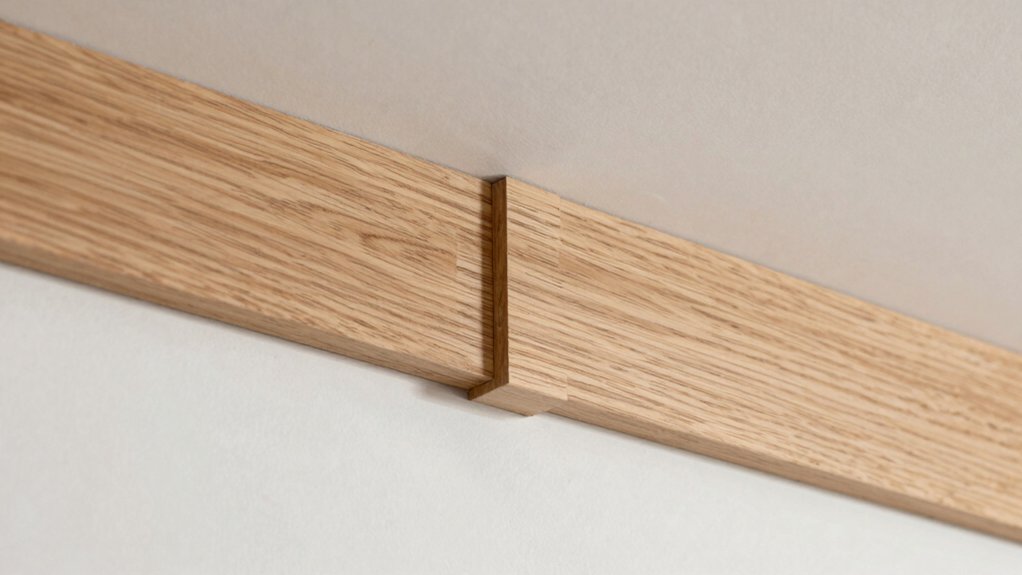
When marking and cutting internal corners, start by aligning the skirting board tightly against the wall and tracing the corner with a pencil. You’ll create a clear inner corner line to guide your cut, ensuring accuracy before you cut.
Use a fine hand saw or a Multitool for controlled removal, keeping the blade perpendicular to the wall. Mark both faces of the board so you can verify fit from either side.
Use a fine hand saw or Multitool, blade perpendicular, and mark both faces to verify fit from either side.
Consider corner jointing techniques that maximize strength while keeping a neat finish, such as mitered joints or tight butt joints with adhesive.
For decorative mouldings, preserve profile integrity by cutting slowly and checking fit with a dry lay. Remove waste carefully, then test the join before final fixation.
Clean lines, solid contact, crisp results.
Coping External Corners for a Seamless Look
Coping external corners creates a seamless edge where the skirting meets the wall and any adjoining trim. You align the cut face against the wall, then scribe the coping line with a coping saw or rasp to match the wall contour. Use a sharp blade and steady stroke to minimize chatter and keep waste minimal.
After cutting, test-fit the piece, then trim for a flush return at the corner. Secure with pins or adhesive, checking that the joint sits tight without gap. Choose corner joint techniques that suit the profile and room; for tight fits, back-cutting slightly can improve contact.
Consider decorative profiles sparingly at visible corners to enhance the finish without compromising alignment or strength. Maintain plumb walls and clear the area before final fixing.
Handling Door Frames and Irregular Edges
Handling door frames and irregular edges requires careful alignment and precise cuts to guarantee a clean, seamless fit. You line up skirting against the frame, checking both vertical and horizontal planes before cutting. Use a fine-toothed saw for clean edges, and keep a sharp knife for internal reveals.
When the gap isn’t uniform, perform door frame adjustments by planing high spots or trimming low sections incrementally, then re-checking with a straight edge. For irregular edge finishing, tailor each piece to the contour of the wall and door casing, avoiding overcutting.
Maintain even pressure during jointing, and apply consistent sealant or paint along the edge to prevent gaps. Measure twice, cut once, and confirm the fit before securing with adhesives or screws.
Fitting and Securing Skirting Boards
To fit and secure skirting boards, you’ll need accurate placement and solid joints from the start. Position each board flush against the wall, ensuring no gaps at corners. Use a sharp pencil to mark top edges and plinth lines, then cut with a sharp saw for clean mitres.
Dry-fit pieces before fixing to confirm alignment and reveal any high spots. When securing, drive 18–25 mm plugs or screws into studs or floor joists, not just plaster. Apply a slim bead of adhesive along the back edge before pressing into place to reduce movement.
Consider skirting board materials for screw depth and adhesive compatibility. For decorative designs, pre-paint or veneer edges to prevent chipping. Keep joints tight and use a small block for consistent contact.
Finishing Touches: Gaps, Caulking, and Painting
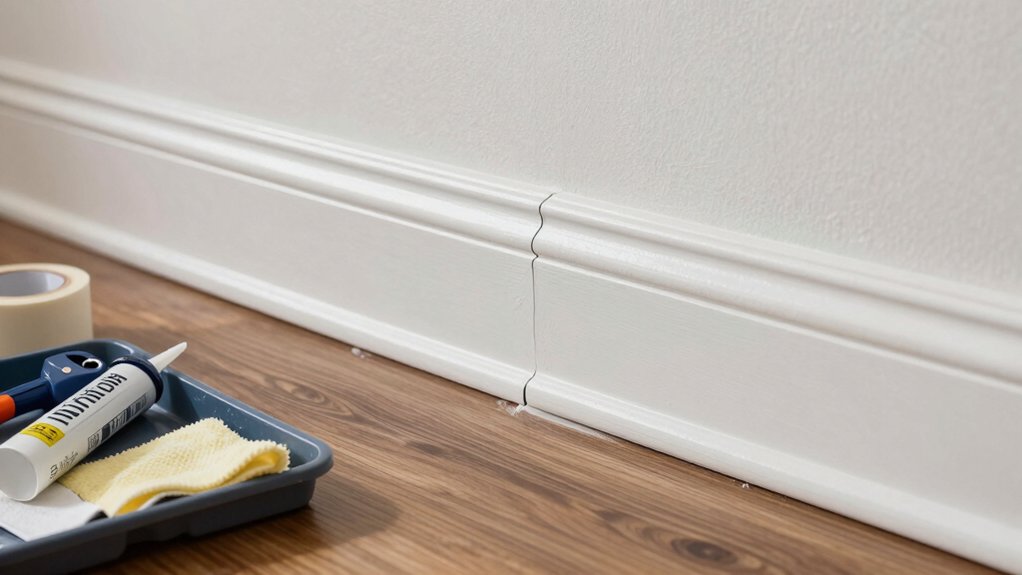
Finishing touches matter, so address gaps, caulking, and painting before you call it done. Start with small gaps around corners using a paintable acrylic caulk; smooth it with a damp finger or caulk tool for a clean line.
Wipe excess adhesive from the boards before it dries. Choose a paint that matches your wall color coordination; test a sample on a concealed area to confirm shade, sheen, and finish.
When caulking, aim for a seamless look, not a visible bead. If you’re using decorative mouldings, fill any tiny gaps between moulding and walls to prevent cracks.
Lightly sand any rough edges after caulk cures, then apply a final coat that blends with the wall. Keep lines sharp and consistent for a professional result.
Maintenance and Troubleshooting Tips
Maintenance and troubleshooting for skirting boards boils down to regular inspection, timely repairs, and addressing common issues before they worsen. You’ll prevent surprises by checking for cracks, gaps, and signs of moisture at least twice a year.
If you spot loose sections, re-secure with finishing nails and a touch of wood glue, then fill the gaps flush. For paint peeling or staining, prepare the surface, sand smooth, and apply matching coats; use a primer on bare timber.
Address moisture promptly to avoid rot, and vent damp areas. Keep edges protected from kicks and furniture pressures.
When choosing skirting board styles, stick to simple profiles near moisture sources for longevity.
Maintenance tips include cleaning with a damp cloth, avoiding harsh cleaners, and resealing joints periodically.
Conclusion
You’ll wrap up with a job that looks tidy and well-considered, even when the quirks show up. Remember: small gaps aren’t failures, they’re opportunities to fine‑tune. With careful measuring, clean cuts, and a patient approach, your skirting reads like a quiet achievement rather than a rush job. Don’t force a fit—cope, adjust, and caulk softly. Finish with a light coat of paint, and you’ll enjoy a seamless, durable edge that quietly elevates the room.


