
Installing energy-efficient windows starts with the right type for your climate and home design, then choosing frames with low thermal conductivity and glazing that’s sized to minimize heat gains or losses. Measure openings carefully, seal interior edges, and use proper flashing to prevent moisture. Decide between DIY and professional installation based on safety, structural concerns, and permits. Avoid rushing fasteners or improper flashing. Regular maintenance and weatherization keep gains and comfort, and you’ll uncover practical setup tips if you keep exploring.
Why Energy-Efficient Windows Are Worth It
Energy-efficient windows save you money from day one by reducing heating and cooling losses. You’ll feel the impact in quieter rooms and steadier indoor temperatures, especially during extreme weather. The key is the window frame and glazing options that minimize heat transfer.
With proper insulation, you gain consistent comfort plus lower energy bills—a measurable energy savings effect that compounds over time. Modern frames reduce air leakage by tight seals and durable spacers, while coatings on glass curb solar gains in summer and keep warmth in winter.
Real-world data show typical households recoup installation costs within 5 to 15 years, depending on climate and home design. In short, energy efficiency isn’t optional; it’s a smart upgrade that pays back through continuous control and savings.
Choose the Right Window Type for Your Home
When selecting window types, start with your climate, home design, and daily needs, then match features to those priorities. You’ll choose window types that optimize insulation, ventilation, and curb appeal.
Start with frame material: vinyl, wood, aluminum, and composites each have tradeoffs in durability, maintenance, and cost.
Next, consider operability: double-hung, casement, sliding, or fixed shapes affect airflow, cleaning ease, and security.
For high-energy performance, prioritize multi-pane glazing and weatherstripping in every unit.
For style and function, mix window styles to suit rooms—larger living areas benefit from expansive fixed or casement panels, while bedrooms may require easy-to-use egress.
Don’t overlook window accessories—low-E coatings, magnetic screens, and exterior grilles can meaningfully boost efficiency and aesthetics.
Learn U-Values, SHGC, and What They Mean
U-values and SHGC are the core metrics that quantify how a window performs in real conditions. You’ll use them to compare products, estimate energy savings, and validate installation choices.
U values explanation: lower numbers mean better insulation, reducing heat loss in winter and heat gain in summer.
SHGC significance: lower SHGC blocks summertime solar heat, while higher SHGC can help with passive solar heating in cool climates.
Track both for your climate and goals; a single metric isn’t enough.
Look for labeled tests from credible sources, and compare identical glass thickness and coatings.
Remember, installation quality affects these numbers as much as a window’s spec sheet.
Use the data to justify upgrades, optimize comfort, and optimize payback, not just to check a box.
Frame Materials That Improve Insulation and Durability

Frame materials matter as much as glass and seals: they govern insulation, durability, and maintenance while influencing cost over the window’s life. You’re selecting framing that minimizes heat transfer and resists warping.
Wood offers natural insulation but demands maintenance; aluminum is strong but conducts heat, so use thermal breaks. UPVC provides stable performance with low maintenance and good air sealing. Composite frames pair wood’s thermal benefits with synthetic durability. Steel frames deliver strength but require careful detailing to avoid cold bridging.
When evaluating insulation materials, prioritize low thermal conductivity, high moisture resistance, and dimensional stability. Consider multi-chamber profiles and proper gaskets to reduce air leakage.
Your goal: maximize energy savings, minimize service calls, and preserve framing integrity through seasons and humidity shifts.
Glazing Options and Gas Fillings for Savings
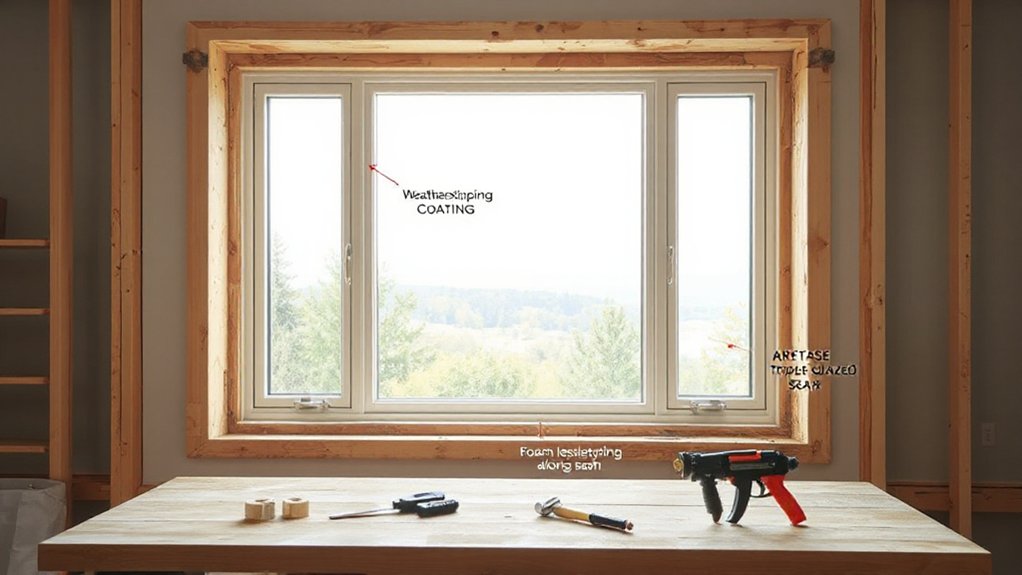
What glazing options and gas fillings deliver real savings without sacrificing comfort? You’ll choose glazing wisely to cut heat transfer and boost comfort year-round. Double-pane units with low-emissivity window coatings, or “window coatings,” reduce infrared heat loss in winter and limit heat gain in summer without sacrificing light.
Add gas fills, such as argon or krypton, between panes to raise R-value per inch and minimize convection losses in the cavity. Prioritize triple-pane where budget allows for deeper savings, especially in extreme climates.
Consider spectrally selective coatings to balance visible light and solar gain. Favor units labeled with energy-efficiency certificates, and verify *ideal* spacer systems to reduce edge heat loss. Combine coatings with gas fills for a measurable performance boost without added complexity.
Measure Openings Precisely for a Proper Fit
Measure frame openings with precise measurements of width and height, and confirm the rough opening is true and square. Include rough opening tolerances and any tudge adjustments to make certain a consistent fit. Then verify sill levelness across the opening. Use those checks to prevent gaps and ensure energy-efficient sealing throughout the window installation.
Measure Frame Openings
To guarantee a proper fit, measure each opening precisely and consistently. You’ll verify both width and height at three points per dimension: top, middle, and bottom for width; left, center, and right for height.
Record the smallest width and smallest height to ensure the frame can accommodate the sash without binding.
Check squareness by comparing diagonal measurements; deviations beyond 1/8 inch can cause gaps or latch issues. Note any out-of-square conditions and plan for adjustments before ordering.
Use a rigid tape measure, steel level, and a square to maintain accuracy.
For frame measurement, document opening dimensions clearly and label as W x H in inches. This opening sizing standard minimizes stress on installation and assists precise trim alignment.
Include Rough Opening Tudge
Ensuring a precise rough opening is essential for a proper fit, so you’ll verify width and height at multiple points and plan for adjustments before ordering. You measure corners, jambs, and midpoints, documenting each reading for the window framing. You expect small tolerances and account for siding, shims, and leveling, ensuring the rough opening remains square.
Precision beats guesswork when you’re dialing in a tight seal and solid performance. You’ll trade guesswork for data, then lock in a fit that accepts factory tolerances and hardware without binding. Your goal is a stable, plumb, true opening that accepts your unit without modification.
- Visualize each corner as a grid: width, height, and diagonals.
- Mark exact studs, studs-in, and shim locations for a clean layout.
- Cross-check with framing plans to confirm mint tolerances.
- Prepare for consistent fastener alignment during window framing.
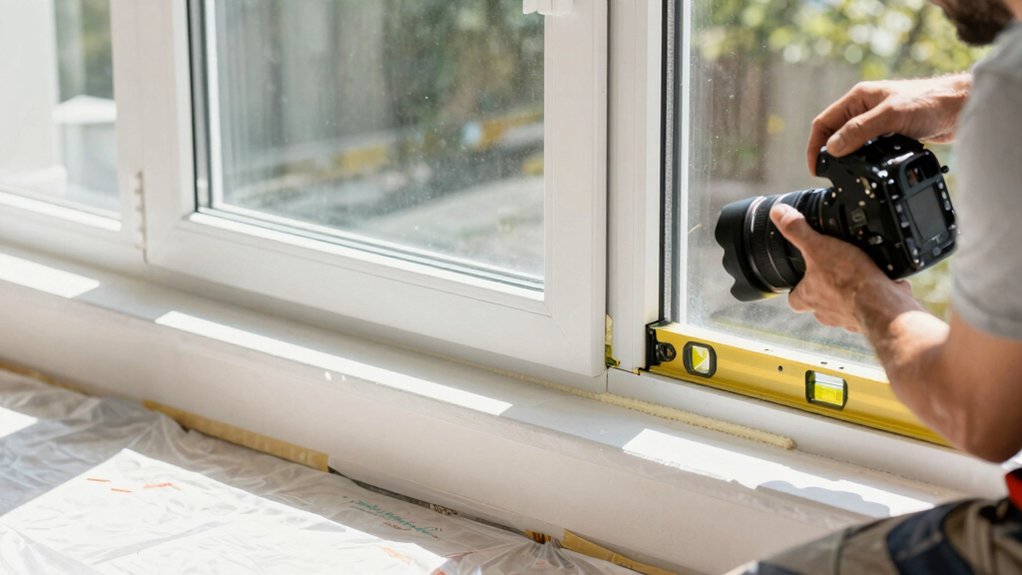
Verify Sill Levelness
Start with the sill, then confirm it’s level across the opening. You verify sill levelness before any window install to ensure proper fit and performance. Use a precise laser or a calibrated spirit level, checking at multiple points along the sill, corners, and center. Record readings, looking for variance within a tight tolerance—typically 1/16 inch over 8 feet, depending on manufacturer specs.
If you detect a twist or bow, rework the sill surface or support shims until level across the entire opening. Document your measurements for future reference and warranty needs.
Levelness supports foundation stability, minimizes air gaps, and improves sealant longevity. Rely on consistent checks, not assumptions, to optimize load transfer, water shedding, and overall energy performance.
Gather Tools and Safety Gear for DIY Upgrades
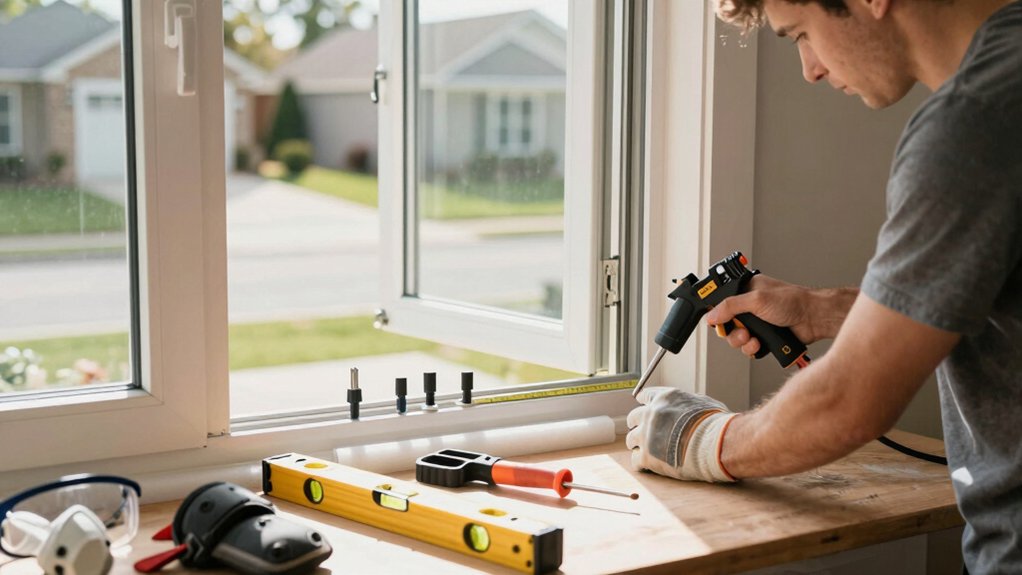
Gathering the right tools and safety gear is essential before you start an energy-efficient window upgrade. You select gear that maximizes precision, speed, and safety, then verify you have the right fit for your project. This approach minimizes mistakes and boosts install success, especially when choosing among window styles and sealant types.
You’ll work cleaner and faster with the proper kit, reducing callbacks and waste.
- Durable pry bars and a putty knife set for clean frame prep
- Measuring tape, square, and a level to lock precise alignments
- Nitrile gloves, safety glasses, and hearing protection for comfort and safety
- Utility knife, caulk gun, and sealant choices ready for exact gaps
With the right items, you stay in control and deliver a solid, energy-efficient result.
When to Hire Pros for Full Window Replacements
There are clear points when bringing in a pro makes more sense: if your existing studs or framing show signs of damage, or if you’re replacing more than one window on a multi-story home, professional installers help guarantee safety and structural integrity.
You should hire pros when substantial framing assessment is required, or when window styles demand precise alignment with wall planes and weatherproofing. Pros ensure accurate measurement, correct flashing, and ideal energy performance, preventing air leaks that degrade energy ratings.
They also handle permits, code compliance, and post-install testing. If you aim for consistent energy savings across the home, a pro’s scope matters for overall performance.
For complex or high-performance projects, trust expert installers to maximize energy ratings and protect investments.
Steps for Safe, Effective Installation (DIY Basics)
You’ll start by prioritizing safety, confirming you have a clear workspace, proper PPE, and a plan for handling glass and ladders.
Next, gather the right tools and materials—measuring tapes, level, mastic or flashing, a pry bar, sealant, and fasteners—so you can complete each step confidently.
Finally, use a straightforward, step-by-step approach to installation, focusing on precise alignment, secure fastening, and airtight sealing to maximize energy efficiency.
Safety Considerations First
Safety comes first: before you lift a single pane, assess the project site, gather the right PPE, and confirm you have the tools, permits, and a clear plan. You’ll reduce risk and improve precision by clarifying scope, checking load paths, and isolating utilities.
Stay laser-focused on safety margins, fall protection, and dust control to protect occupants and yourself. Plan for weather variance, window weight, and debris containment, then verify access routes and waste disposal.
Document every step so if questions arise, you’ve got data to back decisions. Prioritize window cleaning and decorative grilles alignment early, so glazing decisions stay grounded in real conditions.
- Site assessment visuals: anchored ladders, taped zones, clear exits
- PPE ready: gloves, goggles, respirator, hard hat
- Load and fall protection in place
- Debris containment and waste routing
Proper Tools And Materials
To install efficiently and safely, assemble the right tools and materials before you start, and verify compatibility with your window type and frame. You’ll need a tape measure, utility knife, putty knife, level, drills, screwdriver bits, snips, Caulk gun, shims, insulation, and weatherstripping.
Choose fasteners matched to your frame materials, such as corrosion-resistant screws for aluminum or steel, and compatible fasteners for wood. For tools, use a cordless drill with a torque setting and a non-marring blade for glazing.
Gather window styles you’re installing and confirm frame materials align with the opening, frame, and flashing requirements. Stock high-quality flashing tape, sealant, and glazing compound to ensure air-tight, water-tight performance.
This preparation guarantees predictable performance and minimizes on-site adjustments.
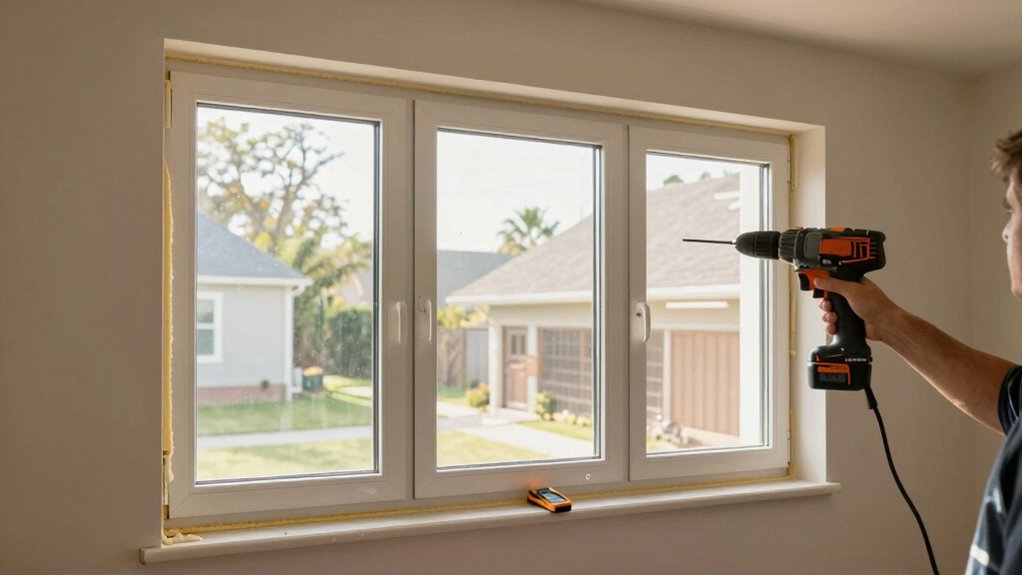
Step-By-Step Installation
With the right tools and materials ready, start by measuring the rough opening and the window unit precisely. Then verify the replacement window matches the opening dimensions and flashing requirements.
You’ll bridge gaps with shims, sealant, and proper fasteners, ensuring square installation and airtight performance. Pro tip: check for level and plumb at each corner, adjust as needed, and align the window for smooth operation.
As you proceed, plan for window cleaning and decorative trims after setback, so finishes look sharp. Use low-expansion foam to seal gaps, then trim and caulk for a clean edge beneath the sill.
Finally, test operation, prime edges, and secure any flashing, so you maintain energy efficiency and durable weather resistance.
- Measure twice, cut once with accuracy in mind
- Shim for square, level, and plumb alignment
- Seal, foam, and caulk for airtight joints
- Finish with decorative trims and final window cleaning
Top DIY Installation Mistakes to Avoid
Even small mistakes in DIY window installs can cost you energy savings and money later, so start by planning around common pitfalls. You’ll improve performance by prioritizing precise square setup, correct leveling, and accurate at-rest distances to avoid air gaps.
Common errors include improper flashing, inadequate sealing, and rushing fastener placement, which undermine insulation and moisture control. Ensure the rough opening is plumb and square before you insert the unit. Pay attention to window framing alignment to maintain consistent shimming and pressure.
Mind the glass coatings; opt for low-emissivity options and verify that coatings are uniform across panes. Avoid over-tightening screws, which can distort frames and compromise seals.
Finally, test for drafts with a smoke pencil and address leaks before moving on to finishing.
Maintenance and Weatherization for Long-Term Efficiency
Regular maintenance and targeted weatherization keep your windows performing at peak efficiency year after year. Implement seasonal routines, seal air leaks, and upgrade insulation where needed to reduce drafts and energy use.
Seasonal Maintenance Routines
Seasonal maintenance routines keep your energy-efficient windows performing as designed by aligning cleaning, inspection, and weatherization tasks with the seasons. You assess seal integrity, test operation, and apply targeted insulation techniques to maximize performance year-round. Track performance data and adjust routines to match climate shifts, ensuring minimal heat loss and consistent comfort. Focus on durable window styles and compatible accessories, integrating practical checks that prevent degradation and prolong life. By scheduling proactive care, you reduce sudden energy spikes and extend the return on investment.
- Clean sashes and hardware at turning points of the year to prevent grime buildup.
- Inspect and lubricate tracks, hinges, and balances for smooth operation.
- Reapply weather-stripping and caulk at transition seasons to maintain tight seals.
- Verify glazing efficiency with simple performance tests after major weather events.
Air Leakage Prevention
Air leakage is a primary driver of energy waste, so you’ll want a focused plan that precedes full weatherization. You’ll start with a tight envelope: identify gaps around windows, doors, electrical outlets, and attic hatches.
Use a blower door or smoke test to locate leaks, then seal with durable caulking techniques and properly trimmed foam where appropriate. Prioritize exterior interactions first; water-resist and seal to prevent drafts before insulation.
After sealing, assess glazing performance and consider window tinting to reduce solar gain on hot days. Maintain door sweeps and weatherstripping for reliable seals.
Track improvements with a simple recharge test after seasonal shifts. Efficient sealing reduces heat loss by measurable margins, delivering faster payback and steadier comfort with minimal maintenance.
Weatherization Upgrades
Have you considered long-term maintenance for lasting energy savings? Weatherization upgrades keep your investment durable and efficient. You’ll reduce heat transfer, lower bills, and extend the operating life of your windows.
Focus on sealing gaps, prioritizing attic and rim joist insulation, and selecting tight-fitting caulk or foam. Regular inspections catch drafts before they compound, while proper drainage and exterior flashing protect against moisture intrusion.
When you plan, think about window styling and interior decoration in harmony with performance—great design can boost efficiency without sacrificing aesthetics. Track metrics such as U-factor, air changes per hour, and surface temperatures to verify gains.
- Tighten seams with weatherstrips that disappear into your framing without visual clutter
- Reinsulate attic and basement edges for a complete thermal envelope
- Choose complementary colors and finishes for cohesive window styling
- Seal interior edges for clean, durable interior decoration integration
Conclusion
Upgrading windows pays off with lower energy bills and more comfortable rooms. You’ll compare U-values, SHGC, and frame materials to pick efficiency that lasts. Use glazing and gas fills wisely, and know when to call pros for full replacements. DIY basics save money, but avoid common mistakes that waste heat. Regular maintenance keeps performance steady. Think of your home as a well-insulated chest, and your new windows as the lock—tight, reliable, and energy-smart. Your comfort awaits.


