

A complete bathroom renovation breaks the project into major systems, finishes, demolition, plumbing, electrical, and ventilation, with inspections and contingency built in. Start with structural and waterproofing rough-ins, then lock in finishes like durable tile and fixtures. Plan demolition and storage, optimize vanities and shower enclosures, and nail down plumbing, electrical, and ventilation needs, plus mold prevention and code compliance. Budget by trade with clear line items and timelines, including potential DIY options for savings. You’ll learn how all pieces fit together as you go.
What a Full Bathroom Reno Covers: A Practical Overview
A full bathroom renovation covers more than just cosmetic changes; it updates the layout, fixtures, plumbing, electrical, and finishes to create a cohesive, functional space. You approach this project with precision, mapping flow, storage, and lighting so every element serves a purpose.
Start with the core: walls, flooring, and waterproofing, then confirm a solid routing for water and waste lines. Next, specify fixtures that balance performance with style, prioritizing reliability and ease of maintenance.
Coordinate electrical tasks to support lighting layers, outlets, and fan ventilation without clutter. When selecting bathroom decor, favor timeless efficiency over fads, ensuring durability and clean lines. Don’t overlook vintage fixtures that offer character while remaining practical.
Your plan blends practicality with power, delivering a streamlined, high-performance, cohesive bathroom renovation.
Budgeting Before Any Tile: Where Your Money Goes
Before you lift a tile, map out where every dollar goes, starting with the heavy hitters: structure, plumbing, and electrical rough-ins. You’ll pin down unavoidable costs first, then layer in finishes. This budgeting discipline prevents scope creep and keeps your project empowered.
Move deliberately from major systems to surfaces, documenting each line item: permits, inspections, and contingencies. For cost considerations, contrast must-have upgrades against value-driven choices, prioritizing safe, lasting installations.
Material selection drives a surprising portion of the bill, so you compare gauges, warranties, and lifecycle costs, not just upfront prices. Build a transparent ledger that aligns with your goals, timeline, and tolerance for risk.
With precision, you’ll optimize value while maintaining authority over every trade-off.
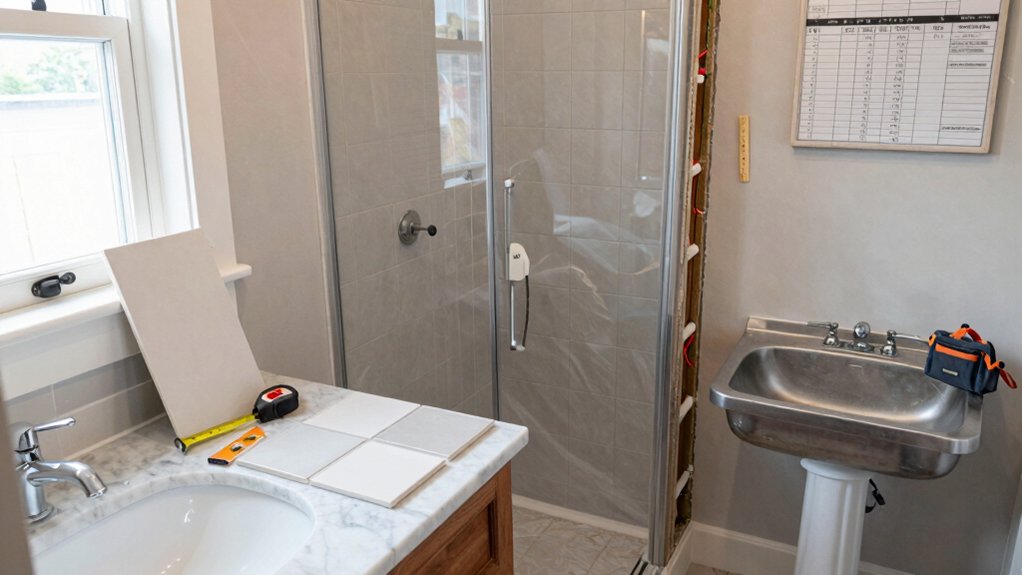
Demolition and Prep: Clearing the Space for the Reno
Demolition and prep set the Reno in motion, and you’ll want a clear, staged plan from the start. You map each step with precision, prioritizing safety, efficiency, and control.
Begin by barricading access, confirming utility shutoffs, and arranging protective gear for your crew. Catalog materials for reuse and responsibly segregate waste.
During debris removal, maintain a tight schedule to minimize downtime and maximize momentum. Clear the space methodically, labeling zones for demolition, storage, and disposal so nothing overlaps or slows progress.
Maintain strict site cleanliness as you go—trash removal should be organized, not improvised. After debris is cleared, execute a thorough site cleanup, documenting any issues that could impact finishing work.
Your disciplined approach guarantees faster decisions and a smoother Reno trajectory.
Plumbing Renovations: Pipes, Fixtures, Permits, and Codes
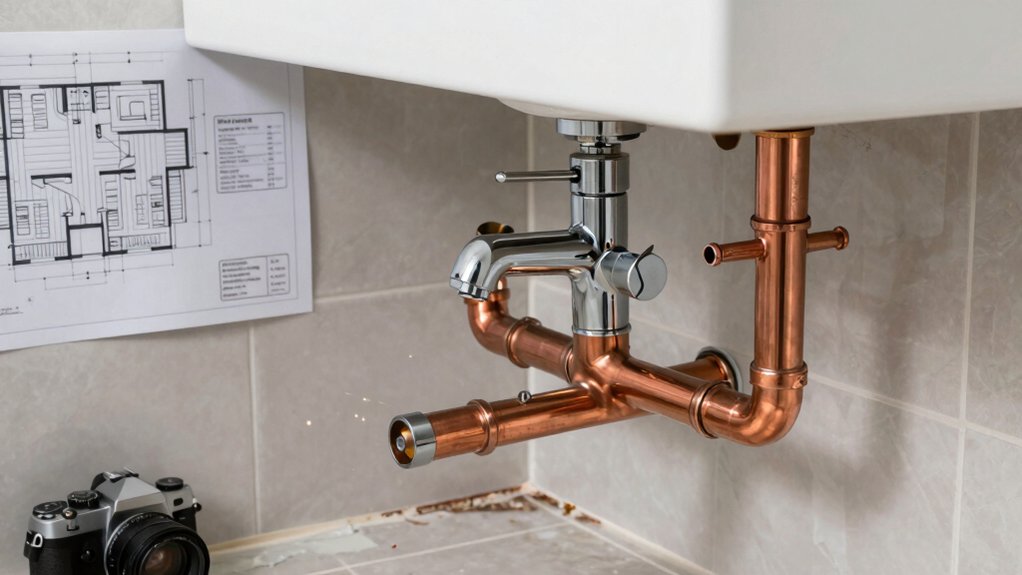
Plumbing renovations start with a precise plan that aligns with your demolition and prep work, ensuring you map every pipe change, fixture location, and permit need before any wrench touches metal. You command the process by detailing water supply routes, ensuring your chosen fixtures match flow and pressure expectations. Assess water pressure upfront, identify potential pressure regulators, and prevent future surges.
Specify pipe insulation where cold conduits risk freezing or condensation, and note accessible shutoffs for quick isolation. Comply with codes and obtain permits before cutting walls, documenting connections and fixture elevations. Choose durable materials, verify venting, and coordinate with tile and vanity layouts to avoid clashes.
Track costs meticulously, anticipate inspection milestones, and maintain strict records for seamless approvals and future maintenance.
Electrical Upgrades for Safety and Style
You’ll start by evaluating wiring safety upgrades, focusing on proper routing, protected circuits, and code-compliant installations.
Next, you’ll consider modern breaker panels that handle added loads and improve reliability.
Then, plan grounding and GFCI relays for outlets near water.
This approach keeps safety and style aligned with cost and timeline, setting a clear foundation for your bathroom remodel.
Wiring Safety Upgrades
Wiring safety upgrades are essential for a bathroom renovation because outdated or insufficient wiring poses fire and shock risks as soon as you add new outlets, lighting, and moisture-rich fixtures. You’ll pin down reliability with careful planning, verifying circuits, and enforcing code-compliant upgrades.
Precision matters when you map where power travels, shield sensitive devices, and label each run for future service.
- GFCI placement: prioritize outlets near water sources and in accessible locations for immediate protection.
- Wiring color codes: follow standard conventions to prevent miswiring during installations.
- Dedicated circuits: reserve separate feeds for heaters, fan, and high-demand devices to reduce nuisance tripping.
- Secure enclosures: use tamper-resistant boxes and proper conduit for moisture resistance and longevity.
Modern Breaker Panels
Are you ready to upgrade not just the look but the reliability of your bathroom’s electrical system with a modern breaker panel? Modern breaker panels deliver clear benefits: organized circuit separation, faster fault isolation, and improved load management.
You’ll appreciate metered spaces for dedicated bathroom circuits, arc-fault protection, and enhanced electrical safety features that reduce nuisance trips. Choose a panel sized for future upgrades, then plan for properly sized conductors and properly labeled breakers so maintenance is quick and safe.
Installation should follow code requirements, with correct clearances and grounding connections verified. Expect fewer hot spots, smoother operation of high-draw devices, and a foundation that supports lighting, ventilation, and heating needs.
This upgrade aligns performance with safety, boosting overall project value and reliability. modern breaker panels, electrical safety
Grounding And GFCI Relays
Grounding and GFCI relays are essential safety upgrades in any bathroom renovation. You’ll install robust grounding paths, verify continuity, and pair them with GFCIs for instant shutoff if current leaks occur. This isn’t guesswork; it’s measured, code-aligned work that protects you and your family.
You’ll test outlets, labels, and reaction times, ensuring reliable performance under load. Focus on reliability, not risk.
- Confirm grounding safety by tracing conductors and bonding metalwork
- Inspect and test GFCI outlets for trip accuracy and reset ease
- Schedule regular relay maintenance to prevent nuisance trips
- Document wiring diagrams and labeling for future upgrades
With disciplined checks, you maintain power, safety, and peace of mind throughout the renovation.
Structural Changes: Framing and Supports You Might Need
When renovating a bathroom, you may discover the need to adjust walls or joists to support new fixtures and layouts, and that’s where framing and structural supports come in. You’ll assess load paths, design solid framing, and determine where to place support beams for columns, vanities, or showers.
Begin with precise measurements, then select framing techniques that ensure straight loads transfer cleanly to studs and joists. Reinforce existing headers and install additional blocking where needed to prevent deflection.
Ensure plumb walls, square corners, and secure connections with code-compliant fasteners. Plan for future accessibility by leaving clear pathways for service panels and plumbing.
Document all changes for inspections, budgets, and durable performance. This disciplined approach delivers reliable, long-lasting structural integrity.
Waterproofing Masterclass: Moisture Barriers and Slabs

Waterproofing starts where structural work ends, ensuring the space you’ve prepared stays dry and durable. You’ll master moisture barriers and slab insulation to safeguard longevity, performance, and value. Approach with precision: plan, install, test, and verify each layer before proceeding.
- Implement moisture barriers at all junctures to manage vapor rise and prevent hidden rot.
- Seal slab edges and joints to create a continuous, impermeable foundation.
- Choose slab insulation that balances warmth, humidity resistance, and cost efficiency.
- Verify membrane adhesion and overlap, then perform a field test for sustained protection.
Walls, Tiles, and Floors: Material Choices and Tradeoffs
Choosing walls, tiles, and floors for a bathroom isn’t just about looks—it’s about performance, maintenance, and value. You’ll select materials by durability, water resistance, and ease of cleaning, then align them with budget and timeline.
Start with wall textures that resist mold and mildew, balancing grip with aesthetics. Consider tile patterns that optimize light, hide seams, and simplify replacements.
Floor choices should prioritize slip resistance and seismic performance without sacrificing design cohesion. Drying times, grout longevity, and stain resistance matter for ongoing upkeep.
Plan progressions between wet and dry zones to minimize maintenance headaches. Finish with a cohesive color story and grout color that minimizes scrubbing.
Document warranties and installation requirements to protect investment and preserve value over time.
Vanities, Storage, and Surfaces That Maximize Space
You’ll optimize your bathroom by prioritizing vanity storage and compact surfaces that provide both function and airflow. Start with wall- or mirror-mounted options to free floor space.
Then choose multi-functional pieces like recessed drawers and slim cabinets. We’ll compare costs and layouts to help you maximize storage without crowding the room.
Maximizing Vanity Storage
To maximize vanity storage, start by evaluating available space and identifying practical storage goals for both daily essentials and seldom-used items. You’ll optimize every inch with a methodical plan, prioritizing accessibility, overflow protection, and future adjustments.
Implement a clear hierarchy for items, so routine products stay front-and-center while infrequently used items retreat to drawers or bins. Choose modular solutions that adapt to changing needs, ensuring your vanity remains uncluttered and efficient.
Focus on seamless integration of function and style, where form supports purpose and speed.
- vanity organization: divide daily items into designated zones
- storage accessories: pull-out organizers and adjustable shelves
- slim profiles: utilize shallow organizers in narrow gaps
- labeling: keep containers and bins clearly categorized for quick access
Surfaces For Compact Spaces
Surfaces in compact spaces demand a precise approach that aligns with your vanity layout and storage goals. You’ll optimize footprint by selecting streamlined vanities, recessed storage, and wall-mounted organizers that free floor space for movement.
Prioritize alignment between countertop edge, sink placement, and drawer reach to maximize usability without crowding. Choose tile patterns that visually expand the room—larger formats with minimal grout lines or diagonal layouts to add depth without clutter.
Surface textures matter: matte finishes hide smudges, while tactile textures can cue maintenance routines efficiently. For durability, pick materials with consistent thickness and seamless transitions between vanity, wall, and storage panels.
Plan integrated lighting and mirrors to reflect space, then test access paths to ensure smooth operation and decisive, powerful upgrades.
Shower and Bath Enclosures: Options, Costs, and Fit
Shower and bath enclosures come in a range of styles, materials, and installation methods, so selecting the right option starts with evaluating space, maintenance needs, and budget. You’ll weigh enclosure types, glass quality, and hardware durability to match Shower design and Bath fixtures with your performance goals. Prioritize watertight seams, easy cleaning, and long-term reliability to maximize value.
- Compare framed vs frameless systems for rigidity and cleaning ease
- Choose glass tint, coating, and whether a door or panel layout fits traffic flow
- Assess wall substrate, waterproofing, and drain placement for a precise fit
- Estimate installation timelines, warranty terms, and total lifecycle costs
Lighting, Mirrors, and Finishes to Elevate the Room
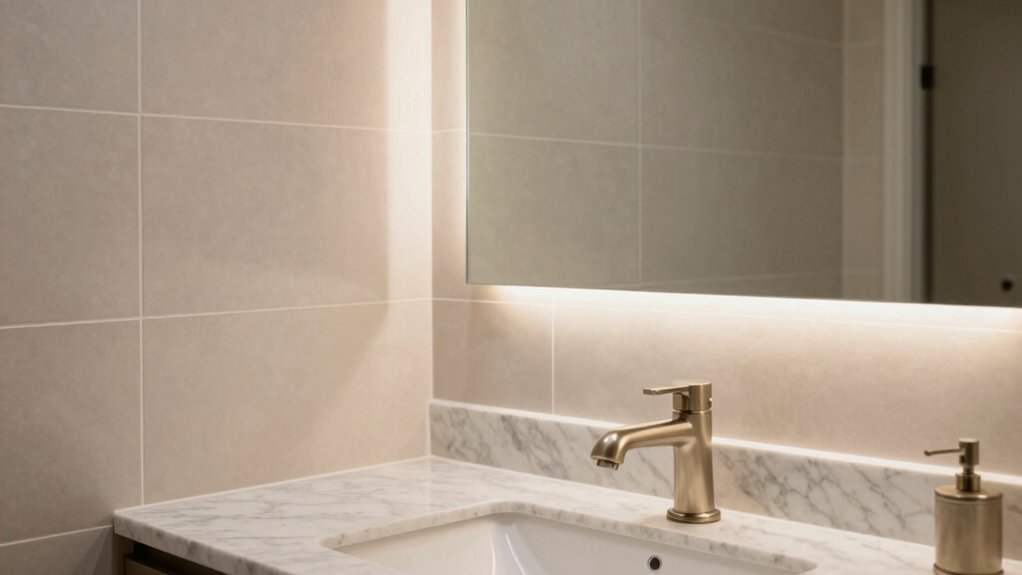
Ambient lighting, well-placed mirrors, and thoughtful finishes transform the bathroom from functional space to spa-like retreat. You’ll design with intent, layer lighting, and control glare to sustain focus and flow.
Start with lighting fixtures that balance task ease and ambiance: ceiling cans for general illumination, wall sconces at vanity heights, and dimmable options for mood shifts.
Choose mirror styles that maximize utility without sacrificing style—full-width mirrors for a cleaner line, or framed pieces to anchor focal walls.
Finishes should persistently reflect your goals: moisture-resistant surfaces, smart hardware, and crisp trim.
Plan around practical zones—vanity, tub, and shower—ensuring consistent color temperature and glare reduction.
Precision planning yields measurable impact: brighter mornings, restful evenings, and a room that feels consistently empowered.
Ventilation and Mold Prevention: Sizing and Code Tips
To start, we’ll review duct sizing guidelines to make certain of adequate airflow without oversizing. Then, pair that with practical vent fan sizing tips for typical bathroom layouts.
Next, you’ll learn how mold prevention codes dictate minimum requirements for exhaust rates, moisture control, and ventilation strategies. This discussion sets a clear foundation for choosing components that balance upfront cost with long-term performance.
Duct Sizing Guidelines
Duct sizing is essential for effective ventilation and mold prevention in a bathroom remodel. You’ll control performance by matching fan capacity to room volume and duct layout, optimizing vent ducting for minimal resistance and maximum air flow. Precision here prevents moisture buildup, reduces odors, and supports long-term durability.
Follow code-referenced factors like air changes per hour, duct length, and turns, then verify with simple calculations before installation. Accuracy matters because even small miscalculations can degrade performance and invite problems.
Plan routes that shorten runs, avoid sharp bends, and preserve access for future service.
- Determine required CFM based on room size and occupancy
- Map shortest, straightest duct path with minimal bends
- Select smooth-walled ducts to preserve air flow efficiency
- Include appropriate vent caps and sealing methods for airtight integrity
Vent Fan Sizing Tips
Vent fan sizing hinges on your bathroom’s volume, the presence of a shower or tub, and the intended moisture control time. You’ll calculate required airflow in air changes per hour and translate that into cubic feet per minute (CFM).
For larger baths or frequent steam, target higher CFM to maintain ventilation efficiency without overmatching the space. If a shower or tub exists, add additional clearance to compensate for humidity spikes.
Consider duct length and bends, since excessive resistance reduces performance. Choose a fan with a labeled CFM that meets or exceeds calculated needs, and verify compatibility with available electrical circuits.
Also assess fan noise levels to balance performance with comfort, ensuring you won’t tolerate disruptive operation.
Precision sizing, proper installation, and repeat testing preserve ventilation efficiency and minimize post-renovation complaints.
Mold Prevention Codes
Ever wonder how codes shape mold prevention in a bathroom renovation? You’ll implement clear standards to minimize moisture risks and protect long‑term value.
Focus on ventilation sizing, airflow rates, and dwell time for air exchange, then verify code compliance at each stage. By treating code requirements as design constraints, you prevent costly rework and setbacks.
- Make certain exhaust rates meet local minimums and match room volume
- Size ducts for effective air movement and reduced humidity
- Use moisture‑resistant materials and proper sealing for mold prevention
- Document inspections and compliance checks to sustain code compliance
This methodical approach keeps you ahead of moisture threats, ensures reliable performance, and supports a powerful, disruption‑free renovation.
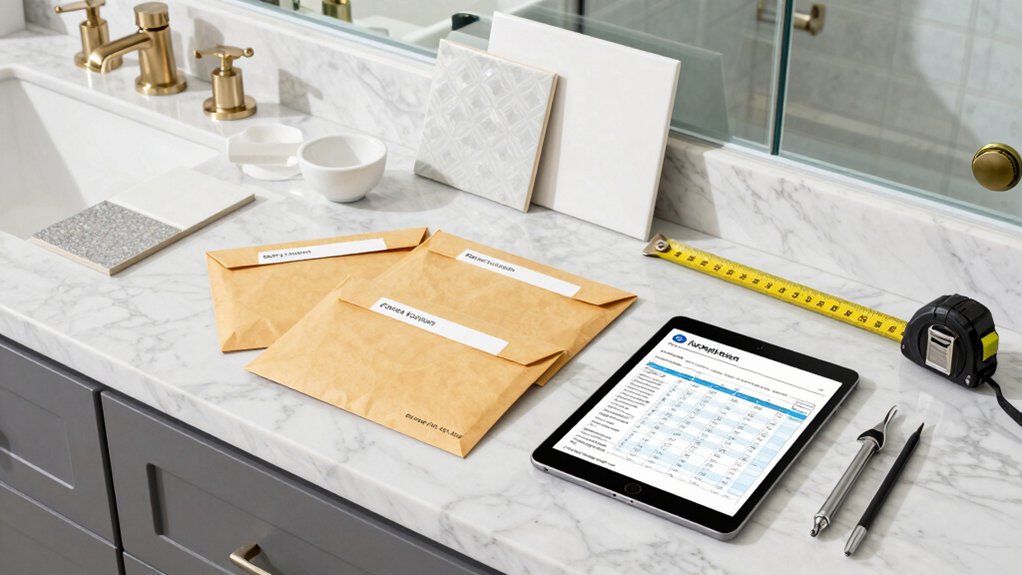
Budgeting by Trade: How Labor and Materials Shape Cost
Understanding how labor and materials break down by trade is essential for accurate budgeting: each trade brings its own time estimates, skill requirements, and material needs, which combine to shape the overall cost. You’ll map tasks to trades, estimate hours, and price materials distinctly, then aggregate to reveal the true financial picture.
Start with framing the scope: what must be done, in what sequence, and which specialties are involved. Then assign labor rates, productivity benchmarks, and lead times for each trade, noting how delays ripple into the budget.
Consider material sourcing early—quality, availability, and delivery windows affect both price and schedule. Expect inevitable trade-offs, document assumptions, and build contingency.
Embrace DIY shortcuts judiciously when appropriate, but don’t compromise essential performance or safety.
Smart Ways to Save Without Skimping on Quality
Smart budgeting in a bathroom renovation isn’t about cutting corners; it’s about making smarter choices that preserve performance and finish. You’ll save without sacrificing quality by prioritizing durable basics, smart sourcing, and efficient installations. Think long‑term value over upfront novelty, and you’ll outpace cost creep with confidence.
- Choose eco friendly fixtures that blend efficiency with lasting appeal to lower operating costs.
- Compare materials for durability, warranty, and install ease to reduce future service calls.
- Leverage vintage design trends to achieve a high-end look without premium pricing on every item.
- Schedule phased upgrades using reputable pros to protect workmanship and ensure precise integration.
This approach keeps performance intact while trimming waste, so your renovation feels powerful and prudent.
Planning Timeline: From Start to Final Touches (DIY vs. Pro)
You’ll start by evaluating DIY timeline variances versus pro scheduling to map out realistic milestones.
Next, consider materials and labor windows to align procurement with installation phases.
Finally, weigh coordination needs, sequencing, and buffer times to determine the most efficient path from start to final touches.
DIY Timeline Variances
When you’re planning a bathroom renovation, the timeline can vary considerably depending on whether you DIY or hire a pro. You’ll gain clarity by sizing all steps, then compress or extend buffers as needed.
DIY timelines lean on your pace, toolkit, and decision quality, while pro schedules hinge on subcontractor sequencing and permits. Focused pacing drives results: tile selection and fixture installation become milestone anchors to anchor decisions and avoid backtracking.
- Define scope and sequencing to align trades
- Schedule tile selection blocks without rushing decisions
- Allocate time for fixture installation with margins
- Build contingency for supply delays and access constraints
Pro Scheduling Considerations
Planning a bathroom project timeline requires clarity on who’s coordinating the work and how each trade fits into the sequence. As a pro, you lay out a tight schedule that minimizes downtime and accelerates decisions.
Begin with a master calendar that blocks critical phases: demolition, rough-in, tile installation, fixture replacement, electrical, plumbing, and final finishes. Assign responsibilities, deadlines, and contingency buffers for weather, supply delays, or inspections.
Use milestone reviews to validate progress before moving to the next stage, reducing rework. Communicate expectations with trades, suppliers, and clients through concise briefs and daily log updates.
Emphasize sequencing: framing and plumbing rough-ins before tile work, ensure water control during fixtures, and reserve space for warranty checks. Your disciplined planning keeps project velocity high and margins solid.
Materials And Labor Windows
Materials and labor windows specify when each trade can begin and how long they’ll need, so you map these intervals alongside your master timeline to prevent bottlenecks. You’ll align order lead times, permit clearance, and crew availability to keep the project moving. Your focus is on control, coordination, and predictable finish quality, especially for tile patterns and paint finishes.
Plan contingencies for setbacks without losing momentum and ensure every phase feeds the next with precision.
- Define trade durations and overlap carefully to sustain momentum
- Schedule tile work before paint to protect finishes and precision
- Align material deliveries with each phase to avoid downtime
- Build in buffer for inspections, touch-ups, and final detailing
Conclusion
You’ve mapped your mess into a meticulous plan, measuring costs, contracts, and contingencies. By budgeting basics, you’ll beat blowouts and baffling surprises. Commit to careful coordination of demolition, design, and durable details. Stay steadfast as subskills stack: plumbing, electrical, ventilation, and finishes. With clear calendars and contingencies, you’ll complete the project with confidence, cost-consciousness, and calm. Craft a concise, consistent cadence: cost, care, communicate, complete. Create confidence by checking, comparing, and correlating every choice before you commit.


