To get paint off a ceiling, start by evaluating the surface and paint type, then gather safe tools and protective gear. Prepare the room with drop cloths and tape, and ventilate well. Lightly heat the painted area to soften it, then use a steady, gentle scraper to lift the coating in small sections. If you hit stains or peeling, apply the right stain-killing primer and light sanding before re-priming. Continue careful steps, and you’ll uncover more tips soon.
Assess the Ceiling Type and Paint剩
Assess the ceiling type and paint before you start. You’ll inspect the surface to determine ceiling material and existing paint formulation. Start by checking texture: smooth plaster, drywall, popcorn, or wood panels each respond differently to solvent and scraper methods. Note any moisture damage, mold, or peeling layers, as these affect removal strategy.
Identify paint formulation—water-based latex versus oil-based enamel—and plan accordingly. Test a small, inconspicuous area with a gentle remover to gauge adhesion and lift. If the ceiling is plaster with old limewash, expect dust and flaking; if drywall with latex, you’ll likely use less aggressive tools.
Record findings so you select compatible temps, solvents, and tools, and avoid damaging repairs later. This assessment guides safe, effective removal without unnecessary work.
Gather Essential Tools and Safety Gear
Now that you’ve assessed the ceiling type and paint, it’s time to gather the right tools and safety gear. Start with basic equipment: a sturdy ladder, non-slip shoes, and eye protection.
Add work gloves and a dust mask to guard against irritants and debris. For paint removal, have a putty knife, plastic scrapers, and a damp sponge on hand, plus a spray bottle for cleaning solutions.
Prepare towels or rags to catch drips and a bucket for rinsing. Choose mild, paint-safe removers if needed, and follow label directions. Keep a trash bag nearby for disposal.
Establish clear access routes and secure the area. Review safety precautions, ventilate the room, and avoid rushing—precision saves cleanup time later.
Safety precautions protect you and the work.
Protect Floors and Adjacent Surfaces
To protect floors and adjacent surfaces, start by shielding floors with drop cloths or plastic sheeting and securing edges to prevent slips. Tape edges along baseboards and thresholds to prevent paint from seeping in.
Also, cover any nearby furniture or fixtures you’ll pass by.
Clean spills as soon as they happen to keep surfaces pristine and avoid staining.
Shield Floors Effectively
Protecting floors and nearby surfaces starts with a simple setup: lay down drop cloths or plastic sheeting, secure them with painter’s tape at the edges, and tape any joints to prevent gaps. You’ll then position a secondary barrier at seams and doorways to stop dust from spreading.
When you’re ready, verify accessibility so you can work without tripping over coverings. During paint removal and ceiling preparation, keep movement deliberate to avoid shifting materials. If you’ve got textured ceilings, use a light, controlled approach to prevent gouges.
Check for exposed areas and adjust coverings as needed. Clean edges frequently to maintain containment, then remove debris toward a central area for disposal. This approach minimizes mess and protects floors while you finish the job efficiently.
Tape and Cover Edges
Tape the edges and cover the floors and adjacent surfaces thoroughly before you start scraping or sanding.
Begin with edge masking along baseboards, crown molding, and any adjacent walls to prevent paint transfer. Use painter’s tape that remains flat, press down firmly, and seal corners carefully.
Apply a generous layer of protective drop cloths or plastic sheeting to catch dust and drips, securing edges so they won’t shift. When you’re done taping, check for gaps and reinforce with extra tape where needed.
Practice proper tape removal by peeling slowly at a shallow angle once work is complete, pulling away from the painted edge. Keep masking materials accessible to maintain clean lines and minimize cleanup later.
Clean up Spills Quickly
Spills happen fast, so grab the nearest drop cloth or plastic sheeting and lay it flat to cover any exposed floor areas. You’ll minimize damage by acting immediately and staying organized.
First, blot, don’t wipe, to control the spill’s reach; use a rag or paper towels to absorb excess paint without spreading it. Next, collect saturated materials and seal them in a disposable bag, then rinse or wipe the area with a damp cloth to remove sheen and prevent staining.
If a brush tip remains in the spill, move it to a safe surface and wash it later. Consider brush types and paint formulations to determine proper cleanup additives.
Ventilate the room, and inspect edges for dry, even coverage before proceeding.
Prepare the Room for Cleanup
Before you start cleaning, set the room up for success: remove or cover furniture, lay down drop cloths, and open windows for ventilation. You’ll reduce mess and speed cleanup. Move items to a safe area, and seal vents if needed to prevent dust spread.
Gather supplies: drop cloths, painter’s tape, plastic sheeting, a bucket, mild detergent, sponge, and an optional fan for airflow. Create a clear exit path to avoid tripping over cords or damp cloths.
Ventilation tips include keeping air moving and avoiding stale air buildup; open multiple windows if possible and use a small fan to direct fumes outward.
Consider paint color matching if you’ll repaint later, so you know base tones and finish choices before tackling ceiling removal. This prep minimizes rework and keeps you focused.
Methods for Softening and Loosening Paint
To soften paint on the ceiling, apply gentle heat to loosen it first. Once the surface yields, you can scrape away the loosened coating to remove it cleanly. Keep the heat controlled and work in small sections to prevent damage or mess.
Heat Softens Paint
Heat softens paint by loosening its binders, making it easier to scrape away. You’ll notice painter’s tape or drop cloths already in place, but your focus is on controlled heat. Use a heat gun or infrared lamp at the lowest effective setting; test on a small area first.
Keep the gun moving to avoid scorching and to prevent thermal expansion from cracking the substrate. Maintain a steady distance per the tool’s guidance, watching for bubbles and gloss loss as signs of softening. If you see smoke, back off immediately.
Work in short passes, allowing time between warm-ups. Remember: heat softens paint, yet you’re targeting the coating, not the surface beneath. This method minimizes solvent use while preserving ceiling integrity.
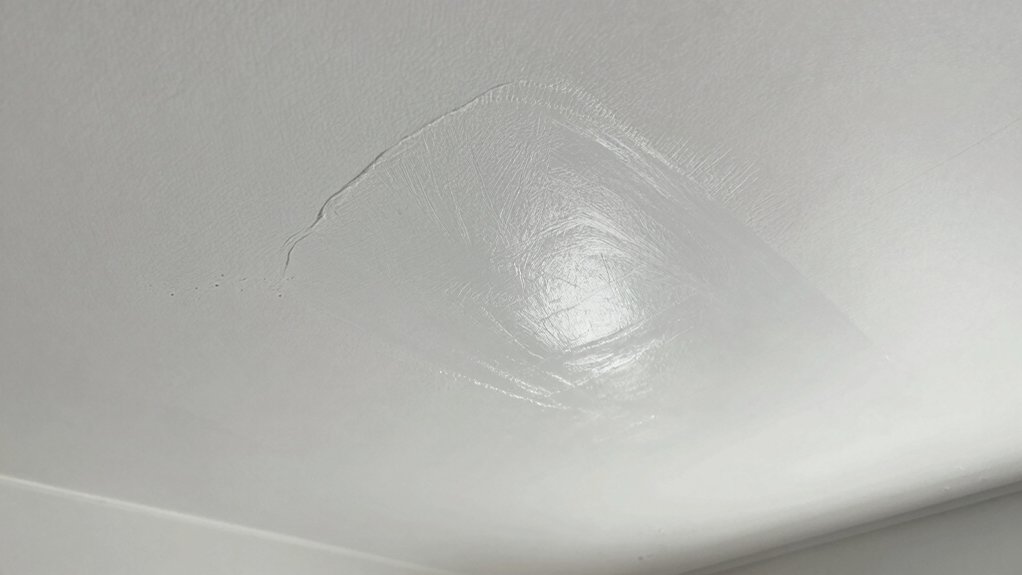
Scrape After Softening
Once the paint has softened, start scraping from an edge and work inward with steady, light strokes to lift the coating without gouging the ceiling. Keep your motions consistent and shallow, letting the softened layer peel away rather than forcefully tugging.
Use a flexible scraper that conforms to slight contours, angling it slightly downward to prevent gouges. If you encounter stubborn spots, switch to a lighter blade or reintroduce brief solvent contact to re-soften, then resume.
Periodically wipe the scraper to prevent smearing loosened paint back onto the fresh surface. Work in small sections, overlapping as you go. After each area, dust or vacuum loose debris to maintain safe ceiling preparation.
This approach minimizes damage and supports effective paint removal.
Scraping Techniques That Minimize Damage
When you’re scraping paint from a ceiling, start with a light touch and a steady hand to minimize damage. Begin with proper surface preparation, laying down a drop cloth and securing nearby trim. Use a flexible, plastic scraper at a shallow angle to avoid gouging.
Work in small, controlled motions, easing pressure as you glide along edges and raised textures. If paint resists, pause and apply gentle warmth or a brief, light dampening with a sponge to soften, buying time without soaking the ceiling.
Maintain consistent pressure and angle, and keep the blade clean to prevent scratch marks. Regularly inspect for loose material and reroute your strokes to avoid overwork. This method supports careful paint removal while preserving the underlying surface.
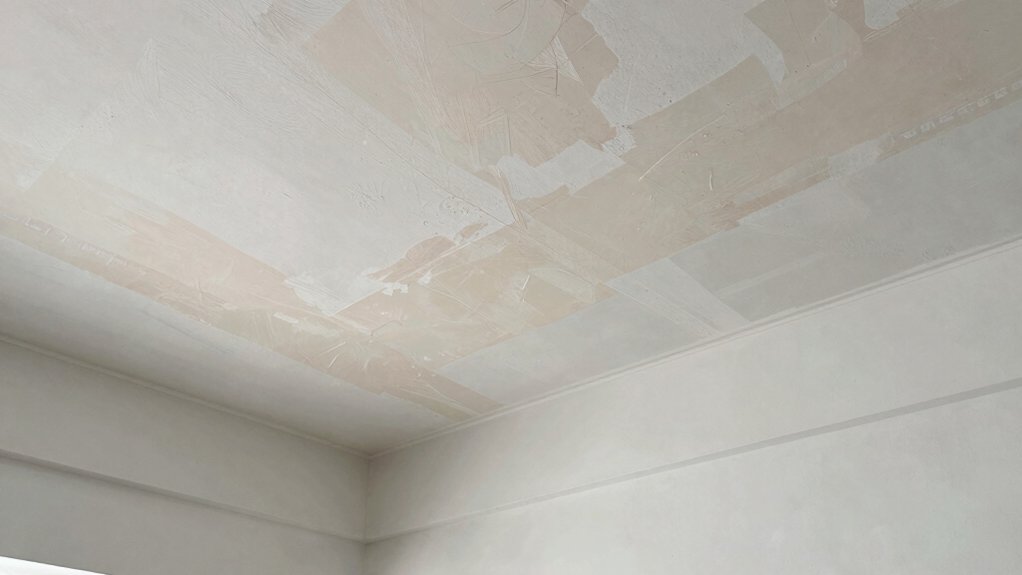
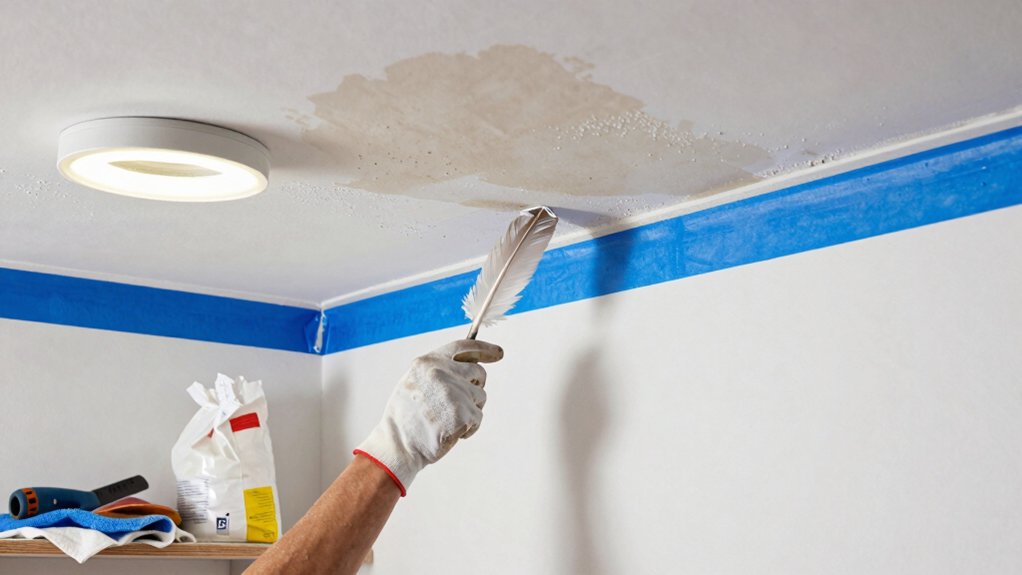
Dealing With Stains, Peeling, and Gloss
Stains, peeling, and gloss on a ceiling demand a structured approach: assess the damage, choose a correction method, and apply it with consistency. You’ll start by identifying whether stains are water-based, oil-based, or tannin.
For removing stains, test a small area with a stain-killing primer and allow it to dry before proceeding.
If peeling is present, plan to address flaking sections first, stabilizing edges and removing loose material. Fixing peeling requires resealing with an appropriate primer, then recoat with compatible paint.
When gloss is uneven, dull the surface slightly with fine sanding, then reprime for an even finish.
Use low-pressure, controlled cleaning to prevent new damage. Keep each step deliberate, and document results to guide subsequent work.
Clean-Up, Repair, and Repaint Prep
Now that you’ve identified and addressed stains, peeling, and gloss, you’re ready to move into clean-up, repair, and repaint prep. Begin by removing loose material and dust with a damp cloth, then vacuum corners to capture debris.
For paint removal, use the gentlest method that works—scrape flaky edges, then re-evaluate before harsher steps. Patch any small cracks with joint compound, letting it dry and sanding smooth for a seamless surface.
Sand glossy areas lightly to improve adhesion, then wipe the ceiling with a damp cloth to remove dust. Establish surface preparation by applying a compatible primer, especially over repaired spots.
Allow primer to cure fully, inspect for uniform sheen, and then proceed to paint with even strokes. This method guarantees durable coverage and a clean finish.
Conclusion
You’ve got a plan, you’ve got the tools, and you’ll stay steady as you work. By evaluating the ceiling, softening paint safely, and scraping with care, you’ll minimize damage and cut cleanup time. Protect surfaces, tackle stains, and prep for repainting like a pro. Think of it as following a recipe: steady steps yield solid results. When you’re done, a fresh ceiling awaits—quiet, revived, and ready to shine.