
To excavate dirt for a patio effectively, start by precisely evaluating your space and depth needs, marking borders with stakes and bright markers. Choose compact, appropriate equipment for access and soil conditions, and protect utilities before digging. Plan drainage and build a stable subgrade with moisture-controlled compaction. Reuse on-site soil when possible, or use licensed fill. Stay safe with PPE, trench gaps, and clear storage of spoil. If you keep going, you’ll uncover more practical steps and tips.
Assessing Patio Space and Depth Requirements
Evaluating patio space and depth requirements starts with a clear plan: measure the available area, account for setback rules, and decide on a target patio depth that accommodates soil conditions and the chosen surface.
You’ll assess how soil bearing capacity affects depth and drainage, guiding material choices and installation steps. Perform soil testing to reveal compaction, moisture, and contamination risks, then adjust plans to meet code and performance goals.
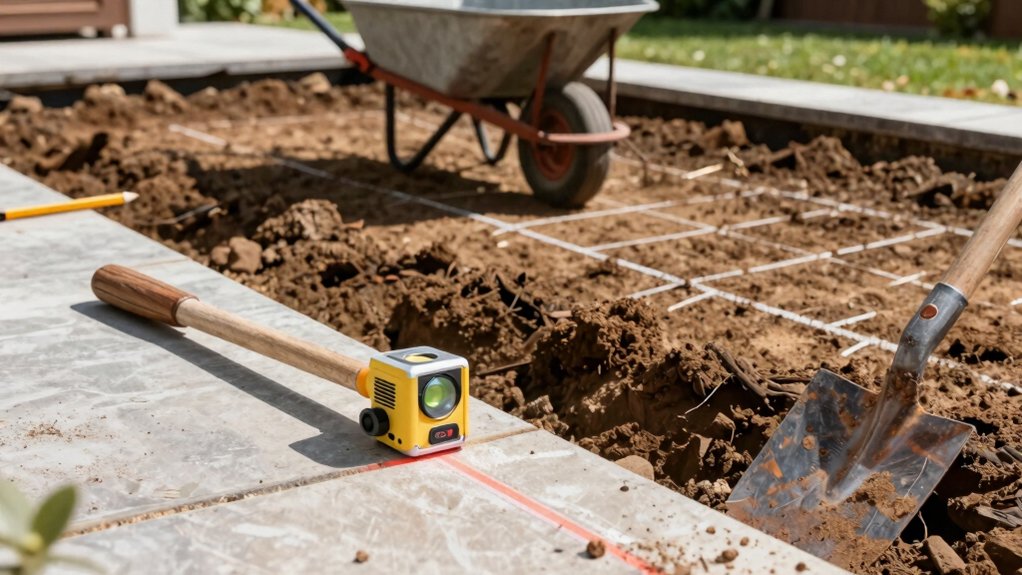
Tool selection matters here: pick a laser measure for accuracy, a depth gauge to verify trenches, and a trenching shovel for clean cuts. Document dimensions, setbacks, and intended slope early to prevent rework.
Prioritize safety: secure utilities, wear PPE, and plan for waste removal. Use findings to finalize excavation depth and structural requirements with confidence.
Measuring and Marking the Work Area
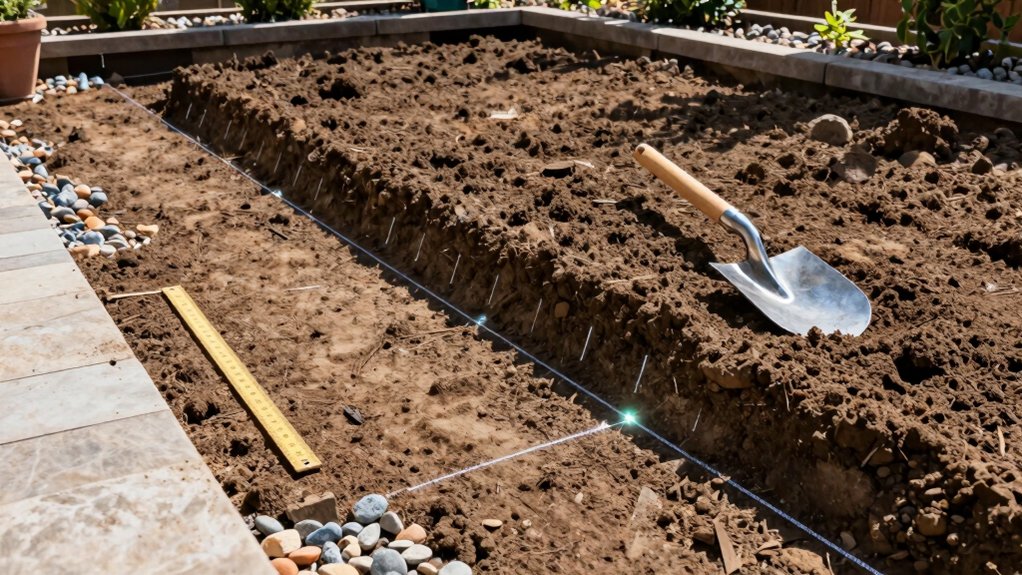
Before you break ground, measure the area precisely and mark it clearly to prevent mistakes later. Start with accurate baselines using stakes and durable string, then verify length, width, and slope from plan to actual site. Record angles and corners to avoid drift during excavation.
Perform soil testing at representative spots to confirm soil type and depth requirements, adjusting your layout if necessary. Mark excavation limits with bright markers, ensuring visibility under dust and debris. Create a simple, scalable grid to guide successive cuts and setbacks.
Double-check that utility lines are excluded and drainage toward the proper direction is maintained. Inspect all measuring tools for accuracy, and schedule equipment maintenance checks after marking and before work begins to sustain safe, efficient operation.
Choosing the Right Excavation Equipment
Choosing the right excavation equipment starts with matching the job’s soil conditions, depth, and area to the machine’s reach, weight, and versatility. For patio digs, select compact or mid-size equipment that minimizes soil compaction while delivering steady power.
Assess soil type, moisture, and underlying obstacles to determine bucket size, breakout force, and cutting speed. Consider access—tighter spaces demand mini excavators or trenchers with tight turn radii.
Plan for stability: track versus wheelbases, ballast, and outriggers if needed. Prioritize excavation safety by inspecting ground conditions, securing utilities, and using appropriate shoring or sloping when slopes exist.
Schedule regular machinery maintenance, including hydraulic lines, filters, and fluid levels, to prevent unexpected downtime. Choose equipment that balances efficiency with operator comfort and long-term reliability.
Preparing the Site for Safe Digging
Preparing the site for safe digging starts with a quick risk check: identify existing utilities, overhead lines, and underground services, then isolate or protect them as required. You’ll confirm utility locations with likes of facility maps, call-before-you-dig programs, and site flags.
Next, draft a brief plan that accounts for soil conditions, slope, and weather, since moisture and loose footing drive risk. Establish a perimeter and wear appropriate PPE, including eye protection and work boots.
Mark out excavation boundaries to prevent contact with buried lines and store spoil away from edges. Consider garden design and landscaping aesthetics when scheduling work so you don’t compromise nearby plantings or irrigation.
Document findings and review with your crew to sustain safe digging practices throughout the project.
Planning Drainage and Subgrade Support
Planning drainage and subgrade support is essential to prevent water-related damage and ensure a stable patio base. Start by evaluating site-specific water flow, soil type, and load expectations to determine necessary slopes, drainage routes, and compactive requirements.
You’ll map positive drainage paths away from foundations and identify low spots for temporary fill. For drainage planning, choose permeable substrates where feasible and include a compacted subgrade layer with proper moisture control to resist settling.
Assess long-term frost action and vehicle or furniture loads to set minimum thicknesses and reinforcement needs. Use groundwater considerations and local codes as benchmarks.
Document measurements, test results, and compaction targets, then verify with field density tests. Prioritize safety, wear PPE, and follow equipment operating guidelines during grading and testing for reliable subgrade support.
Excavation Techniques for Clean Edges
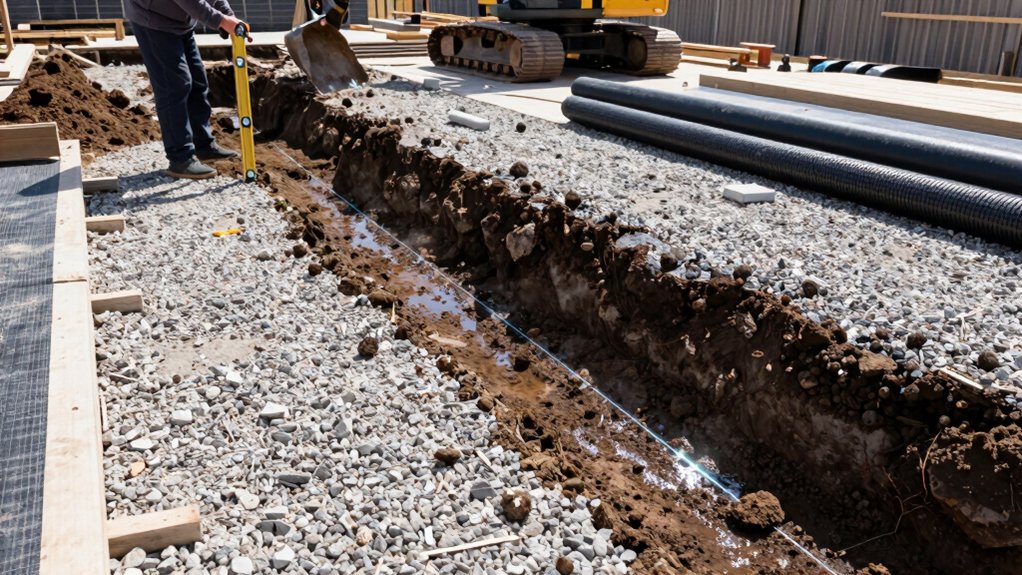
To get clean edges, align your trench walls with a string line and check with a level for consistency.
Use steady, controlled cuts to maintain uniform edge height and reduce wobble, which supports better sidewall stability.
Keep safety first by supporting walls as you go and documenting edge measurements for repeatable results.
Edge Alignment Tips
Edge alignment sets the tone for a clean, durable patio, so start with a taut line and clear stakes to mark the exact edge you’ll excavate along. You’ll verify measurements with a carpenter’s level and a long straightedge, ensuring the line rests true from corner to corner.
Remove soil in controlled, small pockets to prevent sloping, and routinely check for deviations with a string line. Use a hand or powered trencher only where permitted by site conditions; otherwise, dig by level, not by guess.
Safety comes first: wear eye protection, watch for utilities, and keep bystanders clear.
For decorative edging, keep the trench shallow enough to support edging materials and consider aesthetic considerations when choosing soil borders and gradations.
Sidewall Stability Methods
Sidewall stability is essential when you’re excavating for clean patio edges; you’ll achieve it by using straight, measured trenches and proven forming methods to prevent wall creep and soil failure. Start with a solid base plan, then install forms that resist lateral pressure and provide clean vertical faces.
Use trench boxes or shoring where soil conditions warrant, and verify groundwater is managed to reduce hydrostatic load on your walls. Select a compatible retaining wall system, and align reinforcement with load requirements, spacing, and code guidance.
Incorporate soil reinforcement techniques such as geogrid or granular backfill to boost stability without overexcavating. Finally, inspect for key risk factors, including undercuts or loose pockets, and document every step for ongoing maintenance and safety compliance.
Soil Removal, Disposal, and Reuse Options
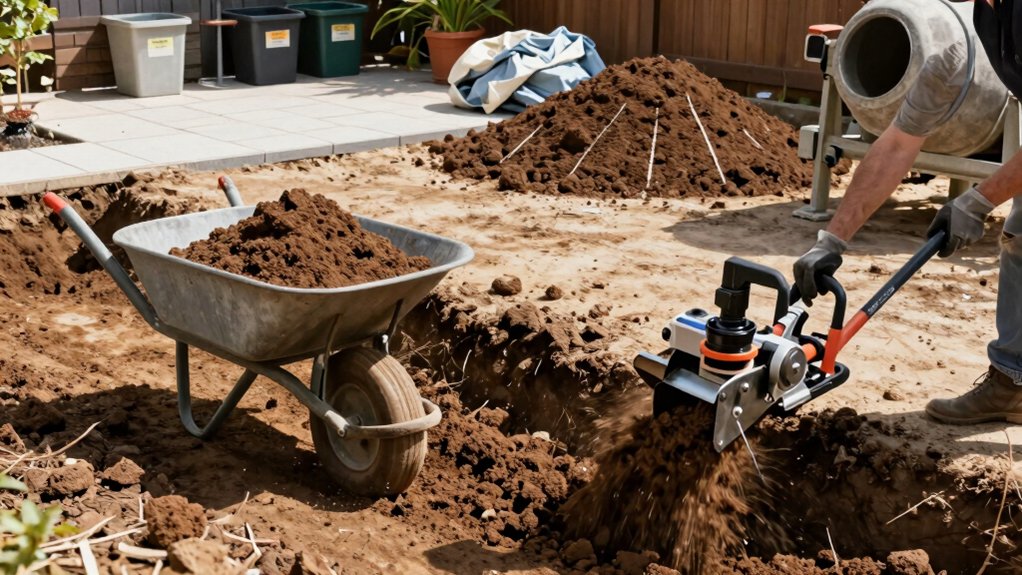
You’ll want a clear plan for removing, disposing, and reusing soil from your patio project. Consider options like on-site reuse for landscape beds, proper soil disposal guidelines, and recycling or soil exchange programs to limit waste.
We’ll compare costs, safety requirements, and environmental impacts to help you choose the most practical approach.
Soil Disposal Methods
When planning soil disposal, you should evaluate removal options, local regulations, and soil conditions early to avoid delays and costs. You’ll compare hauling versus on-site burial or reuse, checking weight limits, permits, and transport routes.
For removal, quantify volumes, then choose licensed haulers with trackable disposal records. If soil is clean, consider reuse on-site for grading or berms; if contaminated, isolate and divert to permitted facilities.
Monitor erosion control during transfer and stockpiling, using silt fences and stabilized access ways to minimize sediment loss. For disposal, confirm landfill or facility acceptance, schedule pickups during dry conditions, and document manifests.
Always prioritize soil stabilization where stockpiles exist to prevent settlement, and maintain clear labeling for future reuse or disposal decisions.
Reuse and Recycling Options
Reuse and recycling options for soil removal, disposal, and reuse should prioritize on-site reuse where feasible, then responsible off-site recycling or disposal. You’ll assess soil quality, contamination, and density to decide reuse viability for garden beds or backfill around new patio edges.
If on-site reuse isn’t suitable, partner with licensed recyclers for clean fill, topsoil, or soil blends that meet local specs. Document volumes, weights, and transport routes to minimize fuel use and emissions.
When reusing soil, test for contaminants to protect garden plants and outdoor lighting foundations from movement or settlement. Maintain safe handling by wearing PPE and keeping loads stable during transport.
Favor material with minimal processing to reduce waste. Schedule reuse around irrigation planning to ensure soil moisture compatibility and long-term stability.
Compaction and Subgrade Preparation
Compaction and subgrade preparation are essential for a stable patio foundation. You’ll assess soil moisture, target a moisture window, and test with a short test strip to gauge compaction response.
Use a plate compactor or vibrating roller to achieve uniform density, following manufacturer guidelines for passes and weight. Record soil compaction results to ensure you meet project specs, then adjust for variations across the area.
Subgrade stabilization starts with removing organic matter, smoothing high spots, and addressing soft zones with gradual fill and compaction. Maintain clean subgrade surfaces to prevent punctures from rocks or debris.
Keep safety in mind: clear work zones, inspect equipment, and wear appropriate PPE. Aim for consistent density, proper drainage, and a solid base for the finished surface.
Safety Protocols and Personal Protective Equipment
As you move from subgrade prep to executing the excavation, you’ll implement safety protocols and PPE to protect yourself and others on site. Start with a site assessment: identify overhead hazards, underground utilities, and nearby structures.
Wear protective gear consistently: hard hat, safety glasses, hearing protection, gloves, and sturdy boots. Use high-visibility clothing when equipment is active.
Before digging, confirm utility lines are buried and marked; maintain a safe trenching distance from edges. Maintain a clean work zone to reduce trip hazards and ensure proper lighting.
Use seemed-to-fit PPE when handling sharp tools or heavy materials. Follow equipment manuals for safe operation, including correct starting procedures and shutoffs.
Document incidents and near-misses to improve future safety protocols and training.
Cost-Saving Tips and Common Pitfalls
To cut costs without compromising safety, you’ll prioritize efficient equipment use, accurate measurements, and bulk material strategies supported by data.
Watch for common pitfalls like overusing rental gear or underestimating soil conditions, and plan contingencies to avoid wasted trips and rework.
Cost-Saving Methods
Locking in savings starts with careful planning and safe digging practices. You’ll cut costs by outlining scope, estimating soil volume, and comparing equipment options rather than defaulting to rent-heavy solutions. Use measured digs to minimize waste and rework, and track time versus rates to see where you gain efficiency.
Reuse excavated material where feasible, or sell surplus to offset costs. When choosing landscaping materials, look for bulk buys, off-season discounts, and local sources to reduce transport fees. Prioritize durable, low-maintenance options that fit your garden design goals, avoiding trendy features that require frequent replacement.
Maintain safety gear and trench safety practices to prevent costly delays. Document decisions to support future budgeting and avoid avoidable pitfalls.
Pitfall Prevention
Pitfall prevention starts with planning guardrails: set a clear scope, confirm soil conditions, and map utilities before you dig; this upfront clarity saves time, reduces rework, and lowers risk. You’ll avoid costly mistakes by verifying drainage and compaction needs early, then aligning with your garden design goals.
Use a data-driven checklist: measure depths, confirm soil type, and document trench widths to prevent under- or over-excavation. Budget for contingency, but limit changes by locking in materials and access routes before breaking ground.
Consider safety—shields, PPE, and site signage reduce injury risk. Plan for furniture placement early; mark patio furniture zones to prevent later rework.
Clear, incremental milestones prevent delays, ensuring excavation supports future garden design and long-lasting patio performance.
Conclusion
You’ve mapped the trench, weighed the soil, and chosen tools like a seasoned navigator. With measurements exact and safety gear in place, you peel back earth as if unmasking a patient, steady and calm. Each shovelful brings you closer to a level, solid stage for your patio—drainage clear, subgrade firm, compaction intentional. If doubts creep in, pause, verify data, adjust plans, and proceed. A well-planned dig rewards you with enduring stability and quiet confidence.


