
Wall-mounted infrared heaters offer steady, space-saving heat that beams directly onto occupants and surfaces, ideal for fixed zones and minimal clutter. Portable units give flexible, zone-specific warmth you can move as layouts change, but may create uneven room comfort and require cord management. Choose wall-mounted for consistent coverage and integrated aesthetics; pick portable for temporary or room-by-room heating. Consider room size, insulation, and safety clearances. Want a tailored fit? You’ll find practical guidance as you continue.
What Infrared Heaters Do for Home Comfort
Infrared heaters heat objects and people directly, creating warmth without needing to warm the entire room. You experience faster perceptible warmth because radiant output targets you rather than ambient air.
In practice, this means you can compensate for uneven layouts or drafty spots without raising overall room temperature. You’ll notice improved comfort when siting near the heater or along walkways, as heat transfers through objects by absorption and re-emission.
The system also reduces convective losses, so you spend less time reheating cool zones. You get consistent surface warmth on exposed items, which helps maintain comfort levels without increasing energy use substantially.
When selecting a unit, consider emissivity, CSA/CE safety standards, and control precision to sustain stable, targeted comfort.
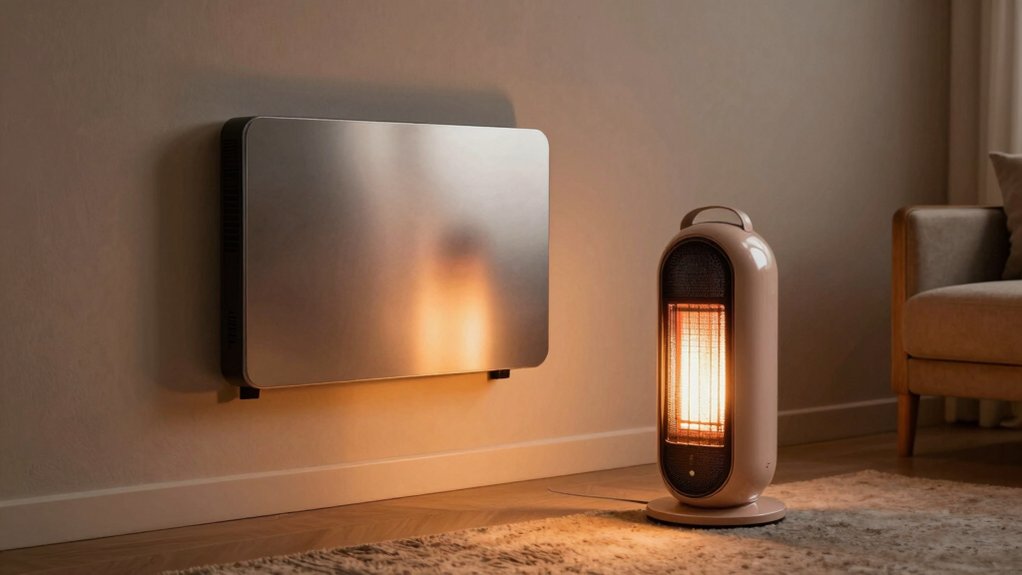
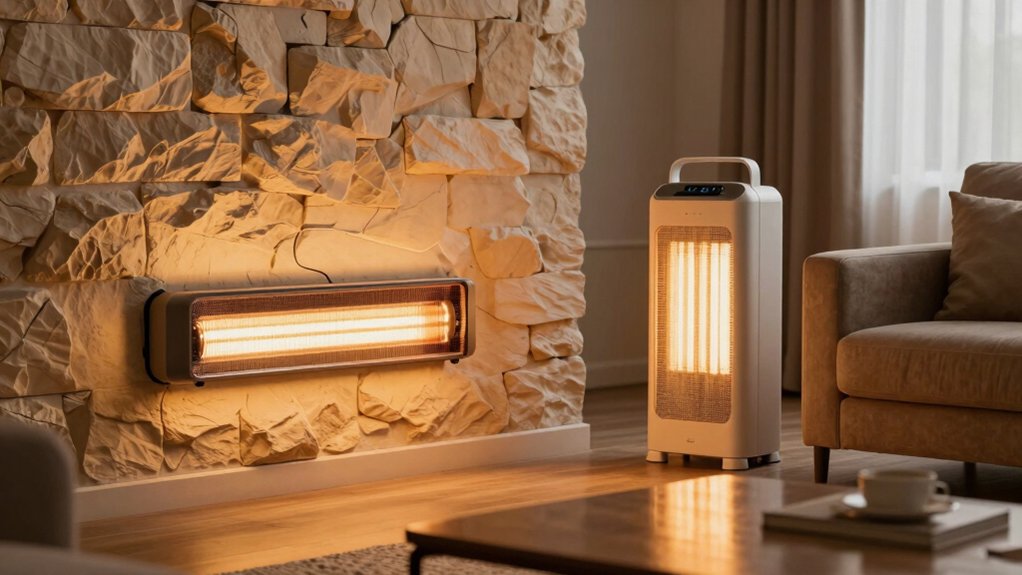
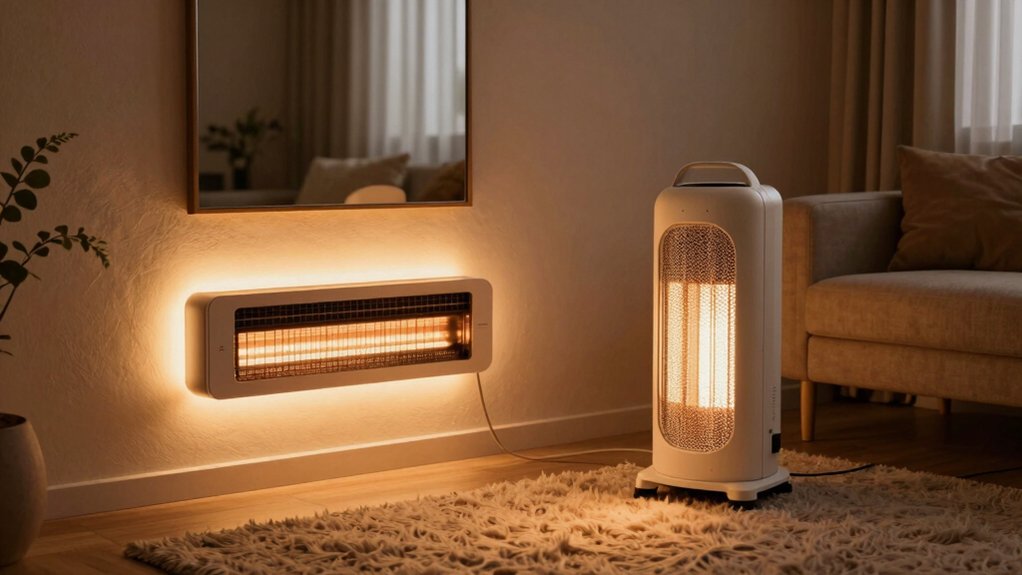
Wall-M Mounted vs Portable: The Fundamental Tradeoffs
When choosing between wall-mounted and portable infrared heaters, the fundamental tradeoffs center on installation rigidity versus flexibility, heat distribution control versus mobility, and upfront versus long-term costs.
Wall-mounted units offer fixed placement, optimized beam geometry, and consistent directional heating, but require permanent wiring, mounting hardware, and limited relocation.
Portable models provide instant redeployability, plug-and-play setup, and the ability to tailor warmth to occupants or zones, yet depend on cord length, surface area, and proximity constraints for effective coverage.
Temperature response and radiant efficiency hinge on mounting height, reflector design, and heater class; wall-mounted designs emphasize steady output, while portable units emphasize user-driven zoning.
Consider lifecycle cost, maintenance access, and safety implications to determine which configuration aligns with your space, usage patterns, and durability expectations.
How to Decide: Use Case Scenarios by Room Type
Consider how each room’s in-room suitability, size, and output needs correspond to your heater choice, not the other way around. You’ll weigh safety and accessibility to ensure reliable operation and maintenance, especially in high-traffic or child-adjacent spaces.
This framework sets up precise use-case criteria by room type to guide selection between wall-mounted and portable infrared options.
In-Room Suitability
Choosing the right heater for a given room hinges on how you plan to use the space, the room’s size and layout, and safety considerations. For in-room suitability, map heat targets to occupancy patterns and furniture placement.
In smaller, enclosed spaces, prioritize direct heat zones and rapid warm-up without overt heating of unused corners. In larger rooms with irregular layouts, plan for zoned coverage, avoiding dead zones behind furniture.
Wall-mounted units excel where wall clearance is ample and airflow isn’t obstructed, allowing focused heat along seating areas. Portable models suit flexible layouts, but ensure stable placement away from flammables and trip hazards.
Consider ceiling or wall clearances, interaction with windows, and the potential for heat loss through exterior walls. Align device type with room usage rhythm, not just size.
Size And Output
Size and output determine how effectively an infrared heater meets a room’s heat demand. In this section, you compare wattage, coverage, and duty cycle to match room type with appropriate device class.
Start by estimating the heat load using ceiling height, insulation quality, and window exposure, then translate that into a required BTU or watt rating.
Account for target temperature rise and momentary duty, distinguishing portable units from wall-mounted ones.
For small, well-insulated spaces, lower outputs still deliver rapid comfort, but you must avoid oversizing, which wastes energy.
In open layouts, prefer higher-output models or multiple heaters with coordinated control.
Consider zoning potential, thermal mass, and startup stability.
The goal is a precise alignment of device capability to the room’s heat demand without overreliance on partial occupancy.
Safety And Accessibility
Safety and accessibility must guide every heater choice, guaranteeing you can operate, supervise, and reach the unit without risk in real-world use. When evaluating room types, prioritize line-of-sight and reach for controls, cords, and mounting hardware.
In living spaces, prefer wall-mounted units with stable brackets and burnished clearance zones; avoid clutter that blocks vents.
For kitchens, position away from heat-sensitive appliances and ensure spill safety; portable units should have resistant bases and automatic tip-over protection.
Bedrooms demand quiet operation, filtered heat delivery, and accessible on/off controls near the bed.
Bathrooms require IP-rated waterproofing and safe location away from water sources.
In work areas, consider quick shutdown access and cord management to prevent tripping.
Finally, validate installation by routine checks and easy maintenance access.
Power and Efficiency: How Each Style Stacks Up
Power and efficiency differ mainly in how heat is delivered and how much energy is required to maintain comfortable temperatures. Wall-mounted units deliver radiant warmth from a fixed plane, minimizing air movement and reducing heat loss through drafts. They often rely on thermostatic controls that optimize duty cycles, improving steady-state efficiency when you maintain a stable setpoint.
Portable models, by contrast, use convection alongside radiant elements, circulating air to raise room temperature more quickly but increasing losses through doorways and gaps. In terms of energy use, wall-mounted designs typically achieve higher overall efficiency at longer run times due to lower standby heat loss and precise zoning.
Portable heaters excel at rapid spot heating but may consume more energy to sustain multiple occupants or larger spaces.
Installation and Setup: What You Must Know
To install and set up either design, you must evaluate Placement and Reach to guarantee safe, effective heat distribution without obstructions.
Confirm Power Requirements match your circuit capability and outlet availability, avoiding overloads or nuisance trips.
Finally, review Safety and Compliance guidelines to meet clearance, mounting, and regulatory standards before operation.
Placement and Reach
Placement and reach are about locating the heater for ideal warmth and safe operation. You should assess room geometry, ventilation, and nearby obstructions before choosing mounting height or leg placement.
For wall‑mounted units, position at mid‑wall height to balance heat distribution and minimize glare or blind spots; ensure brackets align with studs and adhere to manufacturer guidelines.
Portable units require stable surfaces, level footing, and clear floor space for airflow intake and exhaust. Maintain a minimum clearance from curtains, furniture, and combustibles, typically 12 to 24 inches, unless specified otherwise.
Consider sightlines for occupants and pets, avoiding direct line‑of‑sight heat transfer. Verify cord routing and strain relief to prevent accidental pulls.
Re‑check after adjustments to confirm consistent, unobstructed heat reach.
Power Requirements
With safety and performance in mind, guarantee your installation design accounts for electrical supply, circuit capacity, and cord management before powering the unit.
For both wall-mounted and portable infrared heaters, verify the heater’s wattage rating matches circuit capacity and wiring gauge. Check manufacturer-recommended branch circuits, dedicated outlets, and breaker sizing to prevent nuisance trips or fire risk.
Calculate continuous load by applying 125 percent of the rated wattage for uninterrupted operation and longer runtimes.
Ensure voltage compatibility (typically 120 V or 240 V) and confirm plug type aligns with the receptacle.
Consider startup surge characteristics and whether dedicated ducted or non-ducted circuits influence installation.
Plan cord routing to avoid mechanical strain, heat exposure, or obstruction.
Document installation specifics for future servicing and warranty compliance.
Safety and Compliance
Are you guaranteeing every installation meets essential safety and compliance standards before powering up? Start by confirming the unit is rated for your voltage and circuit.
Verify clearances: maintain manufacturer-recommended distances from walls, furniture, and combustibles; avoid obstructed vents.
Secure mounting or placement on a stable surface, using hardware supplied by the manufacturer.
Check that wiring, plugs, and outlets match the heater’s amperage and aren’t shared with high-draw appliances.
Install a dedicated circuit if required, and use a properly rated resettable thermal fuse or thermostat.
Ground fault protection isn’t optional in damp or outdoor environments.
Ensure the product has appropriate certifications (UL/ETL or equivalent) and that install follows local electrical codes and building regulations.
Document test results and keep manuals accessible for future service.
Safety Considerations for Wall-Mounted Units
Wall-mounted infrared heaters require careful attention to mounting location, clearance, and electrical connections to prevent heat-related hazards. You should verify wall strength and stud orientation before installation, ensuring the unit’s weight is supported by structural members.
Maintain minimum clearances from combustible materials, furnishings, and indoor obstructions as specified by the manufacturer; this reduces hot-spot risk and airflow disruption.
Use dedicated circuits and appropriate overcurrent protection; avoid shared feeds that could trip or overheat.
Route wiring through junction boxes with proper strain relief, and install a grounded outlet or hardwired connection per code.
After mounting, recheck level alignment, cord management, and accessible controls.
Regular inspections for loose mounting, cracked housings, or degraded seals help prevent heat leakage and electrical faults.
Never modify controls beyond manufacturer guidance.
Aesthetics and Space: Visual Impact in Your Room
You’ll assess how wall-mounted and portable infrared heaters influence visual harmony and perceived space. Consider how mounting height, finish, and line of sight affect clutter and room balance, versus the compact footprint of portable units.
We’ll explore how these aesthetics interact with your room’s design goals to guide placement decisions.
Visual Harmony Or Flat
Visual harmony is the first measure of how a heater integrates with a room, balancing form and function to minimize visual disruption. You assess profile, enclosure, and finish, ensuring lines align with surrounding architecture rather than stand out as a focal element.
Consider mounting height, enclosure color, and grate texture to reduce glare and contrast with walls. For wall-mounted units, verify slimness, edge radii, and cable concealment, since visible hardware breaks visual flow.
Portable models should use discreet housings, unified controls, and compact footprints to maintain a low visual footprint when not in use. Material consistency matters: metal or plastic should echo door frames and furniture finishes.
Finally, evaluate reflectivity and screen patterns to prevent unintended reflections that draw attention away from the room’s overall cohesion.
Space-Saving Aesthetic Impact
Space-saving aesthetics hinge on how a heater occupies and frees space without compromising comfort or function. Wall-mounted units minimize floor footprint, keeping pathways clear and furniture placement flexible. Portable models, while convenient, introduce tangential clutter and cord management considerations that can disrupt sightlines.
The visual impact depends on mounting height, color, and profile; slim, neutral finishes blend into walls and ceilings, reducing perceptual mass. You should assess ceiling proximity, corner utilization, and potential obstruction of air intake or outlet paths, which influence perceived room scale.
Alignment with architectural lines—vertical boards, trims, or drywall recesses—creates a cohesive look. In practice, select fixtures that mirror existing hardware or ceiling heights, ensuring space appears larger without sacrificing heat delivery or accessibility.
Noise, Heat Distribution, and Comfort Experience
Noise, heat distribution, and overall comfort experience differ between wall-mounted and portable infrared heaters. In wall-mounted units, heat pulses are directed along a fixed axis, yielding consistent wall-to-occupant coverage with minimal floor obstruction. You’ll notice rapid surface heating near the unit, followed by diminishing radiance at greater distances, producing a stable vertical gradient.
Portable models, by contrast, enhance near-field warmth but create variability from repositioning and room layout, which can alter perceived comfort. Noise levels remain low in both types, yet fans in some portable designs introduce perceptible whine at higher speeds.
Heat distribution efficiency hinges on emissivity, reflector geometry, and supplemental convection, not solely wattage. For sustained comfort, align heater output with occupancy patterns and calibrate placement to minimize cold spots and glare.
Maintenance and Longevity: Keeping It Running
Regular upkeep keeps both wall-mounted and portable infrared heaters reliable and safe, so perform routine checks and component cleanings on a schedule tied to usage.
You should inspect electrical connections for looseness, fraying, or corrosion, and replace damaged cords immediately.
Verify mounting hardware remains secure and level, and test safety switches, tilt, and tip sensors after relocation or maintenance.
Clean reflectors and housings with a non-abrasive cloth; avoid abrasive cleaners that could degrade emissive surfaces.
Check thermostat calibration and sensor response, reprogram if drift occurs.
Air vents must stay clear; vacuum dust from grills monthly or more often in dusty environments.
Inspect internal fuses or breakers, and replace them only with identical ratings.
Document service intervals and observed anomalies to anticipate wear patterns and scheduling.
Cost of Ownership: Upfront, Running, and Repairs
When evaluating cost of ownership, consider upfront purchase price alongside long-term operating expenses and potential repair costs.
For wall-mounted models, initial hardware costs may be higher due to brackets, wiring adaptations, and professional installation. Portable units typically arrive with lower installation fees but may incur higher per-hour energy use due to enclosure design and fan-assisted components.
Running costs hinge on wattage, temperature setpoints, and duty cycles; infrared efficiency reduces heat waste but doesn’t eliminate standby losses or filtration maintenance.
Estimate annual energy expenditure by multiplying rated watts by expected usage hours, then apply local electricity rates.
Repairs factor in component lifespan: heating elements and thermostats wear predictably, while sensors and fans present variable risk.
Total cost of ownership balances upfront, operating, and anticipated service needs for your scenario.
Quick Comparisons: Top Use-Case Checklists
Consider your primary use cases to guide quick, precise comparisons: wall-mounted units excel where space is limited and fixed installation is feasible, while portable models favor flexibility and temporary setups.
In this checklist, you evaluate mounting constraints, power availability, and heat targeting. For wall-mounted options, verify wall integrity, required clearance, and fixed electrical connections; note heat distribution patterns and the potential need for supplemental zoning.
For portable units, assess caster stability, ease of relocation, and outlet compatibility, plus any battery or cord length considerations.
Efficiency metrics should be compared using uniform metrics like output per watt and heat retention time.
Safety features, such as tip-over and overheat protection, must be cross-checked across both forms.
Finally, align each choice with your space, usage duration, and maintenance expectations.
Final Decision Framework: Pick Your Best Fit
Ultimately, choose the option that best aligns with your space constraints, usage duration, and maintenance expectations. Your decision hinges on three criteria: space efficiency, thermal target, and upkeep burden.
If you need discreet heating with fixed room geometry, wall-mounted models minimize footprint and reduce accidental tampering, but require professional installation and periodic inspection of mounting hardware.
For flexible layouts and temporary zones, portable units offer ease of relocation and plug-in operation, yet they demand regular stability checks and filter maintenance.
Assess running costs by evaluating heat output, duty cycle, and standby loss. Consider safety features, including tip-over and overheat protections, and verify compatibility with existing electrical circuits.
Conclude with a quantified preference, then validate through a controlled trial period and documented usage logs.
Frequently Asked Questions
Can Wall-Mounted Heaters Be Used Behind Furniture Safely?
Yes, you should not place wall-mounted heaters behind furniture; maintain at least a 3-foot clearance, guarantee unobstructed airflow, and follow manufacturer guidelines to prevent overheating, fire risk, or restricted heat distribution. Regularly inspect for fabric or plaster contact.
Do Portable Infrared Heaters Require Ventilation?
Portable infrared heaters don’t require ventilation in typical rooms, but you should make certain fresh air exchange and avoid oxygen depletion risks; use one in well‑ventilated spaces, monitor for fumes, and follow manufacturer safety instructions meticulously. Also, satire: be cautiously optimistic; lol.
How Do Mounting Height and Orientation Affect Heat Spread?
Mounting height and orientation directly shape heat distribution: higher mounts reduce near-field intensity but widen coverage, while downward tilt concentrates radiant heat ahead. Position fixtures to target occupied zones, avoid obstructions, and make certain of even, safe thermal spread.
Are There Differences in Warranty Between Wall-Mounted and Portable Models?
Warranty differences exist: wall-mounted models often carry longer warranties on heat elements and housing, while portable units lean toward shorter durations; always verify model-specific terms, exclusions, and coverage periods before purchase to avoid surprises.
Which Style Is Better for Allergy Sufferers and Indoor Air Quality?
You’ll fare better with wall-mounted infrared heaters for allergy sufferers, as they limit dust disturbance and reduce clutter, improving indoor air quality; however, guarantee proper filtration, sealed mounting, and regular maintenance to prevent mold or particulate buildup.
Conclusion
When choosing between wall-mounted and portable infrared heaters, you’ll balance fixed heat zones against flexible coverage. An interesting stat: portable units often deliver near-peak efficiency in short bursts, yet wall-mounted designs can outperform over time in large, drafty rooms due to continuous zoning. Consider room size, insulation, and usage patterns. If you want targeted, permanent comfort, go wall-mounted; for adaptable, temporary warmth, pick portable. Decide by room role, maintenance tolerance, and total cost of ownership.


