
Infrared heaters aren’t inherently expensive to run. Your costs depend on how you size and use them, plus your room’s insulation. A smaller, well-insulated space with targeted heating and smart controls will cost less per hour than heating a large, drafty room. Wattage matters for runtime, not just price, so expect monthly bills to reflect actual usage and local rates. If you optimize placement, seal drafts, and use zones, you’ll keep costs down as you explore more details.
How Infrared Heaters Work and What That Means for Running Costs
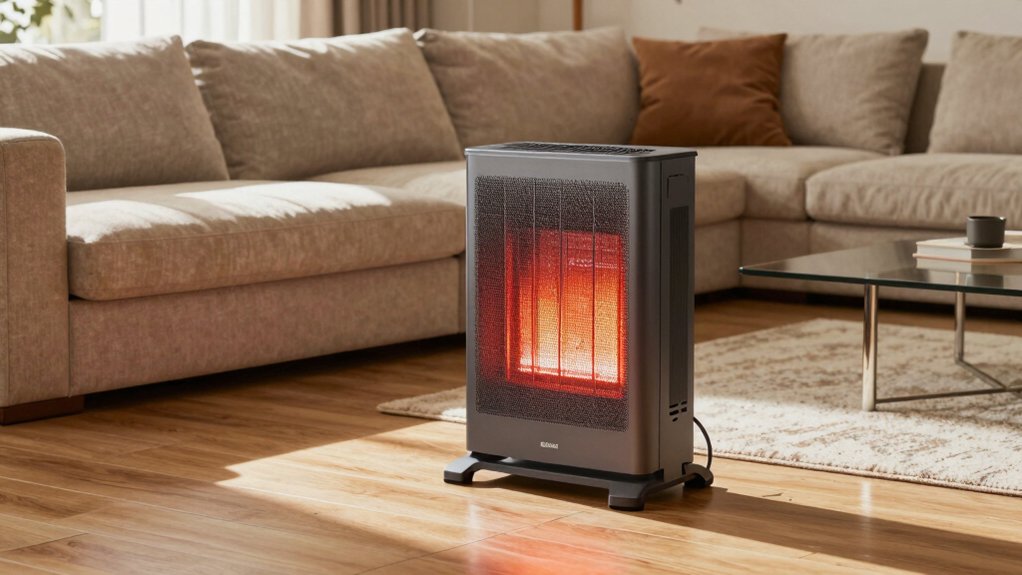
Infrared heaters warm you by emitting radiant energy that directly heats people and objects in a space, rather than the air. You feel warmth near the heater quickly, then the heat slowly radiates to surrounding surfaces.
In practice, efficiency isn’t about heating air, it’s about how well the heater converts electrical input into usable infrared energy and how effectively that energy transfers to you. Choose a device with a rated output aligned to your space size, and note that higher wattage isn’t always better; insulation and layout matter.
Operating costs hinge on electrical rate and duty cycle, not just capacity. Compare efficiency labels, standby consumption, and programmable controls. Real-world bills reflect runtime, not nominal watts alone, so measure usage patterns alongside device specs.
What Typical Wattages Tell You About Running Bills
Understanding typical wattages helps you estimate running bills without overreacting to headline specs. When you look at wattage alone, you’re seeing energy capacity, not price.
A 500W heater may feel similar to a 1500W unit in cold rooms if you run it longer, but costs depend on usage hours and electricity rate. Multiply the wattage by hours used, then by your rate (kWh). For example, 600W for 6 hours equals 3.6 kWh; at 14 cents per kWh, that’s about 50 cents.
Lower wattage isn’t always cheaper if it runs more often. Prioritize comfort targets and occupancy patterns, not peak wattage. Use programmable timers and modest setpoints to balance warmth with cost, and compare models by realistic operating scenarios rather than peak specs.
Comparing Infrared to Other Heating Options: A Quick View
When you’re weighing infrared against other heating options, the key trade-offs are cost, comfort, and control. Infrared shines in targeted warmth and fast response, so you feel heat where you stand rather than radiating across a whole room.
Compared with central systems, infrared often uses less energy for spot heating, but you’ll still heat the space you occupy rather than the entire area. Electric space heaters deliver easy on/off control and predictable budgets, yet may be pricier per hour if used long-term.
Gas heaters can provide bulk warmth at lower running costs in large spaces, but installation, venting, and safety rules add complexity. Heat pumps offer efficiency and year-round climate control, though upfront costs and climate suitability matter.
In short, match tech to room use, not just bill size.
How Room Size Influences Infrared Warmth and Cost
Size matters for infrared warmth and operating cost: as room volume grows, you’ll need more heater output or longer run times to maintain a comfortable temp.
In practice, heat demand scales with volume, not just floor area. For a given heater wattage, expect linear reductions in perceived warmth as ceilings rise or space expands.
If you target a steady 70°F, calculate required BTUs by multiplying room cubic feet by a modest temperature delta, then convert to watts.
Higher ceilings or extra floor space raise energy use for the same comfort level.
Real-world results show a 20% to 40% increase in run time when doubling volume, assuming identical insulation and layout.
Use this as a planning rule: match heater capacity to room size, not just area, for predictable costs.
The Role of Insulation in Maximizing Infrared Efficiency
Insulation is the backbone of infrared efficiency: it reduces heat loss so the heater can work less hard while keeping the room warm. Your goal is to minimize heat transfer from the living space to the outside.
In practical terms, evaluate walls, ceilings, and floors for continuity gaps, drafts, and material age. Data show a well-sealed envelope lowers heat demand by a measurable percentage, improving infrared response time and steady-state comfort.
Prioritize insulation R-values appropriate for your climate and ensure vapor barriers don’t trap moisture. Seal penetrations with weatherstripping or caulk, then verify performance with quick checks like draft hand tests or infrared scans.
Better insulation means you preserve heat, reduce standby loss, and lower operating costs without altering heater settings.
Temperature Setups: Finding the Right Comfort Level Without Overspending
Setting the right comfort level starts with your Ideal Comfort Range and smart temperature tuning. Use data on room size, occupancy, and insulation to keep settings consistent, not drafty swings.
With precise, evidence-based adjustments you can stay warm without overspending.
Optimal Comfort Range
To stay comfortable without wasting energy, aim for a steady indoor temperature that fits your routines and climate, then adjust gradually rather than making big swings.
In practice, most homes feel best around 68–72°F (20–22°C) during daytime when active, with a 2–4°F (1–2°C) leeway for overnight cooling.
Use a consistent setpoint rather than episodic spikes to reduce runtime variability and energy use.
Humidity matters: keep indoor RH around 40–60% to maintain perceived warmth without cranking the heater.
Zone heating can trim waste: target common living areas, not rarely used rooms.
Monitor performance over a week, noting when comfort drops or energy use rises.
Small, regular adjustments beat large, infrequent changes for maintaining ideal comfort and efficiency.
Smart Temperature Tuning
Smart Temperature Tuning means using data to dial in a comfort level that stays steady without wasting energy. You’ll benefit from monitoring local conditions—occupancy, windows, sun exposure—and adjusting in small, data-backed steps.
Start with a baseline setpoint aligned to your desired comfort, then track how often your heater runs. Use temperature offsets for different zones and times of day, not blanket changes. Leverage programmable schedules or smart thermostats to automate ramping, keeping swings tight.
Compare actual room temperature vs. setpoint to evaluate drift and refine thresholds. Avoid chasing precise numbers; aim for stable averages with minimal fluctuation. Document the impact of each change on energy use, then iterate.
This approach reduces runtime, improves comfort, and cuts operating costs over time.
Usage Patterns That Save Money: Timing, Scheduling, and Zoning
Timing matters for cost control, so you’ll see the biggest savings by aligning heaters with when spaces are used and unoccupied.
Zoning lets you heat only the areas you’re in, reducing waste and lowering energy use.
If you plan schedules around occupancy patterns, you’ll maximize comfort while minimizing bills.
Timing Matters
If you control when and where infrared heaters run, you’ll save on energy without sacrificing comfort. Timing matters because heat delivery aligns with occupancy and activity. Use schedules to run heaters only during occupied periods, and dial back when spaces are empty or lightly used.
In practice, set lower outputs for long, idle stretches and higher outputs for brief, peak-use moments. Temperature setpoints influence efficiency: small adjustments (a degree or two) can reduce runtime without noticeable comfort loss.
Measure and compare: track hourly energy use with and without timers, then refine. Avoid continuous full-tilt operation in unused zones. Staggered startup and sensible setback strategies prevent overshoot, reducing total runtime.
Clear schedules, responsive controls, and regular reviews yield consistent savings.
Zoning Benefits
Zoning lets you match heat delivery to how spaces are used, cutting waste and boosting comfort. When you set up zones, you pay attention to occupancy patterns, door openings, and equipment loads, then assign thermostats or smart controllers accordingly.
The data shows you can halve heat loss in rarely used areas by keeping them at lower setpoints while keeping active zones warmer. Scheduling lets you reflect actual usage: dim or cut heat when rooms stay empty, ramping up before you return. You’ll see steady improvements in runtime efficiency and fewer temperature swings.
Zoning also reduces peak demand, which lowers electricity charges and extends heater life. Implement incremental zoning tests, monitor energy use, and adjust to maximize savings without sacrificing comfort.
The Impact of Frequency and Duration on Your Top-Line Costs
The frequency and duration of infrared heater use directly drive your top-line costs, because more frequent sessions and longer runtimes eat into energy bills and maintenance needs. When you run heaters more often, you increase overall energy consumption, even if each session is short.
Longer runtimes raise kilowatt-hour usage per day, boosting monthly bills. Compare duty cycles: a high-frequency, short-duration pattern can equal or exceed a single long session in cost, depending on your heater’s efficiency.
Routine maintenance scales with usage; more cycles mean more filter changes, sensor checks, and potential part wear. Seasonal needs matter: moderate, steady use often costs less than sporadic, intensive bursts.
Track actual run-time, correlate with energy prices, and target consistent, efficient use to control top-line impact.
Best Practices for Sizing and Selecting an Infrared Heater
Choosing the right infrared heater starts with clear load and space assessments: measure square footage, ceiling height, insulation, and door openings, then match those inputs to heater-rated efficiency and placement guidelines.
You should profile the space’s heat loss factors, such as windows, drafts, and ceiling type, and target a load-to-heater ratio that keeps comfort within a defined temperature band.
Rely on verified BTU or wattage specs calibrated to your climate zone and occupancy patterns.
Prioritize controllable output—variable wattage or multiple stages—over single, high-output units for efficiency.
Compare manufacturers’ efficiency claims with real-world performance data from independent tests.
Ensure safety features, warranty terms, and electrical capacity align with your installation plan.
Document calculations for future adjustments, and select a unit with scalable accessories if room configuration changes.
How Placement Affects Heat Feel and Efficiency
Placement can dramatically influence both how warm you feel and how efficiently an infrared heater runs. The heater’s placement determines heat delivery paths, so position it to target occupied zones without obstructions.
Mount or place it at ankle to ceiling height—around eye level is common for ideal plume distribution, but consider room layout. Avoid placing behind furniture or near floors where heat is absorbed or blocked; clear sightlines improve radiant transfer.
Angle matters: a slight downward tilt toward seating areas increases perceived warmth with less output. Reflective surfaces can boost apparent heat, but only if they don’t create glare or glare-induced discomfort.
Check line-of-sight, distance, and room geometry; small changes yield measurable differences in warmth felt and energy use. Measure comfort after adjustments, then refine placement accordingly.
Power-Saving Accessories That Help Lower Running Costs
Ever wondered how small tweaks can trim your running costs without sacrificing comfort? You’ll gain from simple, data-backed accessories that optimize heat use.
Start with a programmable thermostat or timer, which shifts output to match occupancy, reducing idle hours by up to 30% in typical homes. Pair with a smart radiator or wall-mounted controller to maintain target rooms without overheating.
Inspect seals, outlet covers, and door weatherstripping; improved insulation minimizes heat loss, amplifying every watt you use. Use reflective panels behind heaters to redirect warmth outward, boosting perceived comfort at lower settings.
Consider a thermostat with adaptive scheduling to learn routines, avoiding unnecessary blasts. Finally, choose energy-efficient accessories from reputable brands with verified efficiency ratings to sustain long-term savings.
Real-World Scenarios: When Infrared Is Cost-Effective

Infrared heaters make sense when you need quick, directed warmth in small to medium spaces with minimal heat-up time.
In real-world use, you’ll notice cost effectiveness where you regularly heat people or objects, not entire rooms. If a space is well-insulated, infrared can offset higher thermostat settings by heating occupants directly, reducing overall energy use.
In workshops, garages, or drafty basements, infrared delivers fast comfort with short runtimes, keeping bills predictable.
Compare to convection heaters, and you’ll often see lower energy for targeted heating and faster warmth onset.
Track temperature setpoints, usage hours, and insulation quality to quantify savings.
Real-world tests show hour-by-hour costs drop when you limit heat to occupied zones.
Use infrared strategically, not as a blanket substitute.
When Infrared Isn’t the Best Fit for Your Budget
If your budget is tight, infrared isn’t always the best fit because upfront costs and limited coverage can outweigh long-term savings. For small spaces, you may pay a premium per square foot for heaters and installation, making the ROI thinner than expected.
Compare total cost of ownership: device price, mounting, and energy use over time. If you need even heat across multiple rooms or irregular layouts, infrared efficiency drops, and you’ll rely on supplemental systems, increasing complexity and bills.
In drafty or poorly insulated spaces, heat transfer is slower, so you burn more energy for the same comfort. Consider alternatives like space heaters with programmable controls or better insulation first; infrared won’t always meet budget constraints.
Data suggests careful sizing and coverage planning drive cost effectiveness.
Quick Wins: 10 Practical Tips to Cut Infrared Costs Today
With budget in mind, small, practical tweaks can shave costs without sacrificing comfort. Start by sealing drafts: door gaps, window frames, and duct leaks matter more for infrared efficiency than you might expect. Elevate thermostat discipline—setback schedules and targeted room pulses cut runtime without chilling spaces.
Use zone heating: prioritize occupied areas and isolate unused rooms. Invest in smaller, well-placed heaters rather than oversized models; you’ll reduce peak draw and improve response time. Maintain factory specs: keep reflectors clean, verify mounting height, and protect against dust buildup that dulls output.
Use programmable timers to align heat with occupancy, avoiding waste. Track consumption month over month to identify spikes—adjust tactics before costs rise. Combine these tweaks for measurable, data-backed savings.
How to Compare Bills: Estimating Your Infrared Running Cost Before You Buy
To estimate infrared running costs before you buy, start by translating watts into real monthly bills. You’ll convert device wattage into kilowatt-hours (kWh) per month by multiplying watts by hours of use, then divide by 1000.
For example, a 1500W heater run 8 hours daily adds about 360 kWh annually, costing roughly $40–$60 depending on your rate. Compare prices using your electricity tariff (per kWh) and consider standby power, when the unit isn’t actively heating.
Look for efficiency claims, like heat output per hour and automatic shutoff features, to avoid waste. Build a simple spreadsheet: model several scenarios (room size, climate, preferred comfort).
Don’t assume, verify with true-rate bills or online tariff calculators, and normalize for daily usage to reveal true ownership costs.
Frequently Asked Questions
Do Infrared Heaters Warm a Room Quickly or Slowly?
Infrared heaters warm a room quickly, especially when you target people or objects directly. You’ll notice faster comfort near the heater, but overall time depends on insulation, room size, and outdoor temperature. Use energy-efficient settings for best results.
Are Infrared Heaters More Expensive to Run Than Gas?
Yes, infrared heaters usually cost less to run than gas for steady, targeted heating. You’ll see lower hourly energy use when rooms are well insulated, but initial costs and efficiency losses matter; compare wattage, local gas prices, and usage.
Do Warranties Cover Efficiency-Related Costs?
Warranties rarely cover efficiency-related costs. You should verify terms, but most warranties focus on defects and performance, not energy efficiency. If covered, expect caps or exclusions; otherwise, track efficiency improvements through installation, maintenance, and qualified service.
Can Infrared Units Heat Whole-Home Spaces Effectively?
Infrared units can heat smaller, targeted spaces efficiently, but they struggle to evenly warm whole-home areas. You’ll see fast comfort locally, yet you’ll likely need supplemental zoning or other systems for full-home consistency and cost control.
Do Energy-Saving Features Genuinely Cut Running Costs?
Yes, energy-saving features genuinely cut running costs. You’ll see lower electricity use when you enable programmable timers, eco modes, and precise temperature controls, since infrared heat focuses on objects, reducing wasted energy and maintaining comfort efficiently.
Conclusion
If you came for magic, you’ll be disappointed—you still pay for heat. Infrared heaters aren’t spooky savings wands; they’re targeted, efficient when used right, and pricey when left running like a dragon-sized space heater. Data says wattage and room insulation matter more than brand hype. So, crunch numbers, pick sensible watts, seal drafts, and don’t pretend your couch is a furnace. In short: use smartly, budget wisely, and enjoy warm, unbuttered sarcasm-free judgment.


