
Did you know your attic can leak more heat than your walls if you skip sealing before insulation? You probably know you should insulate, but the best choice depends on your home’s structure and climate. You’ll want a practical balance of attic, wall, and basement strategies, plus an eye on air leaks and moisture barriers. Let’s map out options, costs, and how to pair materials for durable, effective performance.
Understanding Home Insulation Basics
Insulating your home keeps heat in during winter and out during summer, reducing energy bills and improving comfort. You’ll learn how insulation works by trapping air pockets that slow heat transfer, keeping indoors stable.
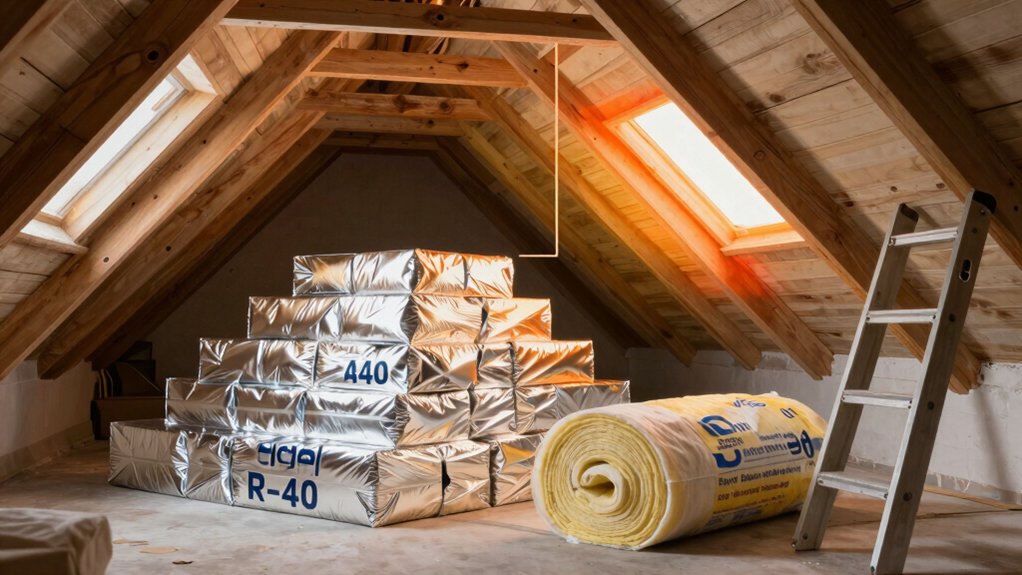
Different insulation materials offer varying R-values, moisture resistance, and installation methods, so pick options suited to your climate and budget. The basics include ceiling, wall, and floor insulation, plus duct and window considerations that affect overall performance.
Attic ventilation matters alongside insulation, helping remove moisture and prevent heat buildup that undermines effectiveness.
Budget-friendly choices include fiberglass and mineral wool, while dense-pack cellulose suits retrofit projects. Prioritize proper installation techniques to avoid gaps and compression.
Understand how to evaluate needed thickness, exposure, and compatibility with existing assemblies for reliable comfort and efficiency.
Assessing Your Current Insulation and Gaps
Start by auditing your current insulation to see what you actually have and where it’s missing. Identify gap areas like uninsulated walls, attic access, and crawlspaces, so you know what needs attention first.
Then prioritize retrofit needs by cost, disruption, and expected energy savings to guide the next steps.
Audit Existing Insulation
To audit your existing insulation, start by gathering any available manuals, receipts, and building plans that show where insulation was added or omitted.
Next, inspect accessible areas like attics, basements, crawl spaces, and exterior walls for visible material, thickness, and signs of moisture.
Compare what you find to typical R values for your climate and structure, noting where insulation seems thinner or missing.
Document temperature inconsistencies you’ve noticed between rooms or floors, as these often indicate gaps or thermal bridging.
Record fastener patterns, gaps around recessed fixtures, and penetrations through walls or ceilings.
Use a flashlight and a stud finder to map insulation coverage.
Prioritize sections with potential gaps for targeted improvements, focusing on maintaining consistent insulation R value throughout the envelope.
Identify Gap Areas
Now that you’ve gathered manuals and mapped visible insulation, it’s time to identify the gap areas. Begin with a quick walk-through of attic, walls, crawlspace, and basement to spot missing or compressed insulation. Note terminations around doors, single-pane glazing, and recessed lighting that could create hidden gaps.
Compare installed material to recommended R-values for your climate, focusing on thickness, continuity, and air leakage routes. Use a tape measure and flashlight to log thickness and holes, then map gaps on a simple diagram.
As you assess, beware insulation myths—oversizing gaps or relying on single-layer fixes isn’t enough. Consider historical insulation practices that may have left porous zones.
Prioritize obvious holes, suspect seams, and moisture-prone areas for targeted upgrades.
Prioritize Retrofit Needs
As you evaluate your current insulation and gaps, prioritize fixes that deliver the most return on energy savings and comfort. Begin by identifying hotspots where heat leaks most, such as attic hatch gaps, rim joists, and ductwork driving energy loss. Map these areas to the gaps you found earlier, then rank retrofit steps by payoff—not just cost.
Target projects that close thermal bridging, because small gaps can undermine whole-wall performance. Compare insulation R values you currently have with recommended benchmarks for your climate, focusing on improvements that yield the largest R value gains per dollar.
Plan a phased approach: seal air leaks first, then add insulation where it counts. Reassess after each step to ensure continued progress toward steady comfort and lower bills.
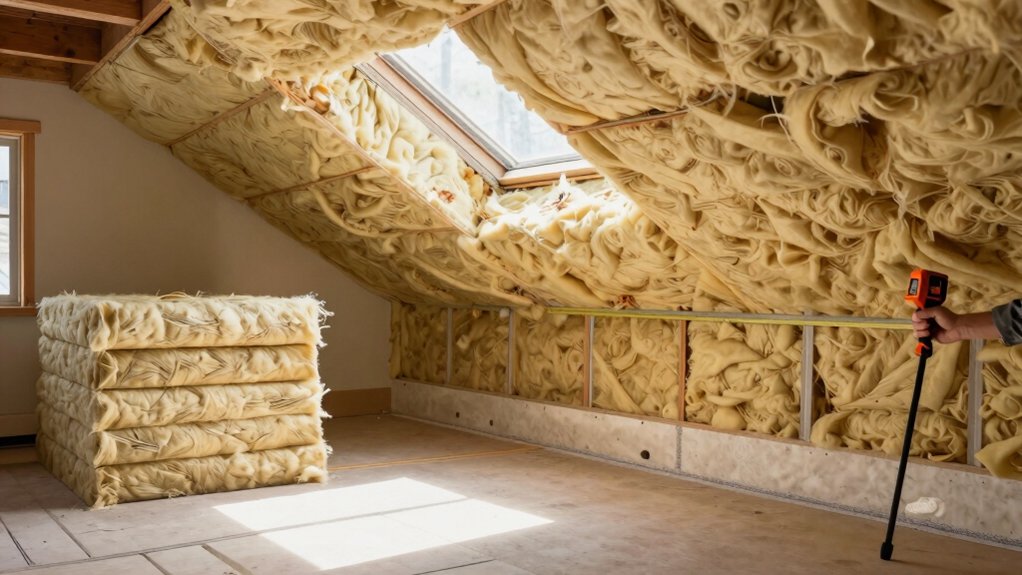
Attic Insulation: Breathing Easy and Saving Heat
If your attic isn’t well insulated, heat slips out and your energy bill climbs, but upgrading attic insulation is one of the smartest, most cost-effective fixes you can make. You’ll want solid planning, not guesswork, to maximize comfort and curb drafts.
Start with a clear assessment of current insulation depth and gaps, then choose appropriate insulation materials that suit your climate and budget. Prioritize airtightness by sealing joints, ducts, and penetrations before adding new layers.
When selecting materials, consider density, R-value, and moisture resistance to prevent mold and condensation. Ventilation strategies matter too: balanced intake and exhaust help maintain attic health without cooling efficiency loss.
Finally, install consistently, avoiding compression or compression zones, to keep heat where you need it year-round.
Wall Insulation Options for Existing Homes
Wall insulation options for existing homes build on the same goal as attic upgrades: reduce heat loss, boost comfort, and trim energy bills. You’ll choose approaches that fit your walls, avoid wasting space, and minimize disruption.
Cavity filling works where cavities exist, using material with solid thermal performance to reduce thermal bridging and improve overall insulation.
External rigid foam or sheathing adds a continuous layer, tackling gaps where studs create cold spots and supporting higher insulation R values.
Internal retrofit options, like insulated plaster or drywall-embedded boards, can be suitable in certain walls but may reduce room size. Always consider moisture control and ventilation.
Measure the R values you need, compare products, and plan for a balanced system that limits thermal bridging while meeting local code requirements.
Floor and Basement Insulation Strategies
Are you targeting comfort and energy savings from the ground up? Floor and basement insulation strategies focus on preventing heat loss where it starts—below living spaces.
Start with floor joist insulation to reduce drafts and improve warmth under raised or vented floors. Choose appropriate materials: traditional fiberglass batts for easy retrofits, mineral wool for fire resistance, or spray foams for tight seals in cramped joist bays.
Pay attention to moisture management; keep vapor barriers intact and address any existing water intrusion before insulating.
In basements, consider insulating walls or using insulated panel systems to minimize temperature swings. Seal gaps around pipes and wires, then install a breathable, moisture-permeable finish if needed.
Prioritize airflow control to maintain long-term performance and comfort.
Air Sealing: The Foundation of Effective Insulation
Air sealing is the foundation of effective insulation, so you’ll start by tightening up where leaks form. We’ll cover air sealing fundamentals and where to look for the biggest gaps.
Then show simple fixes you can tackle first. Pinpointing and sealing these gaps early saves energy and makes your insulation more effective overall.
Air Sealing Fundamentals
Air sealing is the foundation of effective insulation, because gaps and leaks let warm or cool air slip in and out, making your insulation work harder. You’ll tighten this by identifying common entry points—windows, doors, electrical penetrations, attic hatches, and rim joists—and prioritizing fixes where your home loses heat or gains moisture first.
Begin with a quick assessment, mapping likely trouble spots for targeted action. Use appropriate sealing techniques that suit each gap’s size and location, avoiding over-application that can trap moisture. Material selection matters: choose compatible sealants for different substrates and temperatures, and employ long-lasting, durable products that resist aging.
Combine weatherstripping, caulking, and tapes where they perform best, keeping airflow controlled without creating new crevices. Maintain consistent results with regular rechecks.
Key Sealing Gaps
To start sealing gaps effectively, focus on the spots that let the most air slip through: around windows and doors, attic hatches, electrical outlets, wiring penetrations, and rim joists.
Next, identify persistent drafts with a simple test or doorway check, and prioritize high-traffic paths first.
Use appropriate sealants: caulk for small cracks, foam for larger openings, and weatherstripping for moving joints.
Make certain surfaces are clean and dry before application, and don’t overfill—trim excess for a neat seal.
Sealant choices should match material and climate, and you’ll want to address gaps both inside and around exterior penetrations.
Regularly inspect seals and replace worn weatherstripping.
Sealing gaps boosts draft prevention and contributes to overall insulation performance.
Vapor Barriers and Moisture Management
When moisture moves through a wall or ceiling, it can cause mold, rot, and energy loss if not managed properly. You’ll want a clear plan for vapor barriers and moisture control that fits your climate and home.
Start by determining exterior moisture risks and interior humidity sources, then install a vapor barrier only where it’s appropriate to your assembly. Avoid creating traps that trap condensation behind wood or drywall.
Use proper sealing around penetrations and joints, and keep humidity in check with exhaust fans and sensible ventilation. Regularly inspect for air leaks, damp spots, and signs of mold.
Focus on consistent moisture management techniques and timely repairs to protect insulation performance and indoor air quality. vapor barrier installation, moisture management techniques.
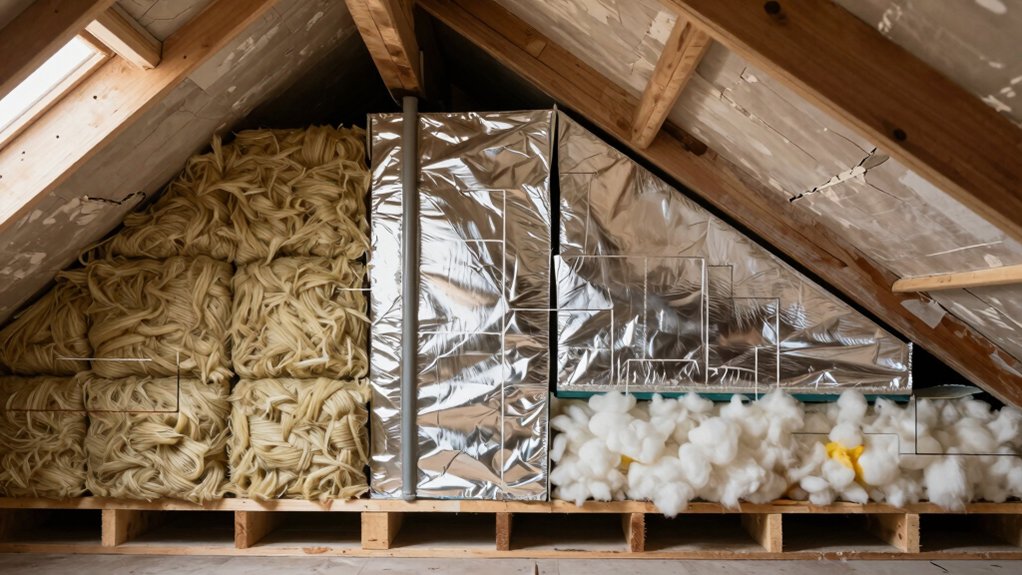
Choosing Materials: Fiberglass, Mineral Wool, Cellulose, and More
When you’re choosing insulation materials, fiberglass is often the budget pick, but you should weigh it against mineral wool for fire resistance and durability.
Cellulose can offer solid performance at a lower cost, though its moisture handling varies by climate and installation.
We’ll compare these options against each other to highlight where each material shines and where tradeoffs occur.
Fiberglass vs. Alternatives
Fiberglass is a common starter option, but it isn’t the only game in town. When you compare insulation materials, you should weigh performance, cost, and installation ease across options like mineral wool and cellulose, plus newer blends.
Fiberglass holds value for affordability and IM requirements, yet it’s not a one-size-fits-all solution. Mineral wool resists fire and sound, offering stability in damp or high-heat areas, while cellulose delivers dense coverage from recycled content, often at a lower material cost.
Consider installation realities—batt vs. blown-in, thickness, and gaps that undermine efficiency. Be mindful of insulation myths, such as “higher R-value always wins” or “all drafts mean fresh air loss.”
Choose the option that aligns with climate, existing framing, and long-term energy goals.
Mineral Wool Benefits
Mineral wool brings practical benefits that make it a strong contender for existing homes. You’ll appreciate its excellent fire resistance and inherent density, which help curb heat transfer without added bulk. It seals well around irregular framing, reducing drafts and air gaps that undermine efficiency.
You’ll also notice its soundproofing options improve comfort in living spaces, thanks to the material’s fiber structure that dampens airborne noise. Durability matters here, and mineral wool resists moisture damage and mold better than some alternatives, preserving insulation performance over time.
It’s easy to handle during retrofit installations, cuts cleanly, and stays stable under fluctuating temperatures. If you want reliable, low-maintenance insulation, mineral wool stands out for ongoing insulation material durability and practical performance.
Cellulose Performance Notes
Cellulose insulation delivers solid performance with a focus on tight, eco-friendly filling. You’ll appreciate its dense pack, which minimizes air gaps and improves thermal performance without added bulk.
In practice, cellulose fire resistance is bolstered when treated to meet code requirements, so confirm labeling and local standards for your area. You’ll also want to contemplate installation quality; proper blower-filled or dense-packed methods matter as much as material choice.
Regarding cellulose environmental impact, it’s favored for recycled content and lower embodied energy, though dust and moisture management deserve attention during installation.
For retrofit projects, you’ll benefit from its compatibility with existing framing and reduced risk of gaps.
Always compare moisture control, pest barriers, and local fire ratings alongside cost and availability.
DIY Vs Professional Installation: When to Call in the Pros
DIY insulation projects can save money, but not every job is appropriate to tackle yourself; knowing when to call in a pro can prevent mistakes and risky outcomes. You should assess DIY considerations like access, ventilation, and specialized tools before starting.
If you’re dealing with dense attic space, unfamiliar r-values, or wiring and plumbing crossings, pause and consult a pro. Professional expertise matters for safety-critical steps, airtight detailing, and code compliance, especially in tight crawl spaces or fire-rated assemblies.
When you’re unsure about moisture risks or handling installation hazards, opt for a licensed contractor. For many homeowners, a consult helps you set realistic expectations and ensure correct material choice.
In the right scenarios, DIY is feasible; otherwise, call in the pros for reliable, long-lasting results.
Cost, Payback, and Energy Savings Estimation
Estimating cost, payback, and energy savings helps you decide which insulation option makes sense for your home. Start with upfront cost estimates, then project operating savings over 5 to 15 years to gauge payback. Include installation, materials, and any necessary retrofits; some options require air sealing or ventilation adjustments, affecting total spend.
Compare thermal performance ratings, since higher R-values can reduce heat loss more effectively, lowering heating and cooling bills. Consider payback timelines based on your local energy prices and climate, not just sticker price.
Environmental impact matters too: select materials with lower embodied energy and better recyclability when possible. Track annual energy use before and after installation to validate savings, and adjust expectations for variable factors like occupancy and weather.
Prioritize options that offer reliable performance within your budget.
Maintenance and Long-Term Performance Tips
Regular maintenance keeps insulation performing as intended and prevents small issues from becoming costly problems, so you should schedule periodic inspections and simple upkeep. You’ll spot gaps, leaks, or compression before they degrade performance, and you’ll reseal or repair without overhauling.
For long-term performance, plan routine checks after seasons or major weather events, and keep an organized record of improvements. Maintain air leaks around doors, windows, and attic hatches, and ensure ventilation remains balanced to avoid moisture build-up.
Consider insulation aesthetics when touching up exposed areas, so repairs don’t look out of place or compromise effectiveness. Stay informed about insulation regulations to ensure any upgrades comply with local codes.
Use durable, compatible materials and follow manufacturer guidance to extend service life and sustain efficiency. Schedule professional audits periodically to validate performance and compliance.
Frequently Asked Questions
How Do Climate and Orientation Affect Insulation Choices?
Climate and orientation steer insulation choices: as you plan, climate adaptation guides material and density, while orientation considerations push you to target sun exposure, wind paths, and thermal bridges. Select, seal, and isolate accordingly for comfort and efficiency.
What Are Hidden Costs Beyond Material Prices?
Hidden costs sneak in, like drafty shadows, and installation surprises catch you off guard. You’ll face labor overruns, moisture checks, and equipment needs you didn’t anticipate, so budget for permits, access, cleanup, and post-install inspections. Stay vigilant.
Can You Insulate Without Removing Drywall or Flooring?
Yes, you can insulate without removing drywall or flooring. You’ll target gaps and cavities, use blown-in insulation through small access points, and apply floor-screw spacing where possible, prioritizing drywall removal and flooring insulation only if needed for best results.
How Long Before You Notice Comfort Improvements?
You’ll notice comfort improvements almost immediately, a near-instant relief that feels like a warm hug. Thermal resistance ramps up quickly, and energy savings begin within days as the system stabilizes and drafts vanish.
Are There Rebates or Incentives for Specific Upgrades?
Yes, you can access rebate programs and incentive eligibility for upgrades. Check local and federal offerings, compare requirements, and track deadlines. Gather receipts, project details, and contractor certifications to maximize rebates and guarantee you meet all incentive eligibility criteria.
Conclusion
You’ve got solid options to tighten an older home without overhauling everything. Start with sealing leaks, then add attic, wall, and basement insulation as your budget allows. Choose materials that fit your climate and existing walls, and decide between DIY or professional installs based on complexity. Track costs, expected savings, and payback. With steady upgrades, your home will be more comfortable and energy-efficient—reducing drafts so dramatically you’ll swear the furnace is hiding a miracle.


