

As you stand at the bench of the kitchen, the task ahead—installing a sink—shifts from theory to hands-on reality. Begin by turning off water, removing the old basin, and clearing the countertop, then measure for the new opening. You’ll set the sink with sealant, secure it with mounting hardware, and reconnect drains and supply lines. A careful test for leaks will reveal if you’ve missed a step, so keep steady and follow each stage in order.
Planning and Tools You’ll Need
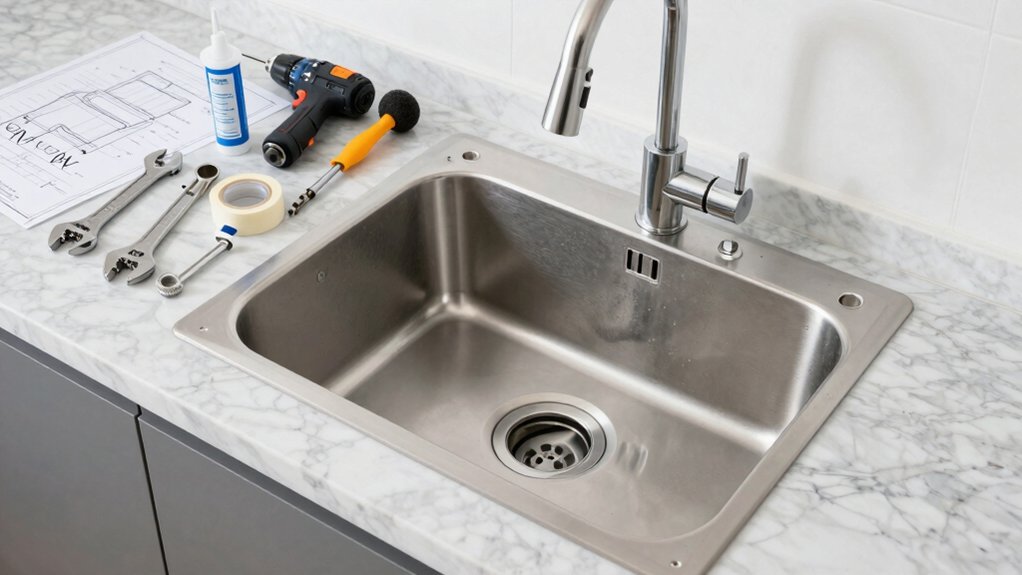
Before you start, gather the essentials: a tubing cutter, jigsaw, drill, screwdriver, pliers, wrench, tape measure, and utility knife. You’ll need the right sink type and size, chosen from cabinet dimensions and your style, ensuring compatibility with existing plumbing. Prepare all materials: sink, gasket, mounting nuts, washers, plumbers putty, silicone caulk, and supply lines for a smooth process.
Plan precise measurements and mark the sink’s outline on the countertop or cabinet so you can cut the opening accurately with a jigsaw or hole saw. Keep safety first: protect surfaces and handle the sink carefully to prevent damage during installation.
Tools and measurements drive preparation, so confirm you have everything before you begin the cut, then proceed methodically.
Preparing the Work Area
To prepare the work area, start by clearing the countertop and removing items stored under the sink so you have a clean, unobstructed surface.
Next, turn off the water supply valves to prevent leaks during installation and disconnect any existing plumbing if you’re replacing an old sink.
Protect surrounding surfaces and cabinetry with drop cloths or towels to prevent damage or scratches.
Gather all necessary tools and materials, ensuring you have the correct size and type of sink for your space.
Measure the sink opening accurately and prepare the area by removing any old sealant or debris to ensure a proper fit.
Keep the drain accessible and free from obstructions as you align the new unit.
Maintain a tidy, organized work area throughout the process.
Removing the Existing Sink
If you’re removing the existing sink, start by shutting off the water supply valves under the sink and placing a bucket or towel beneath the drain to catch any remaining water.
Next, use a wrench to loosen and detach the supply lines from the faucet and shut-off valves, then set them aside.
Carefully cut through any sealant or caulk around the sink perimeter with a utility knife or putty knife to separate the sink from the countertop.
Disconnect the drain pipes, ensuring you have a container ready for residual liquid.
Remove fasteners securing the sink to the cabinet, then gently lift the old sink straight up and out.
This completes the remove the old stage before proceeding with installation.
Measuring and Opening the Countertop
Start by marking the opening outline on the countertop using the sink or a template. Then, place pilot holes at each corner to guide your cut.
Drill small corner holes to create clean starting points for the jigsaw blade, ensuring the lines stay true.
Double-check measurements and align the edges so the opening fits the sink with a precise, snug fit.
Marking the Opening Outline
Need to guarantee the opening fits perfectly: measure the sink’s width and length, then use either the template or the sink itself to trace its outline onto the countertop.
Start by confirming the measurements, then transfer the outline with a pencil or masking tape for visibility.
Use the template if available; otherwise, place the sink and trace its outer edge to ensure a precise outline.
Mark the outline clearly, aligning it with the intended placement and considering any tolerance for sealant, mounting clips, and fixtures.
Double-check both measurements and placement before proceeding.
Verify the outline is continuous and legible, with clean, defined lines.
Verify that the opening accommodates the full assembly and any adapters.
Reconfirm alignment, then prepare to move to the cutting stage.
Readjust if anything seems off.
Cutting Corner Holes
To begin Cutting Corner Holes, place the sink outline on the countertop using a template or painter’s tape for exact positioning. Then drill small pilot holes at each corner to guide the jigsaw. You’re creating entry points that guarantee clean cuts and accurate corners.
Next, set up your jigsaw with a sharp blade and steady speed. Align the blade with the marked lines and begin cutting, letting the tool do the work without forcing it. Maintain smooth, even motion to follow the outline precisely.
After completing the cut, remove the template and test the opening. Finally, smooth any rough edges with sandpaper or a file so the opening presents a clean, accurate fit for the sink. Always double-check the fit before proceeding with installation.
Fitting Opening Edges Properly
Measure the sink and the cutout to confirm a proper fit before marking the countertop.
Next, use a straightedge or template to trace the sink’s outline onto the countertop surface, ensuring the cut-out lines mirror the sink’s edges.
Mark small, evenly spaced reference points along the traced perimeter.
Drill corner holes inside the traced shape with an appropriate bit to guide the jigsaw.
Cut along the marked lines slowly, maintaining steady pressure for a smooth edge.
After cutting, inspect the edges for any burrs or uneven spots.
Use sandpaper or a file to remove splinters and refine the cut‑out.
Verify the fit by dropping the sink into the opening, adjusting as needed until the edges align neatly with the countertop.
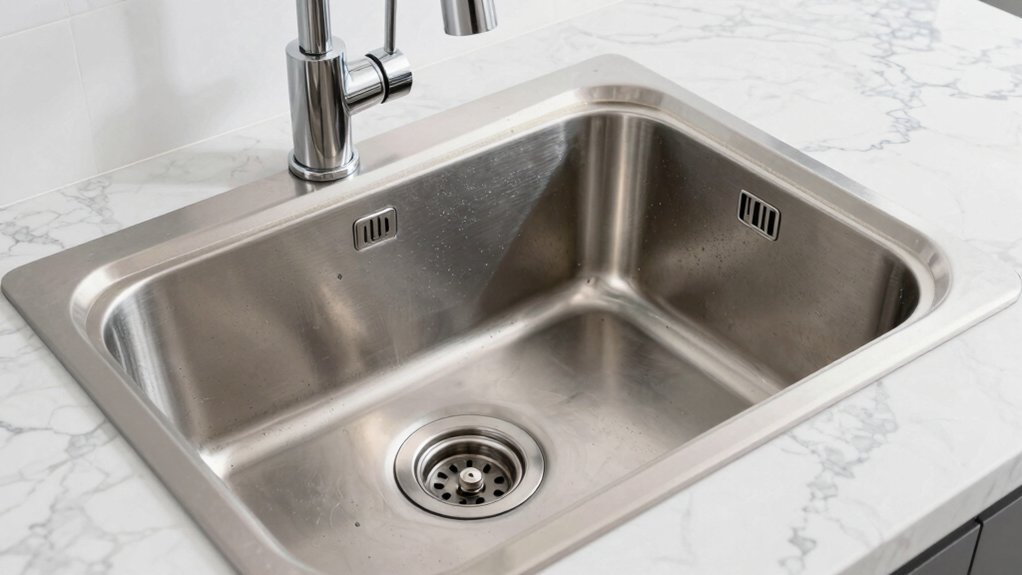
Installing the New Sink and Mounting Hardware
Before you set the sink in place, apply a bead of silicone caulk or plumber’s putty around the underside of the rim or mounting surface.
Carefully lower the sink into the cutout, making sure it sits flush against the countertop or cabinet surface and is properly aligned.
Install mounting hardware, then secure the sink by tightening the nuts evenly to prevent gaps or movement. Avoid overtightening to prevent damage.
If the manufacturer provides additional clips or braces, install them per instructions to ensure stable support.
Check that the sealant remains intact around the edges, and wipe away any excess after securing.
Allow the sealant to cure as recommended before connecting plumbing, then confirm the sink is snug and secure.
Connecting the Faucet and Drain Assembly
You’ve secured the sink, so now you’ll connect the faucet and drain assembly. Begin by mounting the faucet: insert it through the sink holes and tighten the mounting nuts with a wrench or screwdriver until snug.
Next, attach the hot and cold supply lines from the shut-off valves to the faucet inlets, ensuring a snug fit without over-tightening.
Install the drain assembly by applying plumbers putty around the drain opening, then insert the drain flange and tighten the locknut underneath.
Connect the drain tailpiece to the sink drain and attach it to the P-trap, keeping everything aligned.
Finally, test for leaks by turning on the water and flushing the drain; seal with silicone caulk if needed.
Plumbing work is complete.
Hooking Up Water Supply and Drain Lines
To hook up the water supply and drain lines, start by attaching the flexible hot and cold supply lines to the faucet shut-off valves, tightening with a wrench until secure. Then connect the other ends to the faucet inlets, ensuring the correct orientations.
Next, connect the drain lines by installing the drain tailpiece into the sink drain opening with plumbers’ putty or silicone sealant for a watertight seal. Attach the sink drain to the P-trap and trap arm, making sure all fittings are snug and aligned to prevent leaks.
Turn on the water supply and inspect all connections for leaks. Run water through the sink to confirm proper drainage and leak-free operation, adjusting as needed for a tight, functional setup.
Testing for Leaks and Final Checks
Begin by inspecting all connections for tightness and signs of moisture. Then run water to perform a full test on both hot and cold lines. Fill the sink, watch the drain area, and check beneath the cabinet for any drips or damp spots, noting sealant edges with a wipe to catch small leaks.
Confirm the drain stopper seals properly and that each connection holds steady without leaks. Use a paper towel to detect any missed drips.
Inspect All Connections
Once you’ve connected and tightened every fitting, turn on both hot and cold water and watch for leaks at every connection. You’ll perform leak detection by inspecting each plumbing connection as water flows.
Check under the sink for moisture, drips, or pooling around seals, and look at the drain and trap area after filling the sink. Use a flashlight to examine joints for tightness and potential leaks, focusing on the water supply lines and mounting hardware.
Wipe away excess sealant or plumber’s putty and ensure fasteners remain secure. Confirm no condensation or damp spots develop after initial run. If you see moisture, tighten fittings a quarter-turn at a time and recheck.
Ensure all connections stay dry and seals stay intact.
Run Water Test
With the water supply valves turned on, run both hot and cold through the faucet to check for leaks at all connections and fittings.
Observe the drain area while the sink is filling to ensure there are no leaks or slow drainage issues.
Fill the sink with water and then release it to verify proper drainage and that the P-trap and drain connections are secure.
Inspect all underneath connections for any signs of water seepage or dripping after running the water for several minutes.
If you detect a leak, tighten fittings or reseal as needed, then recheck.
Perform a brief water test by turning valves off, drying surfaces, and confirming no residual moisture.
Turn off valves, wipe away excess sealant, and confirm seals and components are functioning correctly.
Judge Seal Integrity
Have you run the faucet and checked for leaks yet? Start by filling the sink and inspecting underneath for any signs of leaks. Look at all connections and fittings as the water rises.
Run the faucet to confirm proper water flow and watch for drips or wet spots around the seals and joints.
Move to the drain assembly and supply lines, noting any water seepage during and after testing.
Wipe around seals and joints with a dry cloth or paper towel, and look for moisture that indicates a leak.
If you see moisture, stop and tighten connections as needed.
Allow the sealant to cure per manufacturer guidance before applying pressure or heavy use to ensure long-term leak prevention and reliable leak detection.
Conclusion
With the sink in place, you’ve seated a new heartbeat in your kitchen. The faucet becomes the pulse; the drain, a steady breath. Silicone seals the chorus, mounting hardware keeps the rhythm true. As you turn the valves, triumph arrives like a quiet sunrise—no leaks, only clarity. Your countertops now cradle a trusted tool, reminding you that careful steps, like small stones in a stream, create a lasting path to daily ease. You’ve finished, you’ve aligned, you’ve secured your fresh start.


